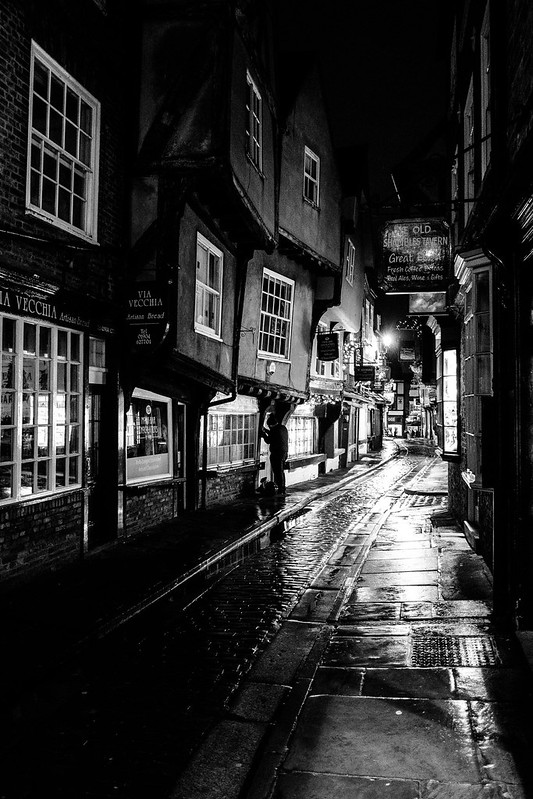
Coffee Yard at night. York, November 2017. Fujifilm X-Pro2, Fujinon 18mm f2.
Following my previous post here I realised that I hadn’t posted anything since September and that towards the end of the post I said that I needed to get out and shoot more.
It’s not that I haven’t been getting out to shoot at all, more that I’ve not been particularly excited by my results. Much of the time it’s the same old places that I’ve visited how many times before and I’m finding nothing new to see, not feeling inspired.
Also maybe I just need to blog about my photography more, even if I’m not doing anything fantastic.
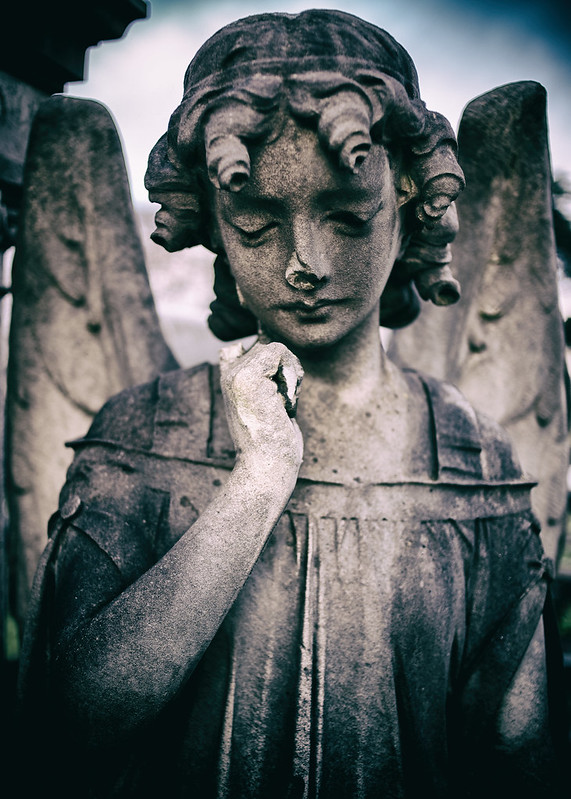
I’ve been a paying member of Flickr for a very long time now and I barely use it these days. Every now and again I realise that I’ve not uploaded any photos there for a while so I add a few but I increasingly wonder why. I find it’s rare that I obtain any kind of useful feedback there. Maybe it would be better to put extra effort into my blogging instead? As a case in point I recently once again had a photo featured in “Explore” and the views and favourites went ballistic on that photo for a couple of days. I really don’t know why. It was one of my regular shots of my favourite angel at Welford Road Cemetery. I’ve taken an awful lot of very similar shots and I would also say an awful lot of much better shots, so why this one? It really wasn’t anything special (below).
I did enjoy a few days in York during November and in particular was drawn to shooting the narrow lanes and alleys after dark. I felt these scenes were quite striking when the cobbles were wet, reflecting more light into the street. I think I need to do more night time street photography.
I also spent quite a bit of time messing around with long exposures during the autumn but I’ve yet to shoot anything that I’m particularly pleased with. I think I still have a lot to learn about which scenes make the most compelling long exposures.
After not shooting with my Canon kit for a good 18 months to two years I have tried to take it out and about with me recently. On the whole I found it a reminder of why I’d not really used it for so long. Yes, it’s bigger and heavier than my Fuji kit but there are other aspects which make me prefer shooting with the Fuji bodies. Shooting with a DSLR again I found that I really missed the “live preview” of the Fuji viewfinder. Yes, I know I could pop the DSLR into “live view” but I generally don’t like composing a photo on the screen (sometimes I will use that method if the camera is on a tripod, but never hand held). Having a live view of the final exposure is something I’ve got very used to and I think it’s particularly useful when shooting under more tricky lighting conditions.
And that is about where I am with my photography as we head into 2018. I want to play more with long exposures and I want to spend more time shooting with a single body and lens. During my recent trip to York the Fujinon 18mm was pretty well a permanent feature on my X-Pro2 and I think I enjoyed myself all the more as I wasn’t always thinking about which lens to use.
I’ve recently invested in some new computer kit and changed the way I work with my photos in Adobe Lightroom.
I built myself a new tower PC a couple of years ago and that has been my “digital darkroom” ever since. It’s powerful enough for my needs with an i7 processor, a reasonable wedge of memory and fast PCIe connected SSD. However using it means shutting myself away in my “den”. Sometimes that’s fine, other times I’d like to be able to work in the living room, at the kitchen table or for that matter in a hotel room.
I did have a laptop with Lightroom installed on it but it was a separate catalog. If I imported my photos on the laptop to work on them I would then later export those photos and import them back to my main catalog on the desktop machine. This worked, but it was a more laborious process than I wanted so I didn’t work that way very often.
I explored the idea of storing my Lightroom catalog and more recent photos on a USB hard disk. This worked pretty well. I had for a long time held archives of photos from previous years on a NAS so that they could be accessed by multiple devices, albeit rather more slowly than anything which was held on local storage. With my catalog and recent photos on an external drive I could now swap between the desktop machine and the laptop and just carry on working from where I was before – same photos, same edits, same presets available. As long as I’m at home then my full archive of photos is available on the NAS device. If I’m away from home, working on the laptop then all I’ll have is my recent photos.
Although this solution worked it could feel a bit sluggish. This was only to be expected with storing the Lightroom catalog files and the photos on a USB hard drive. Transfer speeds of around 100MB per second don’t match up to the sort of speeds obtained from an internal PCIe attached SSD. However with an external USB SSD that 100MB per second could be increased to something more like 500MB per second and with Christmas coming around I had gift money to spend so I invested in a Samsung T5 250GB external SSD. I had to further reduce the number of photos I kept on this drive so that now everything but the last 3 or 4 months worth of shooting is on the NAS but the extra speed when working with current photos was worth it.
In addition to being roughly five times faster, the Samsung T5 is much smaller and lighter than a conventional USB hard drive. This coupled with a 13.3″ laptop and my Fujifilm X series cameras makes for a really very small and light travelling kit compared with what I would have had to take with me previously.
Due to the obviously very portable nature of a laptop and small, light external storage I feel that encryption is very important. If I lose the laptop or it’s stolen then I want to make sure that the most important asset, the data, is protected. The SSD internal to the laptop is encrypted using BitLocker provided by Windows 10 Pro and the external T5 SSD comes with its own encryption solution. Of course I also protect my data by having multiple backups with at least one copy being held off-site at all times.
All of this is great and it enables me to work with my photos the way I want to but now of course I need to get out with a camera and take more photos! I don’t really “do” New Year resolutions but if I did they would have to include getting out more, taking more photos and blogging more frequently.
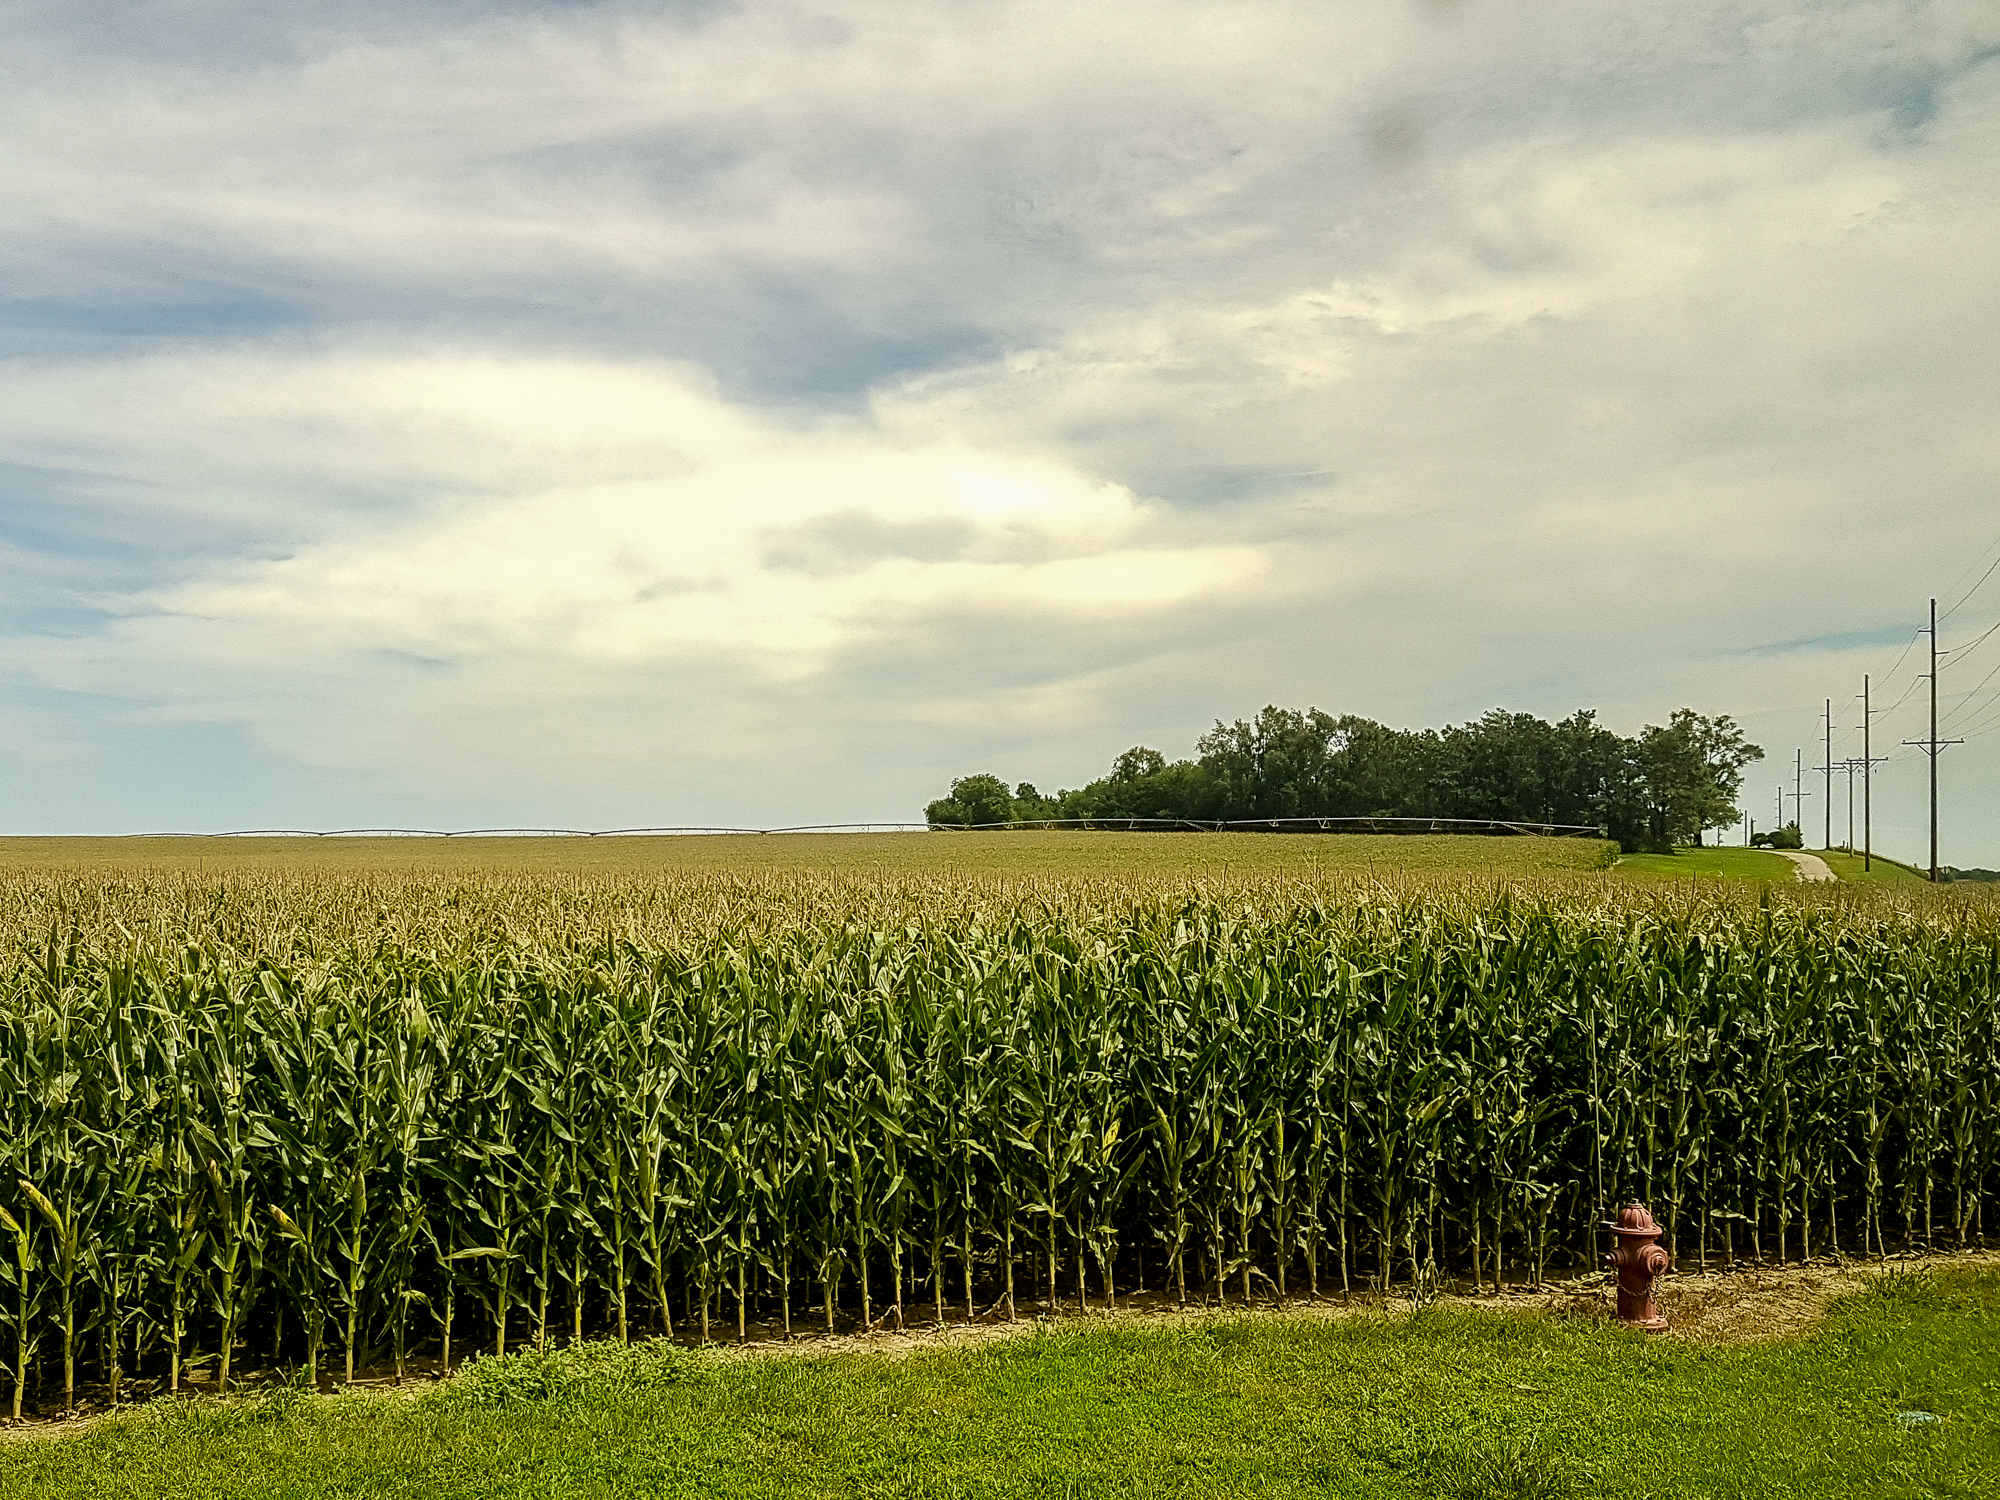
Field of corn, Aurora Nebraska. Phone snap. (this was taken from the shuttle bus as it left the viewing event after totality. The weird lighting is a combination of tinted windows and the fact that the eclipse is ongoing – the sun gradually being uncovered following totality – at the point I took this the sun was a crescent again).
Corn. Mile after mile of corn. I had been to The Cornhusker State previously but it had been 23 years before and at an earlier time in the year when the corn was less apparent in the fields.
After our concerns about “carmageddon” on the roads due to crazy eclipse crowds we actually had a very smooth journey from Thornton, Colorado to Hastings, Nebraska. We had a hotel room booked for the night before the eclipse and the plan was then to continue on the little way to the town of Aurora next day to watch the action – or if carmageddon occurred we would most likely stay put at Hastings.
After the dry air of Colorado the humidity in Hastings came as a bit of a shock and the skies were almost totally clear – a good omen for the following day. We had most of a day to kill so we looked around the campus of Hastings College where my wife had studied back in the day. I had visited here myself on one occasion and that was during my previous visit to Nebraska all those years before. It was amazing how clearly I remembered the place. We also had a wander around the town and the market stalls which had been put up as part of “SolFest“, the town’s celebration of the solar eclipse. It was a great atmosphere and expectations were running high for the following day.
August 21st dawned, the day of the eclipse. There was quite a lot of cloud about. We had two choices – drive around trying to find clear skies or head to Aurora as we had originally intended – and just hope we would be lucky. You could spend all day driving around trying to find the perfect conditions and still be defeated by the weather and my wife had friends (Dan and Tracy) who were running the Aurora eclipse viewing event – they were staying put and hoping for the best so that was what we did too.
The event had been organised at The Leadership Center, Aurora. Some folks had camped overnight but for those driving in on the day a free shuttle-bus service had been arranged, running from a nearby ball park where we left the car. Arriving at the Leadership Center we chose our spot in the shade of a couple of trees and I got my camera ready. I have to say I was very impressed with the event planning. Dan was providing a commentary during key phases of the eclipse but not so much that it detracted. Food and drink was available to buy at a very reasonable price with the proceeds making a contribution to the funding of the event. There was no charge for use of the shuttle bus and no charge for entrance to the event.
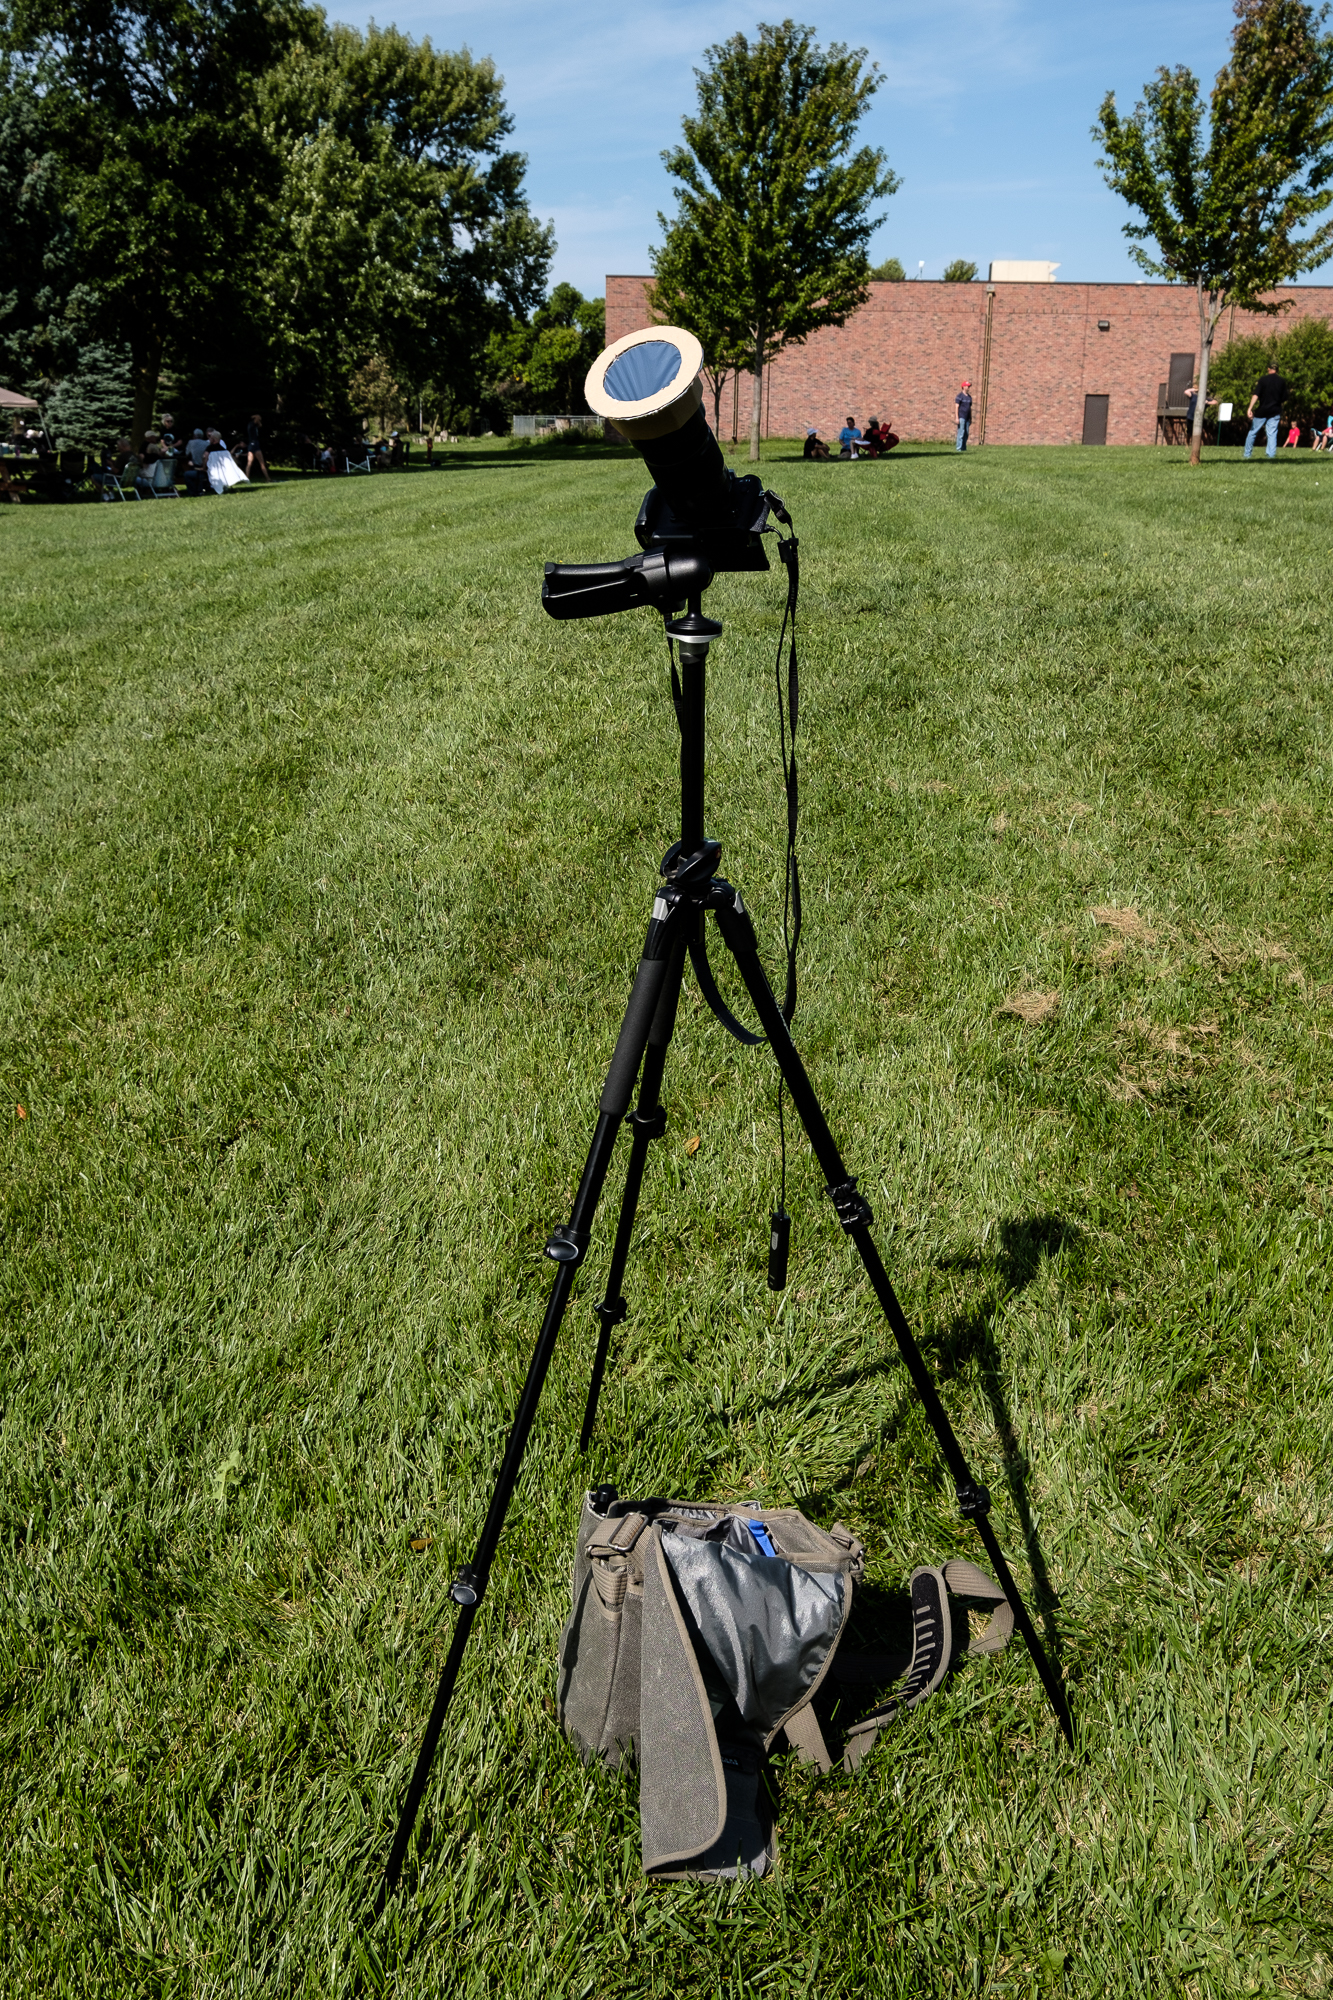
Solar filter in action shooting the eclipse.
We still had concerns about the clouds. At first we had a clear view of the sun but that was something which was constantly changing, we would just have to hope. It seemed like we had been there for quite a while before I noticed the first sliver of the sun had been eaten away – first contact. From then on I was taking shots at regular intervals. I was bracketing my exposures to try and make sure I got at least something. The filter was working well and I was getting a good view of the ever diminishing solar disc but the clouds were quite variable and although most of the time we could make out the sun behind them I was having to adjust my exposures quite dramatically to compensate. It was difficult to notice the light levels dropping around us, it was so gradual. At one point I noticed that the cicadas had started chirruping as they do in the evening, a sure sign it was getting darker.
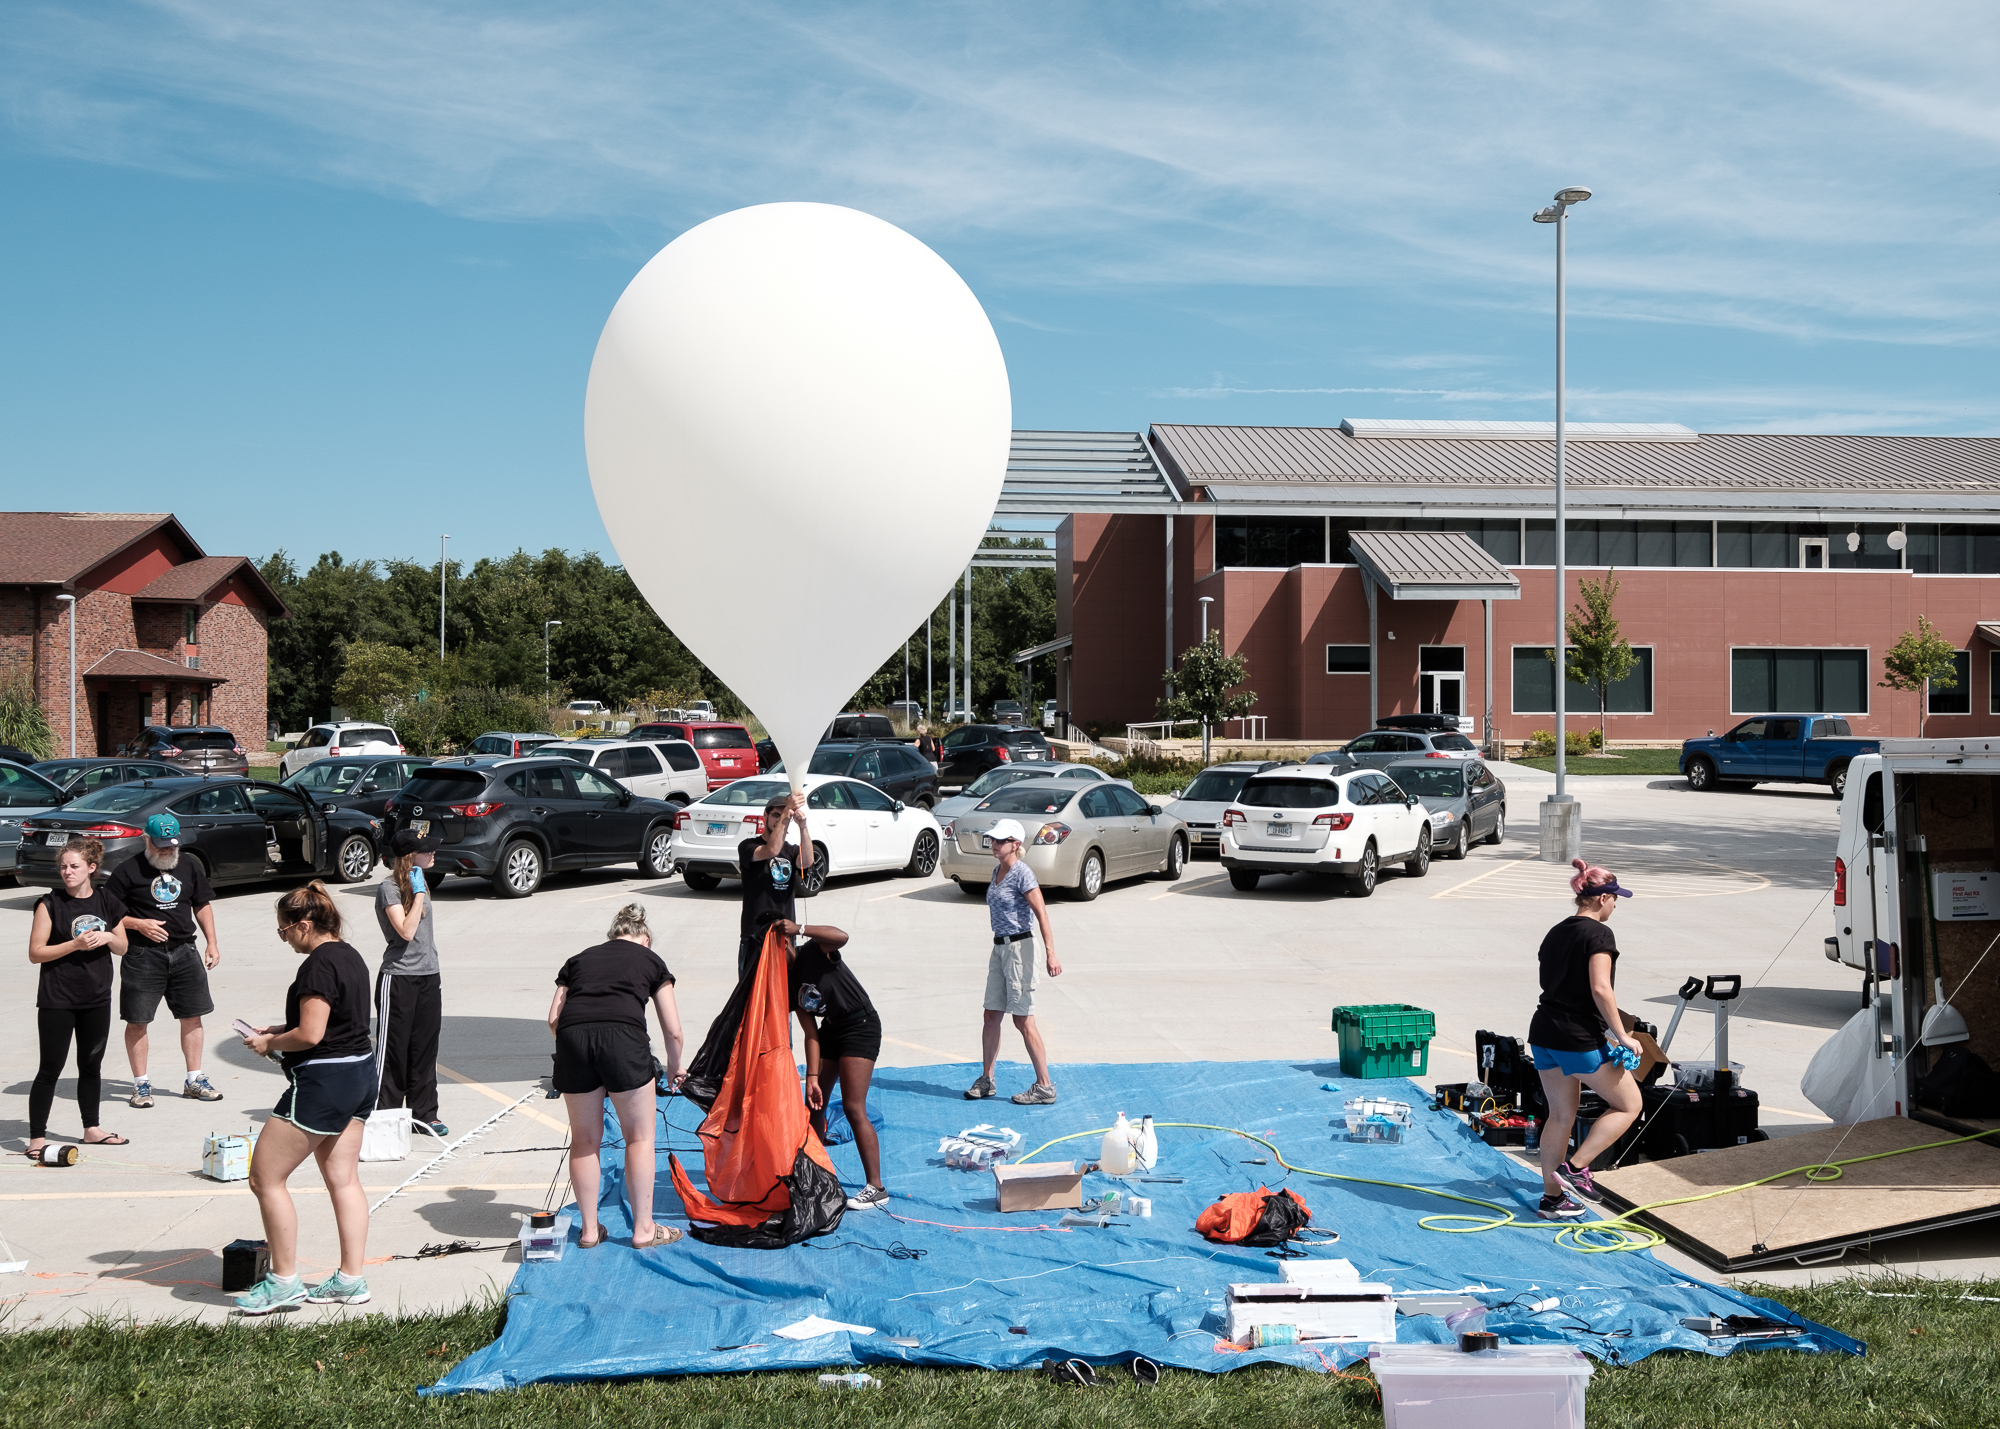
A weather balloon being prepared for launch. Measurements being taken of atmospheric changes during the eclipse.
We were very lucky. Just moments before totality was due the clouds cleared enough for us to get a really good view. It was amazing just how bright it was right up until totality and then suddenly the light level fell to something similar to twilight as a “black hole” appeared where the sun used to be. I really don’t think any words, photographs or video can possibly do justice to the beauty and other-worldliness of witnessing a total eclipse. I felt like I was in a science fiction movie or a surrealist painting. We were in the shadow of the moon, the sun was a black hole above us with a rim of glowing plasma, stars and planets were visible in the sky during daytime and there was a 360 degree sunset extending all around us.
During totality there is no need for protective glasses or for my solar filter over the lens. I slid it off and carried on shooting whilst also trying to take in every moment of the experience.
It was true that no photo could adequately convey what it felt like but I had come all this way and I was prepared the best I could be so I fired away with my Fuji X-T1 and did the best I could. Yes, I needed a longer lens. A much longer lens. In hindsight maybe I would have been a little better off taking my EOS 7D with me just for the eclipse. That would have given me an effective 460mm (ish) instead of 300mm. What I really needed was a telescope. But I had what I had in terms of photographic kit, that decision had been made weeks before we left England and the most important thing was to experience the eclipse first hand, try to remember everything about it as clearly as I could.
I’m delighted that I was able to capture the photos below, inadequate as they are, I had to crop quite heavily due to my short focal length (click to see them larger). They are part of my memory of a unique event. It would be wonderful if I got the chance to see another total solar eclipse but I feel so fortunate to have witnessed one during my life and to have managed to capture anything at all on camera is a bonus. I was delighted that my DIY solar filter worked so well, much better than I ever expected it to.
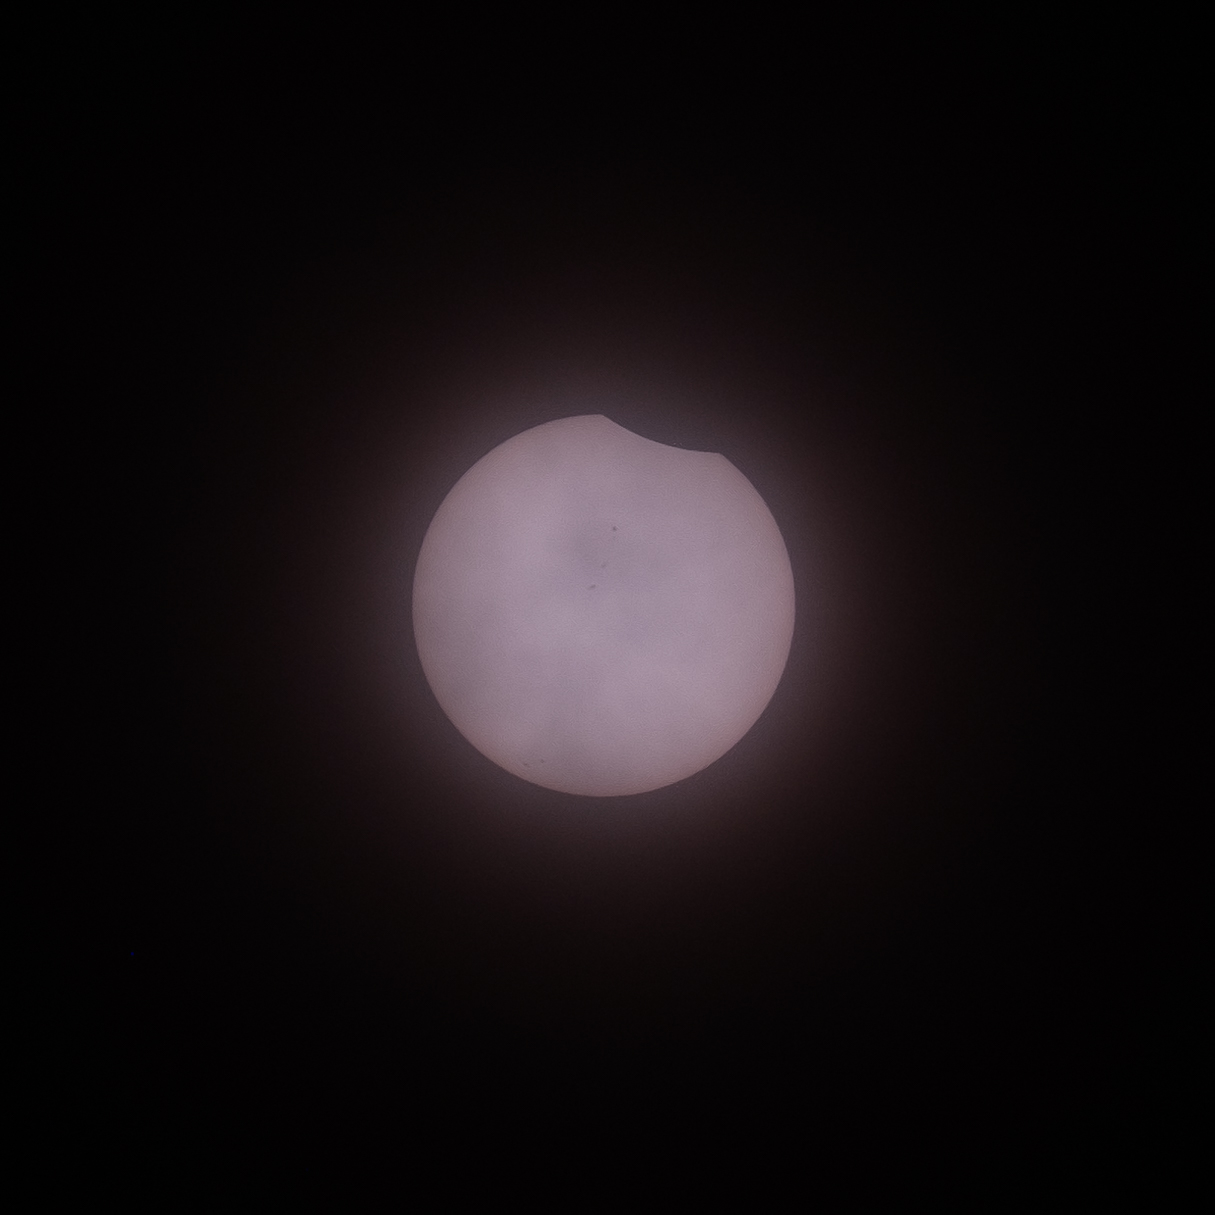
Before the eclipse started, a complete solar disc.
A tiny sliver of the sun is missing – first contact.
Very obvious now, but the clouds are evident.
Nearly a Pac-man moment.
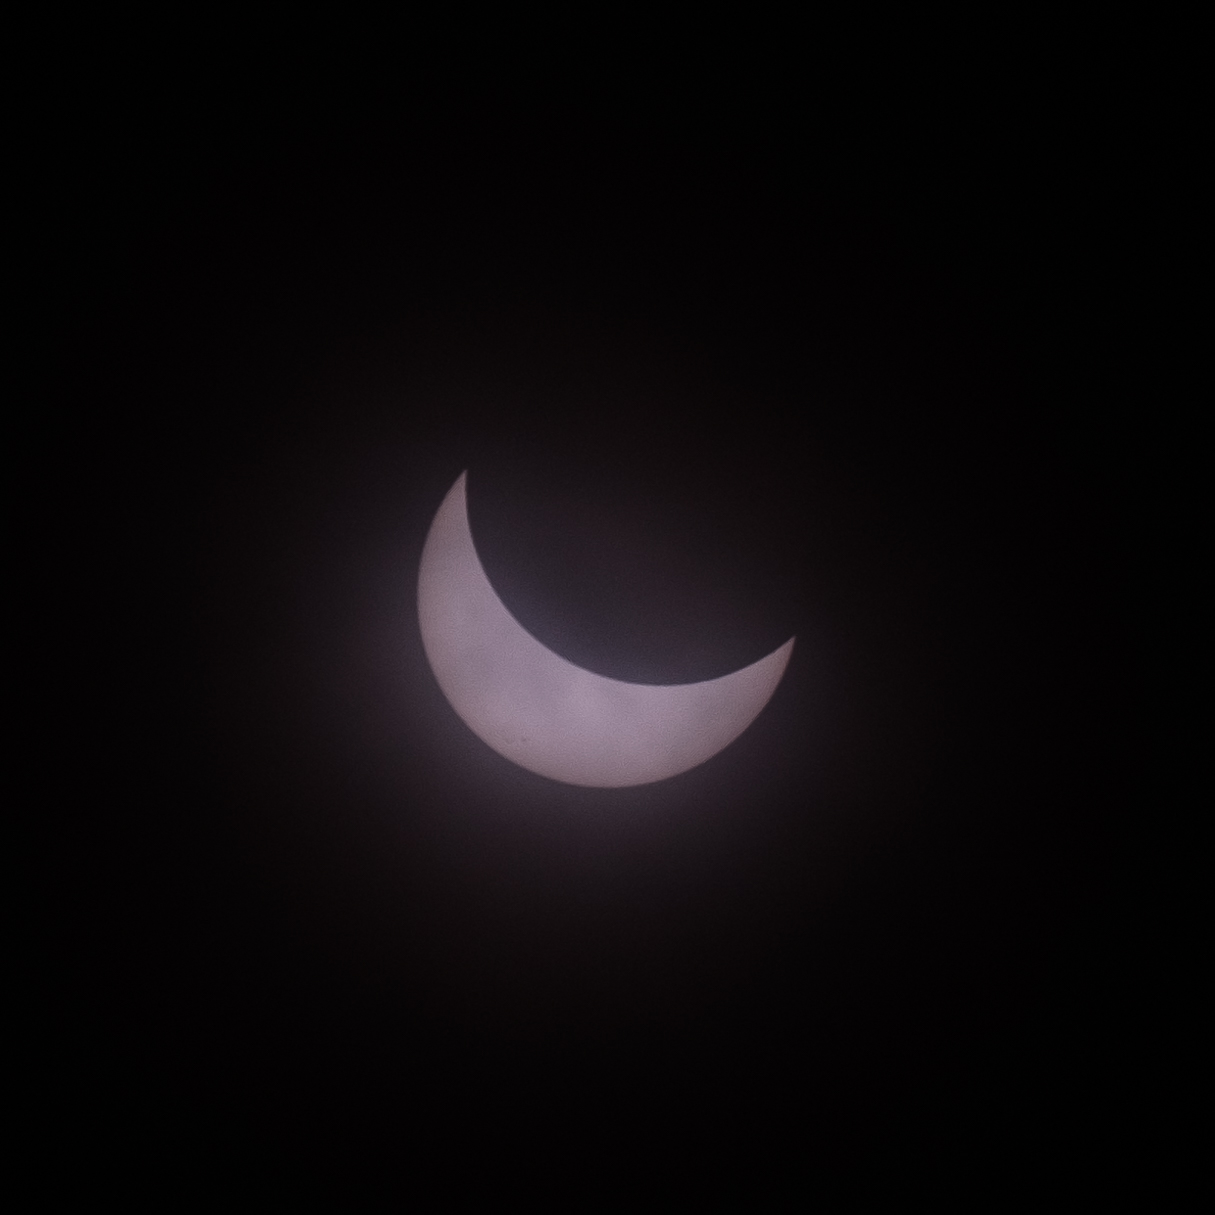
Maybe two thirds gone.
Crescent sun.
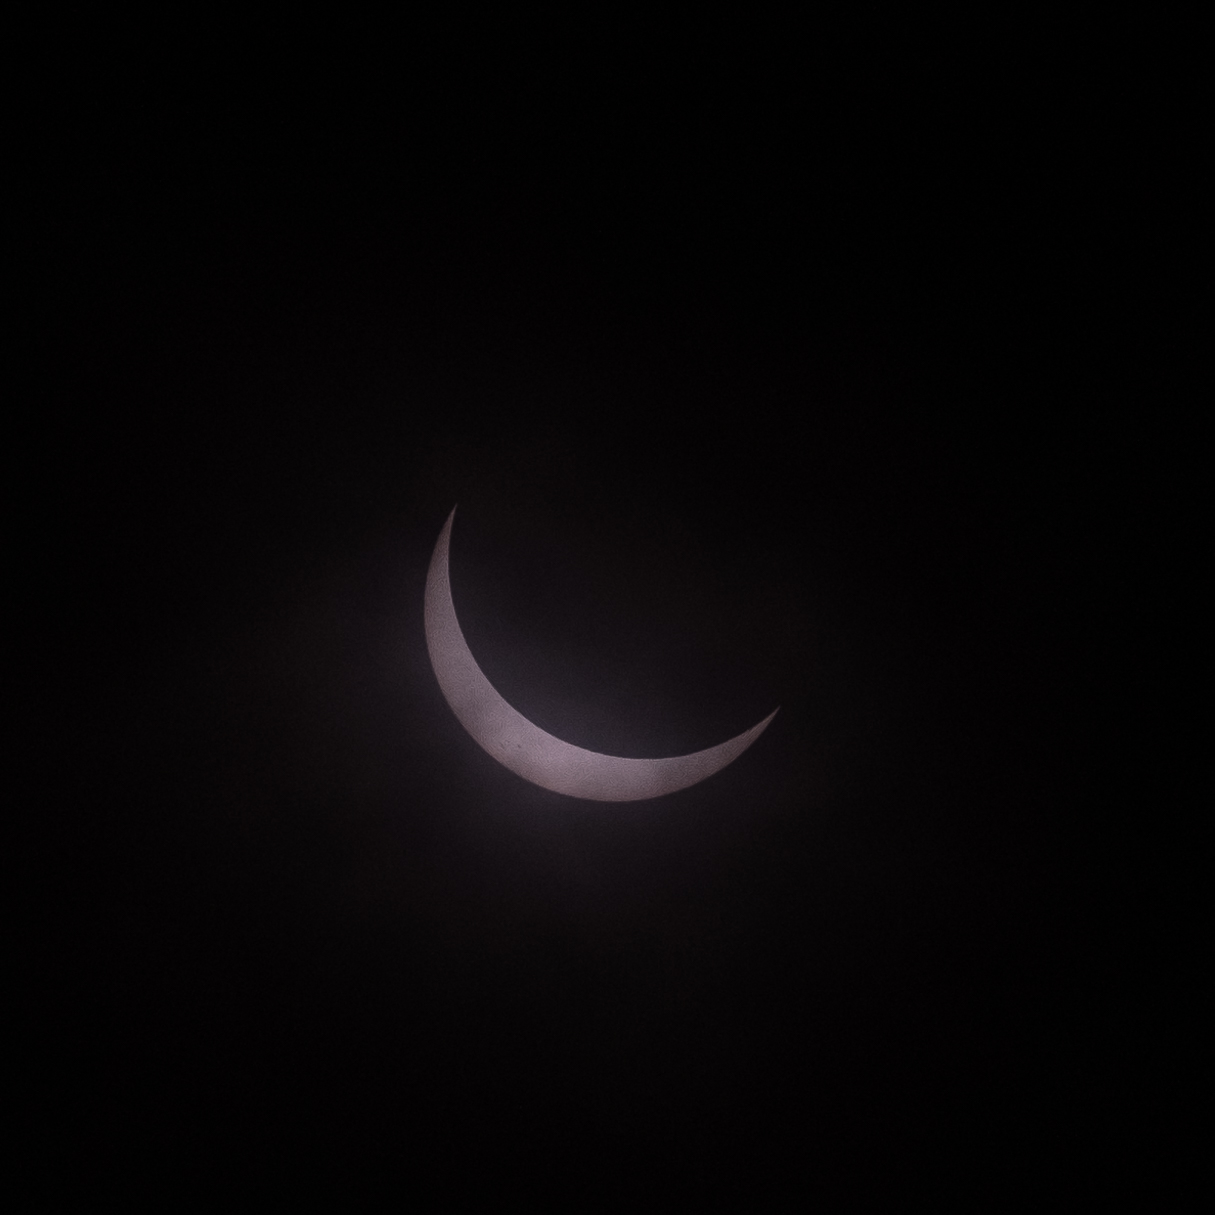
Just a toenail clipping left now
Last moment before totality.
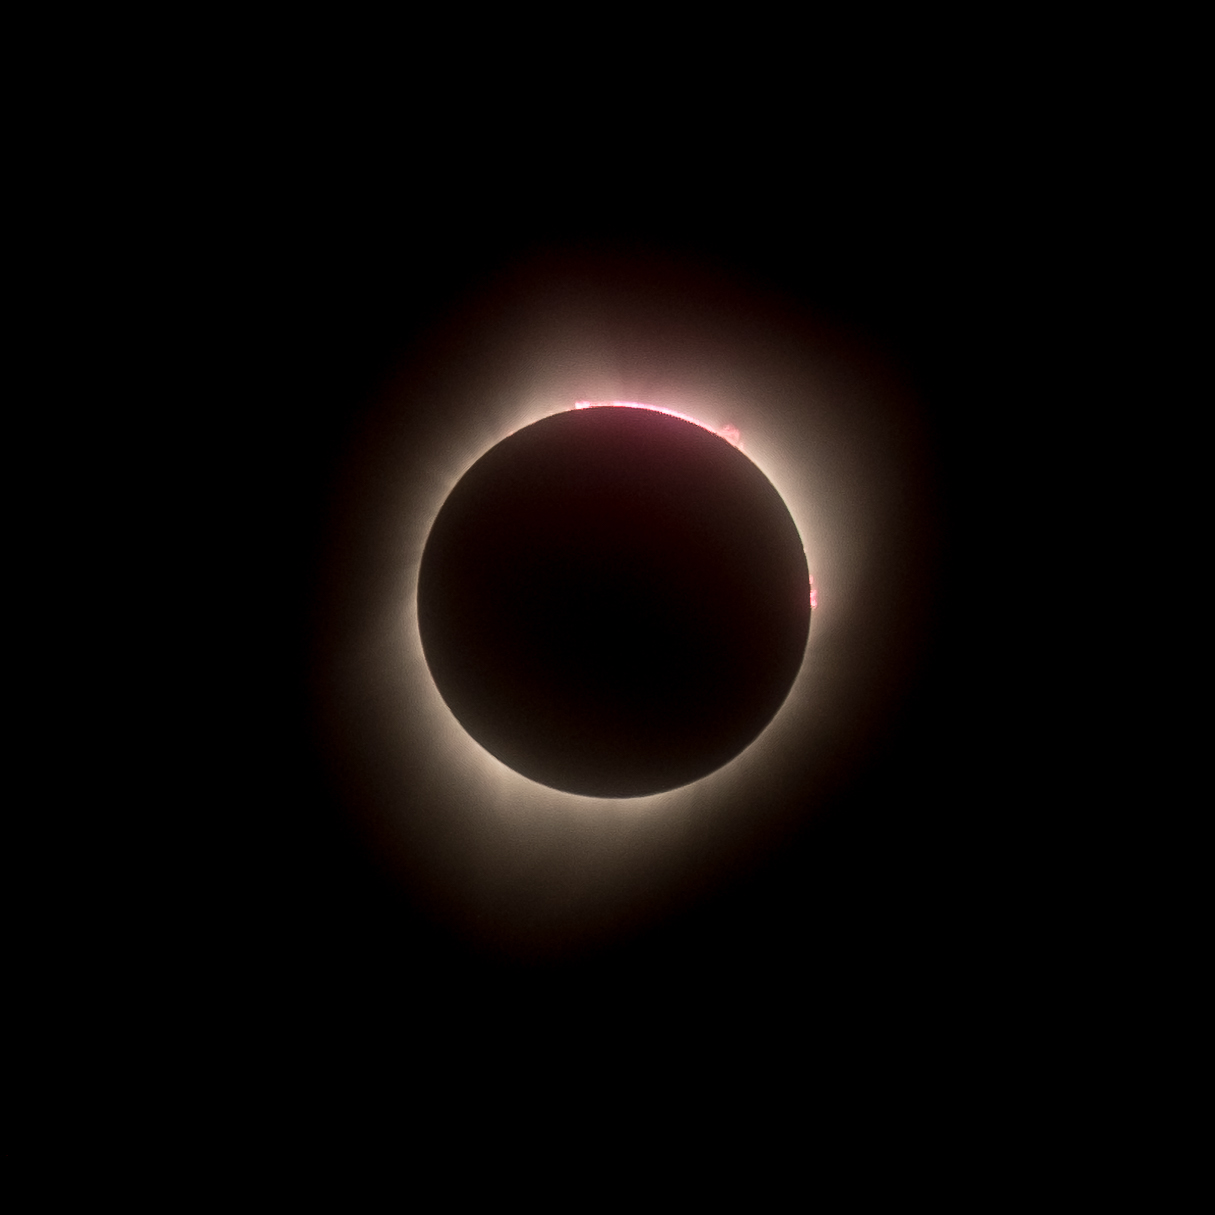
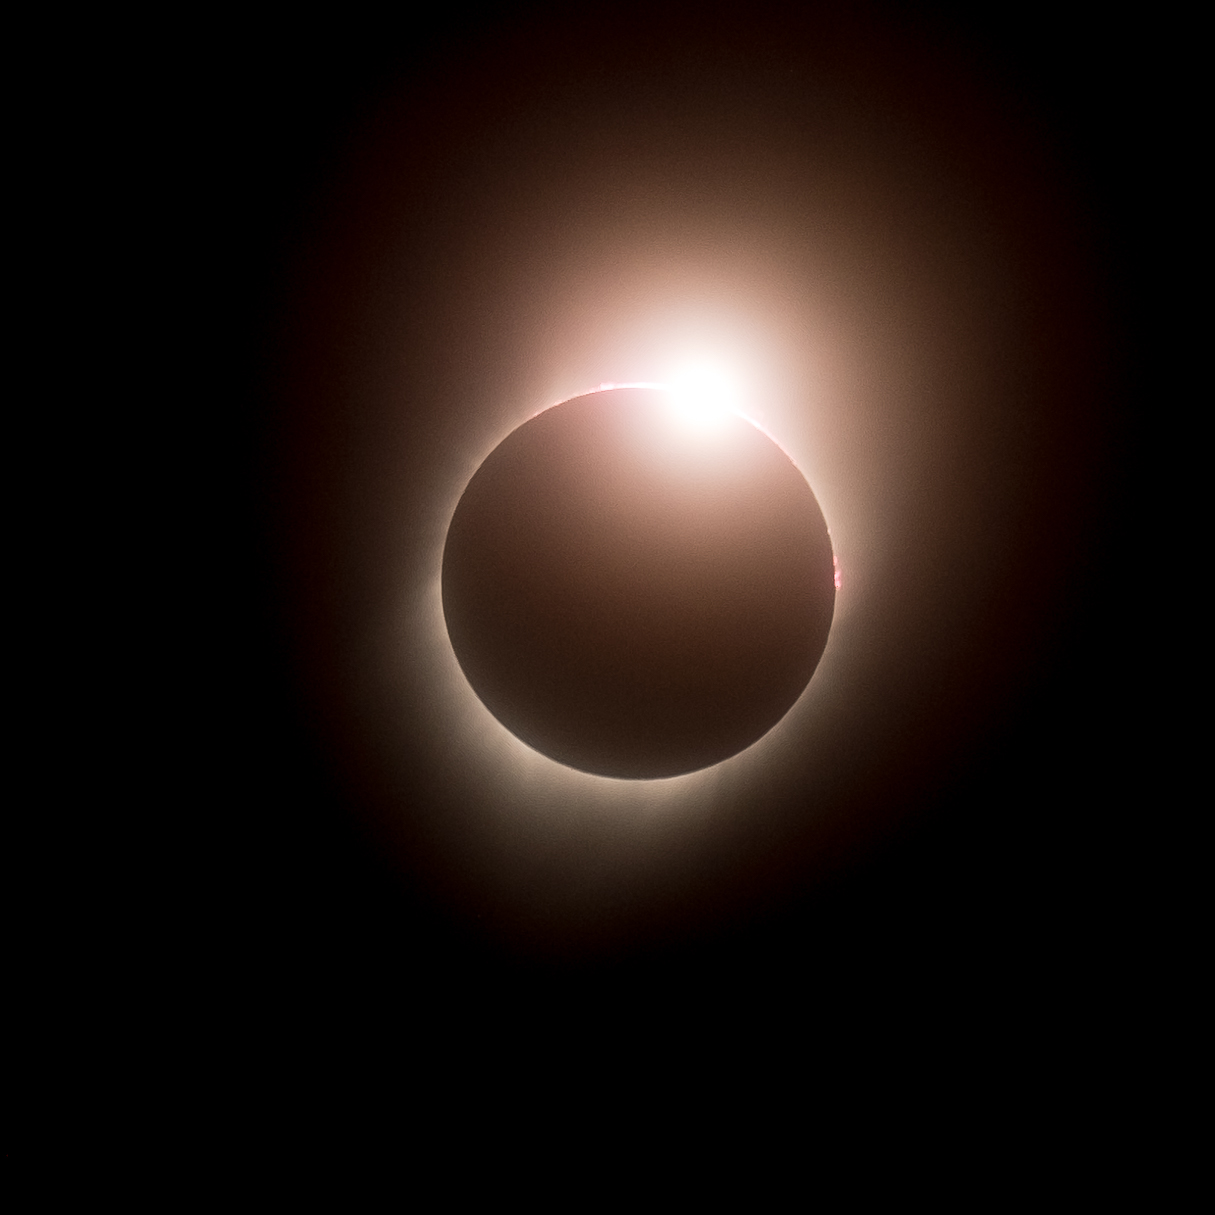
Totality. Note the prominence to the top right.
Totality without the cropping. This is what I saw through my viewfinder.
Last moments of totality.
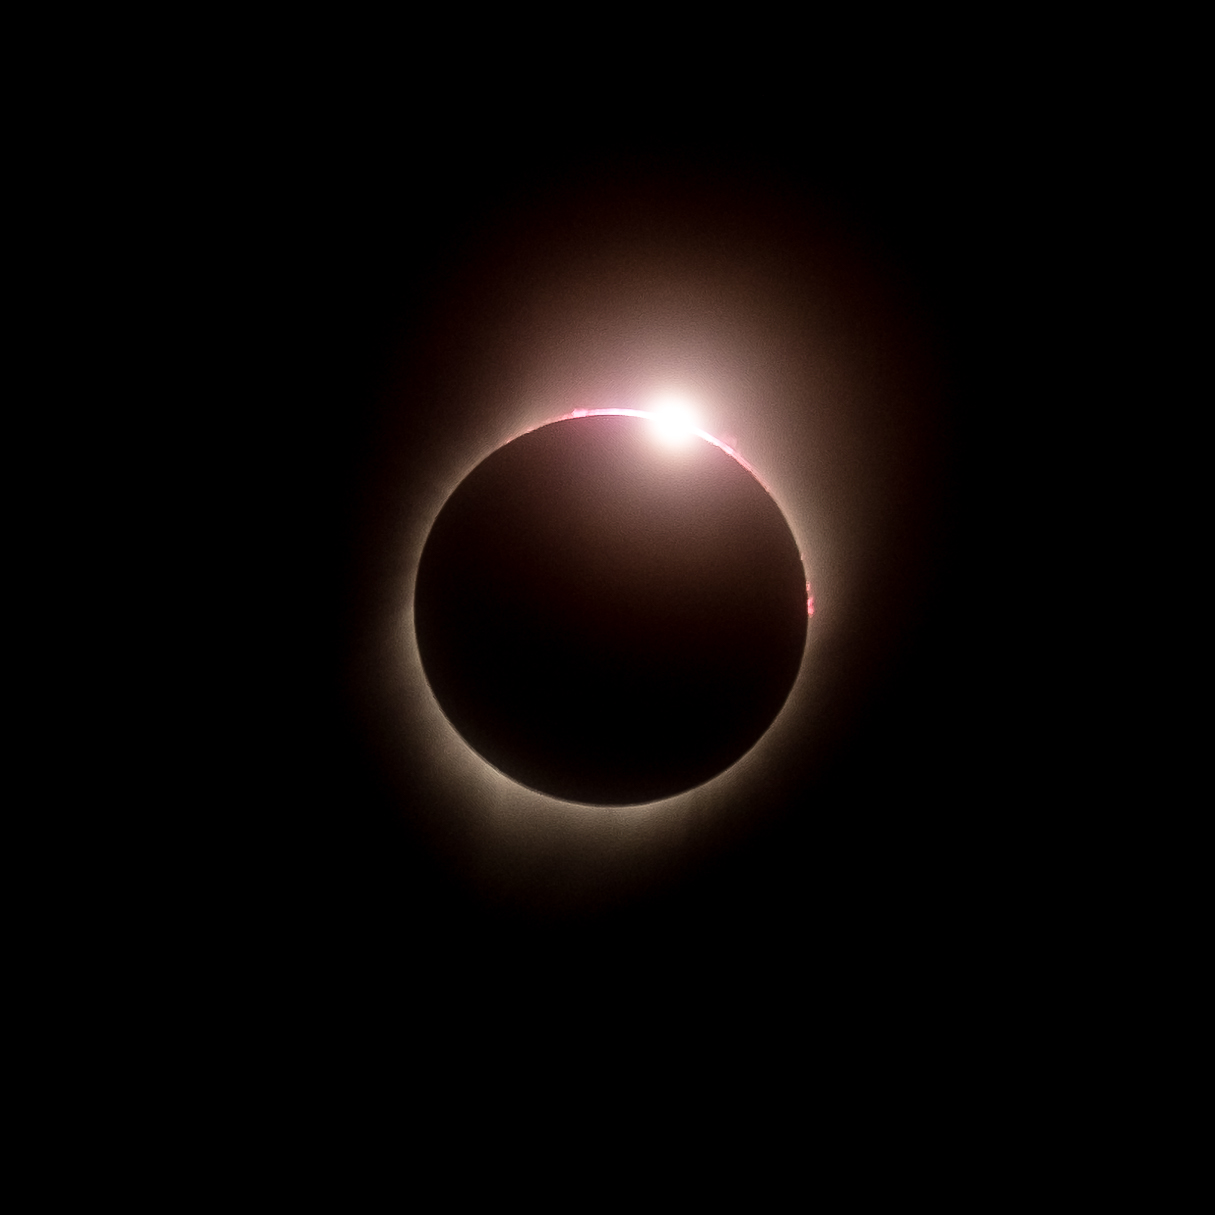
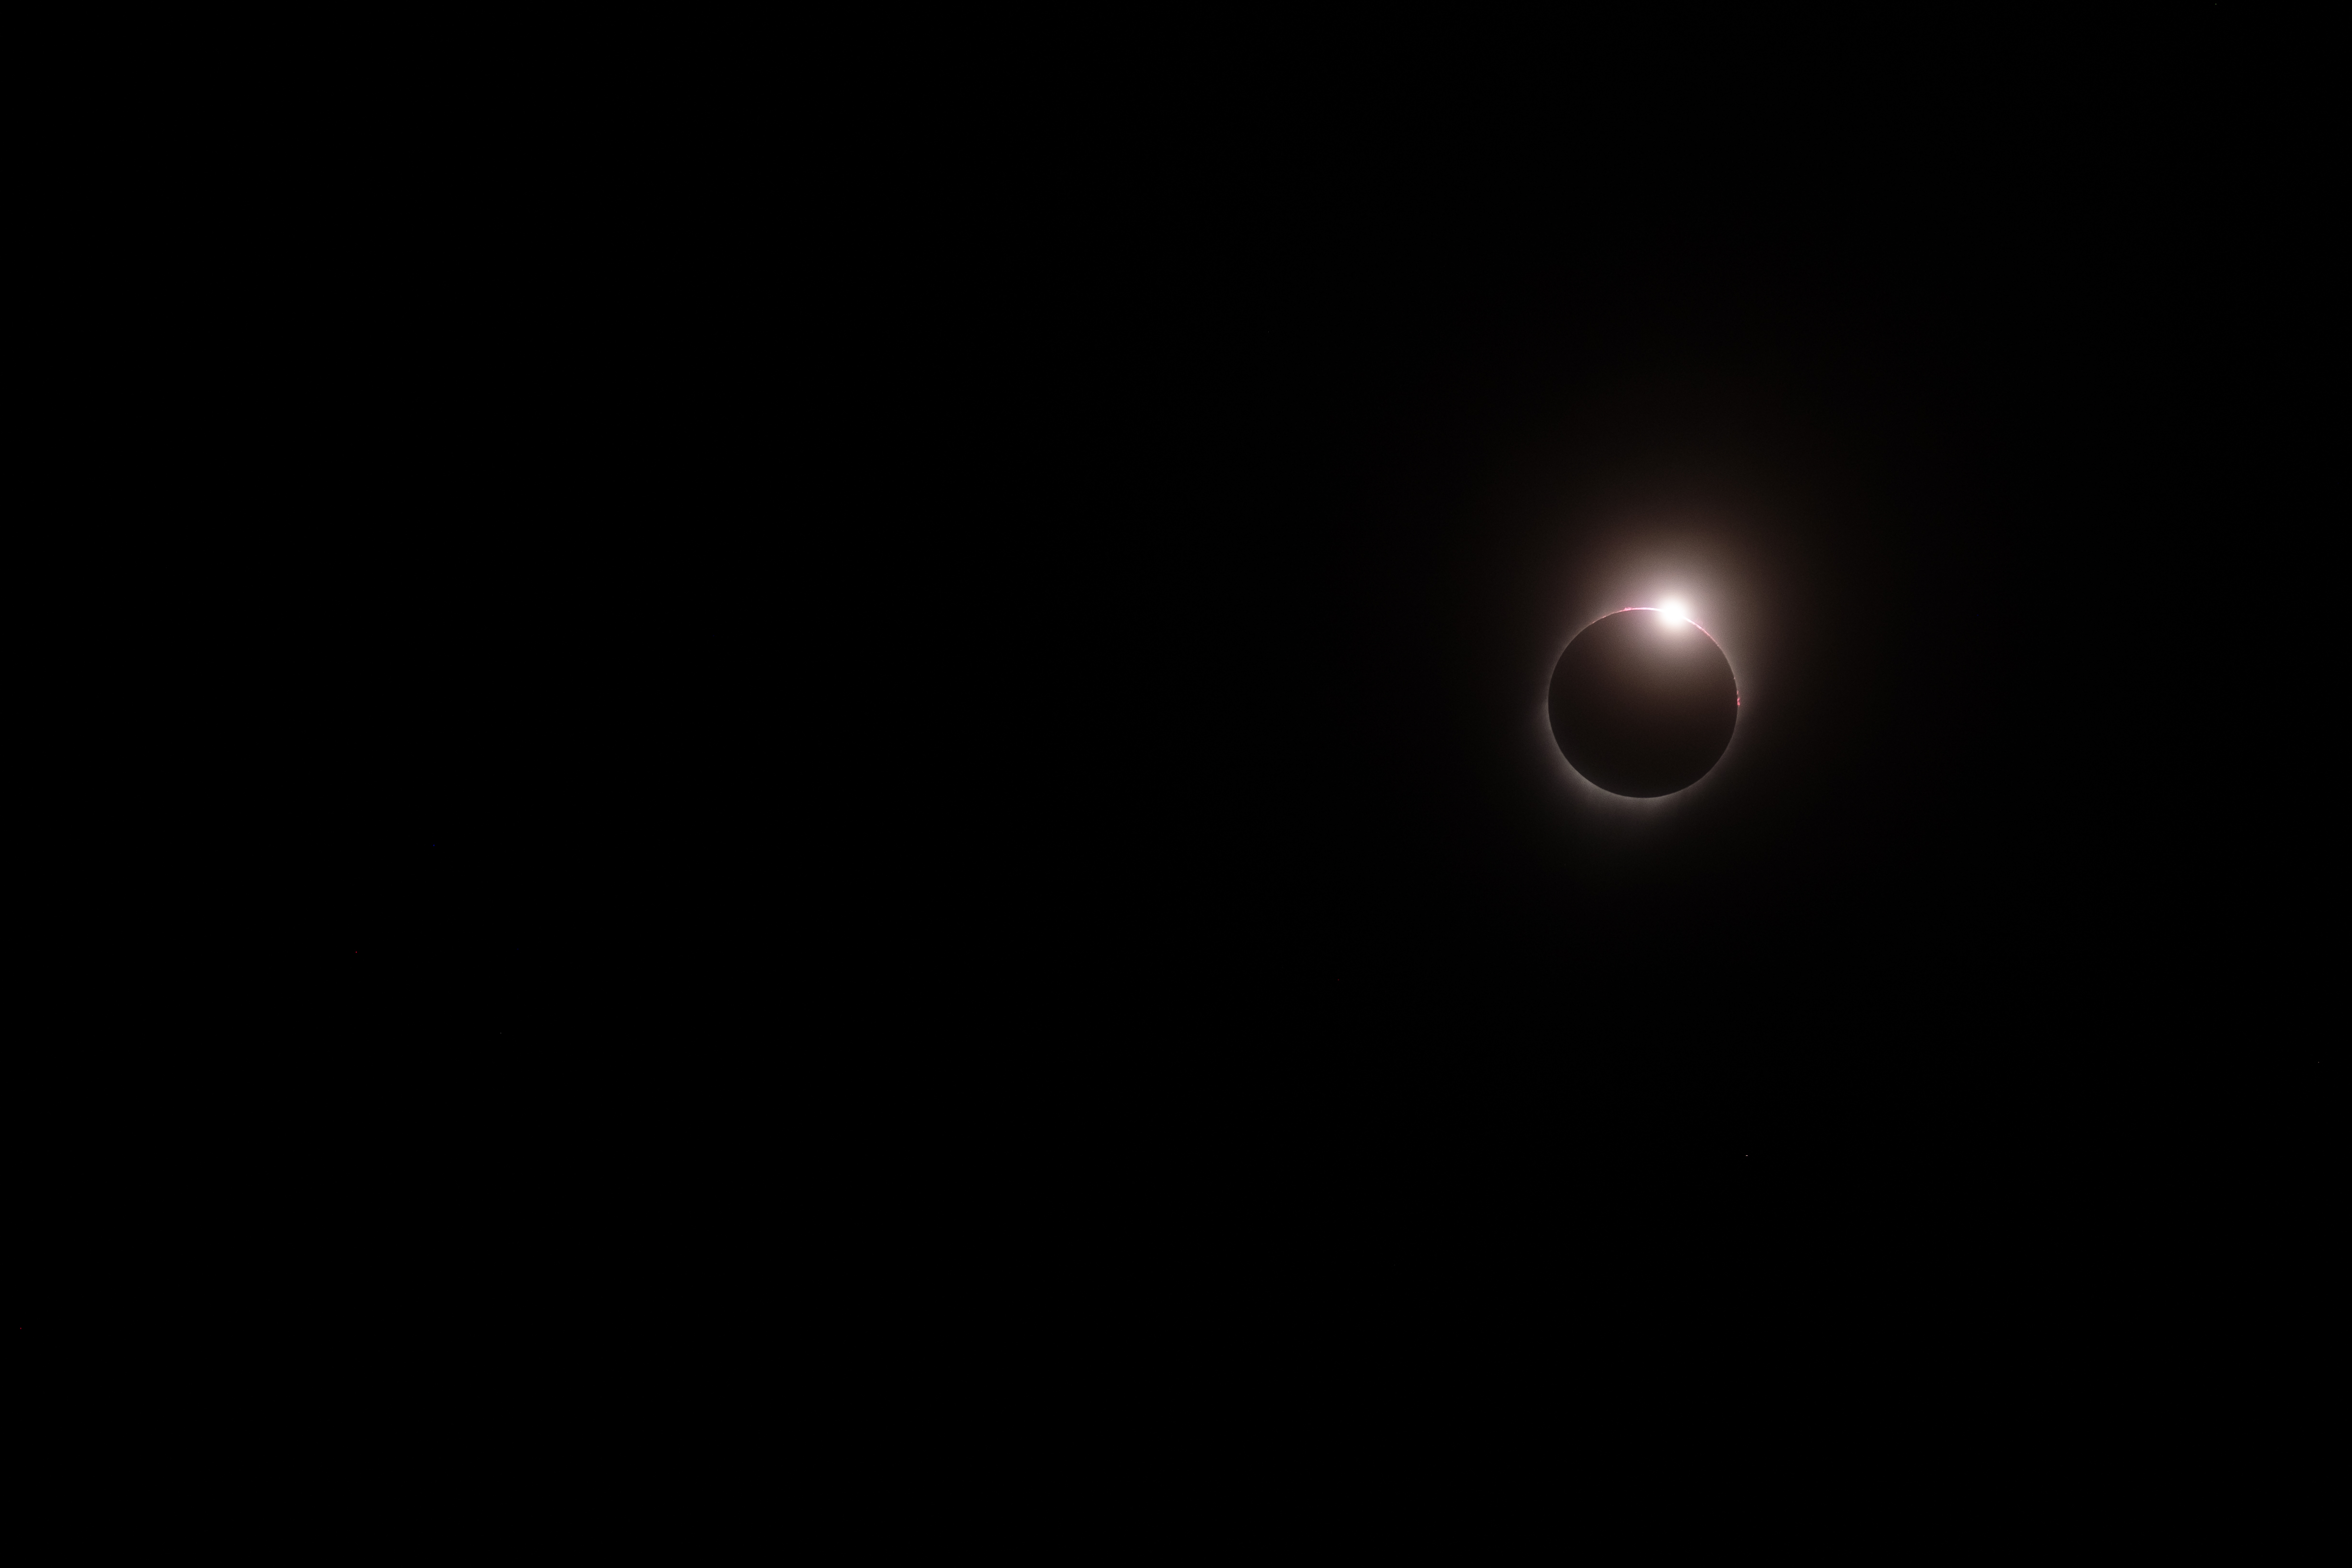
Diamond ring.
Diamond ring without the cropping.
Diamond Ring glowing brighter, a moment later it would be over.
Totality as seen from Aurora, Nebraska. 21st August 2017.
Towards the end of 2016 we received an invitation to attend the 50th wedding anniversary celebrations of my parents-in-law over in Colorado during August 2017. Nine days after the anniversary party a total solar eclipse was due to sweep over the USA from coast to coast with the path of totality passing within a “reachable” distance of my in-law’s house in Thornton, Colorado. My wife studied in Hastings, Nebraska and still has friends over there, two of whom were involved in organising an eclipse viewing event in Aurora, Nebraska. So back in December of 2016 plans were hatched and a hotel room was booked in Hastings (a short drive from Aurora) for the night before the eclipse.
I had seen partial eclipses before but I had never been lucky enough to see a total eclipse. Back in 1999 there had been a total eclipse which passed over SW England but at the time we were on the Isle of Lewis in NW Scotland and got to watch that one as a partial eclipse from Callanish stone circle. That was an amazing experience but it wasn’t a totality.
If I was going to find myself in the path of totality then I was sure as heck going to do what I could to try and take some photos of it but I didn’t want to spend a fortune in the process. I’ve already spent quite enough money on photographic equipment over the years and I didn’t want to spend loads more especially for an event which could be wiped out by the weather. After doing a bit of research I decided to make my own solar filter using Baader AstroSolar Safety Film and some cardboard.
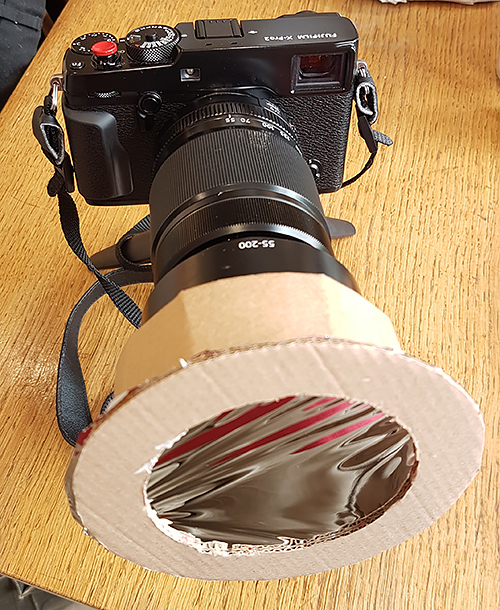
I decided to travel with my Fujifilm cameras as they are smaller and lighter than my Canon rig, easier to transport. There was also the factor of them being mirrorless which I saw as being an extra layer of safety to prevent me from burning out my retinas. I would be looking only at an electronic viewfinder, never a view directly down a lens. The flippy out screen on my X-T1 was also a small factor in favour. This decision being made I then started construction of a filter to fit the longest lens I had for my Fuji cameras, the 55-200mm. This would give me an “equivalent” of a 300mm lens which I knew would be “too short” but I didn’t want to spend thousands just for this one event. I do have the Canon 70-300mm and my old 7D body would make that an equivalent of around 460mm but I had decided to take my Fuji kit and not my Canon kit. The rights and wrongs of that could be debated for ever – the decision had been made.
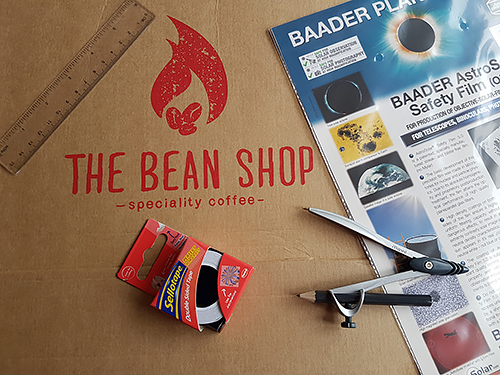
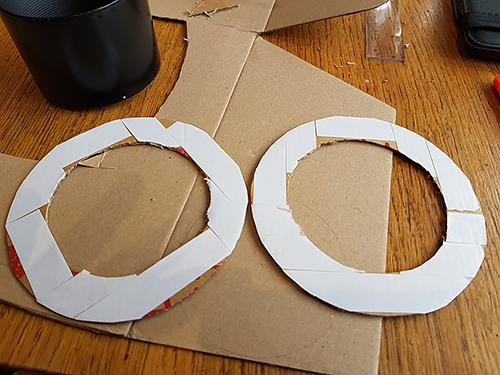
Making a solar filter from cardboard and solar safety film.
The solar safety film cost me about £20 for an A4 sheet. A ready made solar filter would have cost me several times that and this was way more fun anyway. The cardboard (as you can see) came from the delivery carton used by my favourite coffee suppliers. In addition some double sided tape and a glue gun were used. Two rings of cardboard were cut and the solar film sandwiched between them then more card was used to create a short tube which would fit over the lens hood of my chosen lens.
Expertly crafted rings of finest cardboard covered in double sided sticky tape waiting for a layer of solar film to be stuck between them.
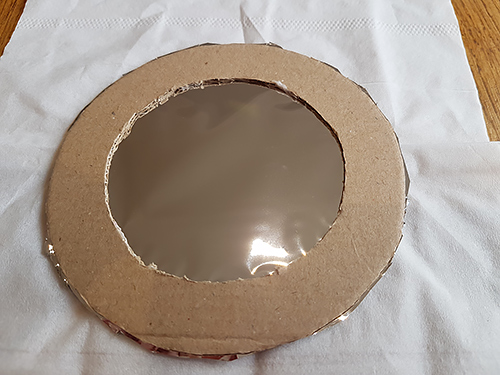
Solar film in place between cardboard rings, tissues used to prevent scratching the solar film during construction.
The finished filter in place on my camera.
I completed the construction of the filter one wet Saturday about three weeks before we were due to fly out to the USA. British Summer being what it is, there wasn’t a sunny day when I was off from work between when I finished making it and when we were due to fly. I did take it out one evening when the sun was behind a layer of clouds and I got at least the idea that it was blocking light. Any other testing would have to wait until we reached Colorado.
Over in Colorado anniversary celebrations were enjoyed, extended family was met, ballgames were watched, mountains were experienced and then we had a couple of quiet days before the journey out to Nebraska for the eclipse. I took the opportunity to set up my camera on a tripod in the garden, pop on the filter and see how it worked. Or how it didn’t.
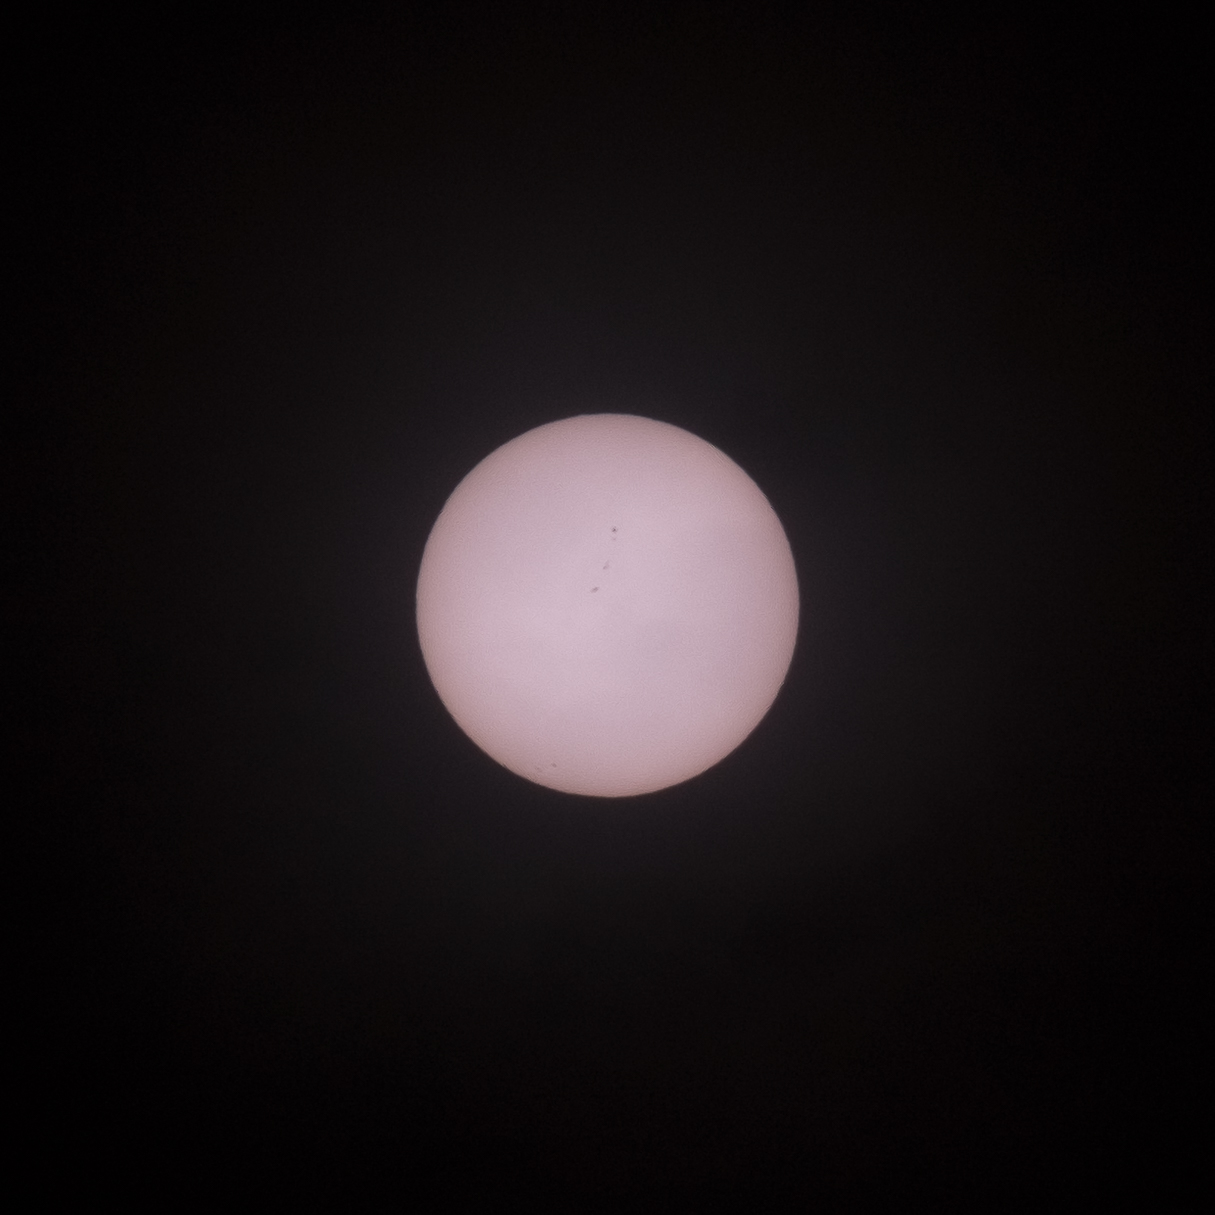
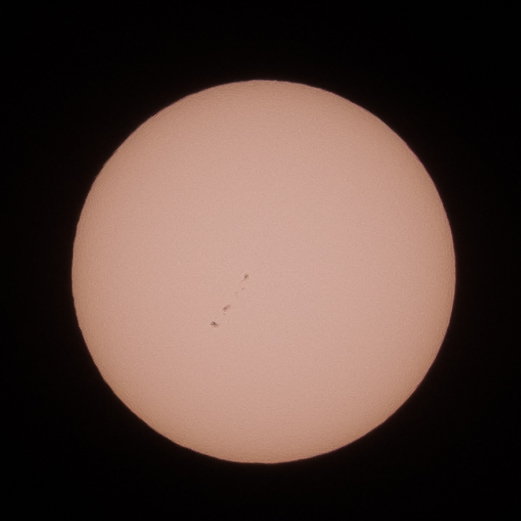
Sunspots! Shot with Fujifilm X-T1, 55-200mm, 1/500th at f16. Thornton, CO. 19th August 2017.
Phew!
It worked. And to be honest it worked a lot better than I was expecting it to. At first I thought the splodges were sensor dust. Mirrorless cameras are more prone to suffering from this as when you take the lens off the sensor is directly exposed rather than having a mirror in the way. I was also shooting at f16 which would accentuate any dust on the sensor. However, I moved the sun around in the frame and took more shots as I did so and the splodges stayed put. Sun spots! I couldn’t believe that I was seeing sun spots with my tiny lens and my DIY, bodged together solar filter. I was already excited by the prospect of just seeing a total eclipse. I was now also contemplating the fact that I might be able to capture a set of photos of my own of the event.
I tried the filter out using both my X-Pro2 and the X-T1 (normally I shoot with the 10-24mm on one and a longer lens on the other if I have both bodies with me). I decided that the extra resolution of the X-Pro2 didn’t outweigh the flippy out screen of the X-T1 plus in the event of an accident the X-T1 was bought as a used body and was older technology. Basically I would cry much more if my X-Pro2 got killed during this process. Sorry X-T1 but those were the cold hard facts.
We were due to drive out to Nebraska very early on the morning of Sunday 20th August. We were trying to minimise any issues with busy roads and in the couple of days before we traveled there were indeed stories on the TV news of huge traffic jams and even gas stations running out of fuel. This very nearly put us off the journey. It was a six hour drive each way to our destination in order to see 2 minutes 31 seconds of totality. If we stayed right where we were we would get something like a 90% eclipse without all the driving and the risk of being stranded and out of fuel on the Interstate in the middle of a Mad Max like scenario where rip-off merchants could charge whatever they liked for fuel, food, water – the chance to live on in this cruel, harsh world…
Fortunately our sense of adventure won out and we headed off at 4am on 20th August to drive along I76 and I80 to Hastings and a hotel room we hoped would still be held for us.
I’ve been blogging for a number of years now over at SquonkyBlog. That was a “general interest” blog, I would write about anything that I was interested in. It was predominantly photography related but certainly not exclusively so.
I finally decided that it was photography that I really wanted to write about so I had to decide whether to carry on with the old blog or make a fresh start.
I decided on the latter.
This will let me make a clean break from my previous blog, not carry over any of the clutter and rubbish, let me do things the way I want to rather than the way that WordPress.com will allow me to and to concentrate on the photography. Because that’s what I’m passionate about.
I want to relate my experiences and thoughts when I’m out shooting. I want to talk about techniques and equipment which I find fun and useful. I want to encourage myself to get out and shoot more frequently. And hopefully along the line I’ll learn some new things, meet some new people and have a lot of fun.
And I’ll save saying anything else for the next post.