I’ve owned this Helios 44M lens for some years now but I think I’ve only shot with it once, a very long time ago.
These lenses were churned out in vast numbers in the Soviet Union in the 1970s and 1980s. Consequently, you can generally pick one up at a bargain price.
The 44M is a 58mm f2 lens, becoming an equivalent of 87mm on an APS-C sensor (close enough to 85mm). Naturally, everything is manual and there’s no electronic communication with my camera. The focusing ring is nice and smooth and on this one the aperture ring has positive clicks (I have read that some of them have a smooth, non-clicky aperture ring and I’m guessing that’s a good thing for videographers).
The unique selling point of these lenses is their swirly bokeh effect. You really need to get close to your subject and have the background quite a way off to maximise the effect. Ideally, you’d also use a sensor larger than the APS-C of the Fuji X system. I do have a Canon 6D, and somewhere I think I also have the required M42 adapter, but manual focusing aids on mirrorless bodies make it a doddle to use a lens like this, so that’s what I went with this time.
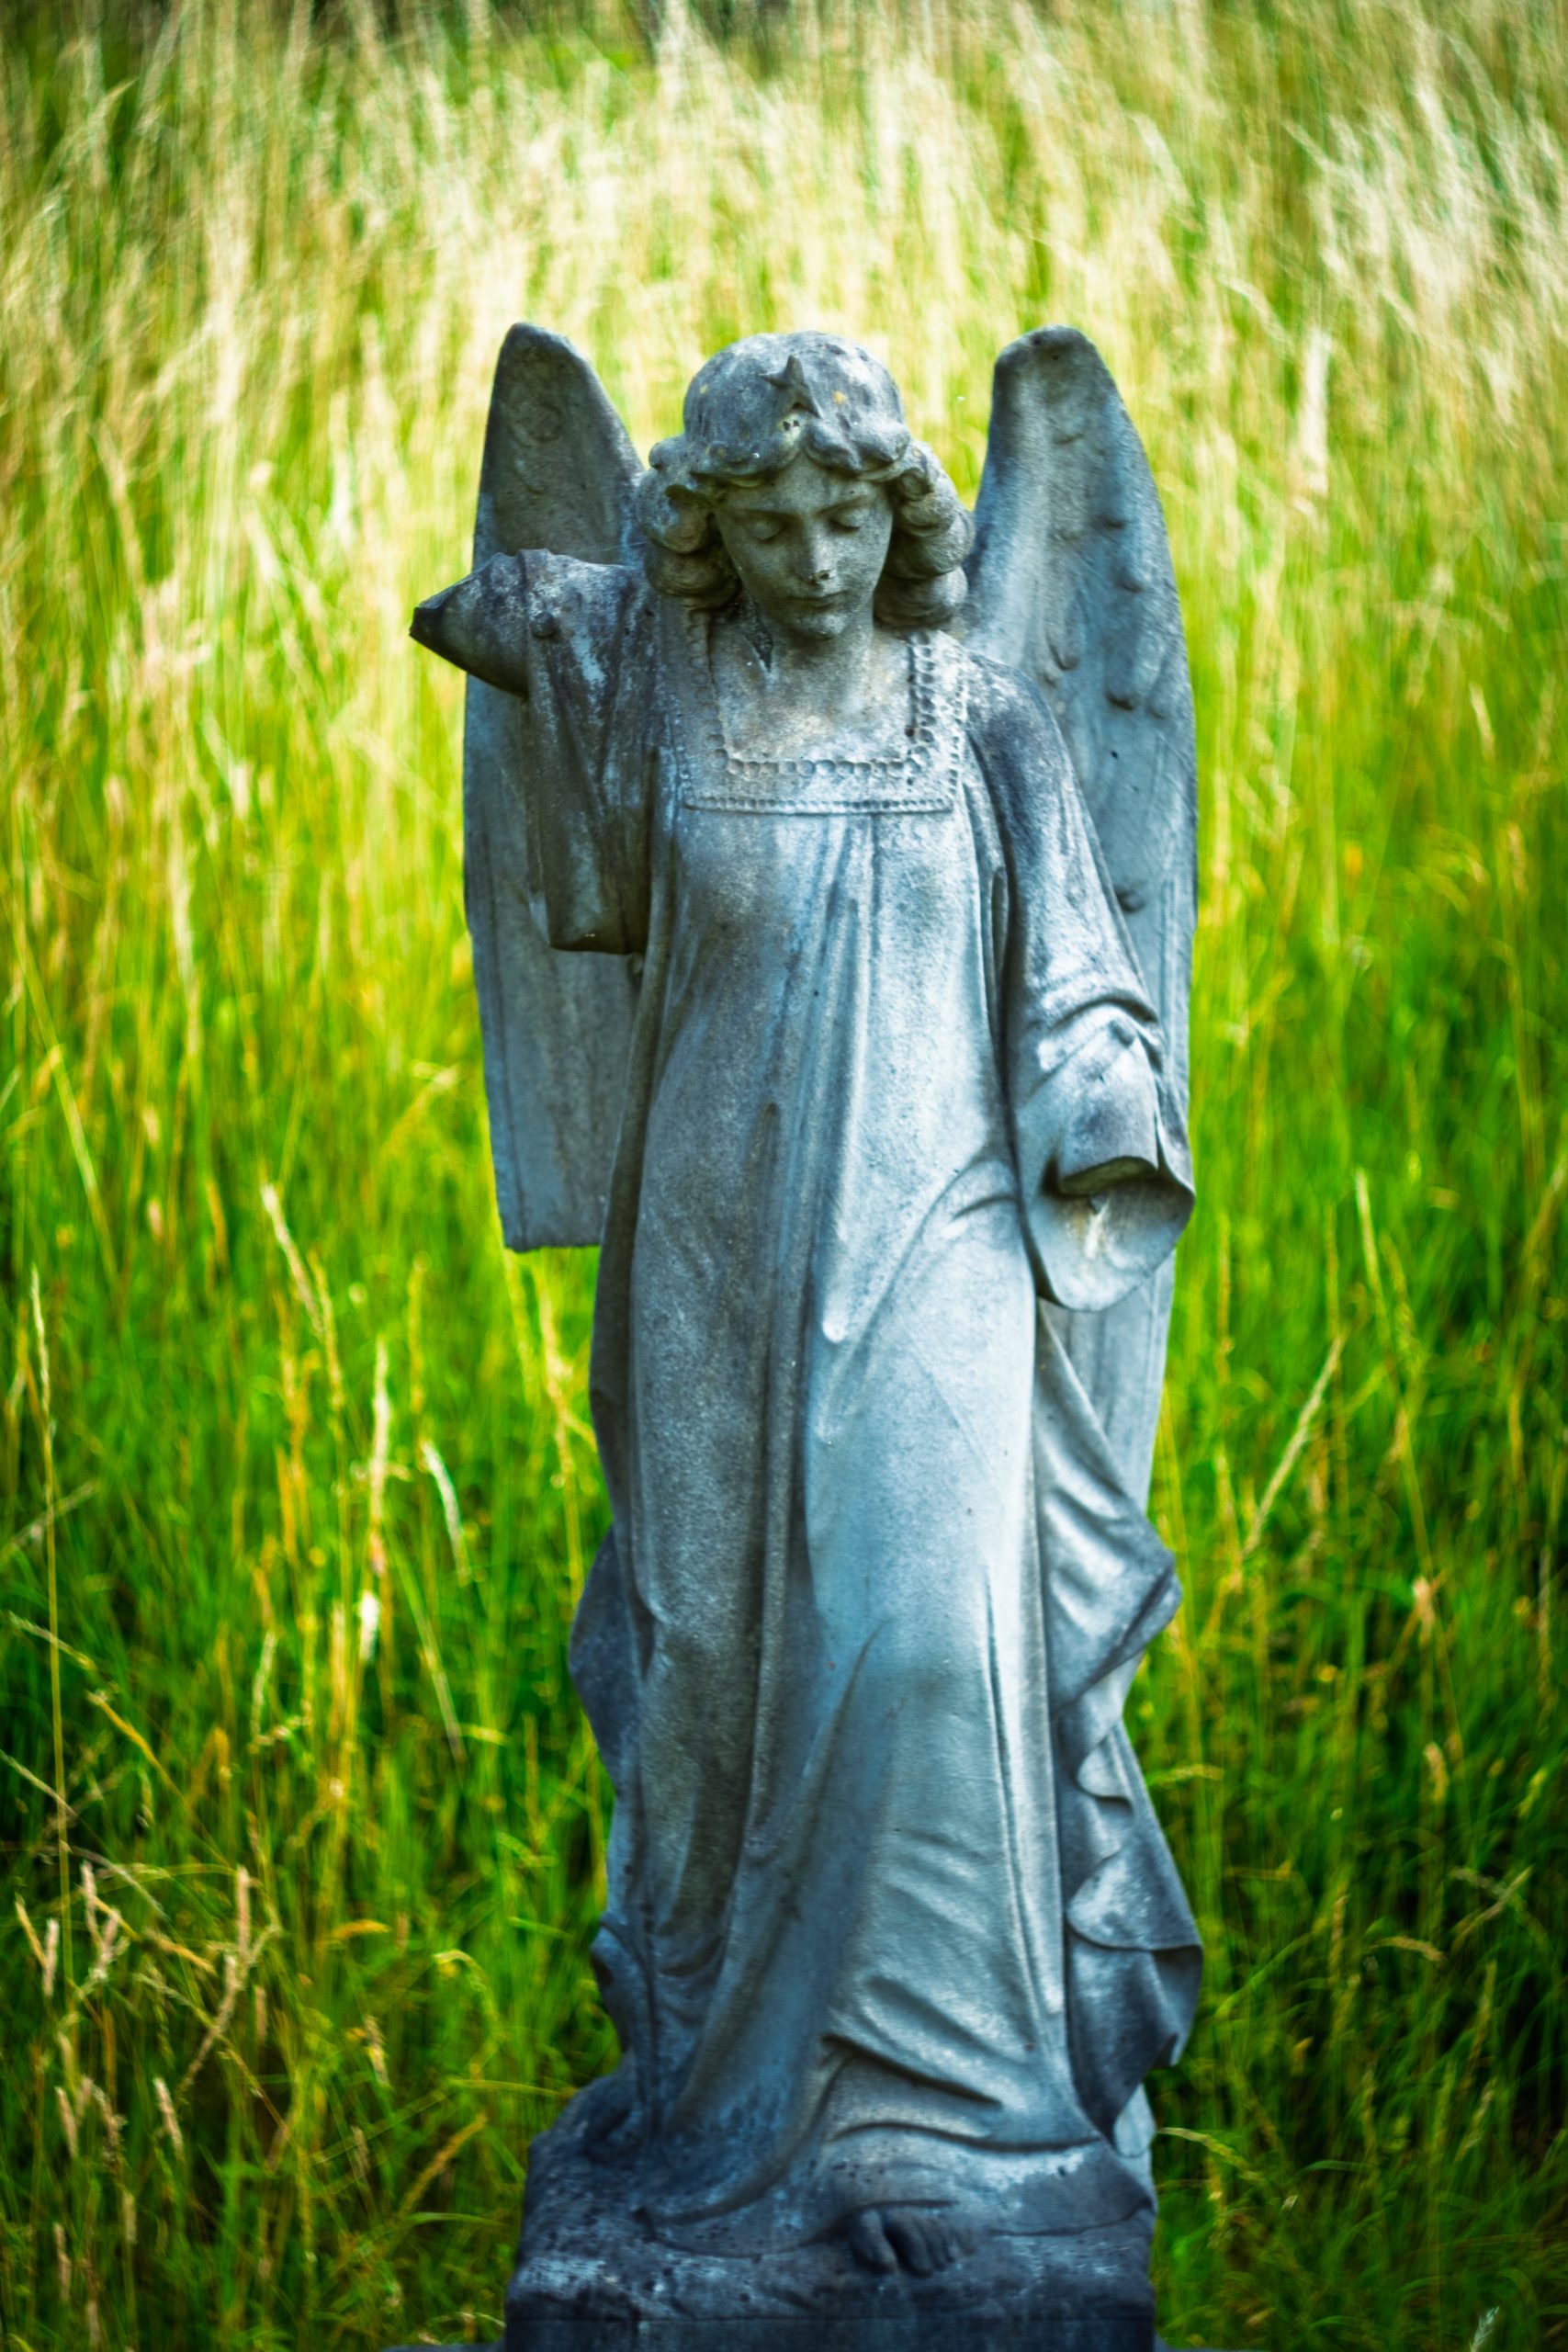
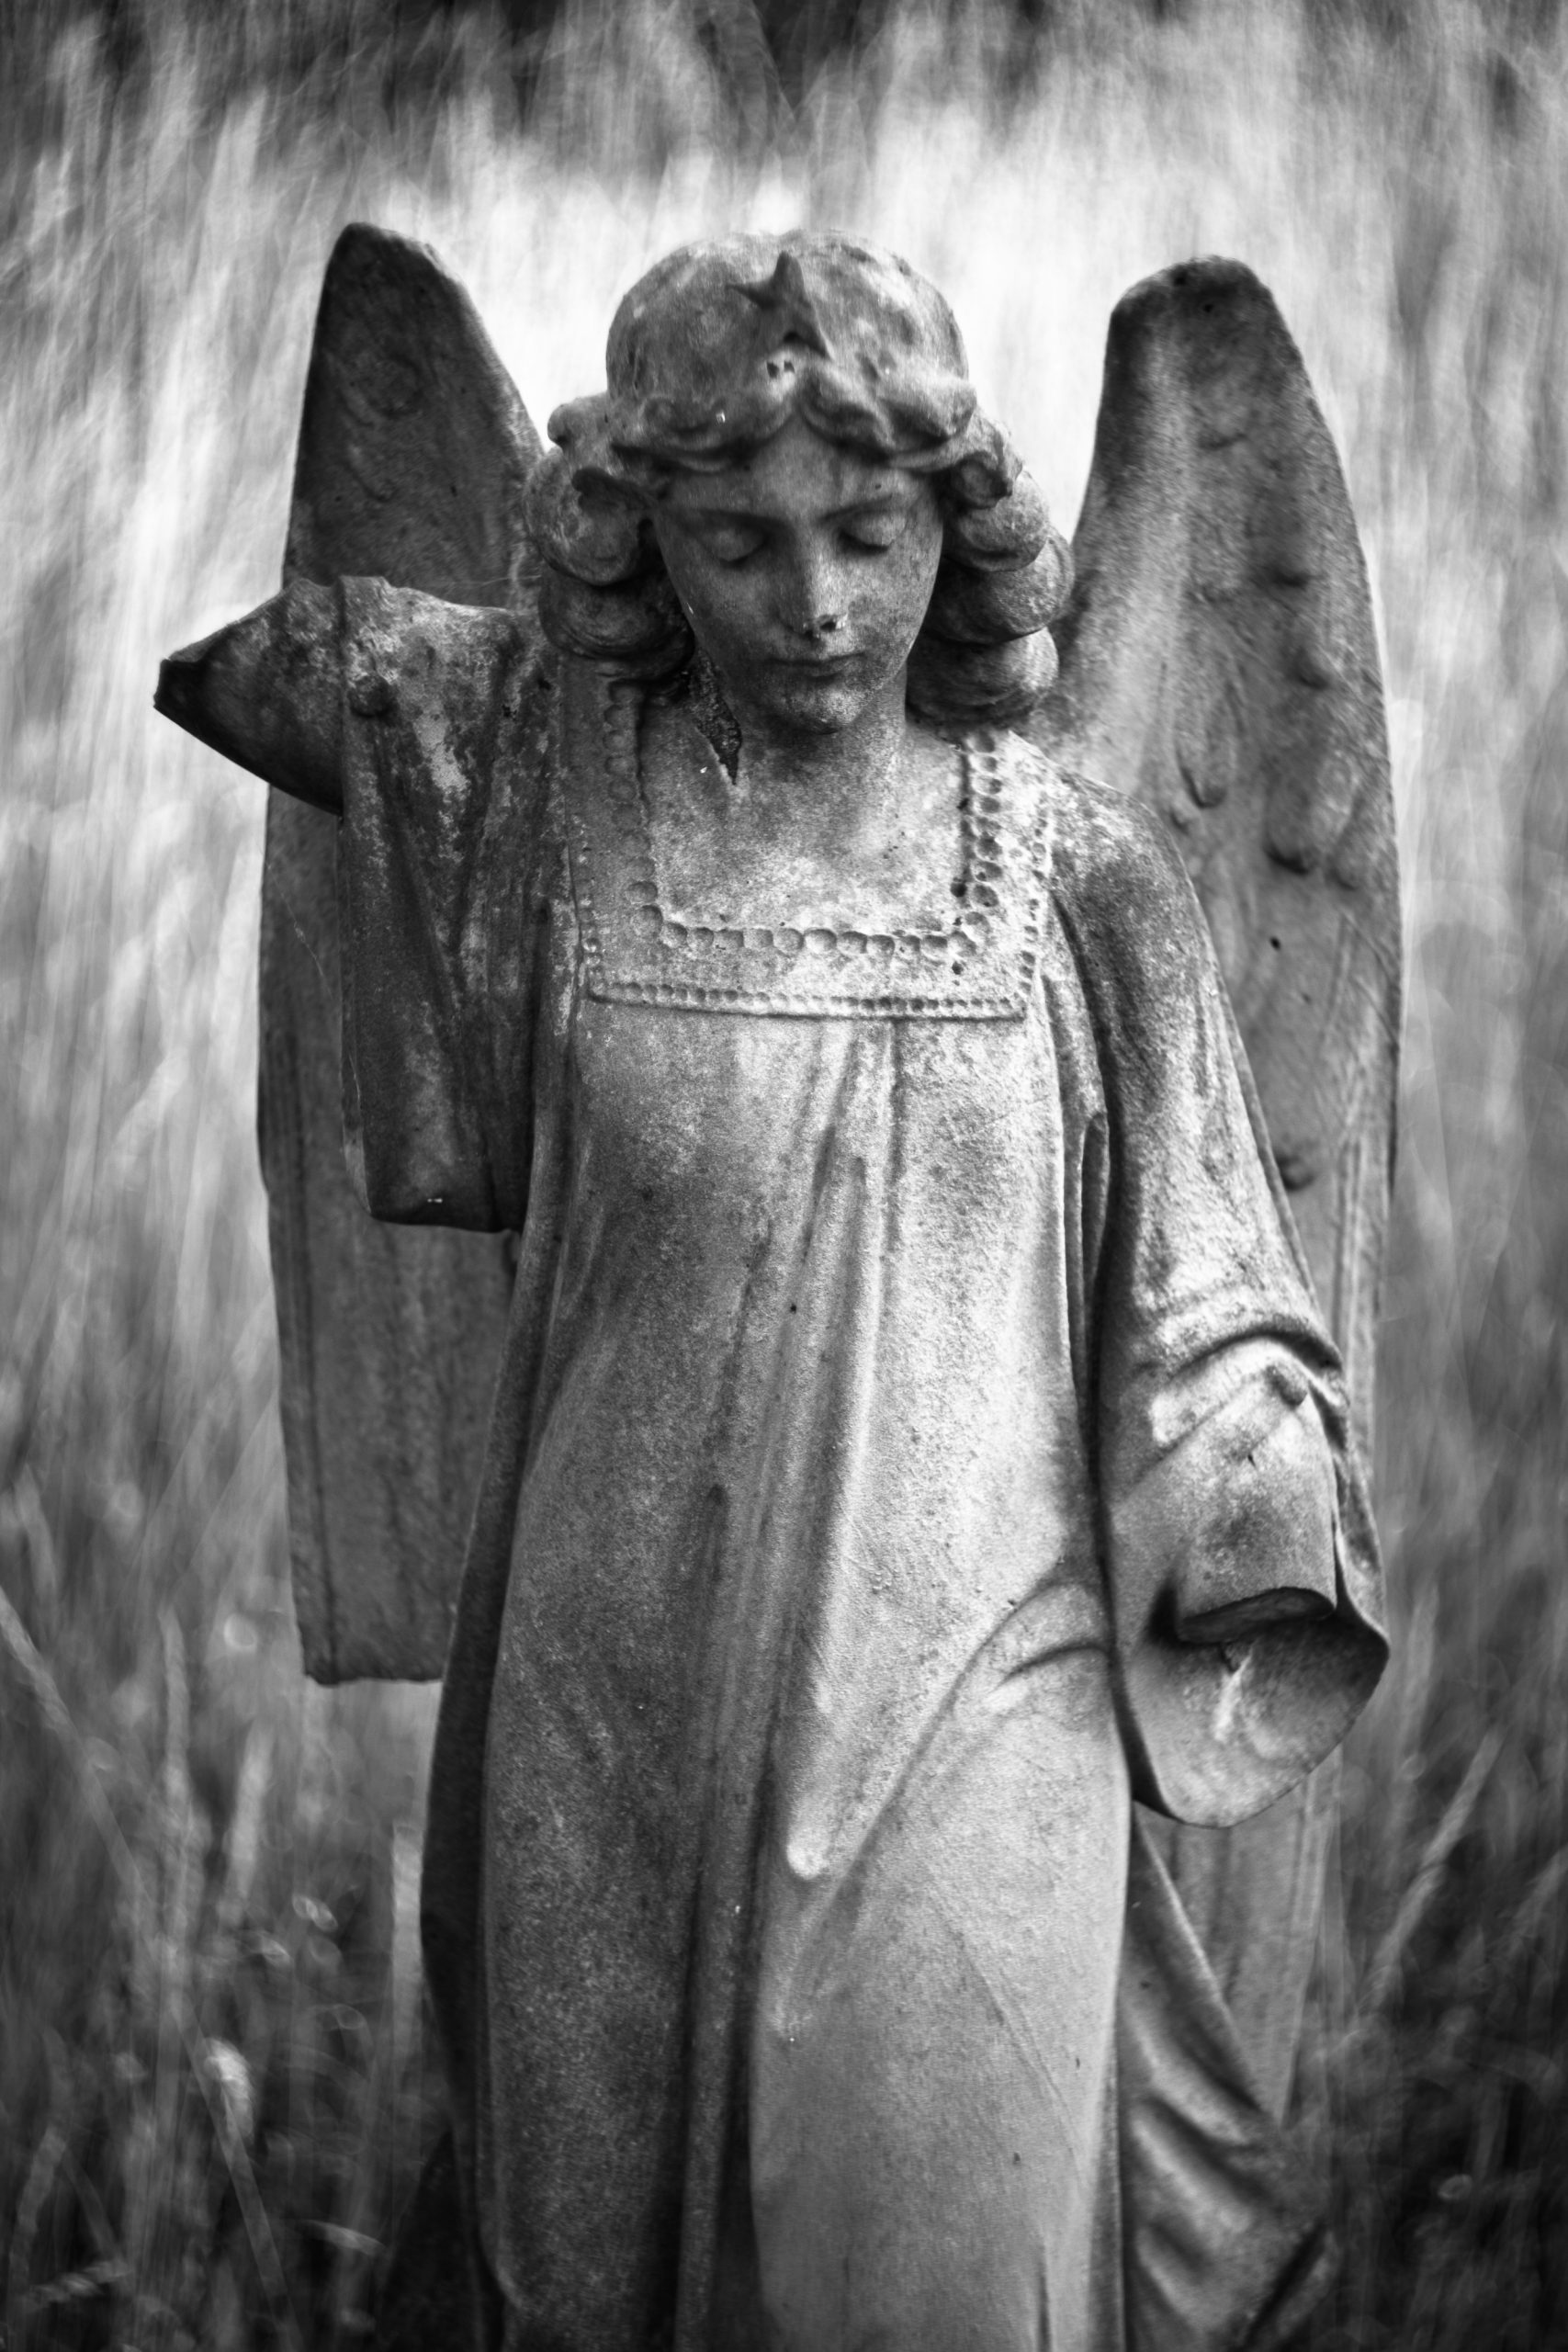
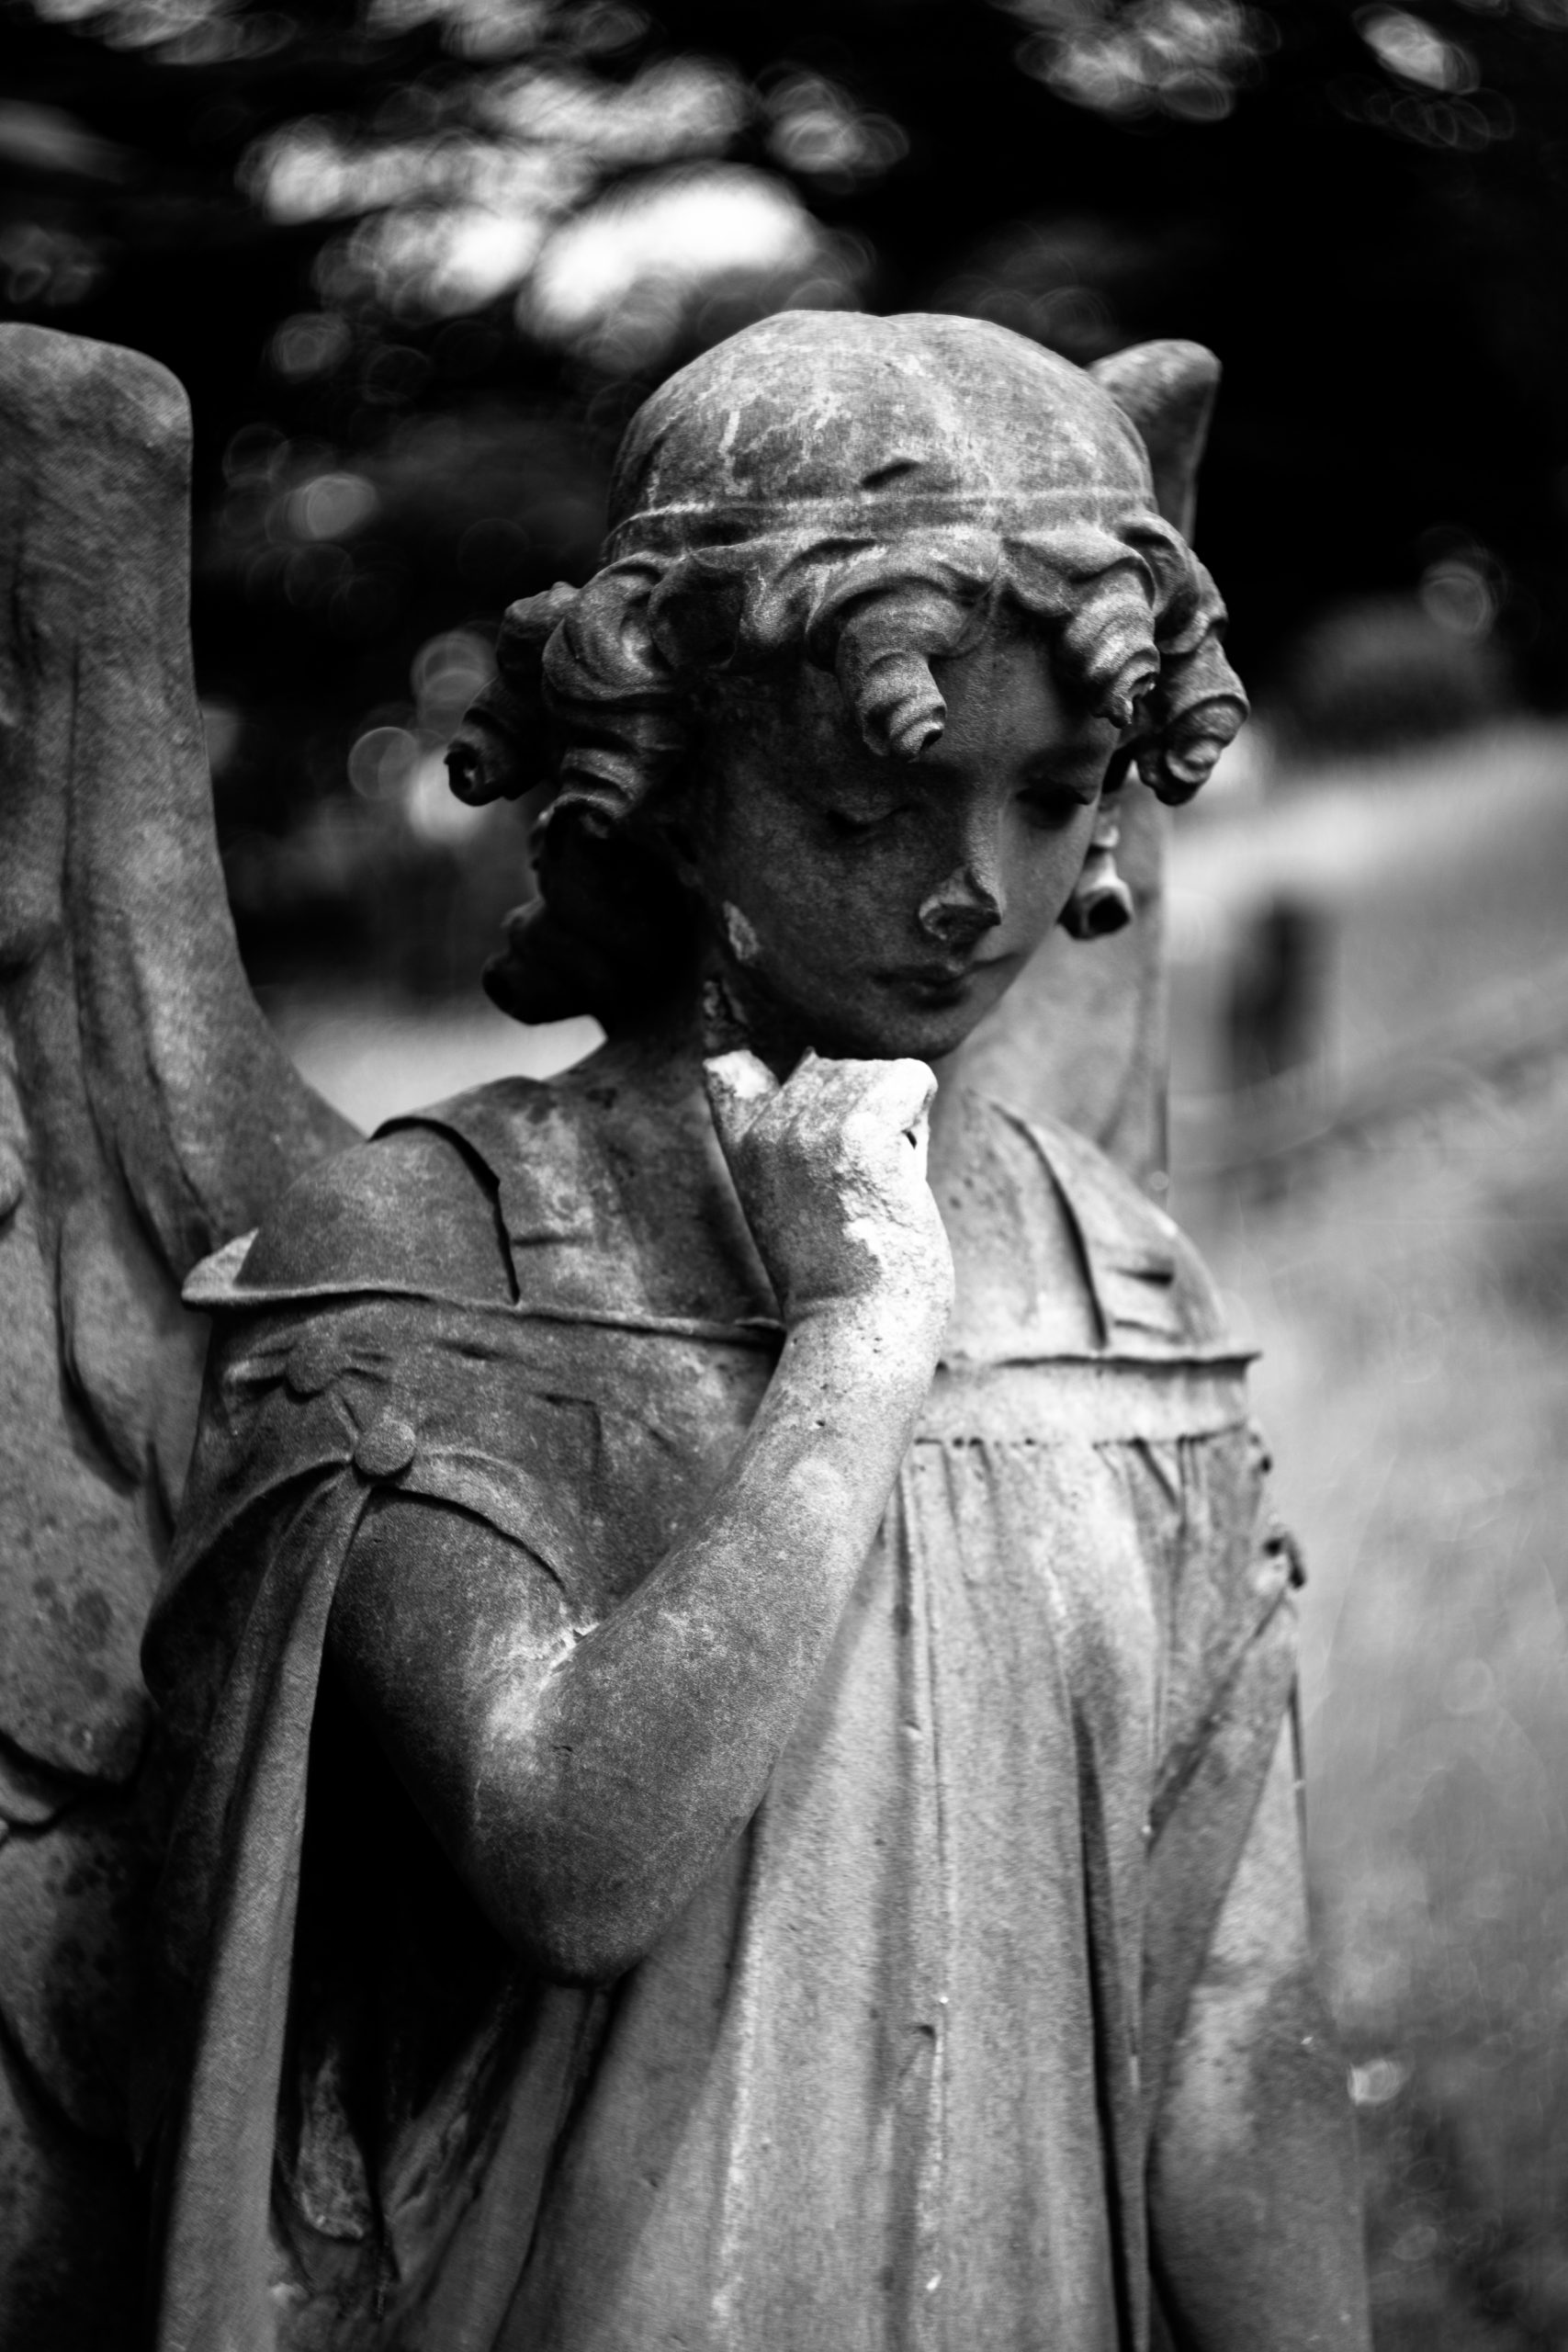
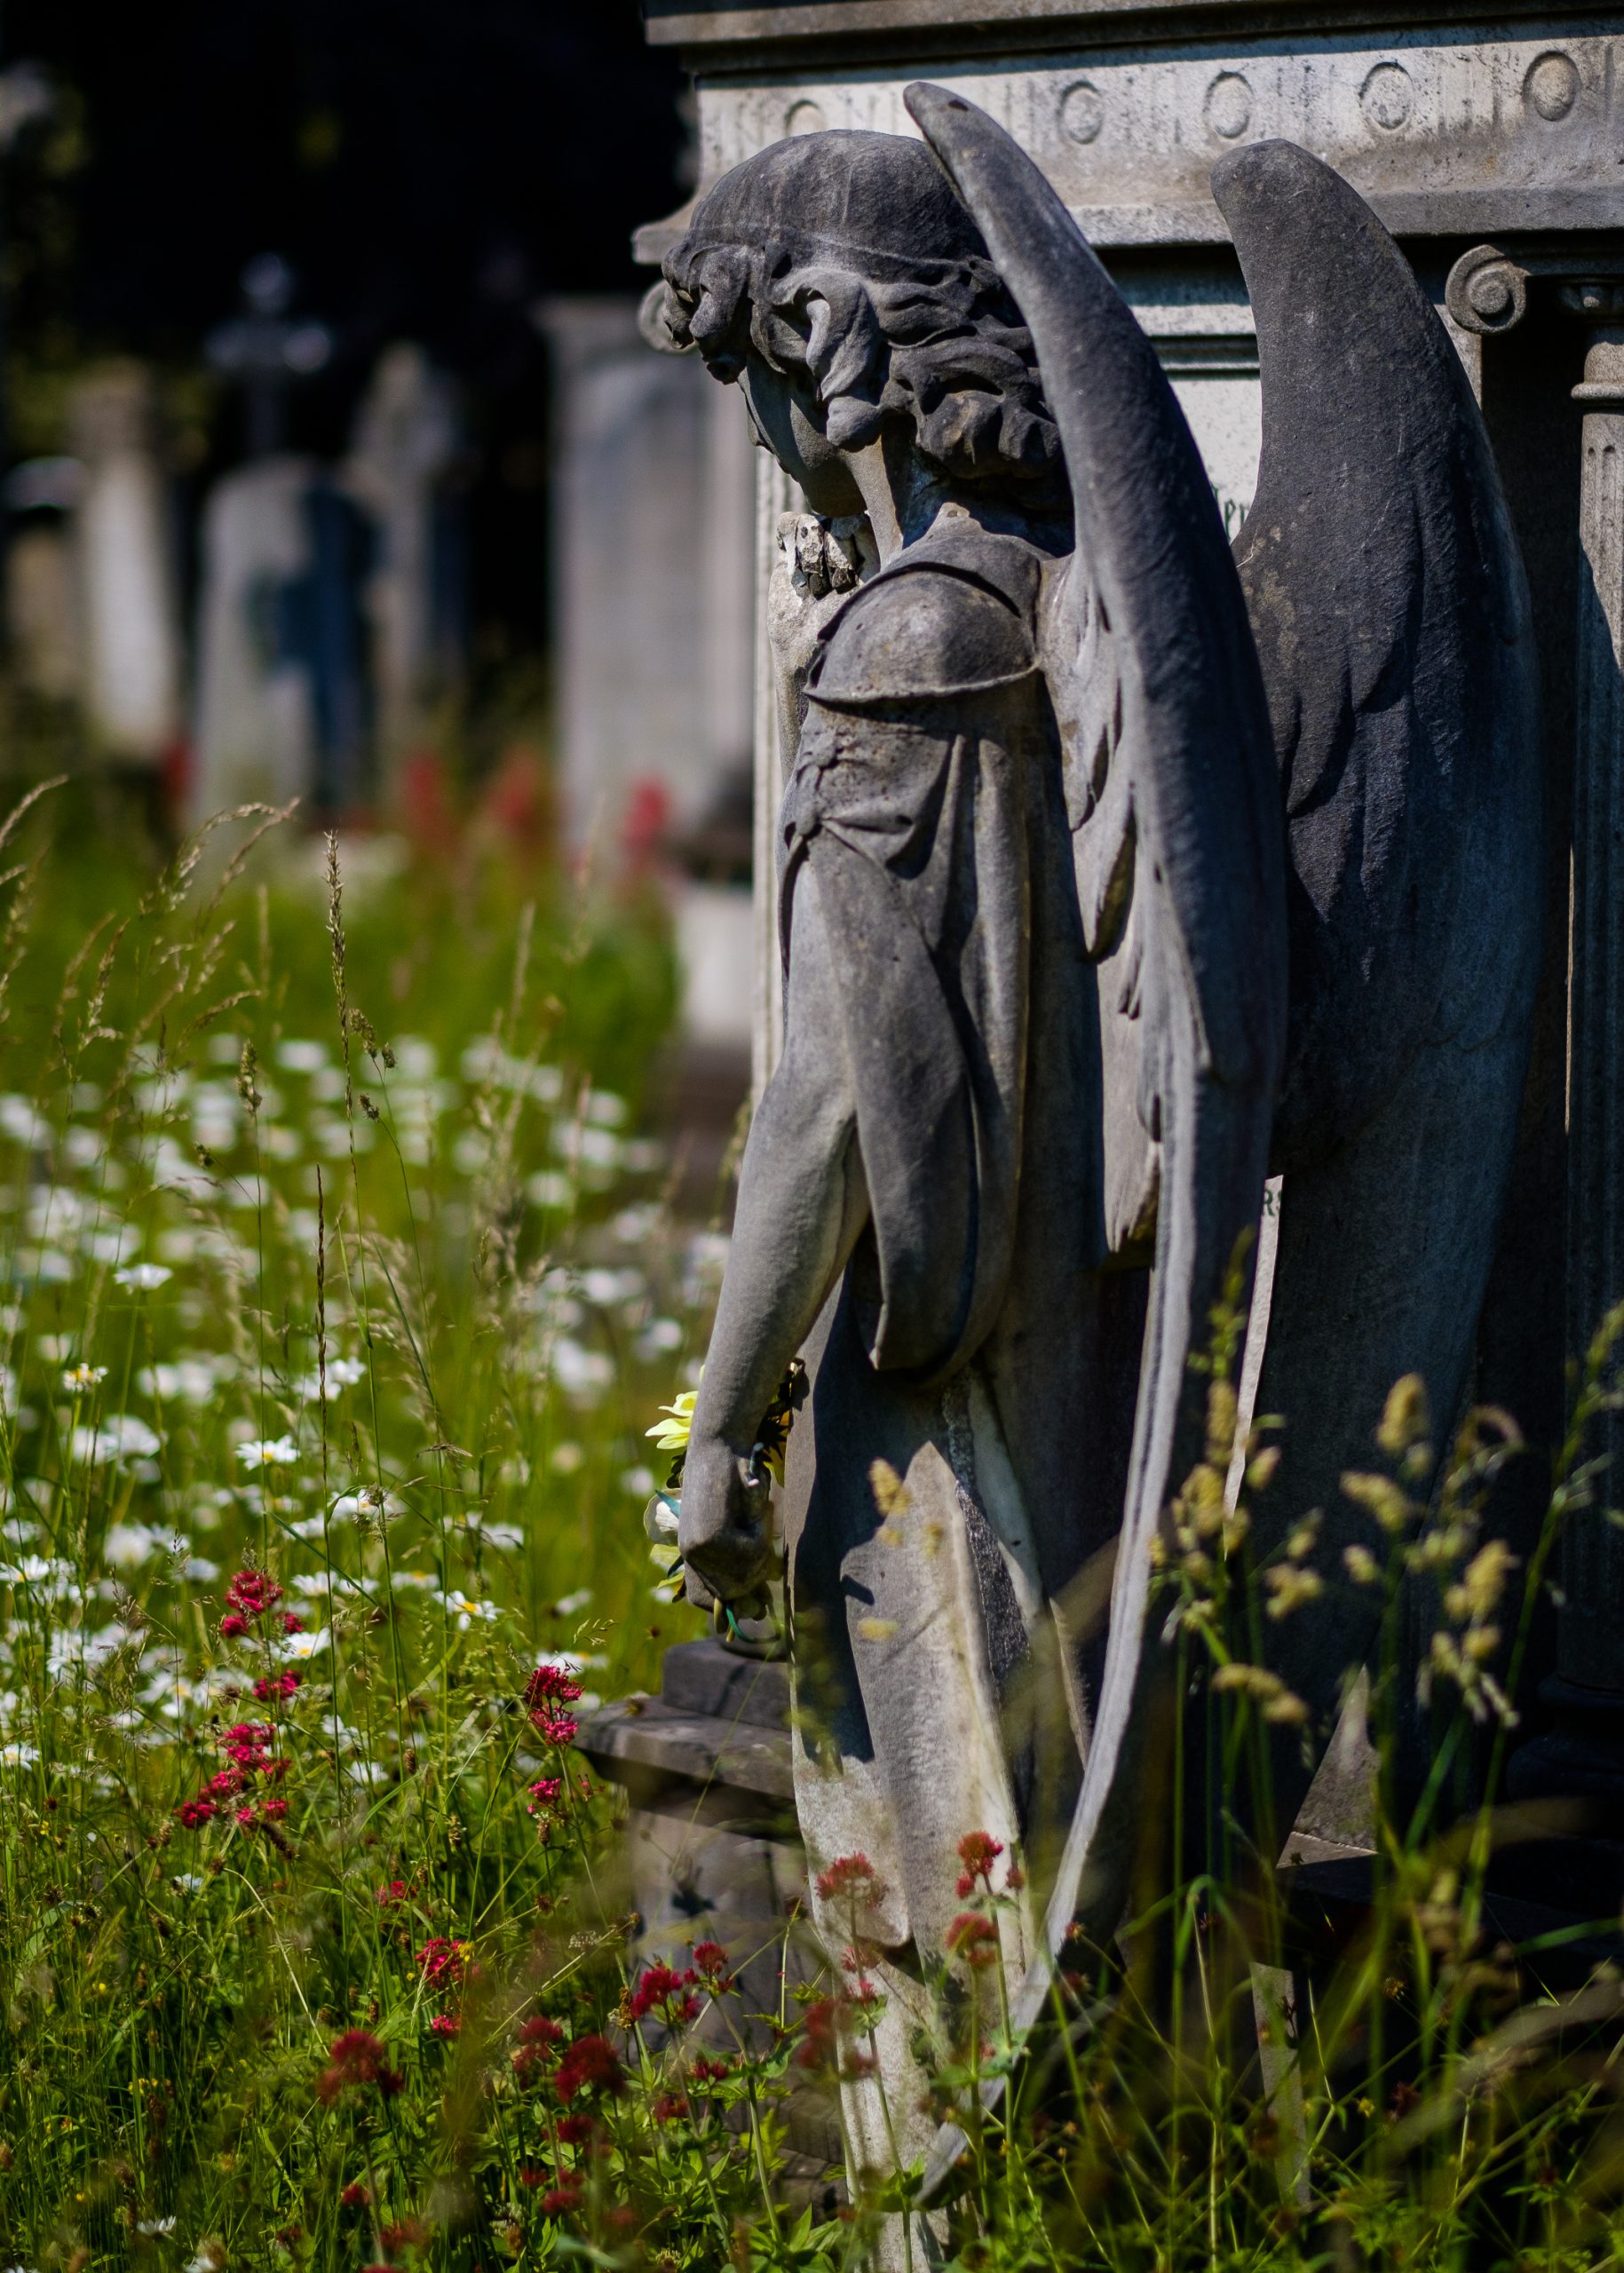
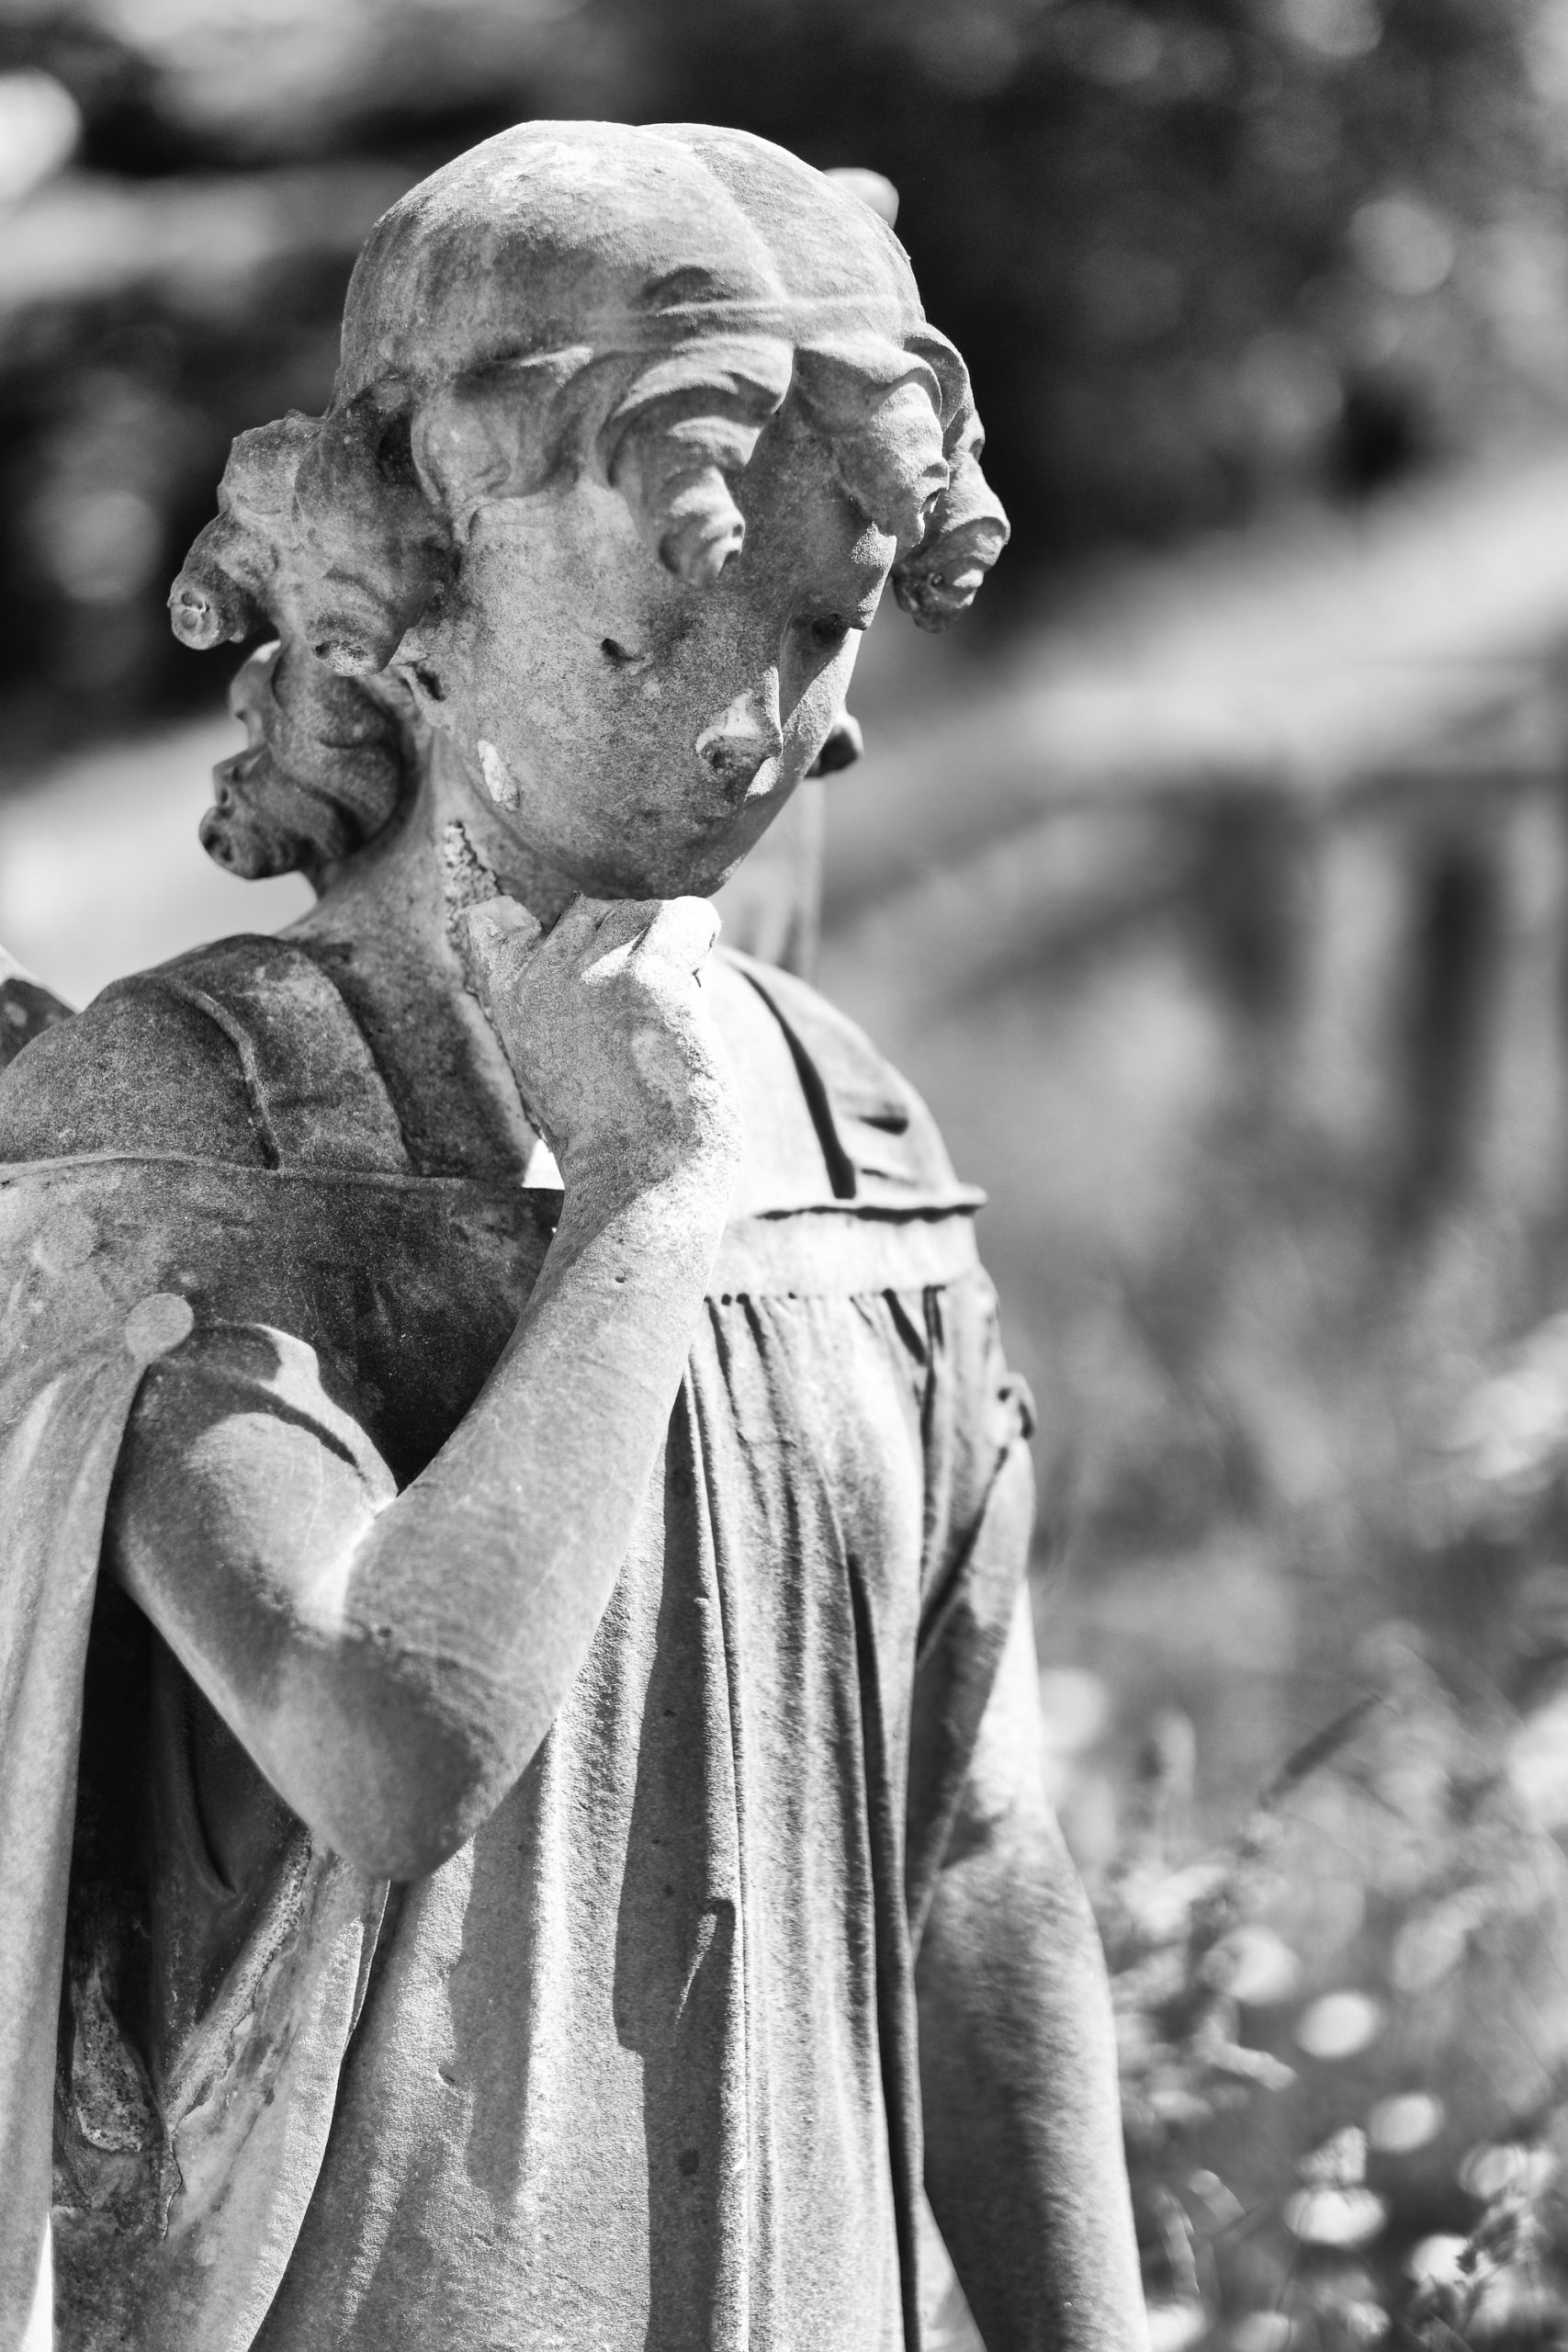
I went for a wander around my favourite local Victorian Necropolis, Leicester’s Welford Road Cemetery, to try and have a bit of fun with this lens today. I’ll post some of my photos below. The swirly bokeh is only really prominent in a couple of them, but I enjoyed my little photo walk.
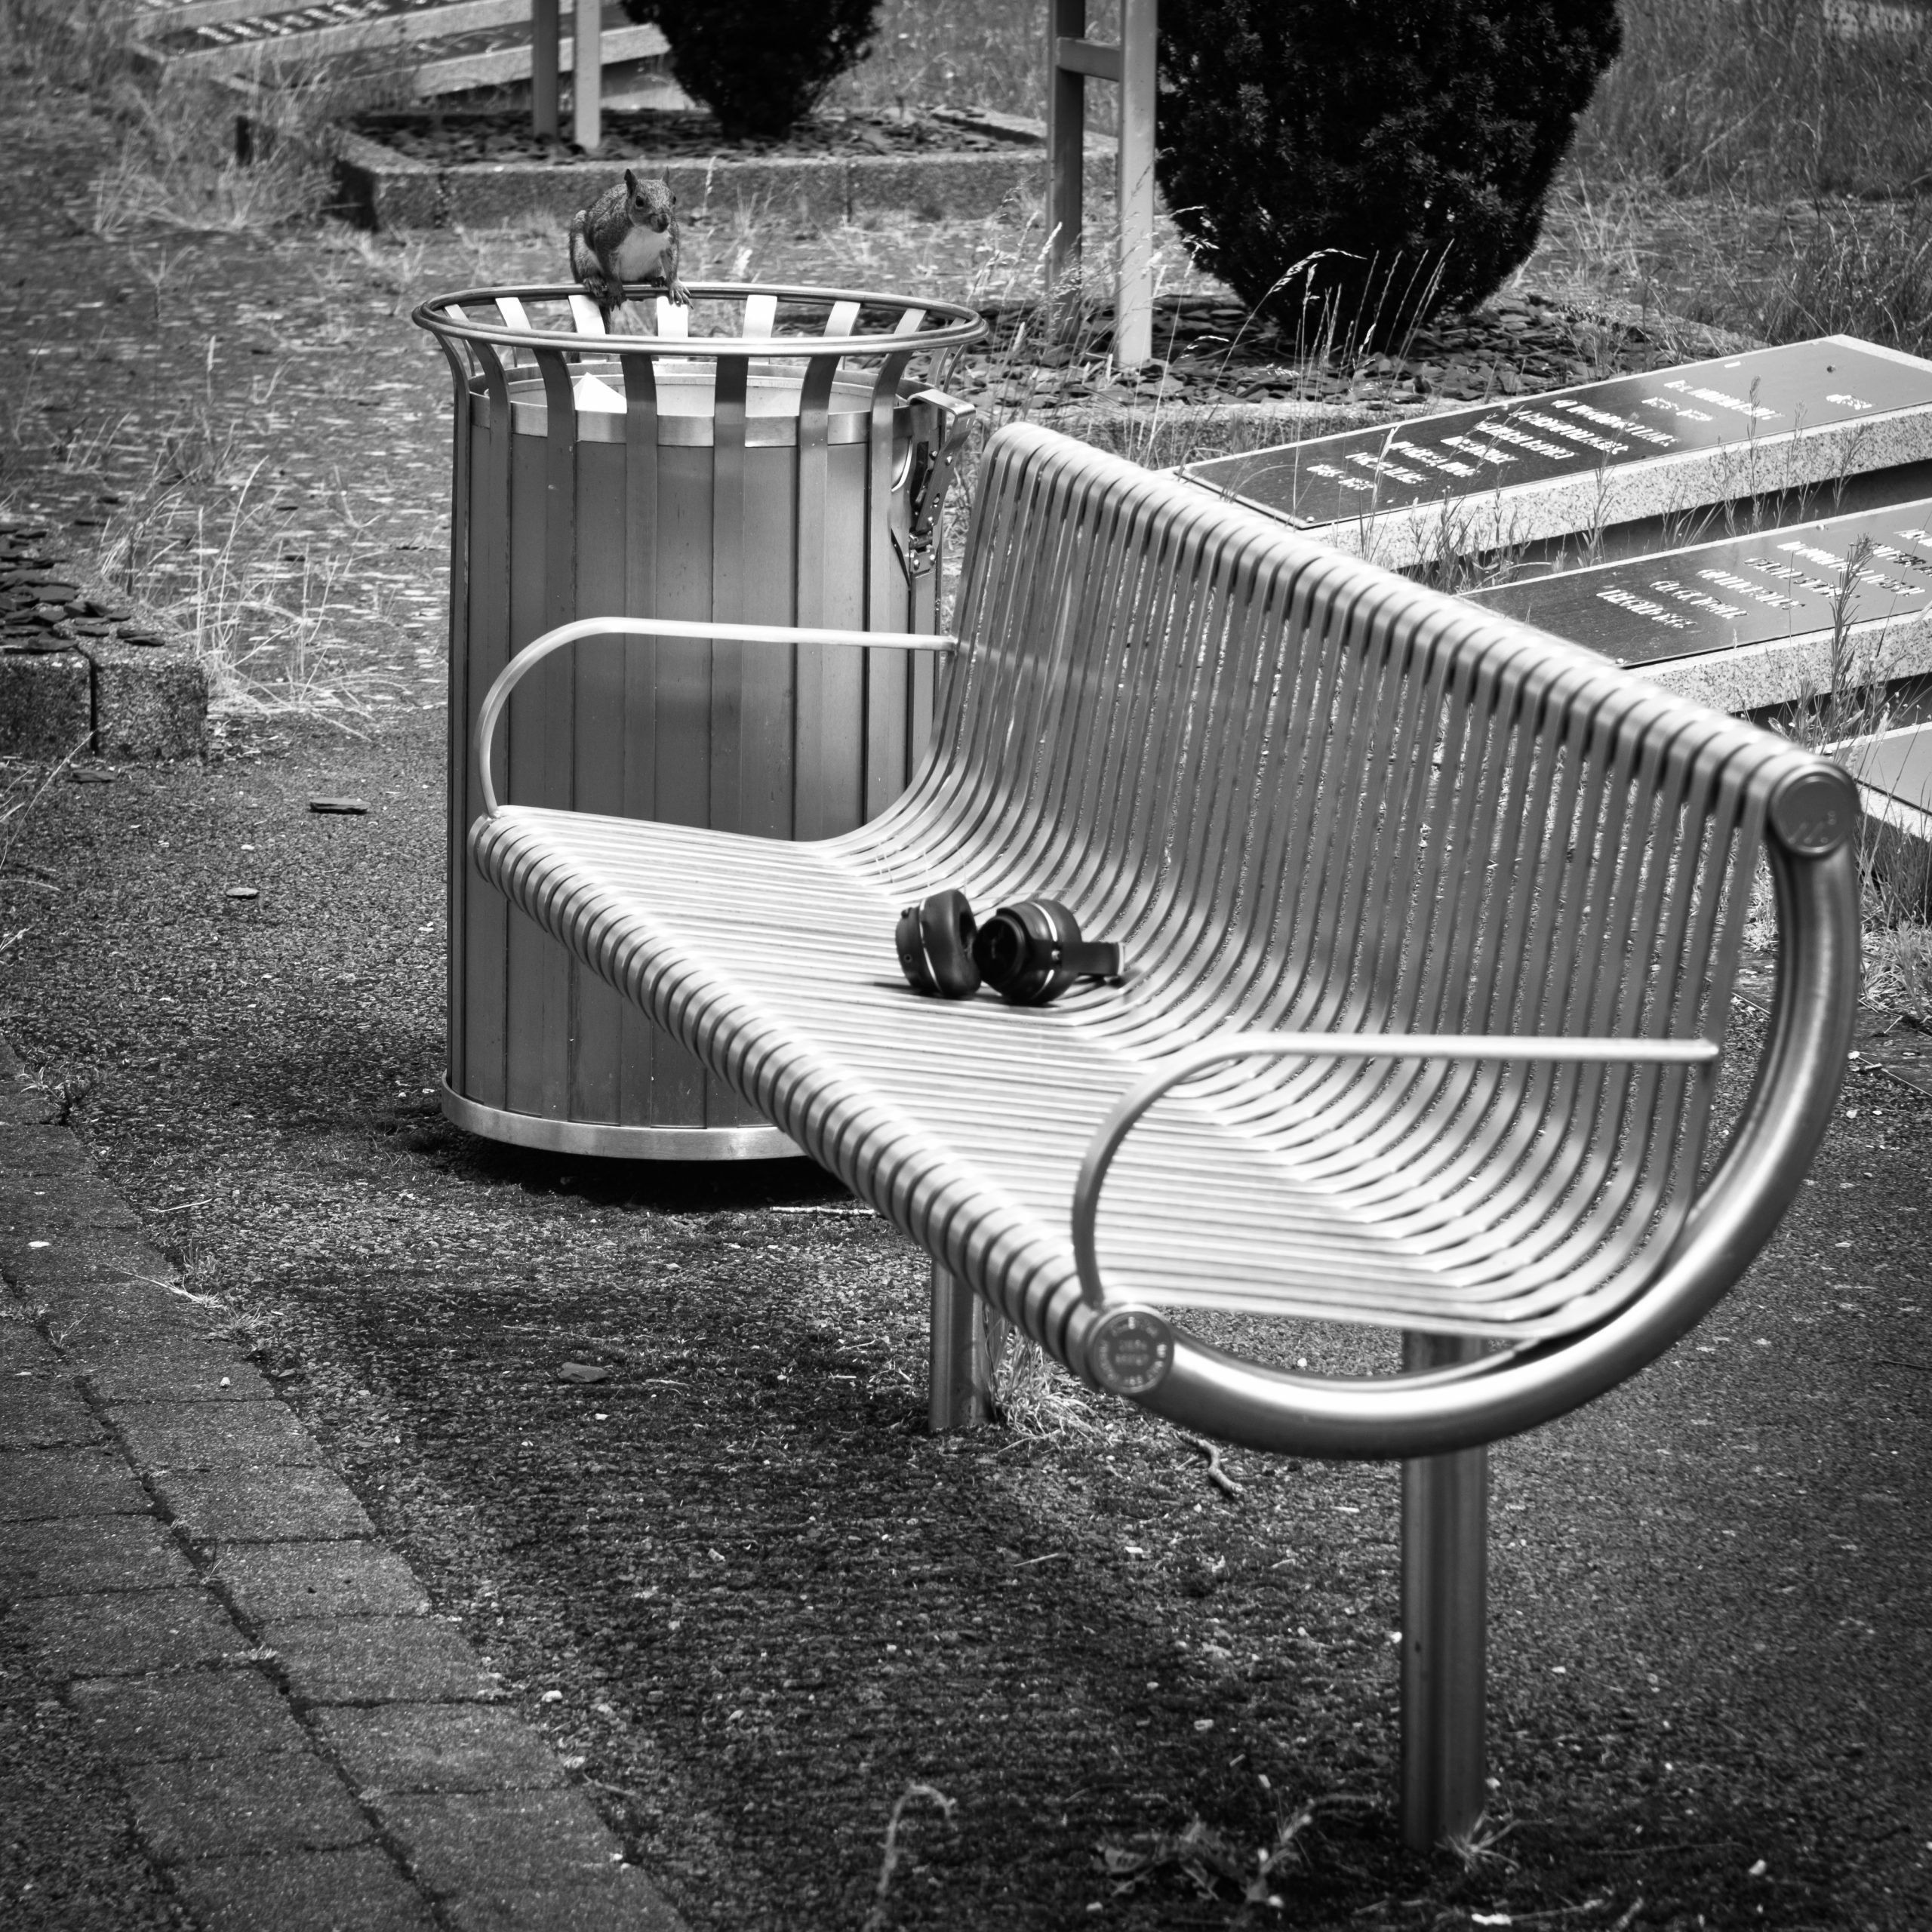
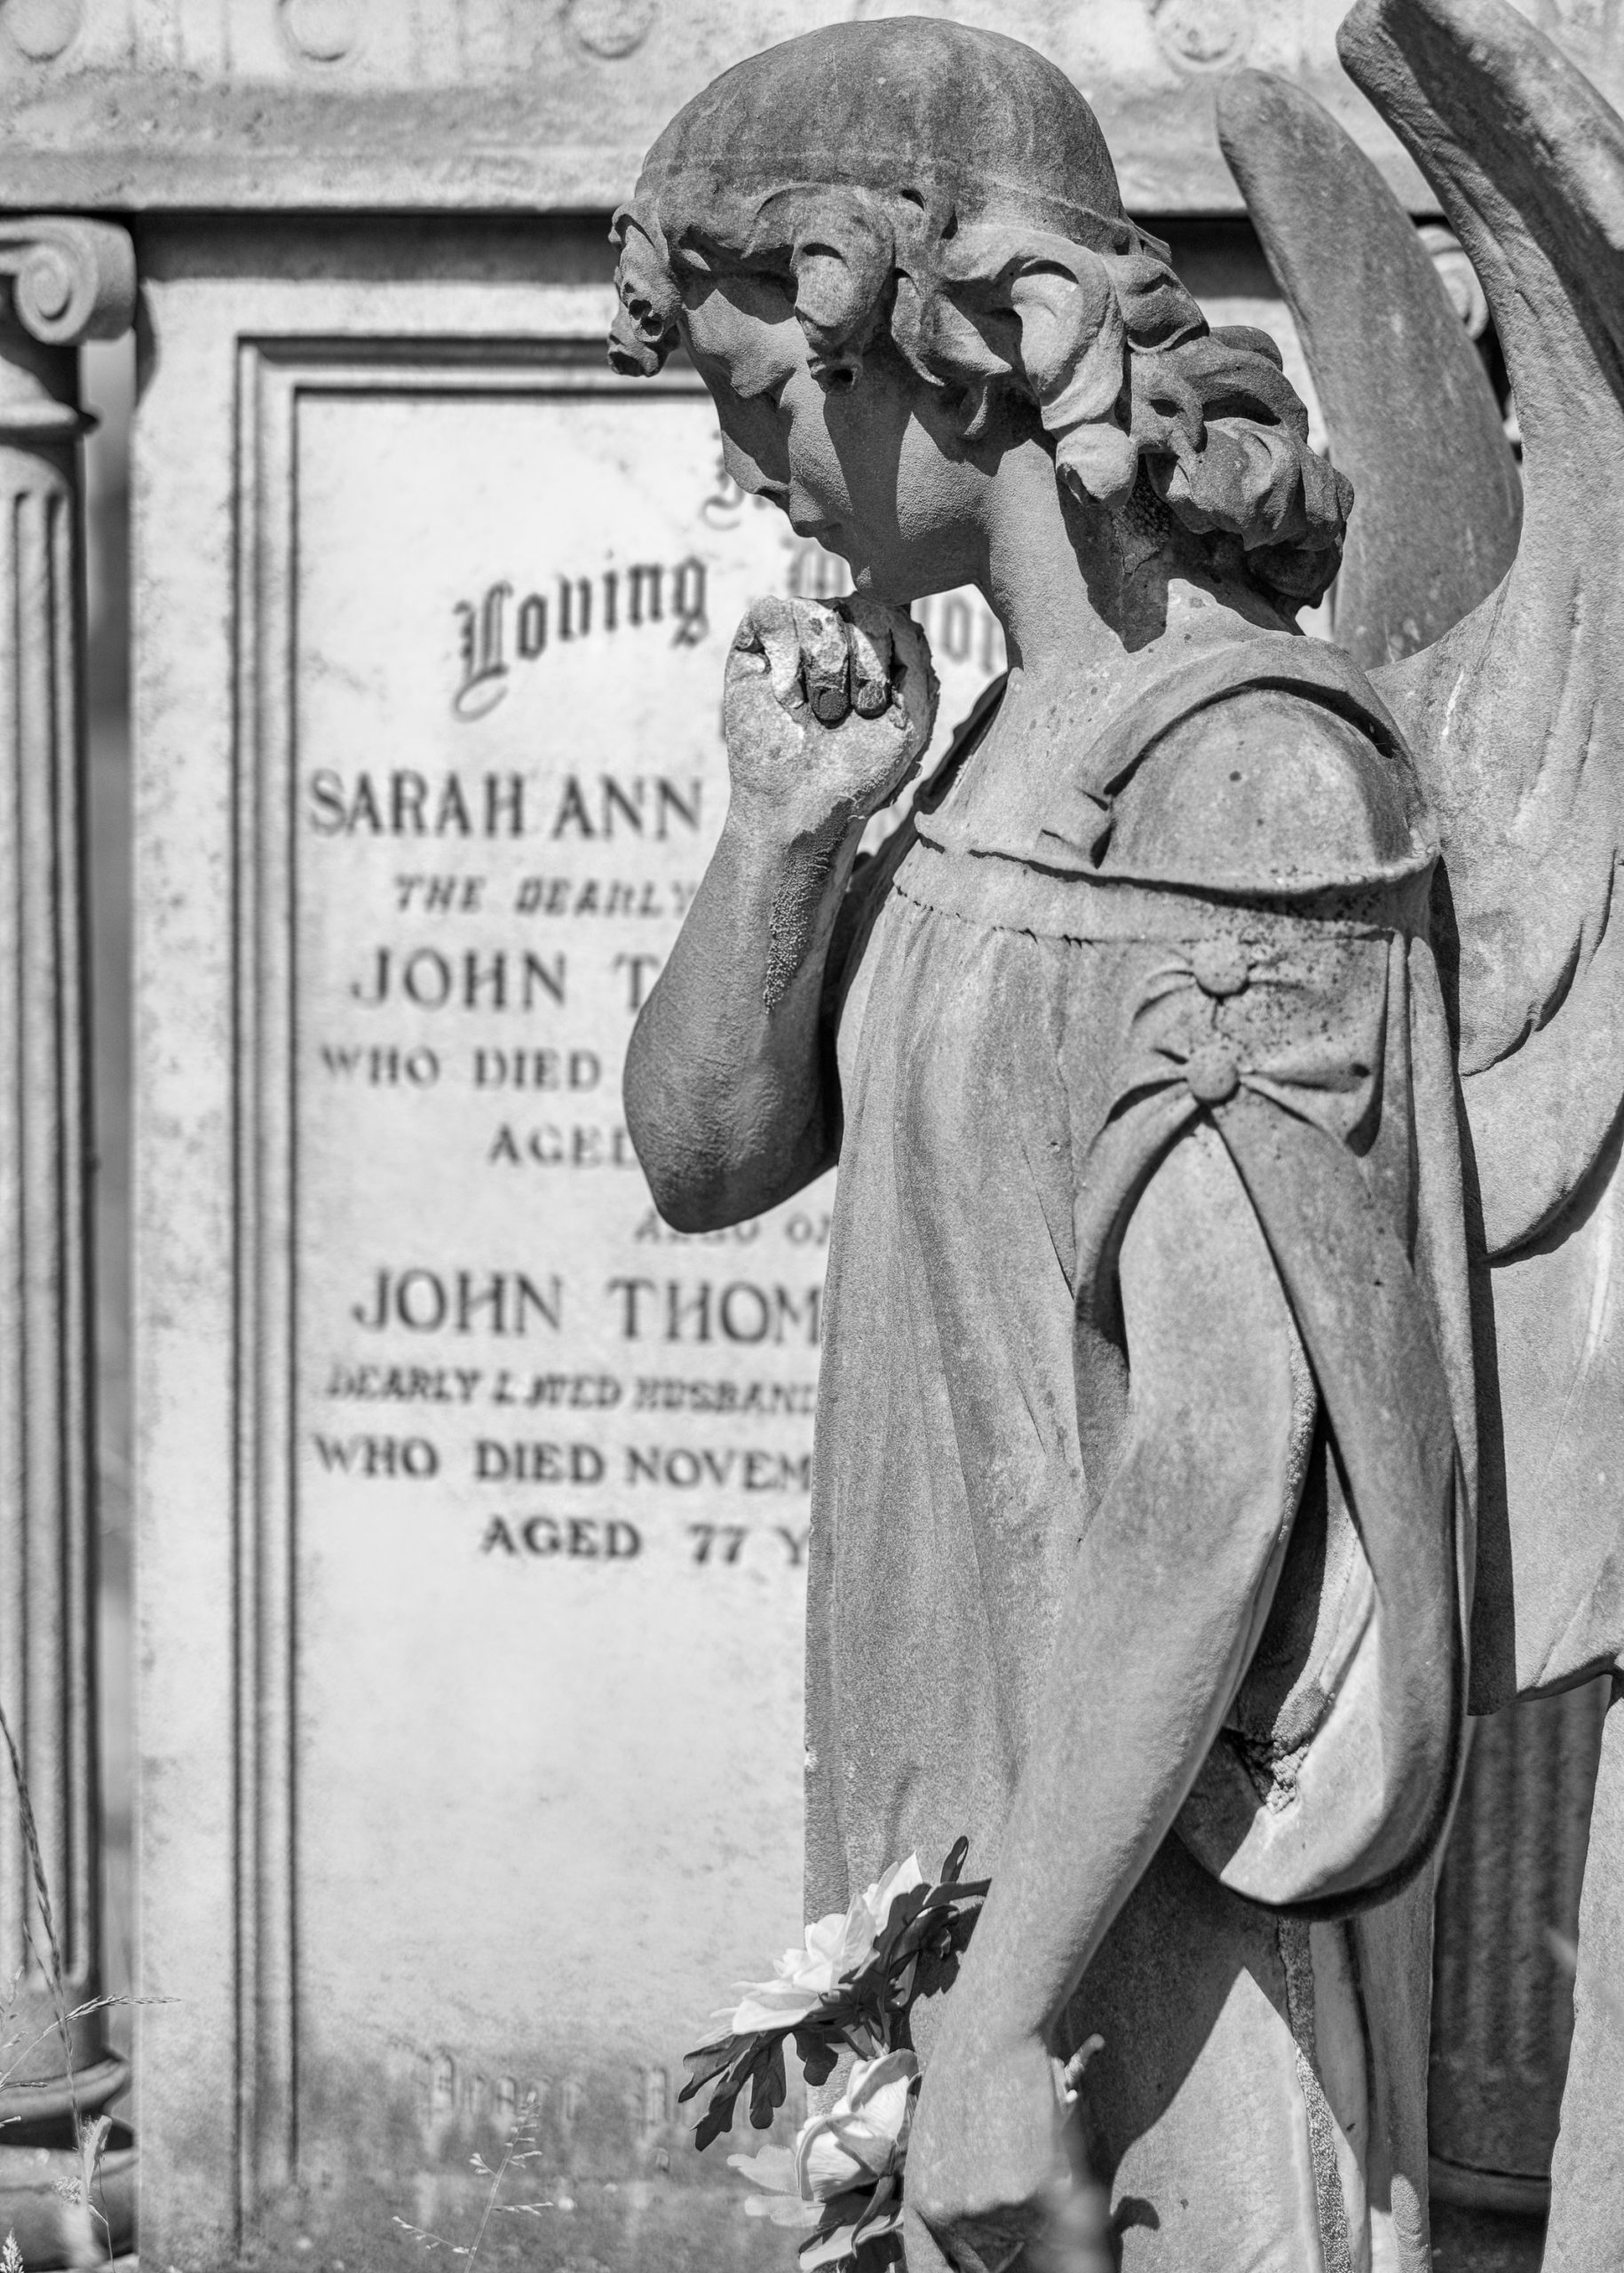
My best result in terms of the swirly bokeh effect. The tree in the background was far enough away.Angel statue with vivid green and yellow grasses behind.Angel statue with blurred out grasses in the background, black and white.My favourite angel statue in the cemetery. I always have to take a photo of this one.Just a grabbed snap of a squirrel who seemed to be eyeing up the headphones which somebody had abandoned on the bench.
December was a busy month for me. I guess it can be for a lot of people. Time seems to compress into a rush of things that need to be done before December 25th or the New Year.
This December, I made a trip up to Lancaster to visit my sister and brother-in-law, I photographed the wedding of two great old friends, and I attended a couple of gigs. There was also excitement around the release of the album “Affinity” on December 5th, an album I provided the cover photo for and one which I’ve listened to a lot since its release. I’m now looking forward to receiving a copy of this on vinyl, and I’ll be interested to see how my photo looks on the front of an LP cover.
This was all punctuated by catching a nasty cold (I’m guessing at one of the gigs), navigating the rounds of Christmas-related shopping, a broken down oven that needed fixing (great timing, I got it fixed on December 23rd) and visits to friends.
Wedding photography. Yes, I have done it several times before, but it’s something I find very stressful, and I have turned people down on many occasions over the years.
But this one was an occasion I felt more relaxed about. Two very close and special friends had decided to ‘make it official’ after 20 years together. The wedding was on December 16th, 20 years to the day after their first date. They are two lovely people who I knew wouldn’t be putting incredible pressure on me.
Despite this, I decided to visit the wedding venue a couple of weeks in advance to scout it out and see what the lighting would be like. A trademark phrase of a good friend of mine is “set yourself up to succeed”, and I felt better for getting an idea in advance of the conditions I would encounter. As it transpired, I was shown the wrong room when I visited, but conditions were very similar, so it wasn’t a problem.
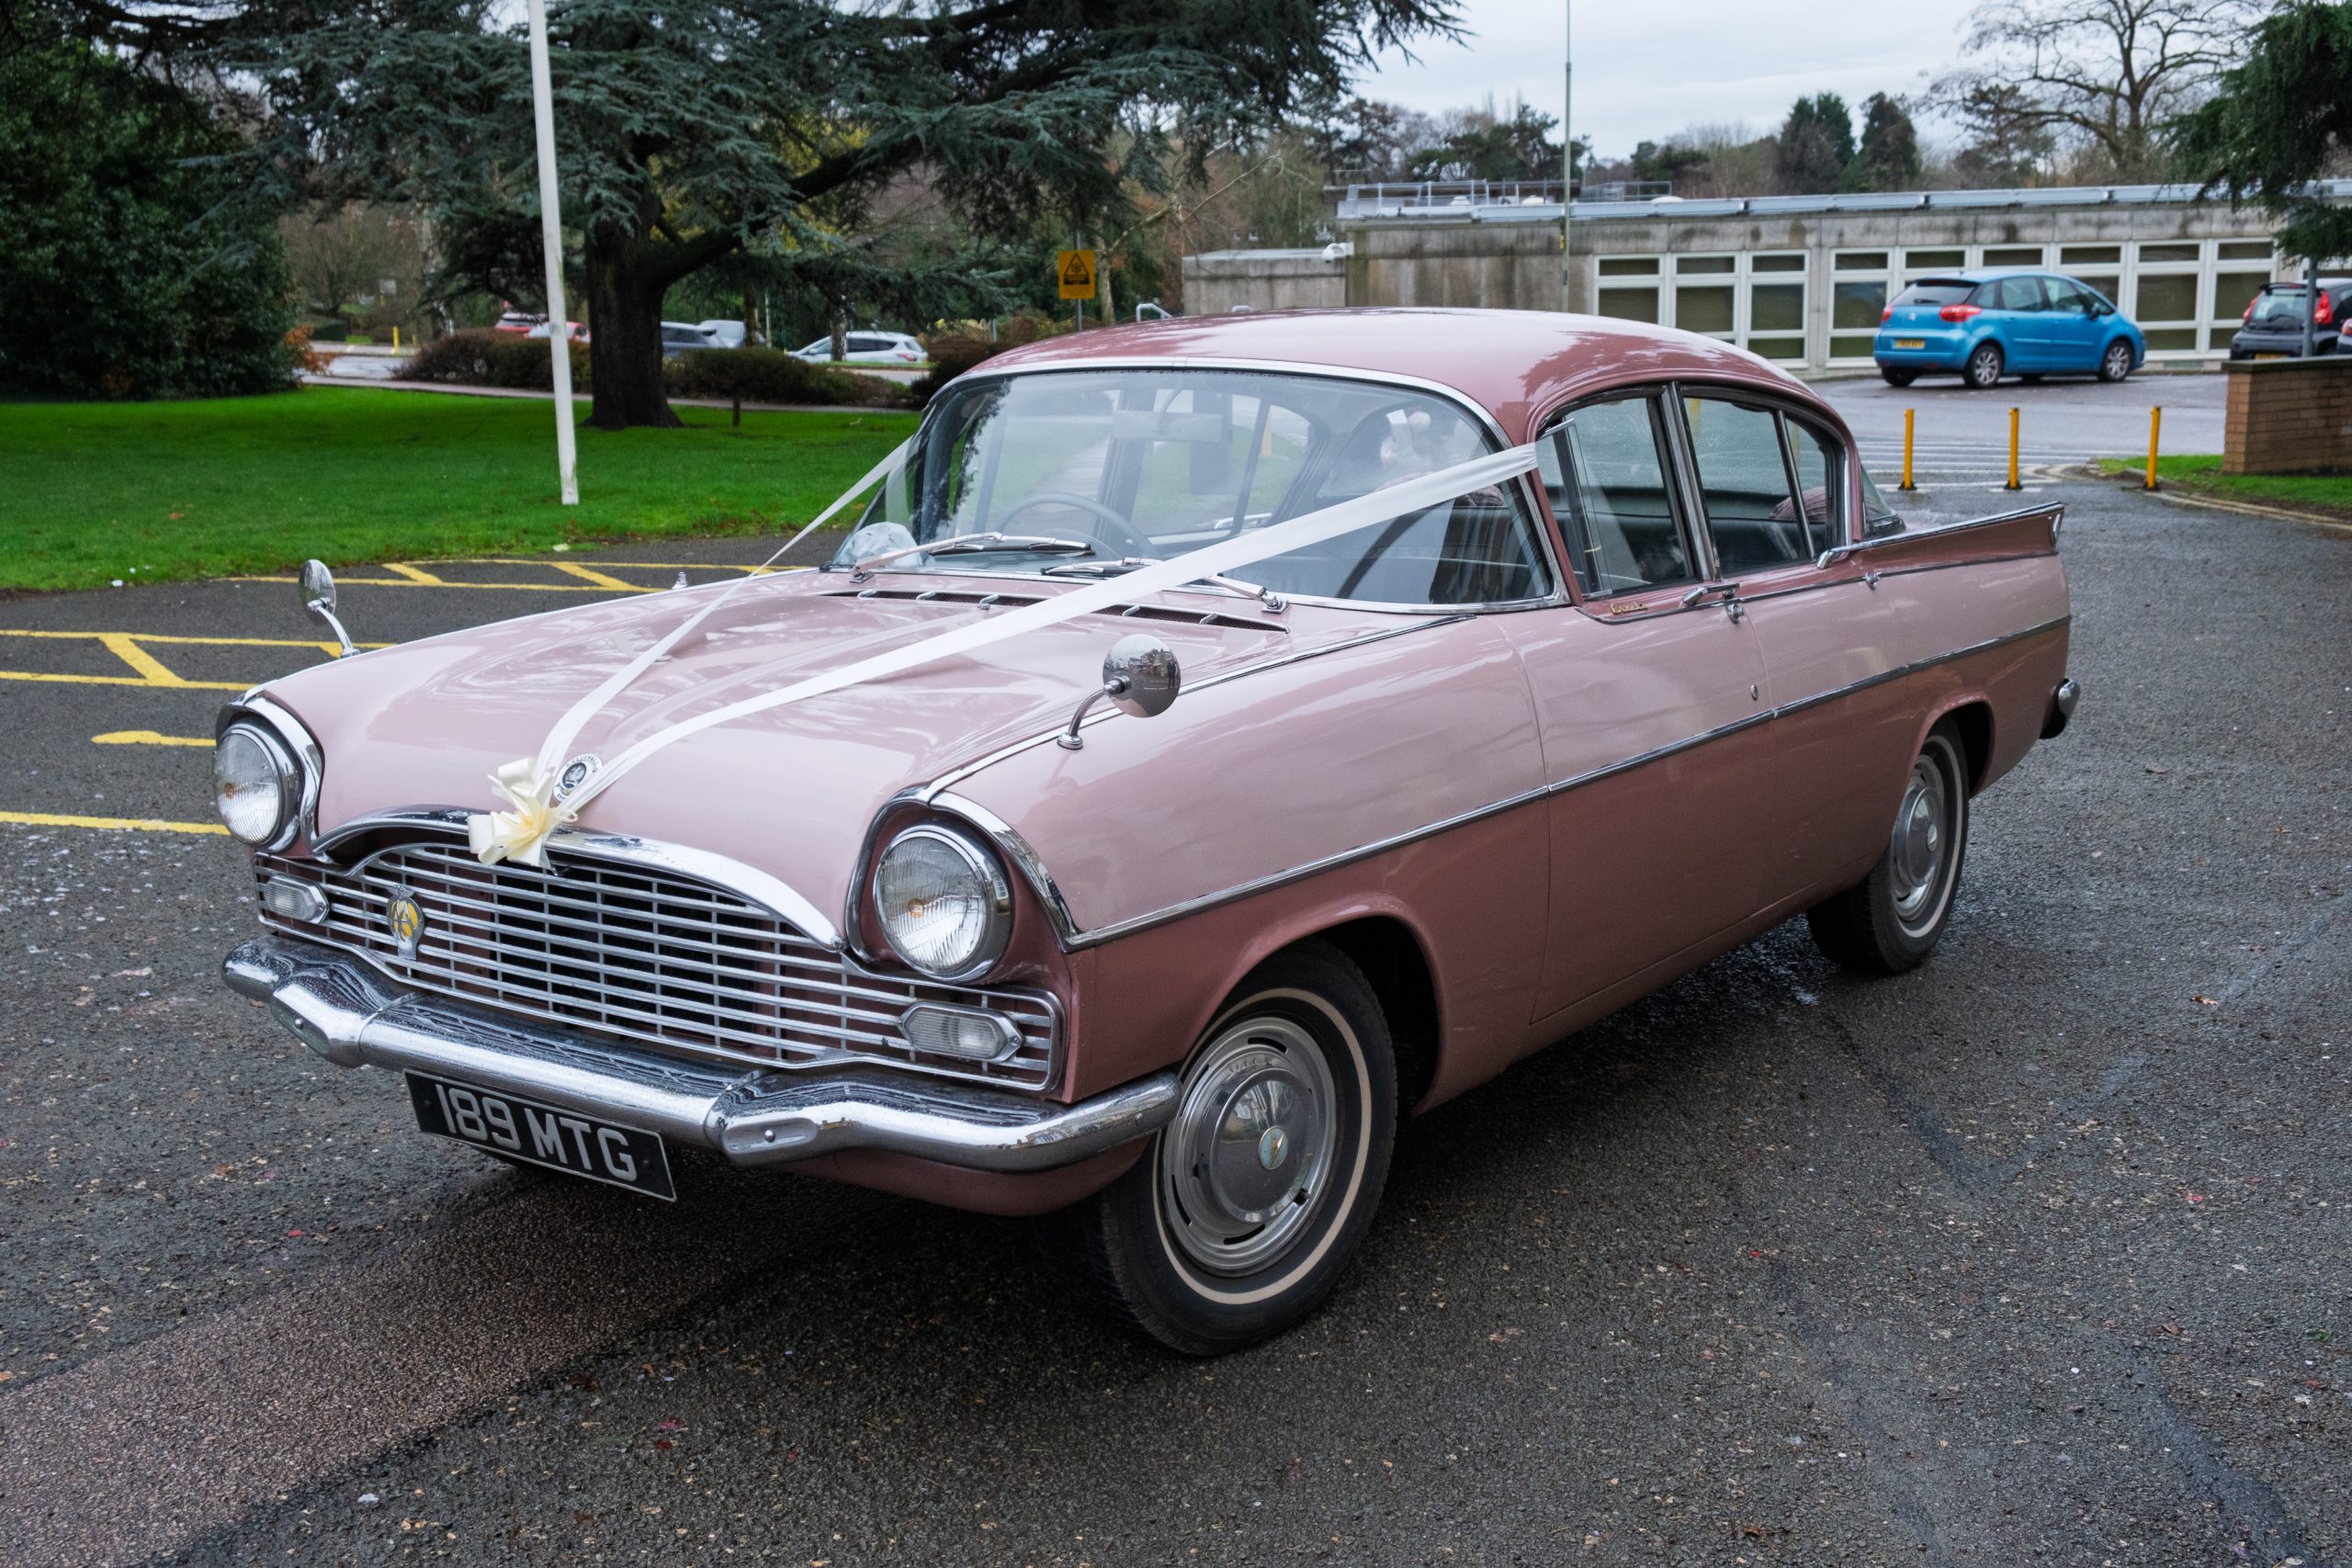
On the day, as I drove to the venue, I felt incredibly anxious, but this eased once I arrived and started shooting. The couple had booked a lovely old two-tone pink Vauxhall Cresta to transport them to and from the venue, and my brief was to make sure I got plenty of photos of them with the car. I’m not going to share photos here of any of the people attending the wedding out of respect for their privacy, but I wanted to share one of this beautiful old car.
Pink Vauxhall Cresta hired for wedding transport.
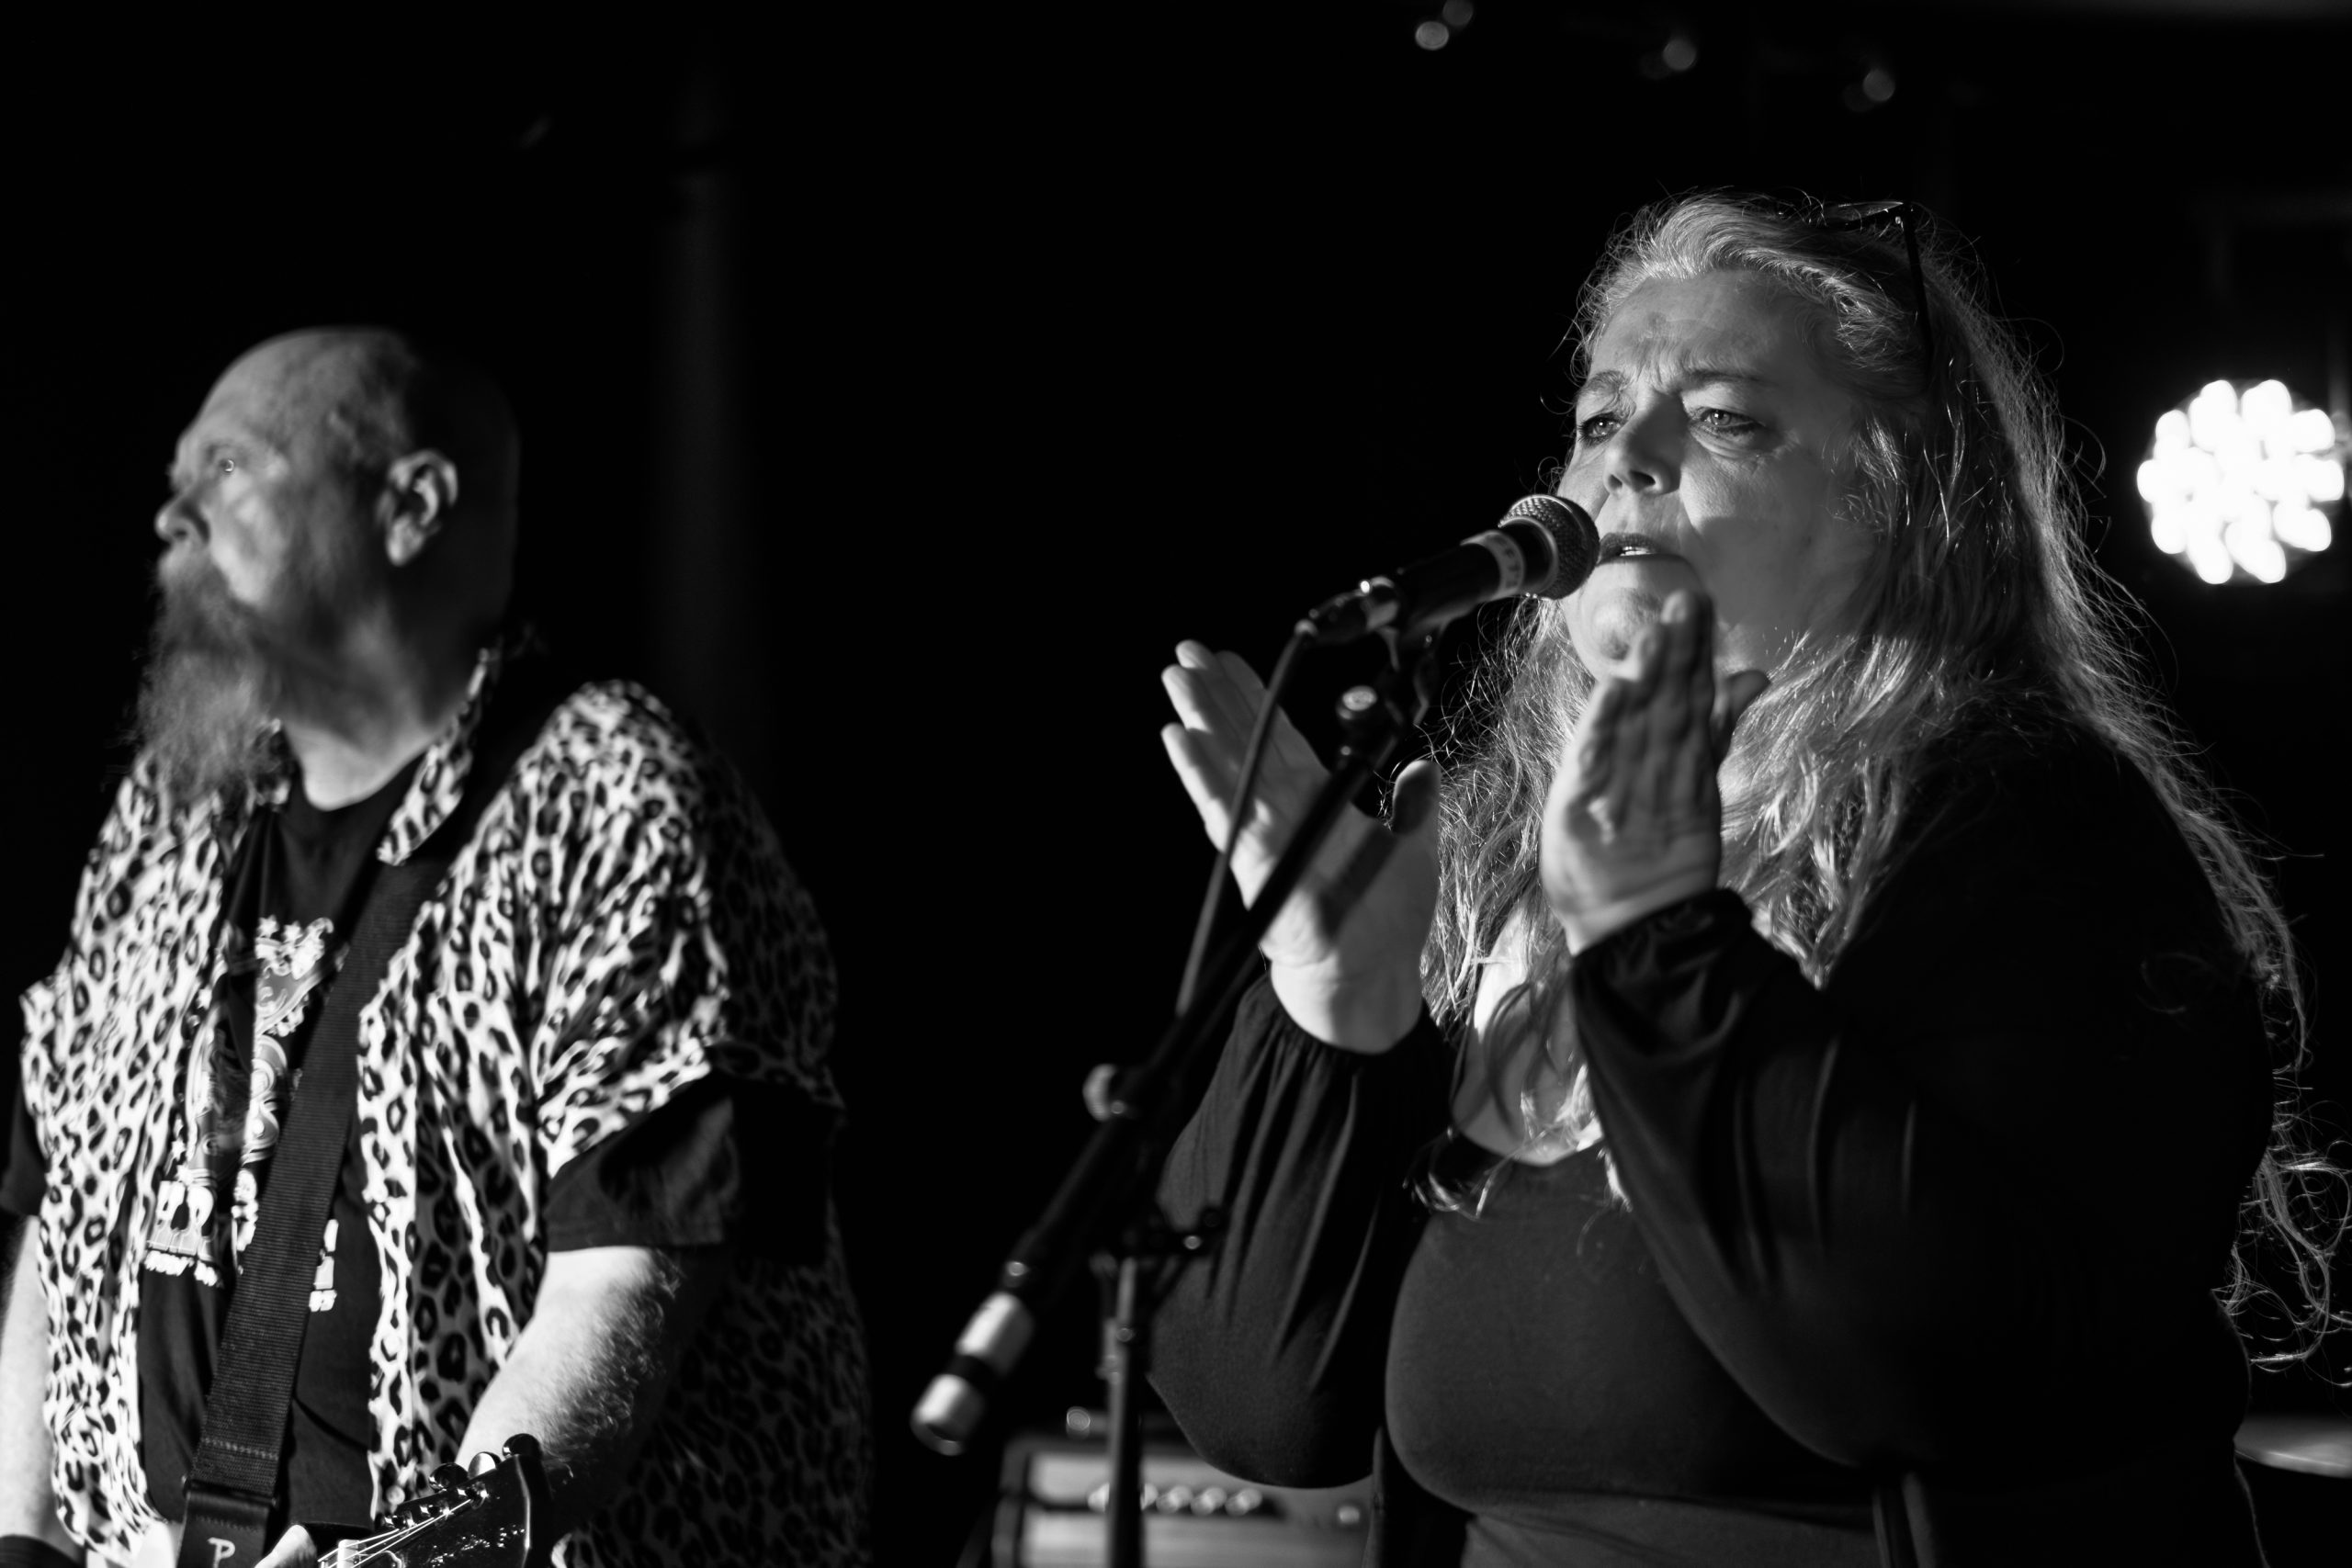
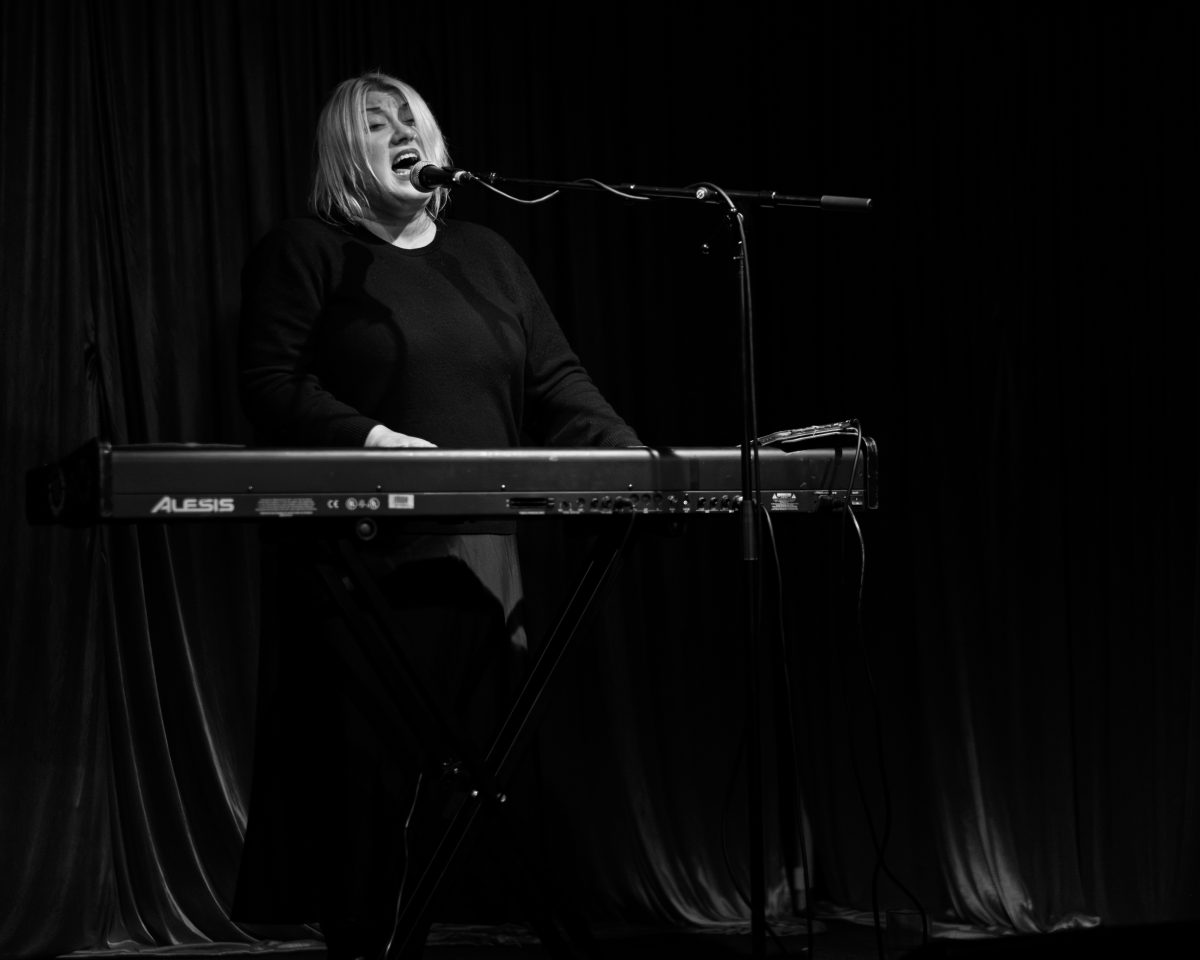
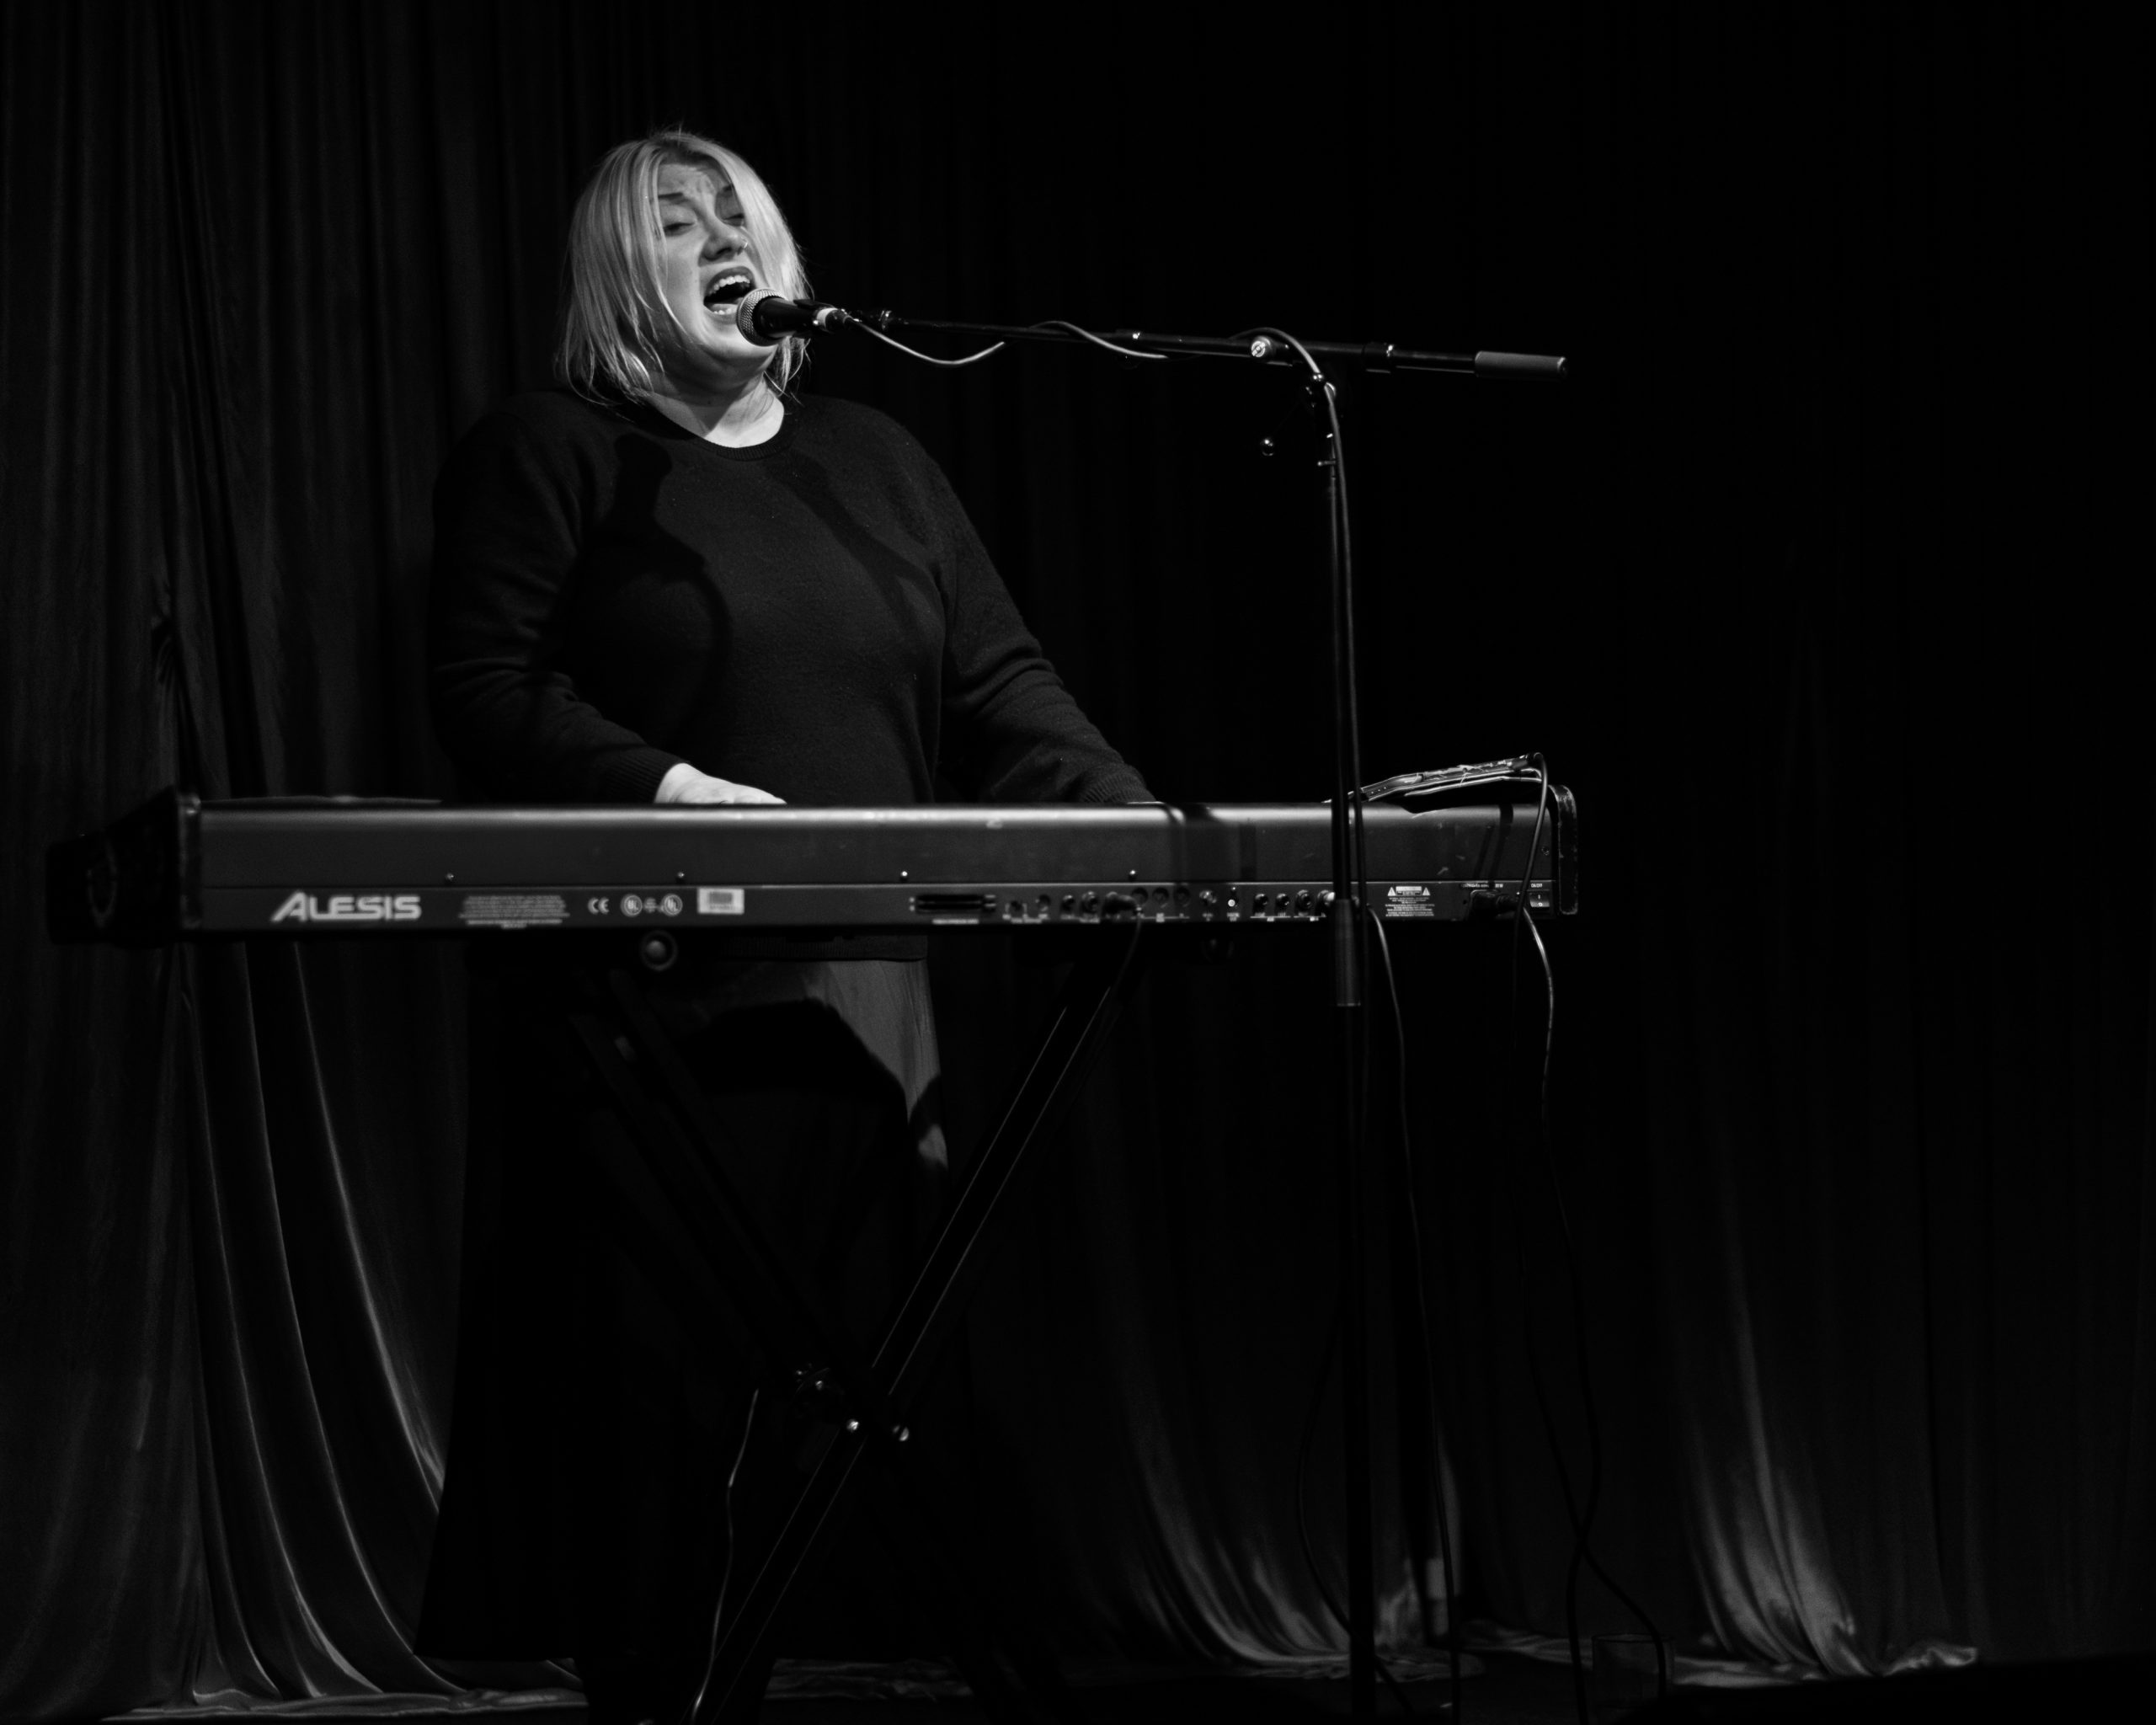
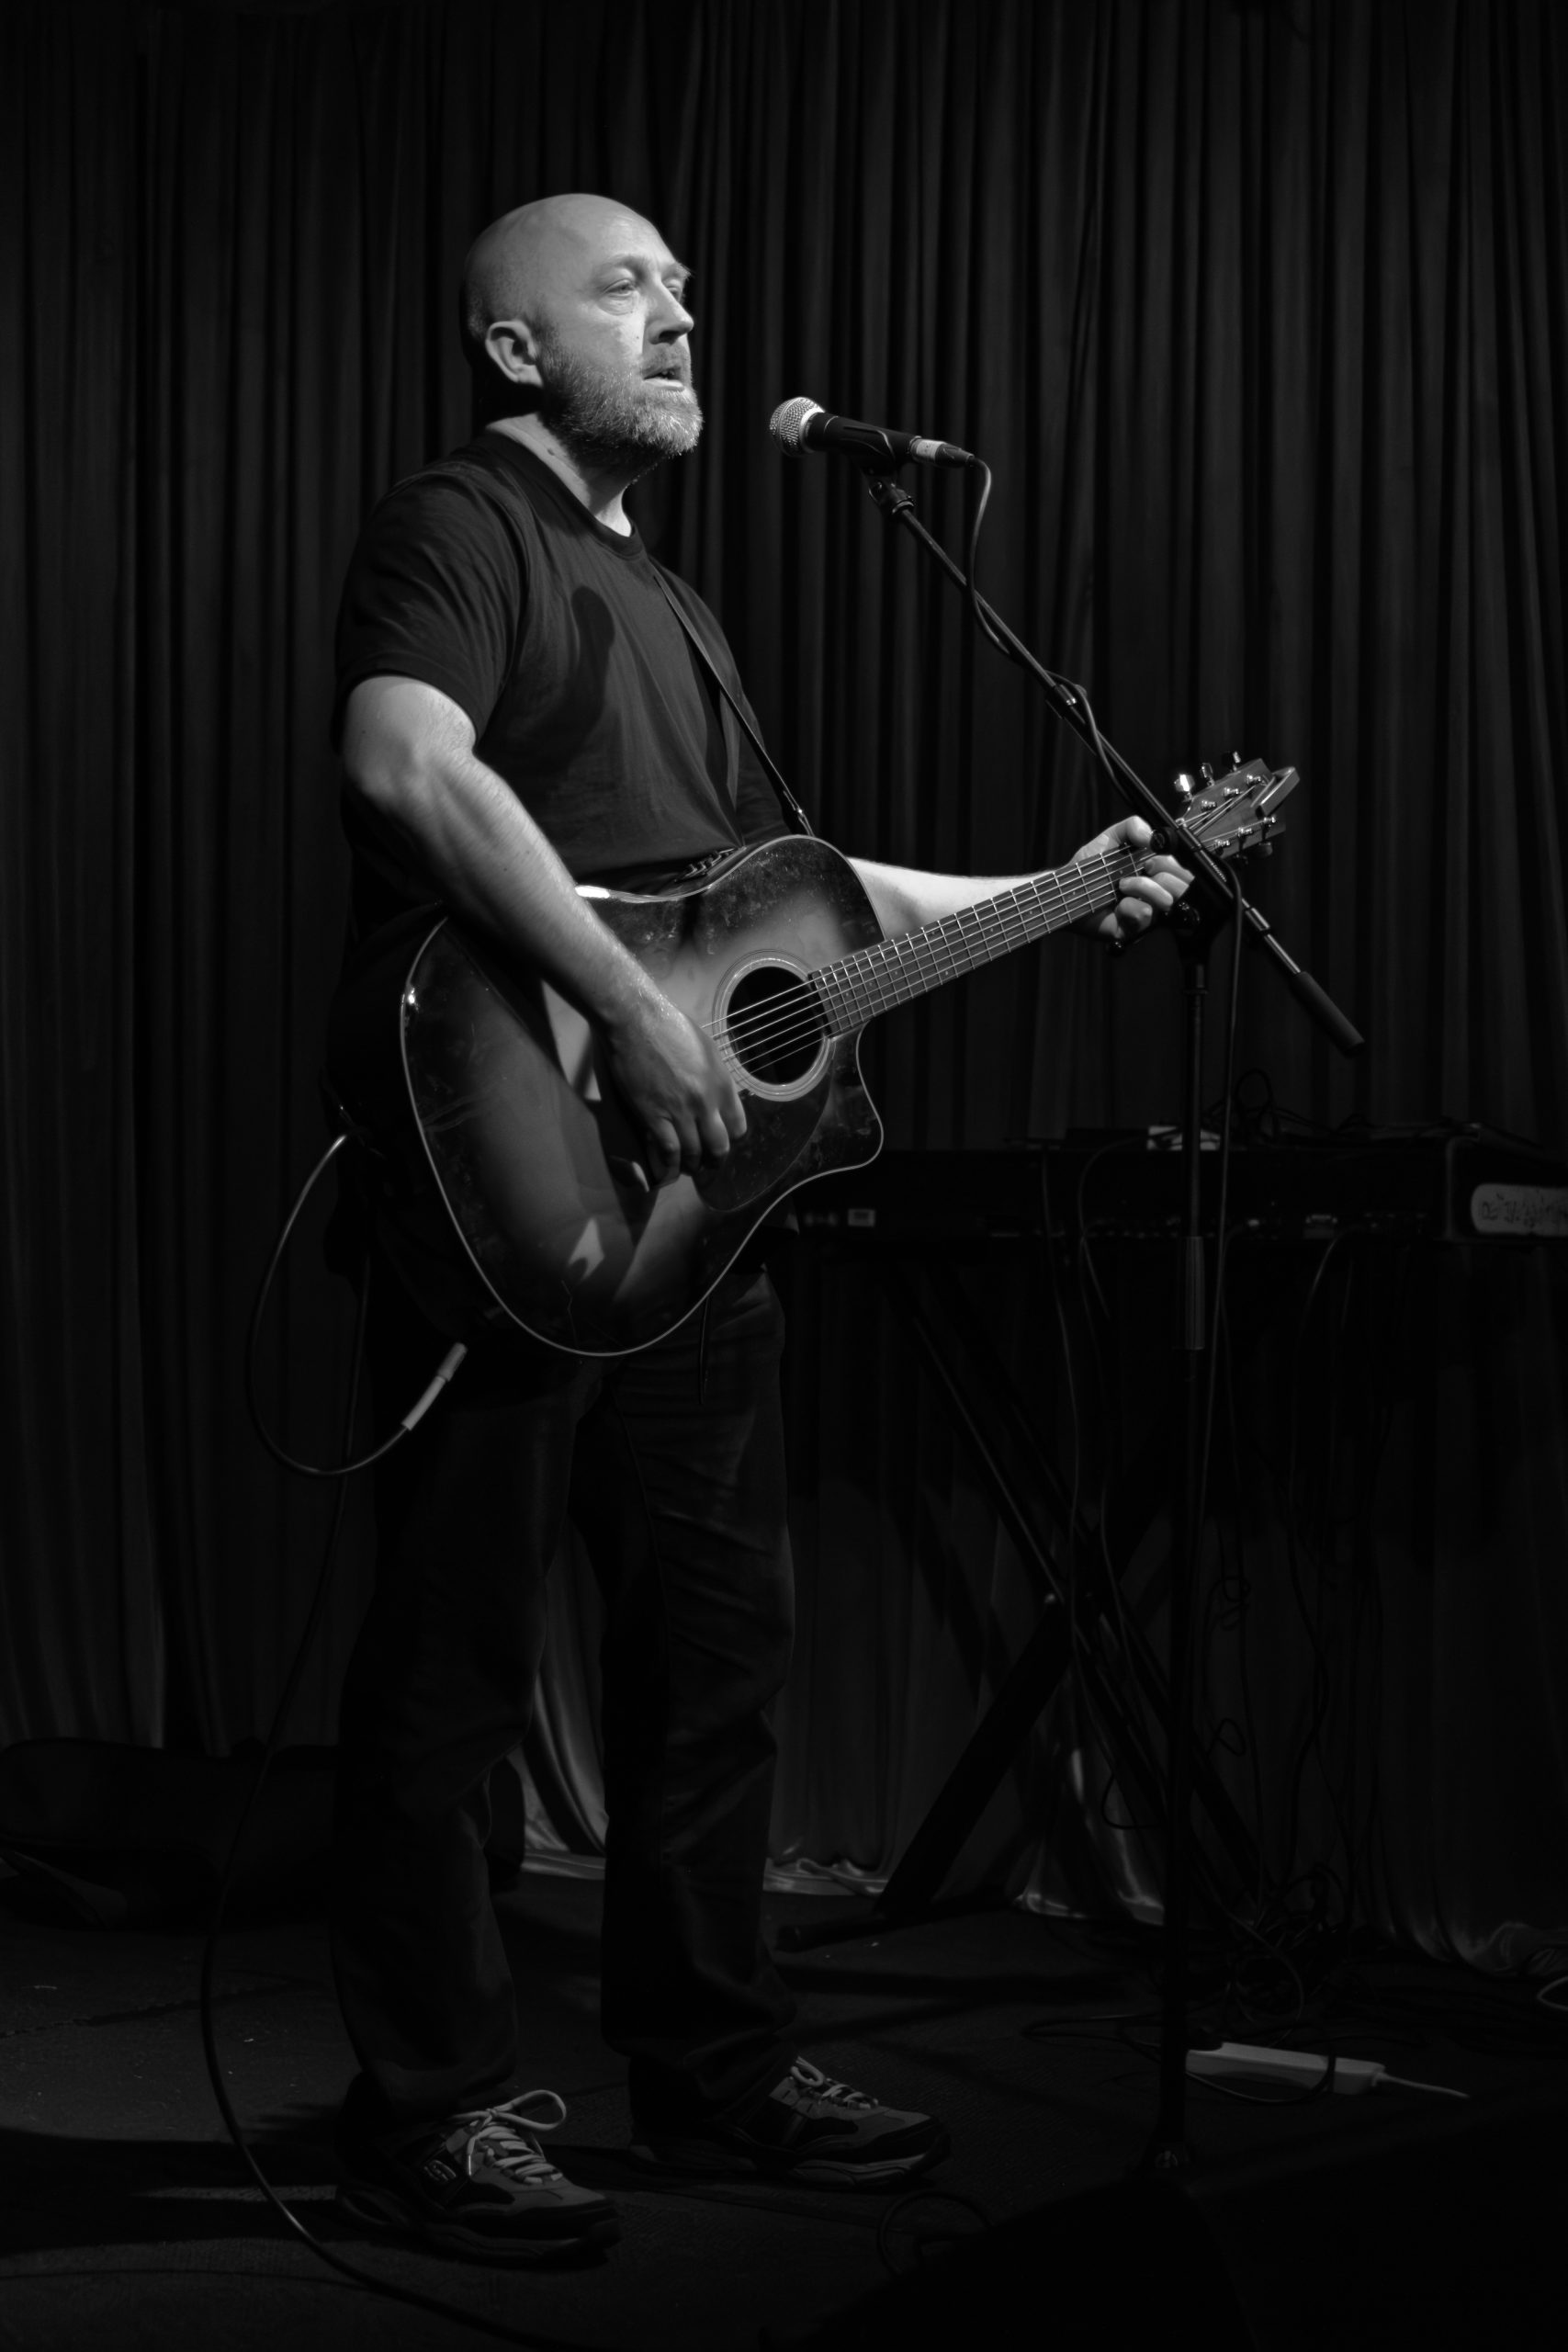
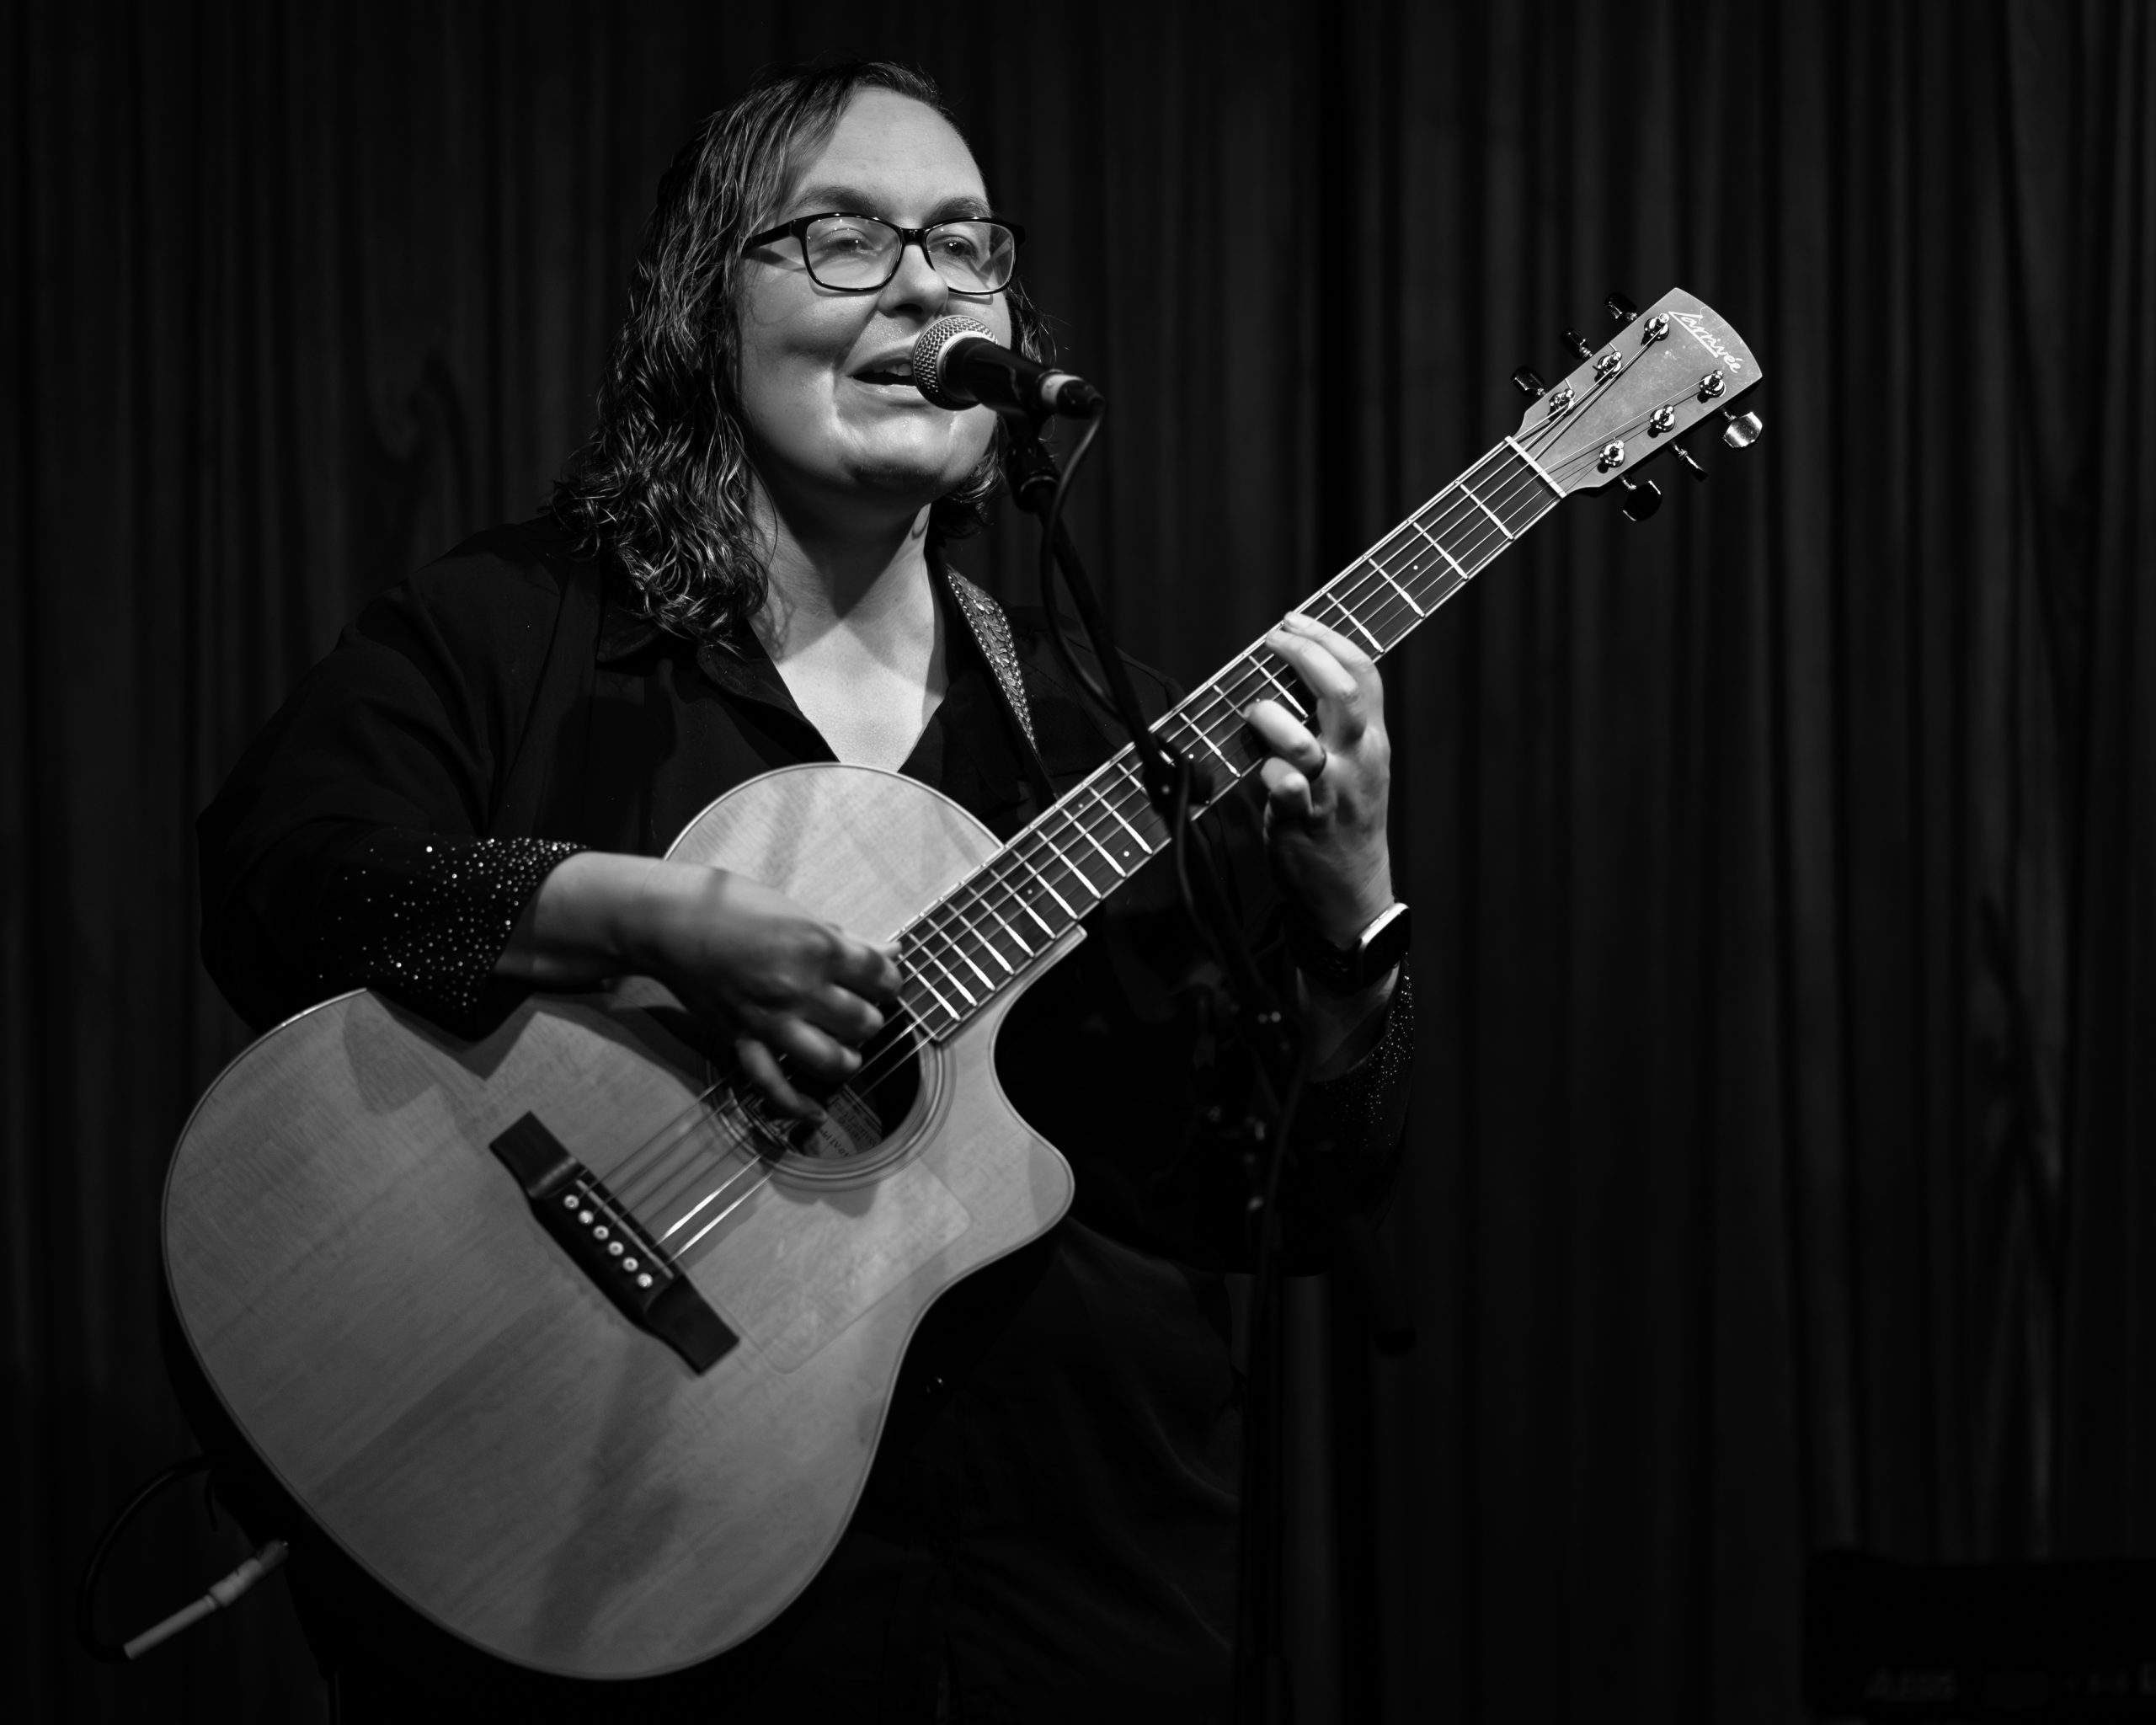
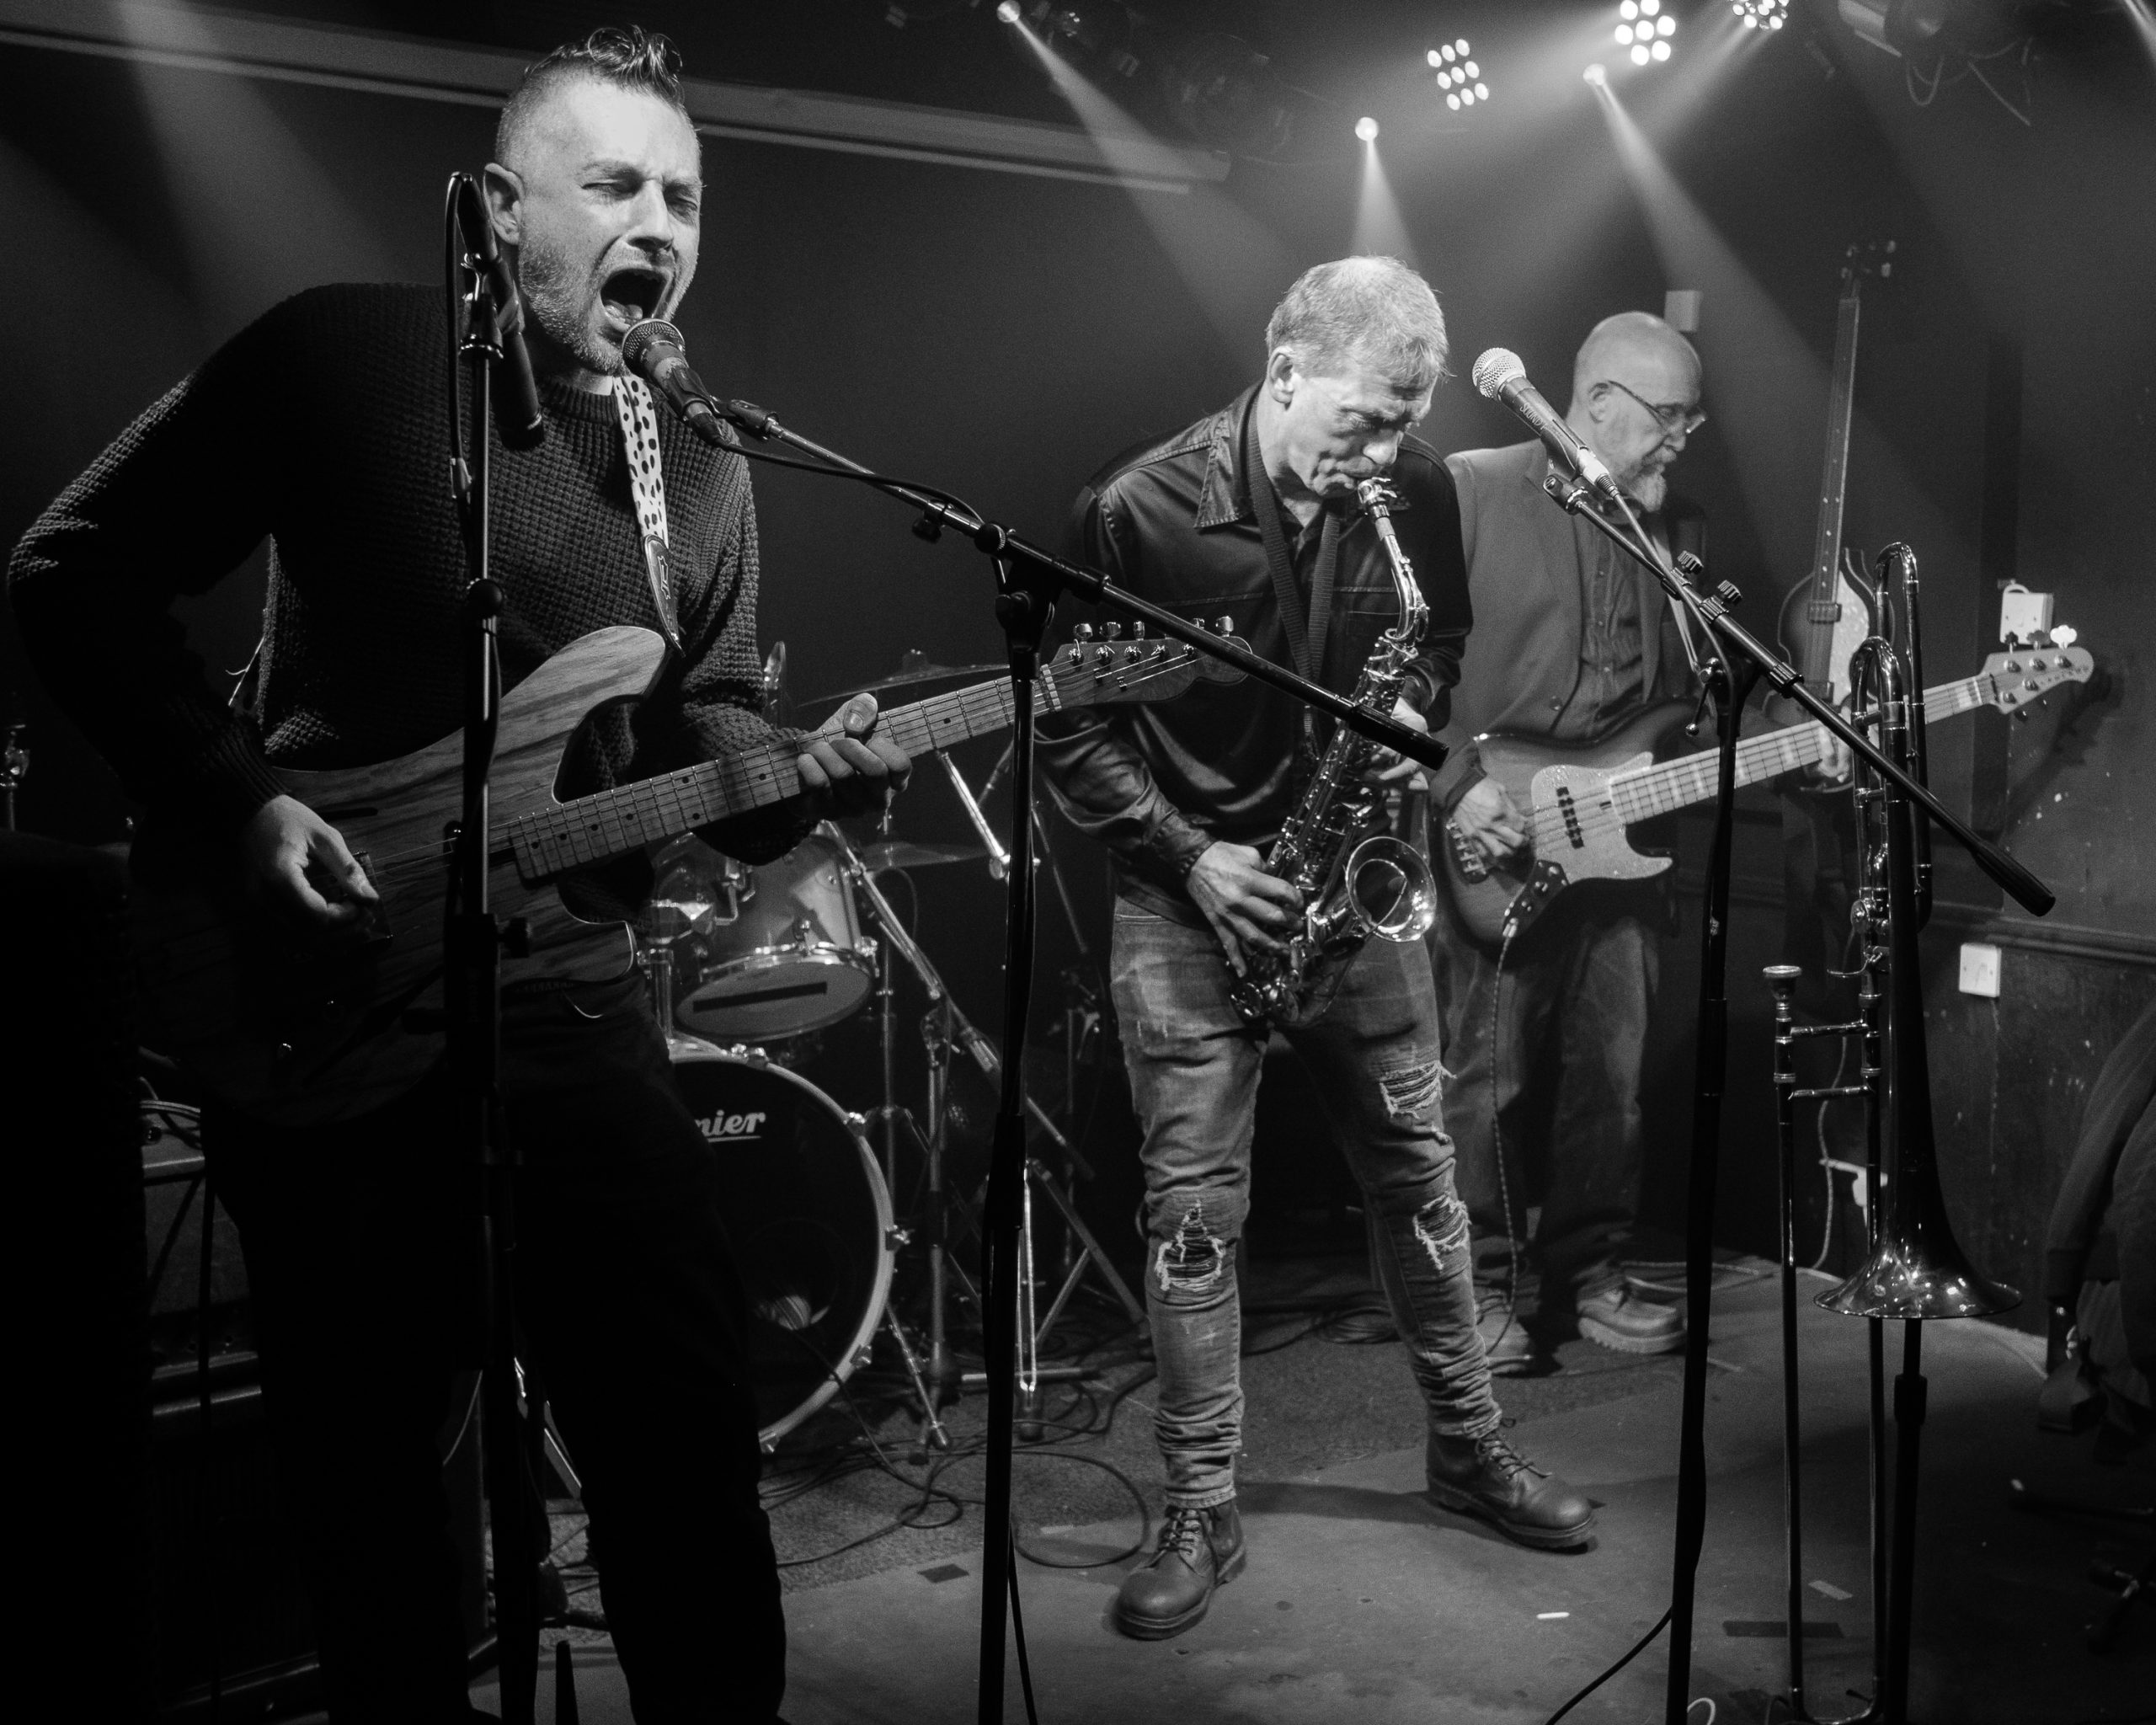
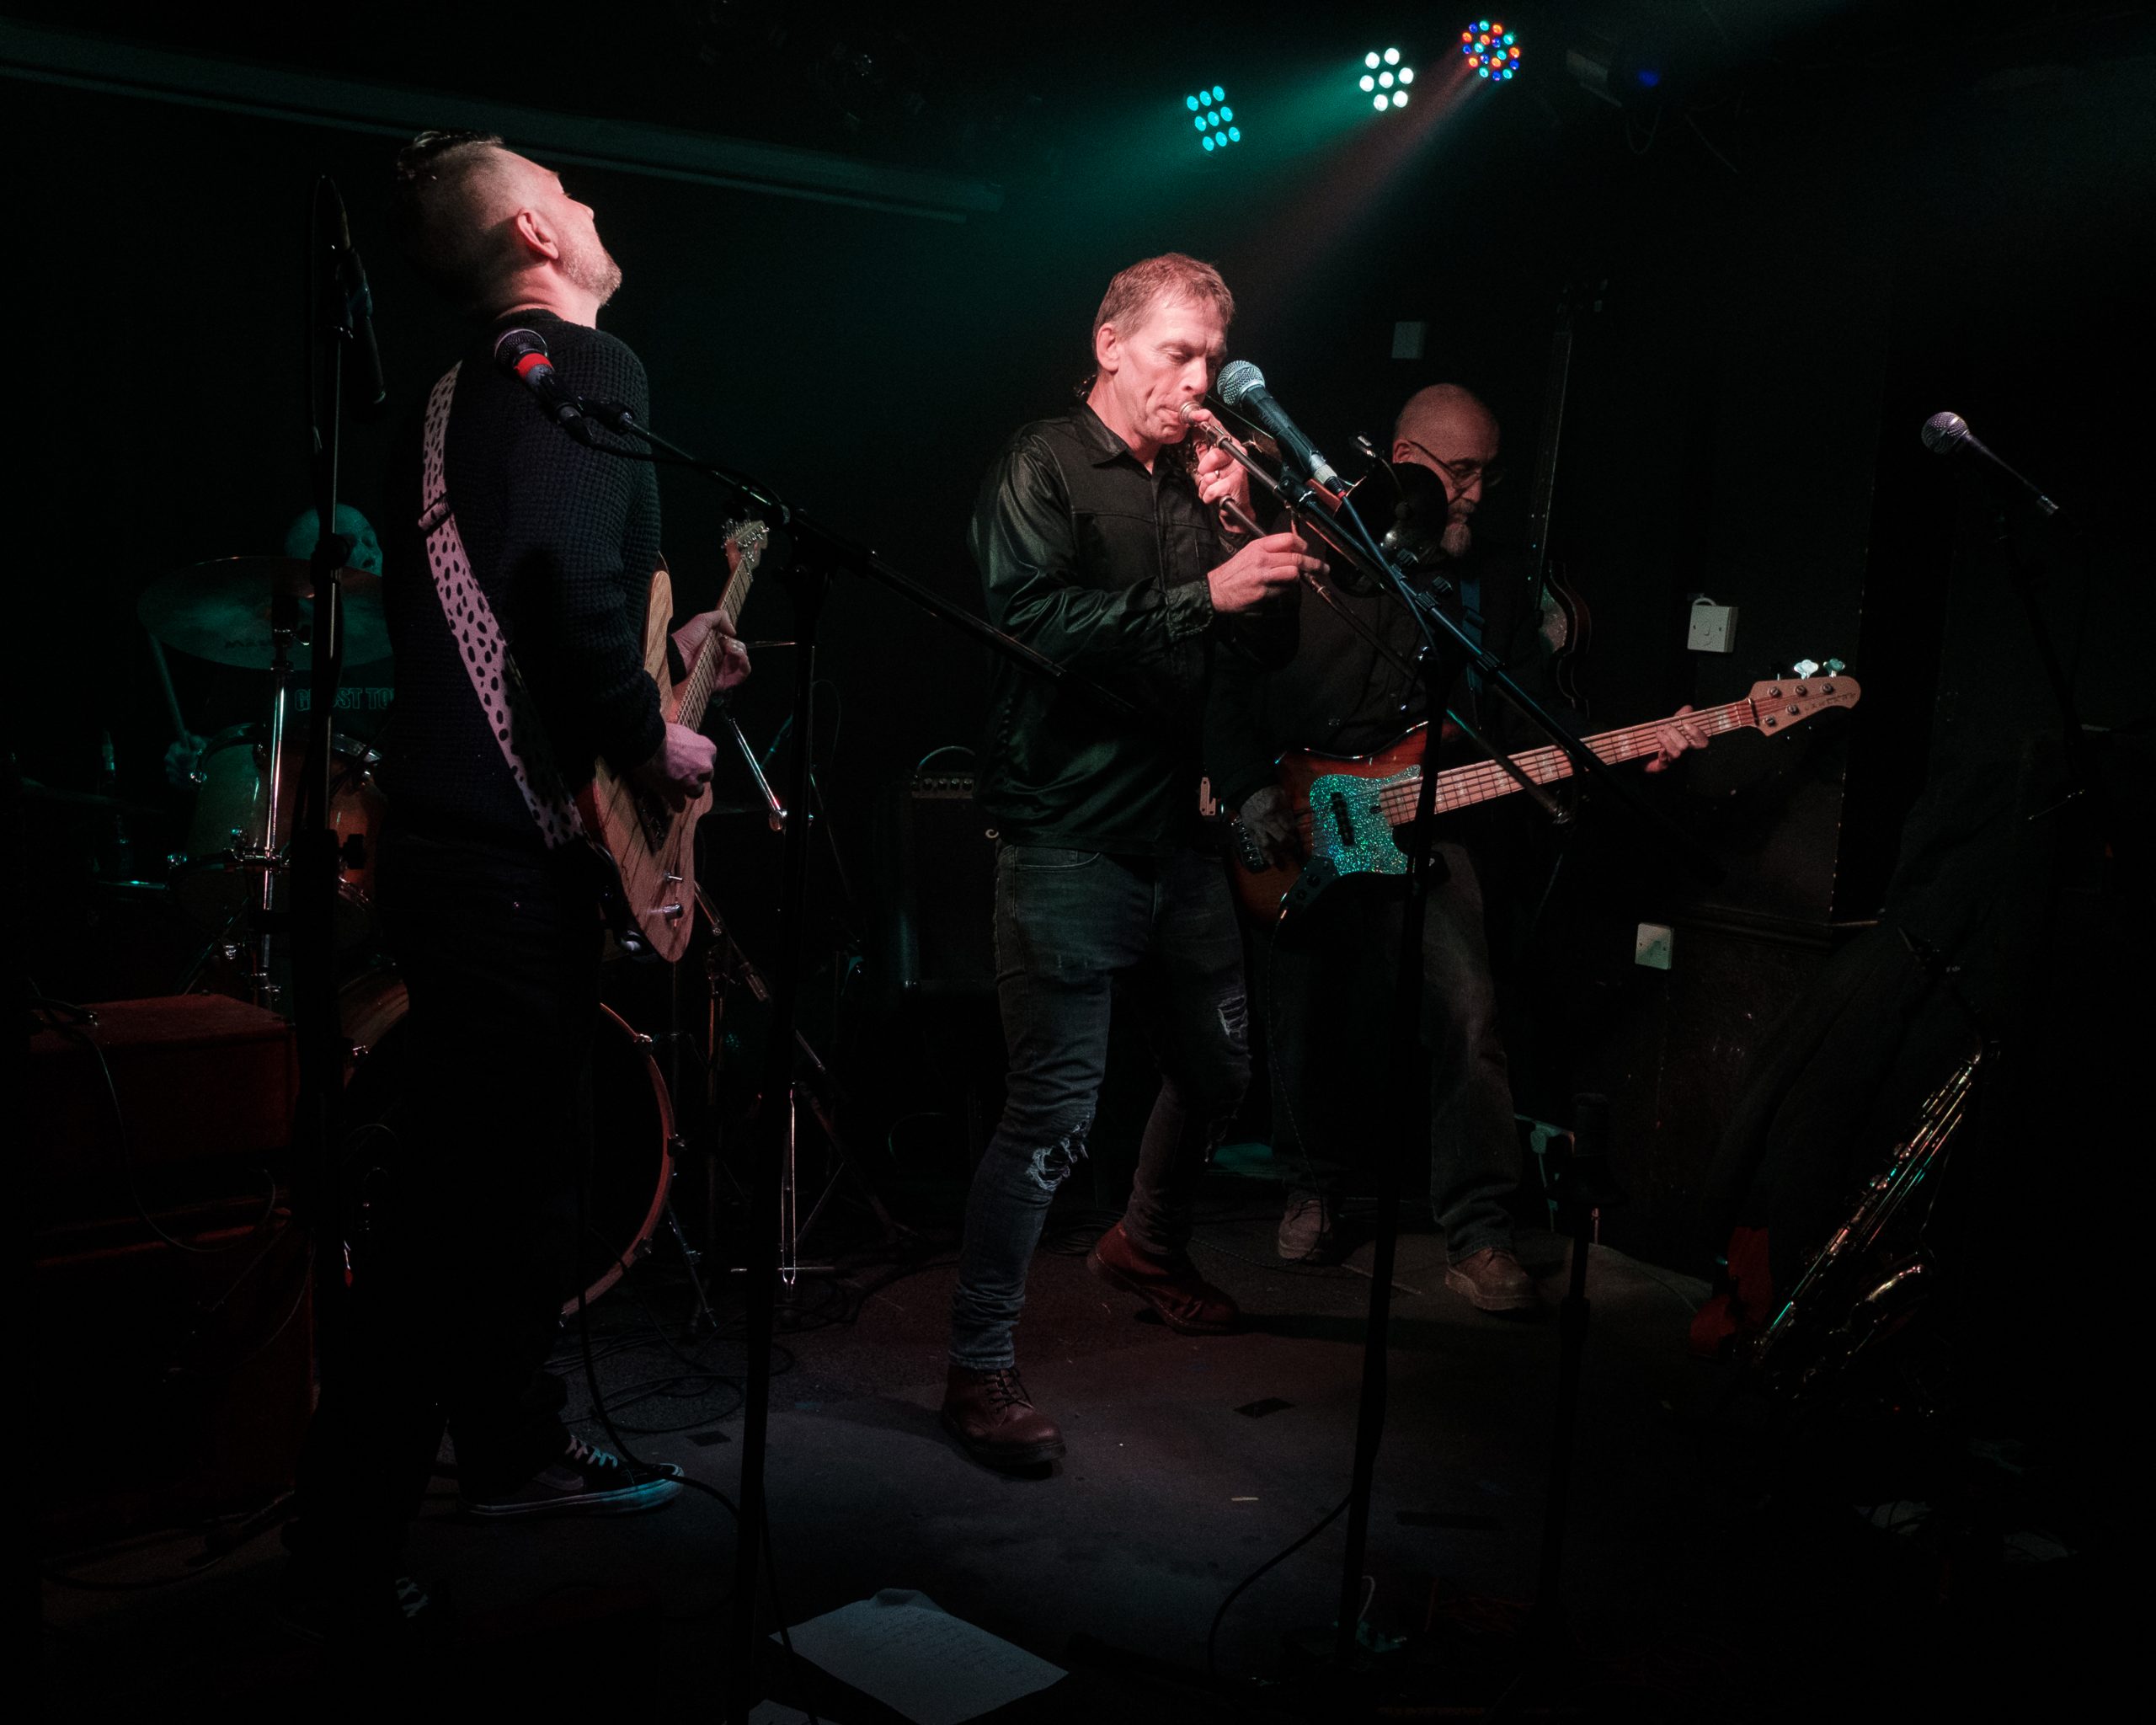
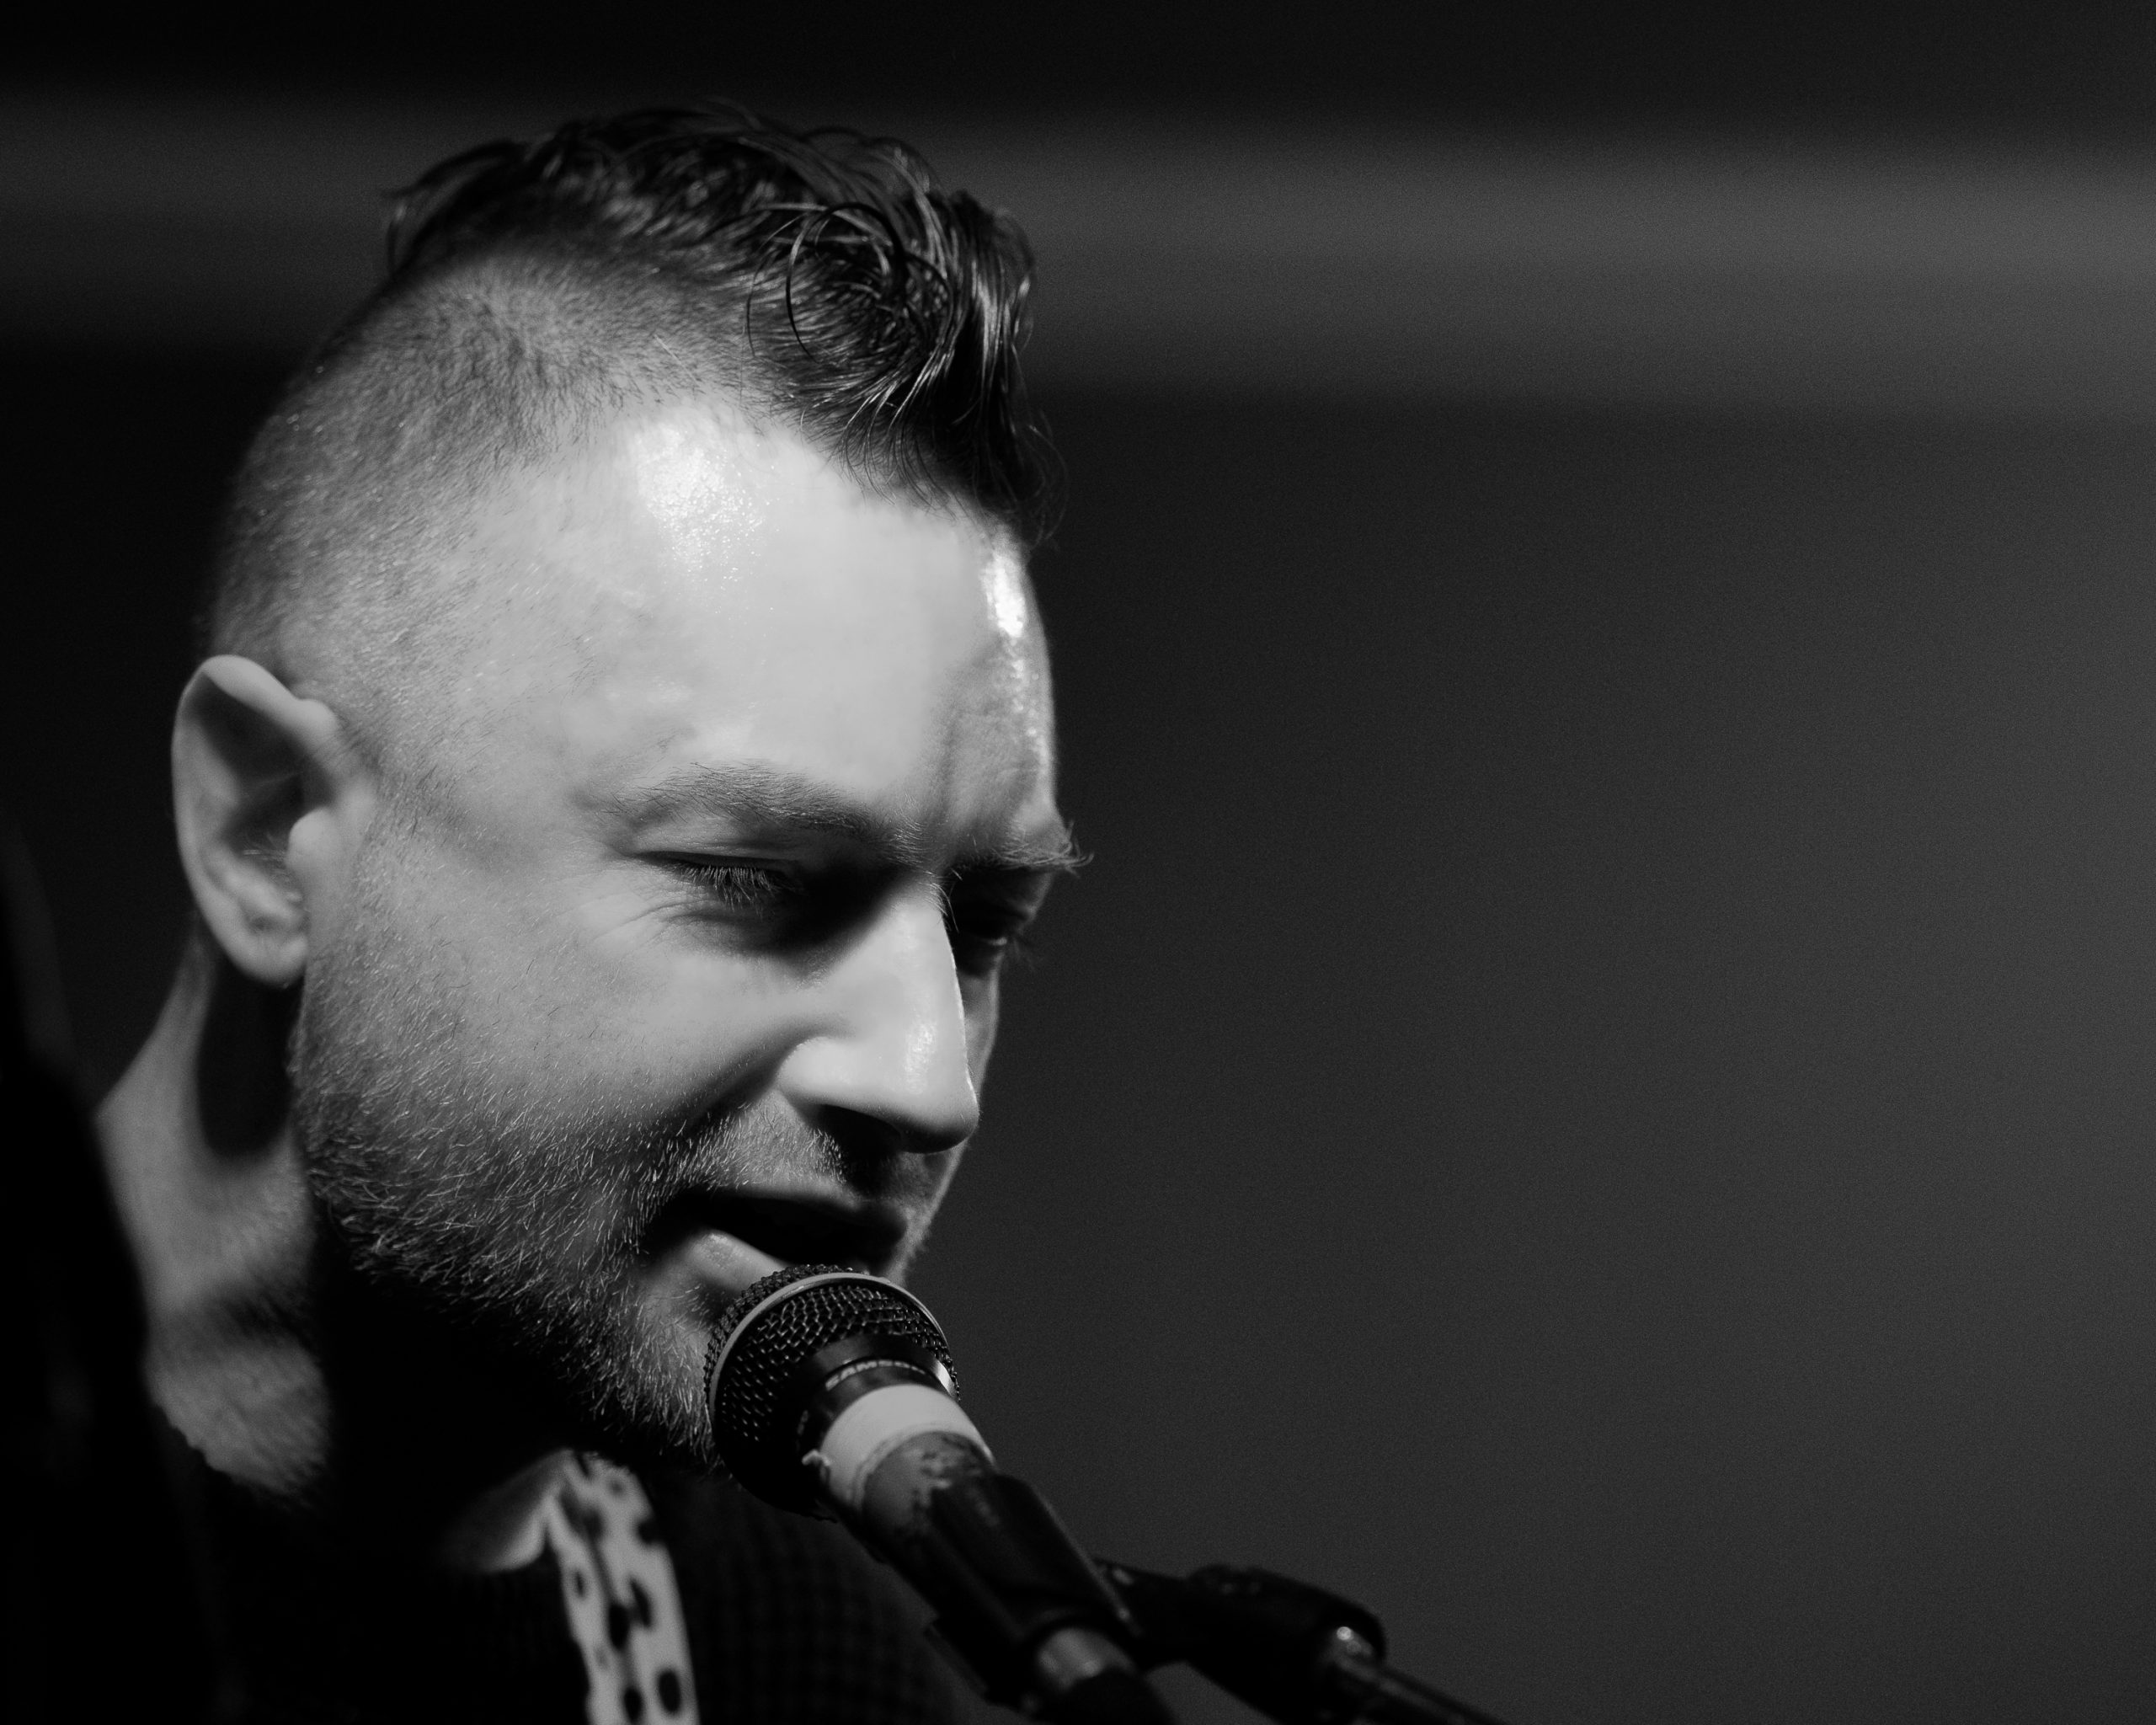
Two gigs I really wanted to get to in December both featured JJ Lovegrove. Both were in Leicester, one at the O2 Academy and one at Duffy’s Bar as part of the excellent “Up The Duffy’s” monthly event.
For the gig at O2 Academy, JJ was supporting Then Jerico. It’s a larger venue than I’m used to shooting in, and I decided to leave my camera at home that night. This was mainly because I thought the venue wouldn’t like it. It was only when I was at the gig, chatting with Judi, that I learned I could have requested a photographer’s pass and been allowed to shoot from the ‘press pit’ for the first three songs of each set. I’m kicking myself a bit, as having that kind of access for photography at a gig has been something I’ve dreamed of for many years. It was a great night, and I was delighted that Judi got lots of new ears listening to her music.
“Up The Duffy’s” is a monthly music night held at Duffy’s Bar in Leicester. It evolved out of the brilliant “Soundhive Social” events, which were hosted here to encourage people back to gigs in the wake of the Covid-19 pandemic. I don’t really do “New Year Resolutions”, but I have told myself that I really need to make it to more nights of “Up The Duffy’s” this year.
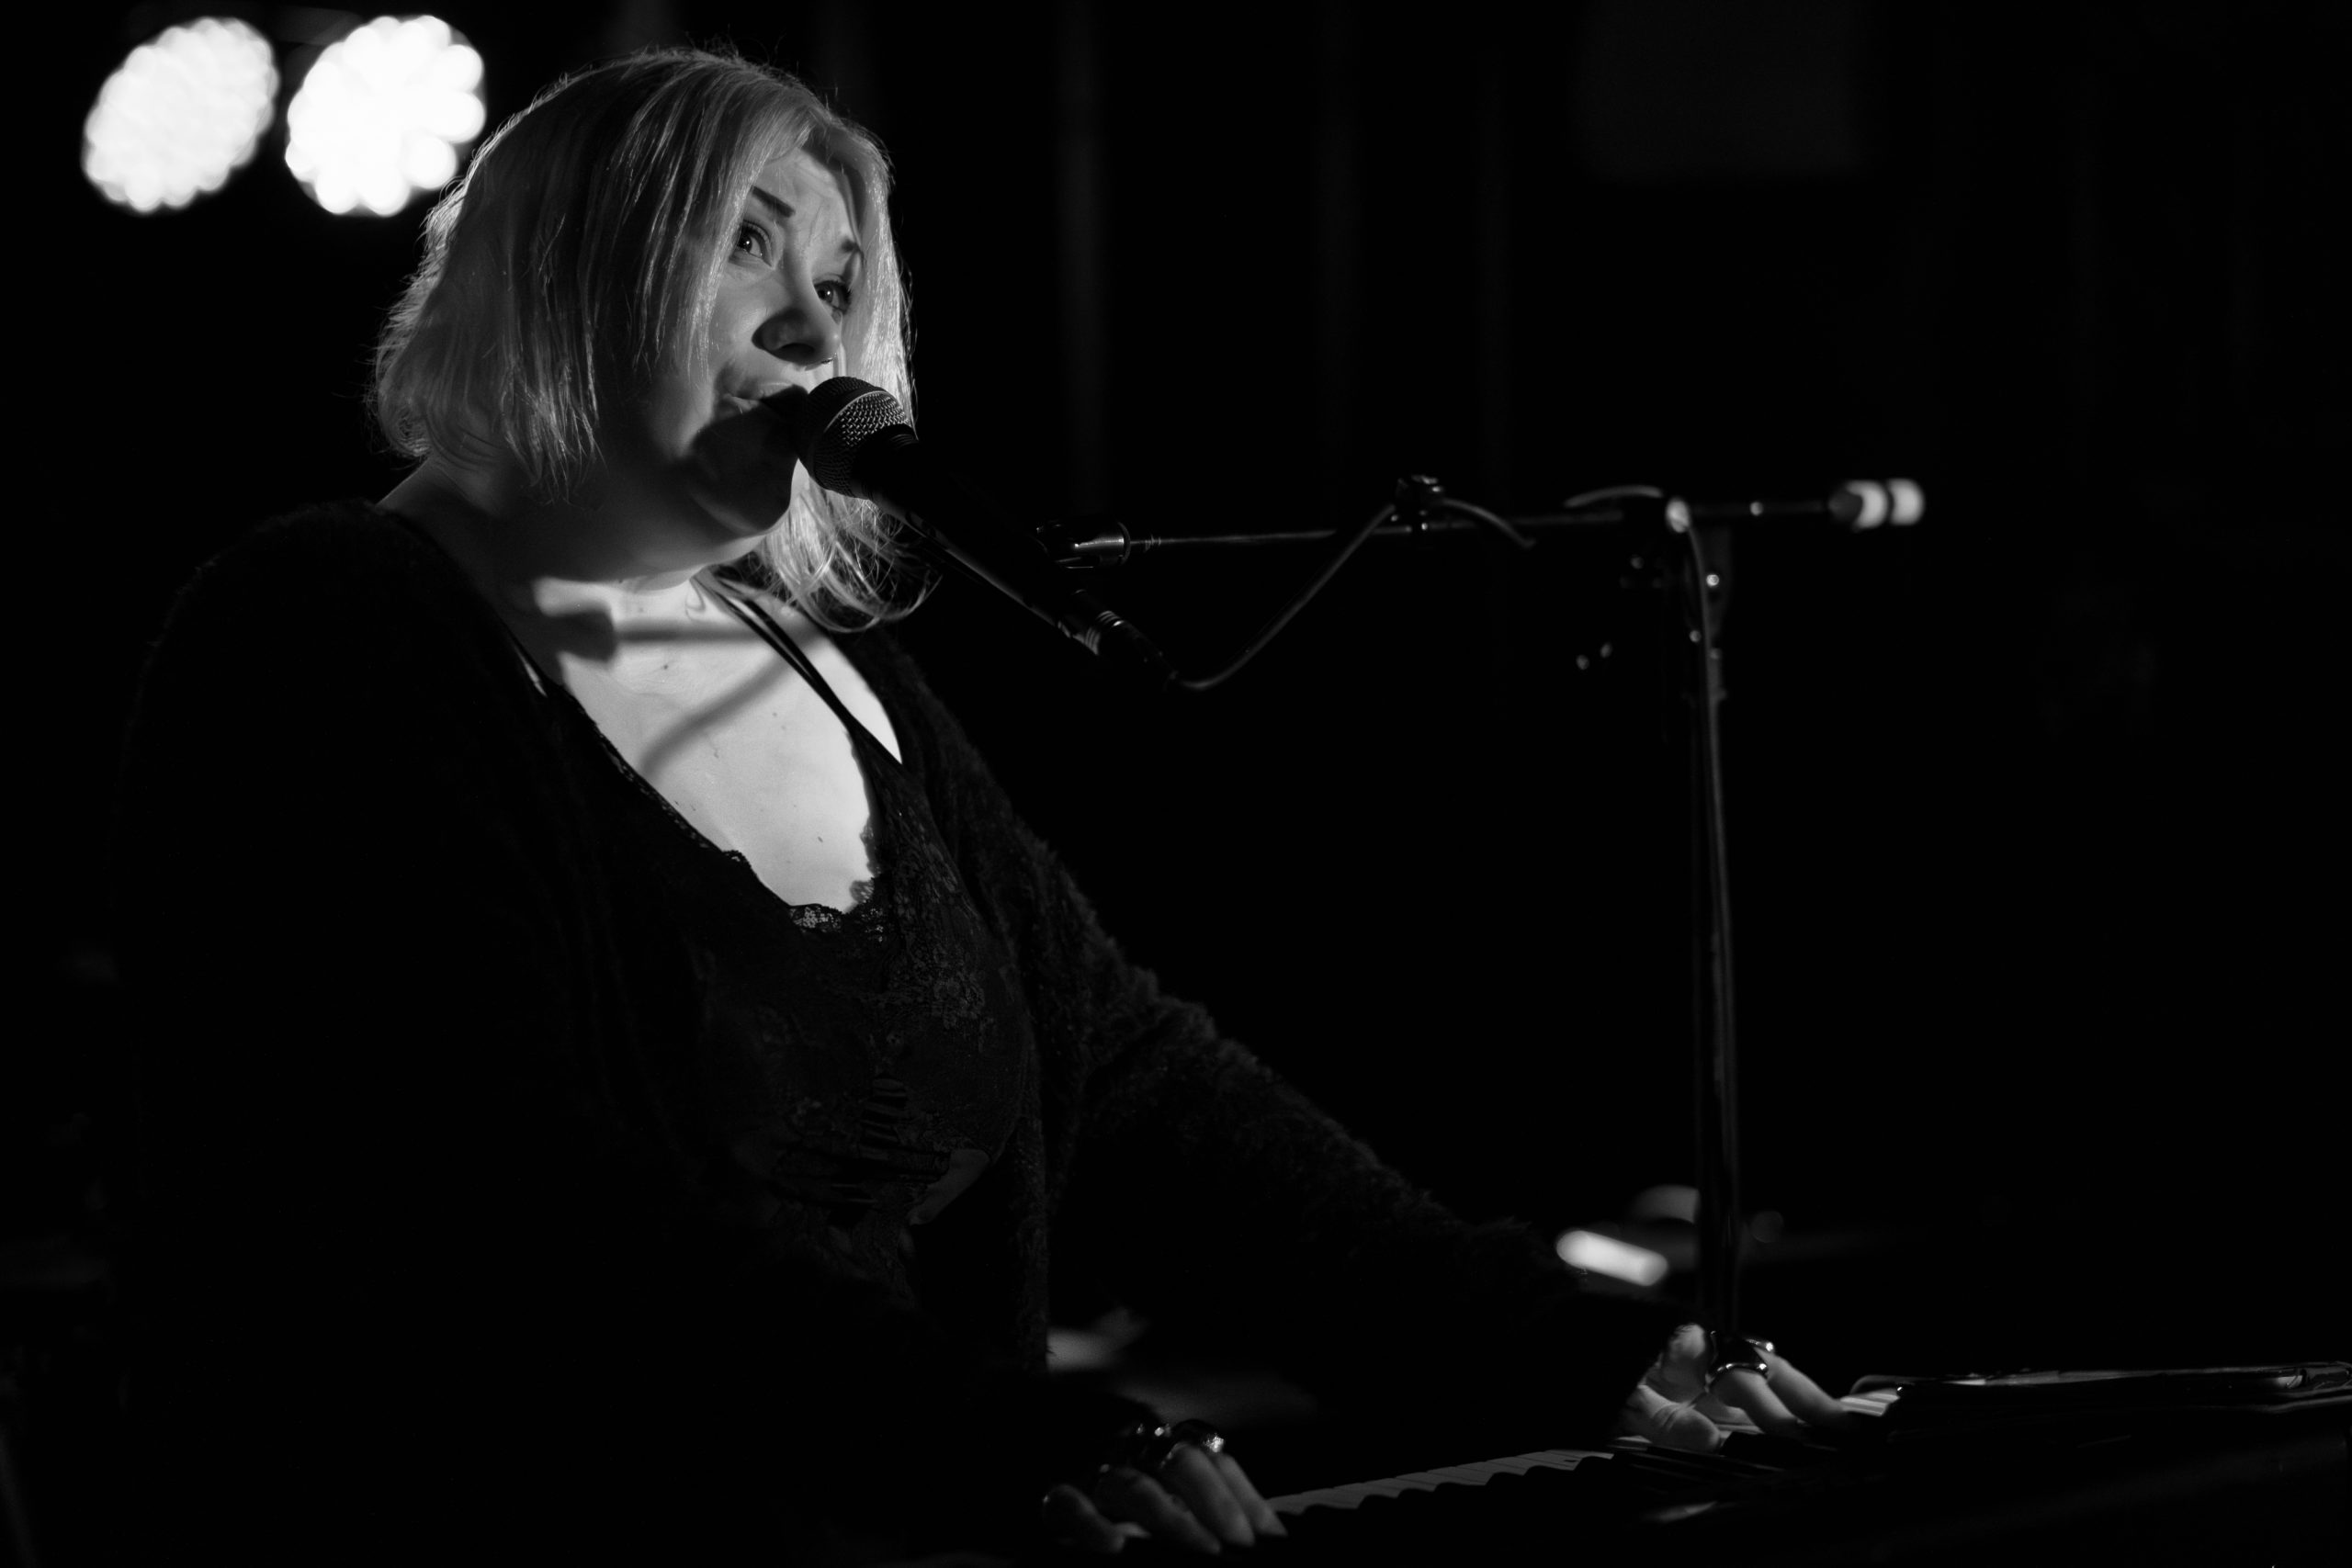
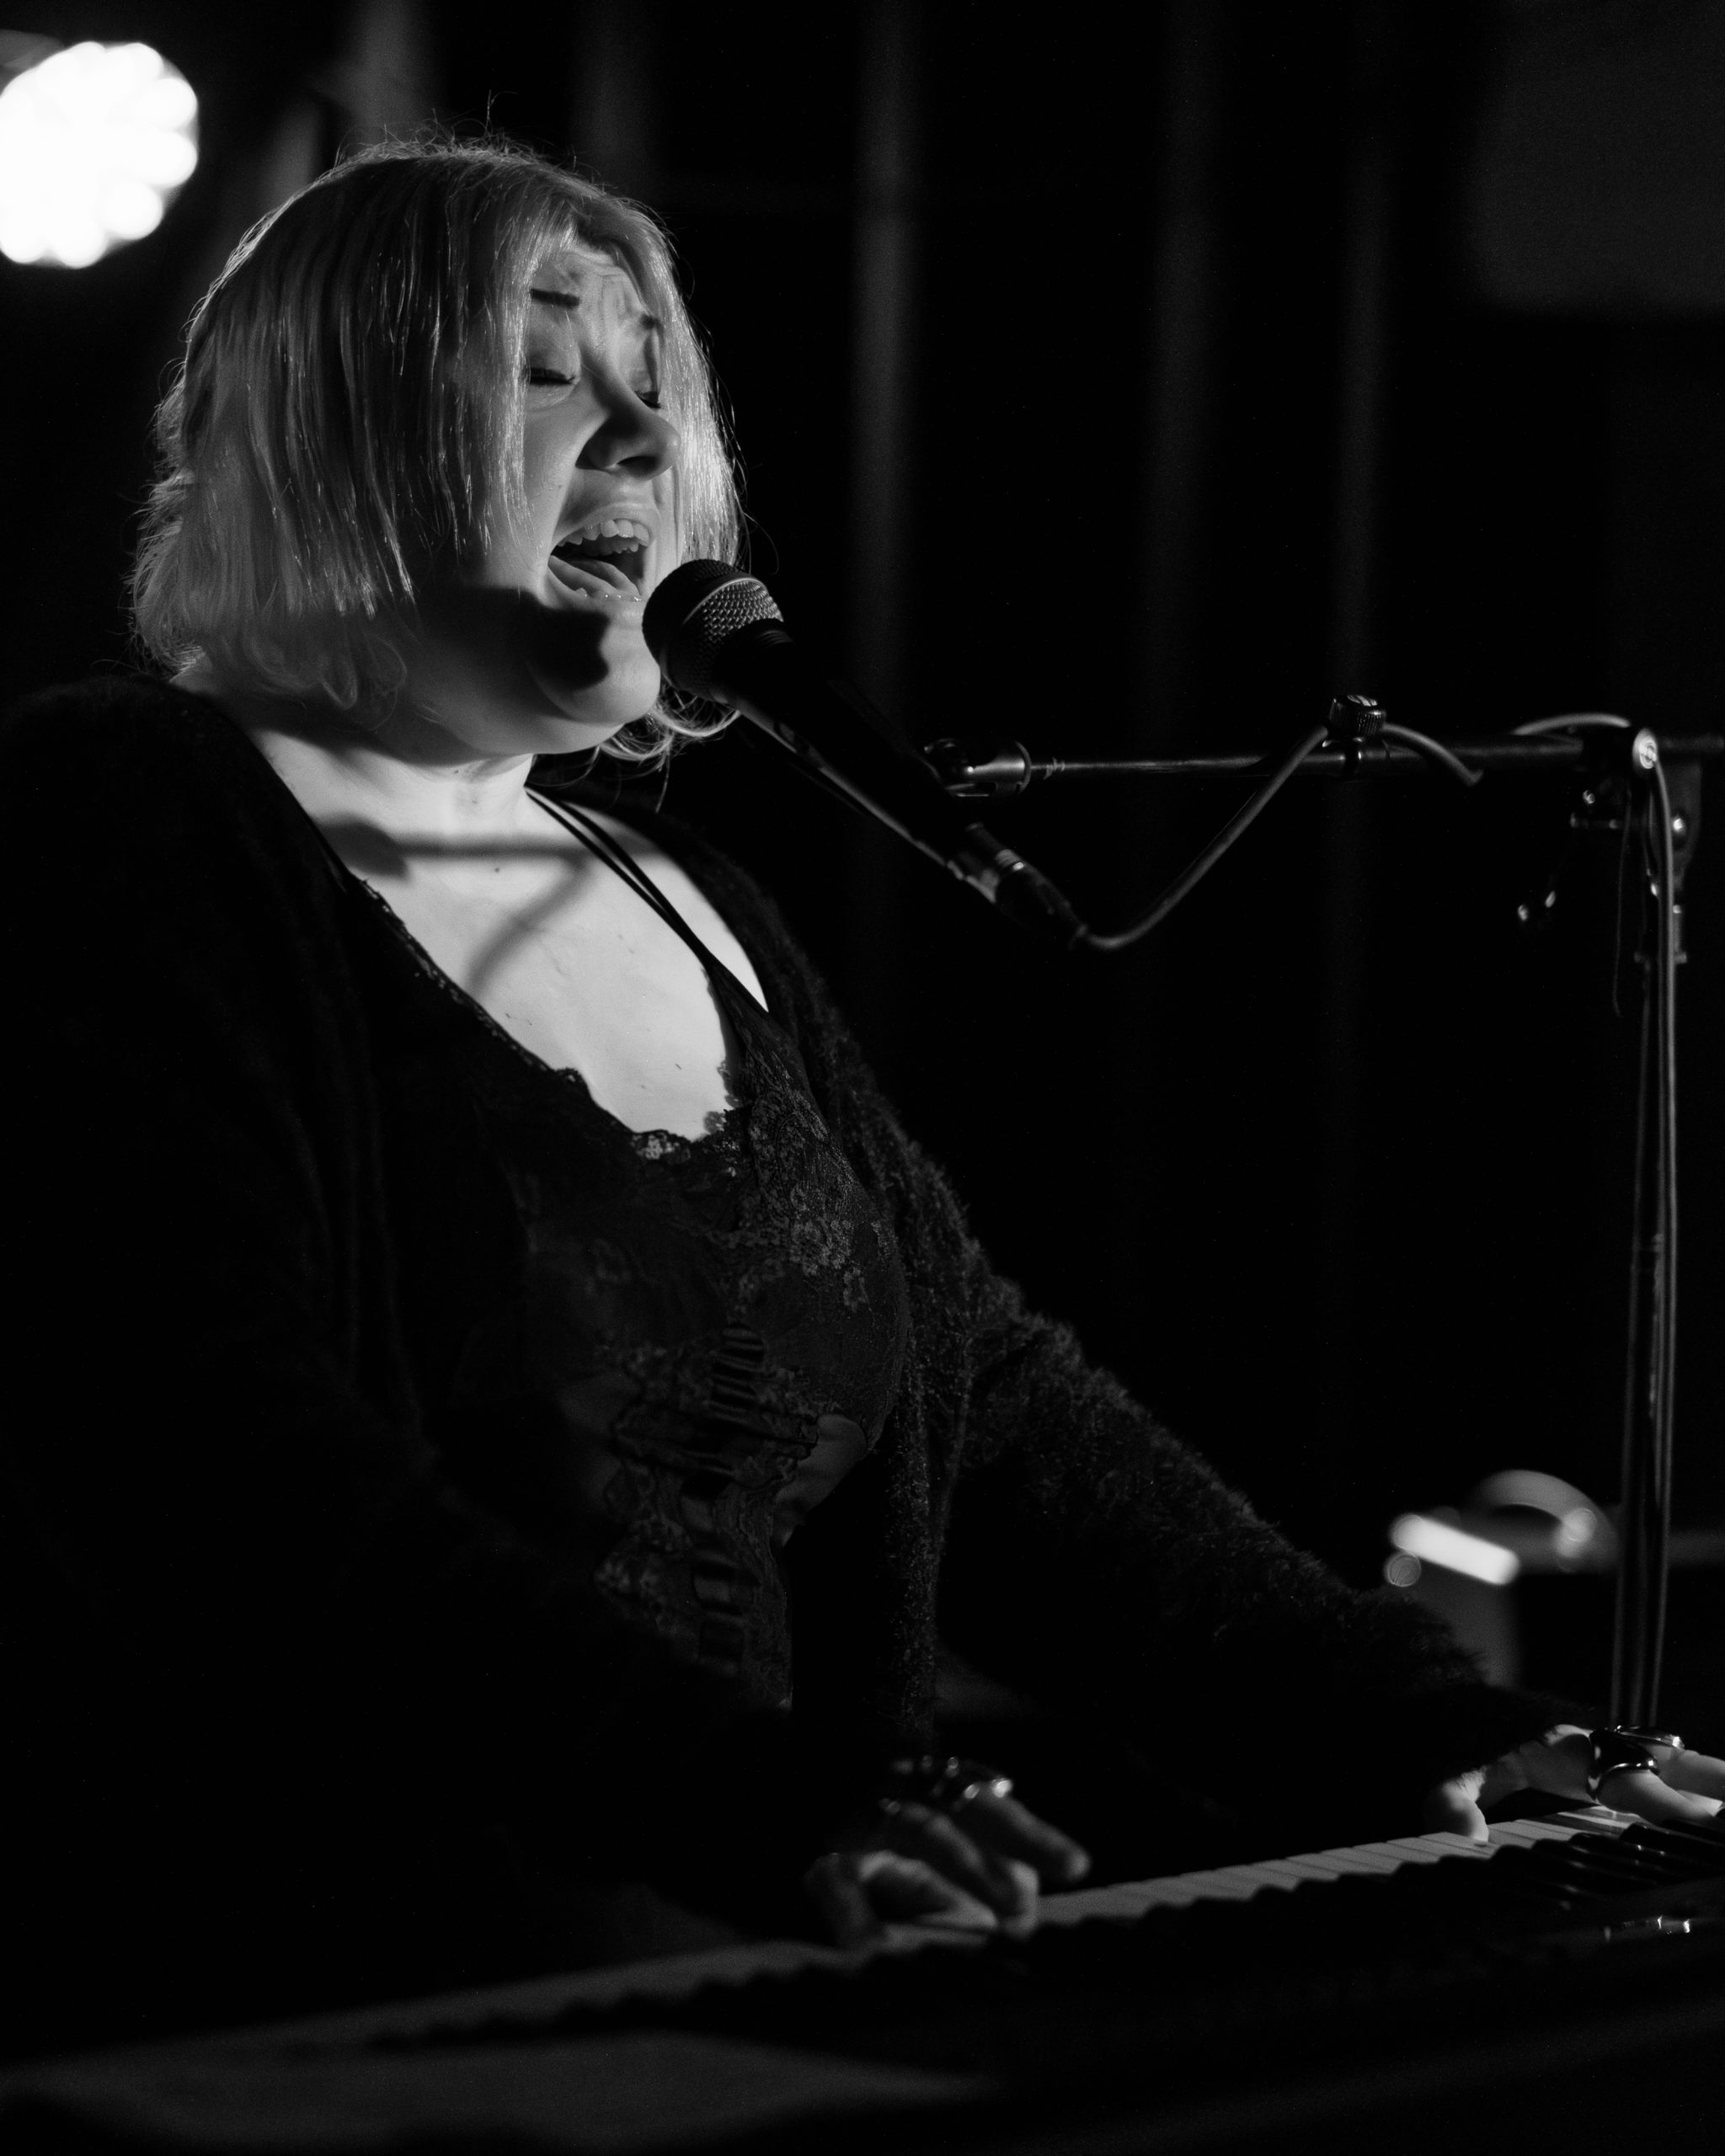
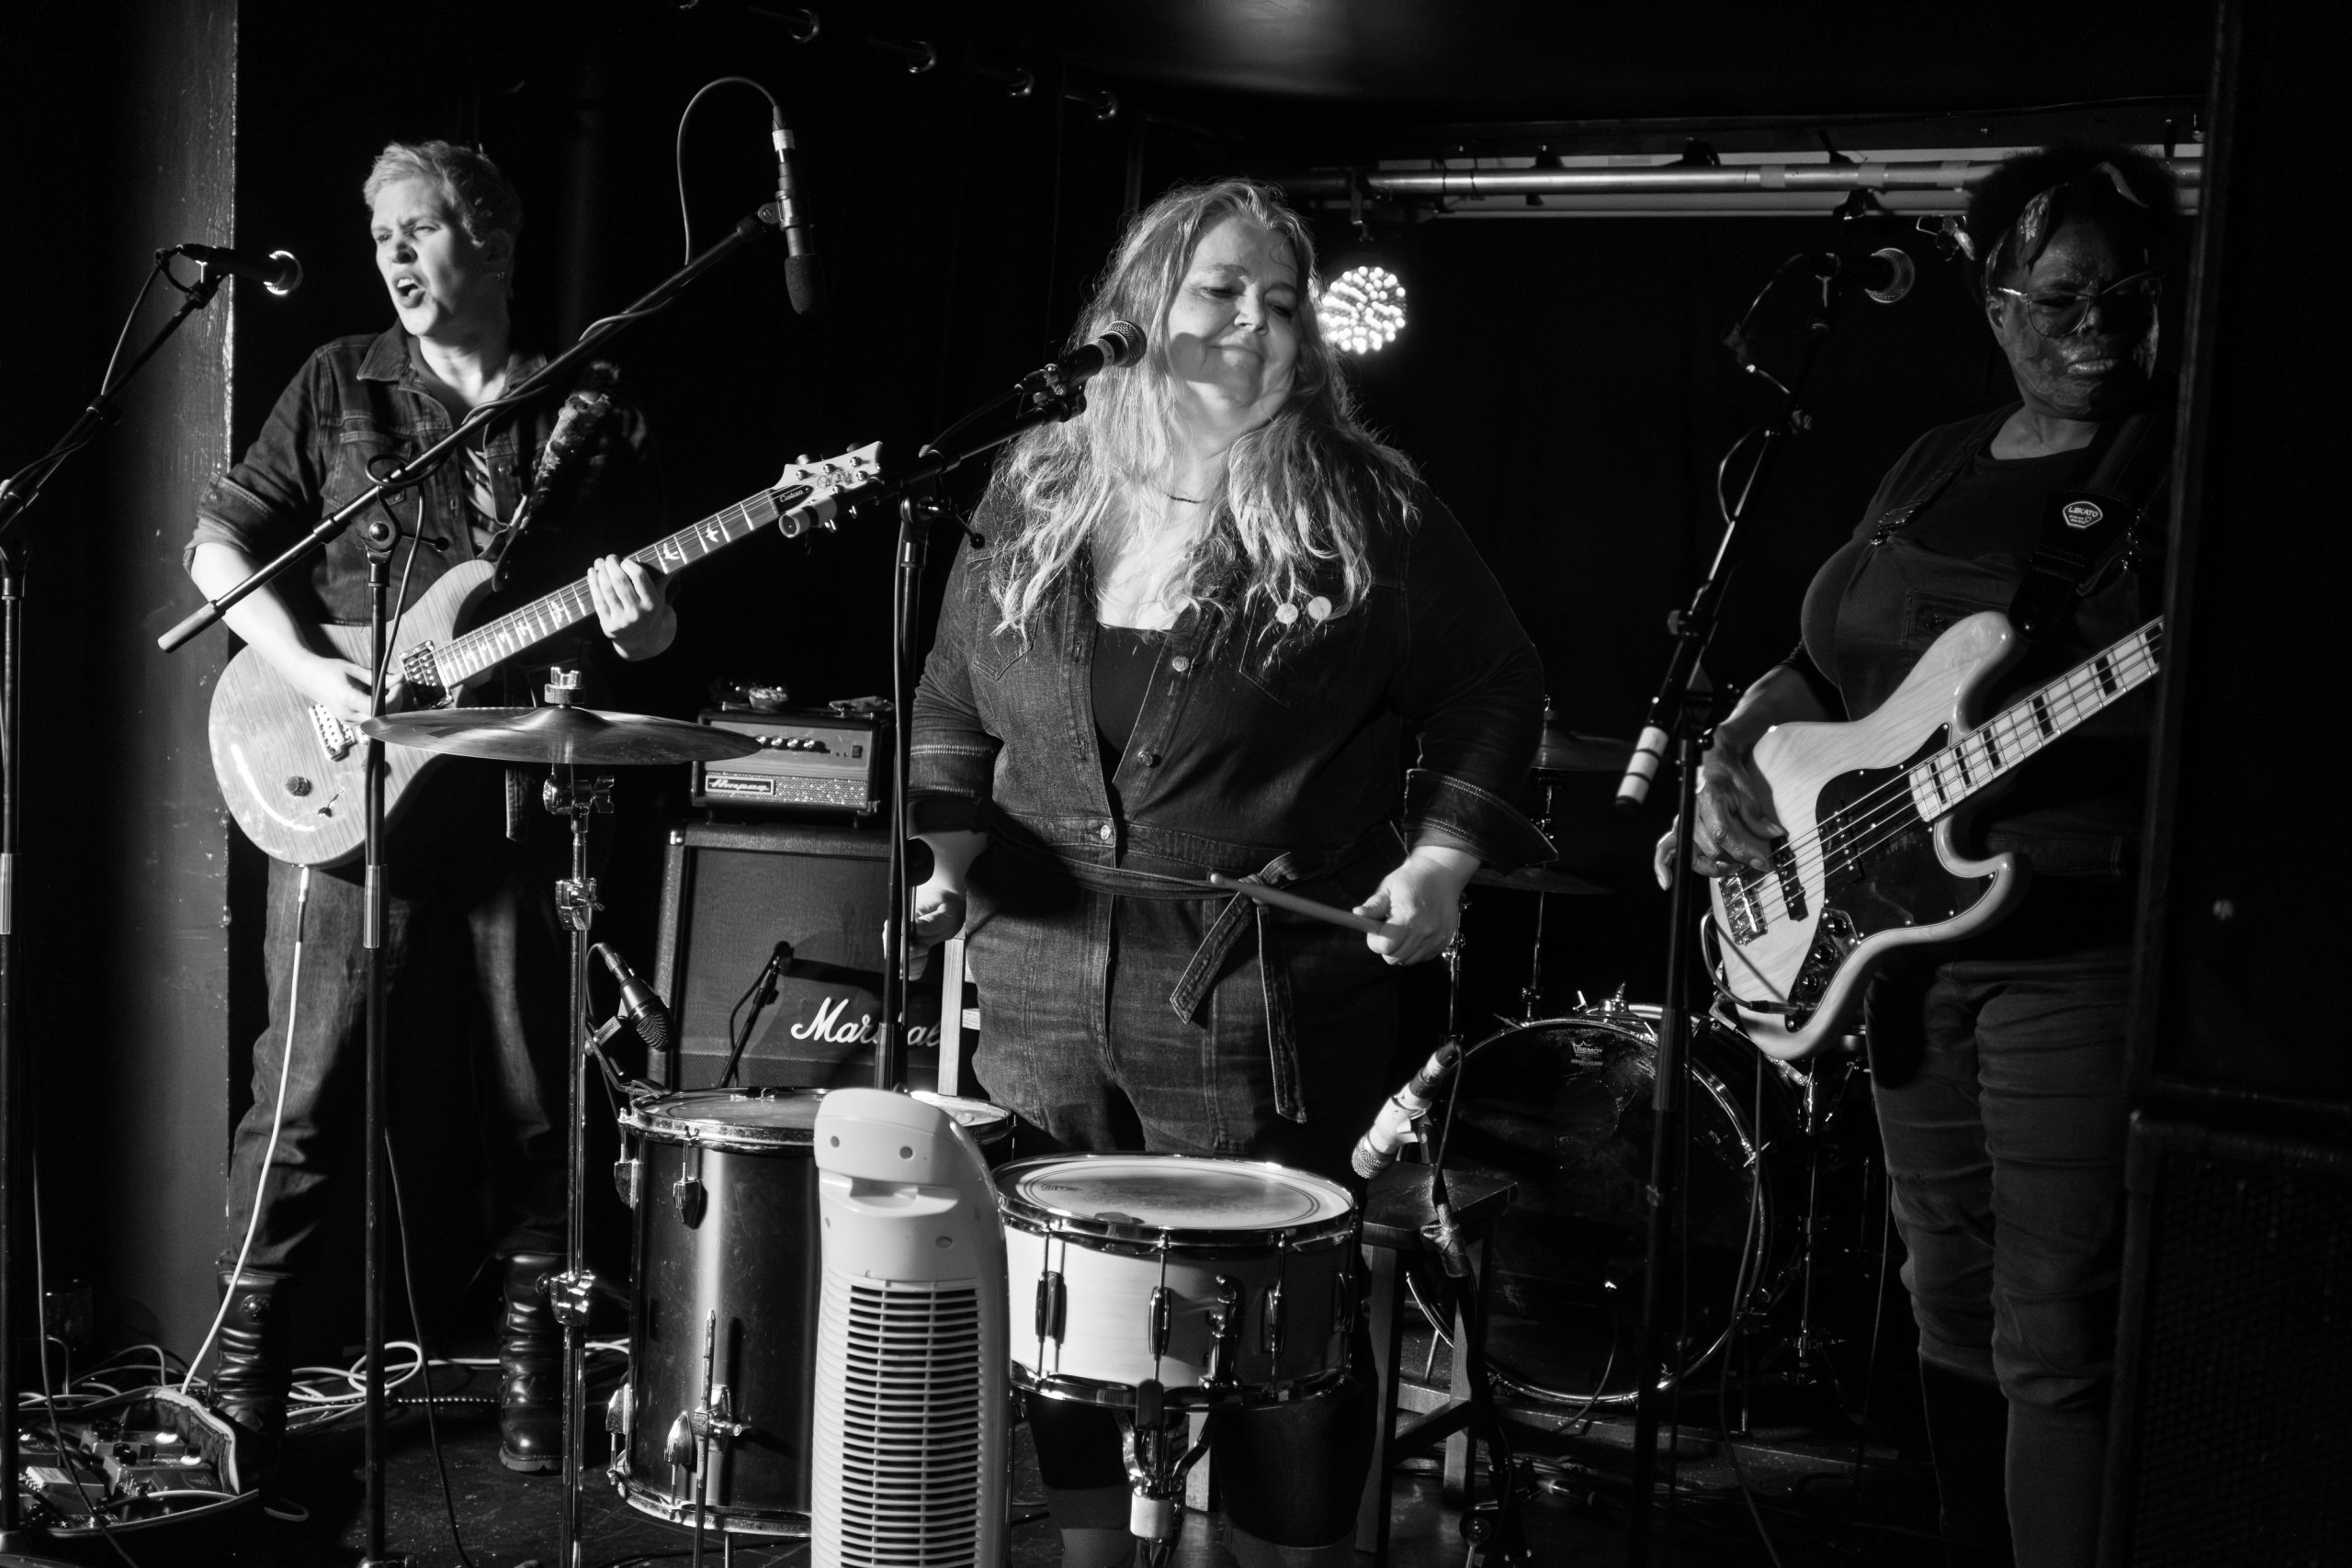
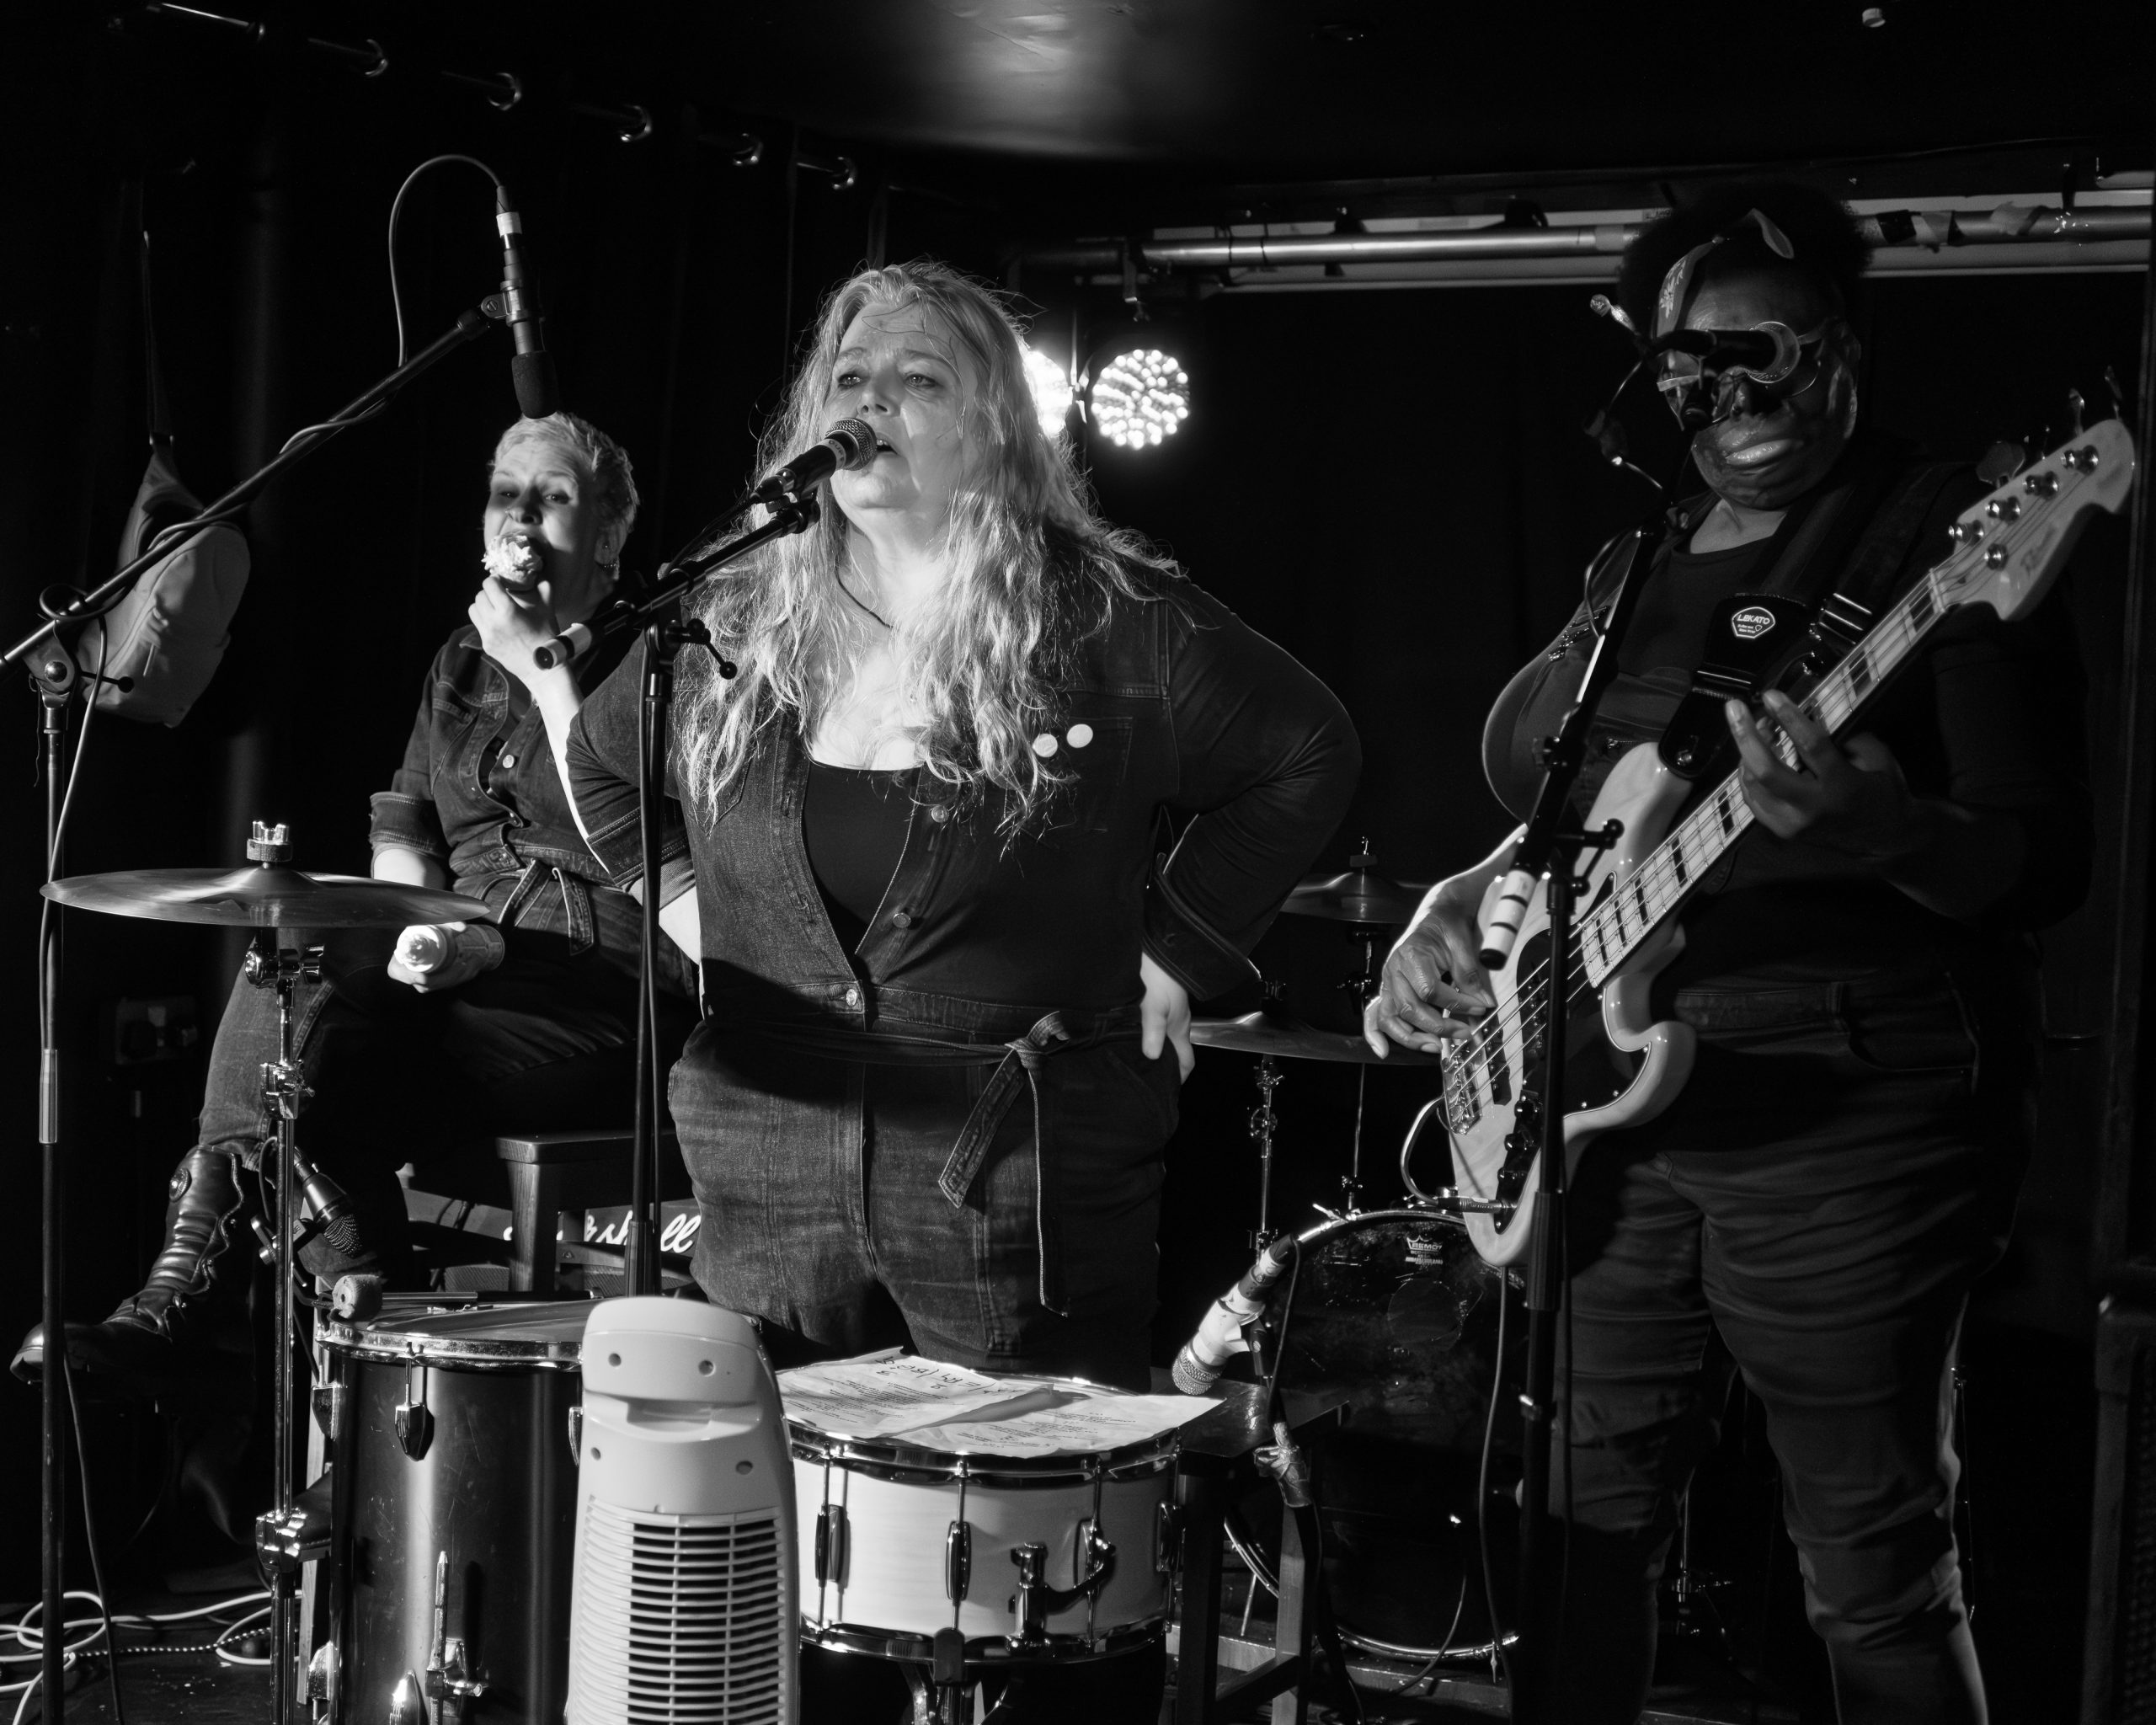
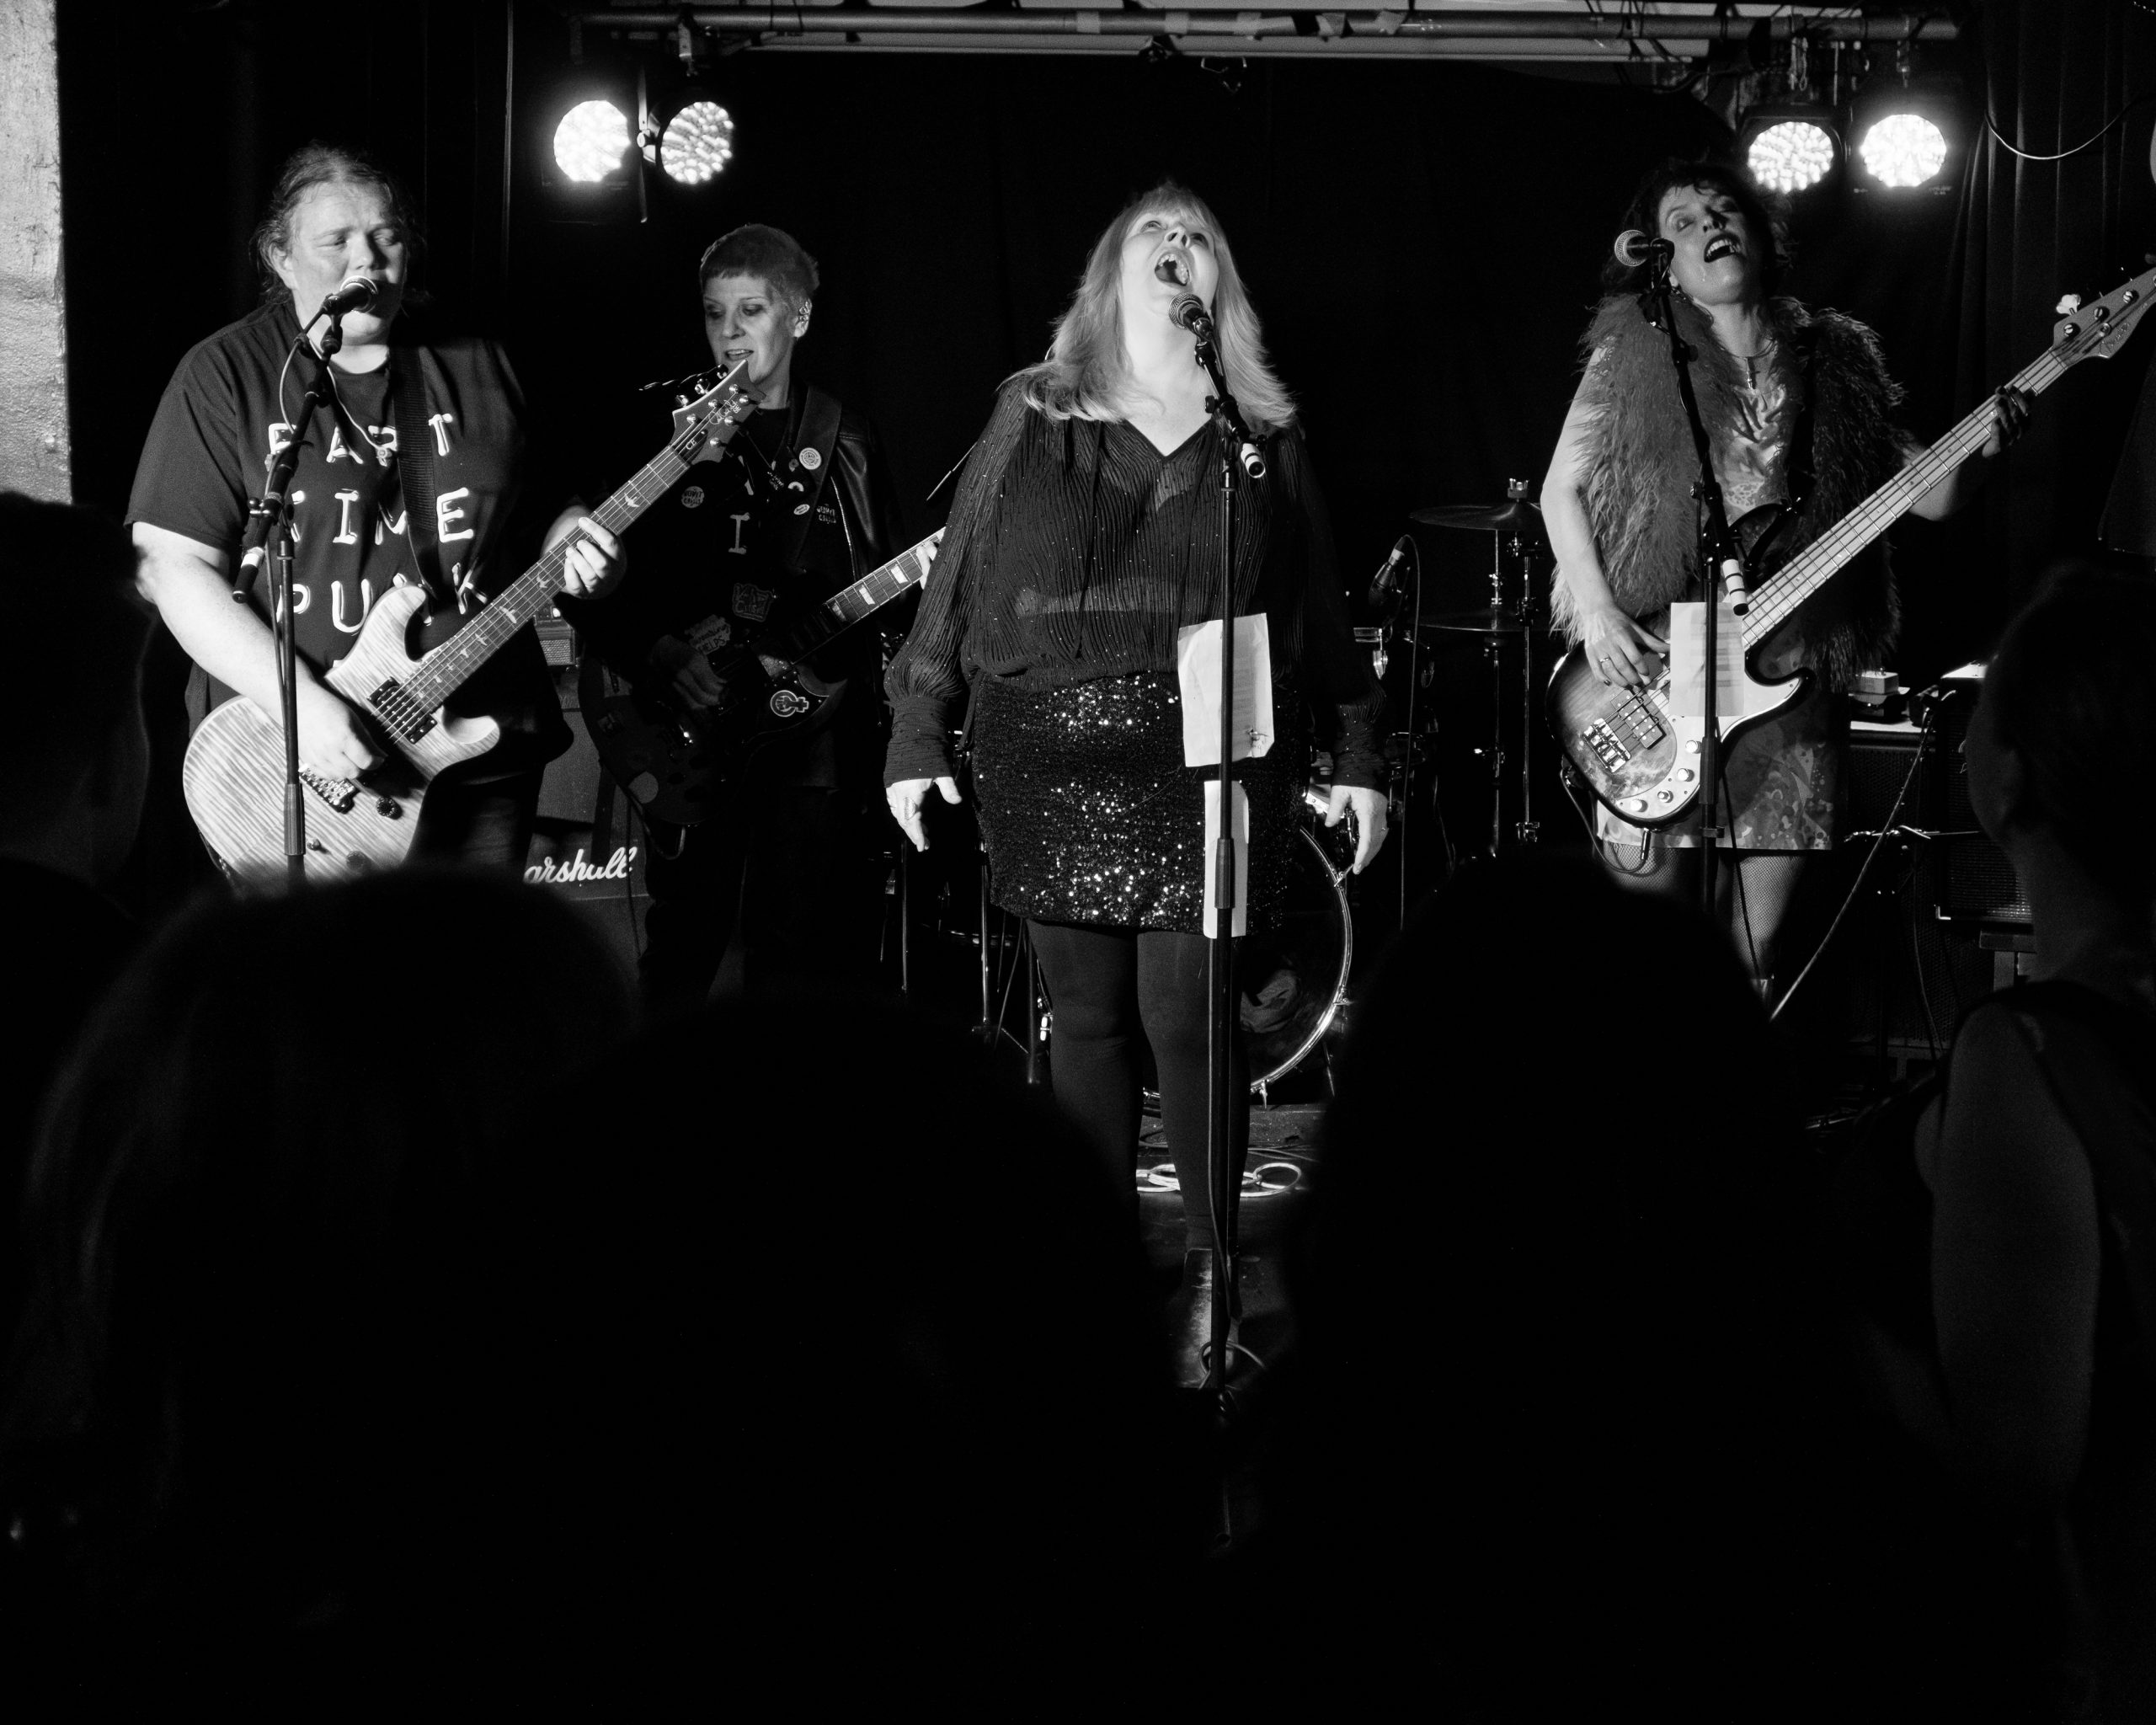
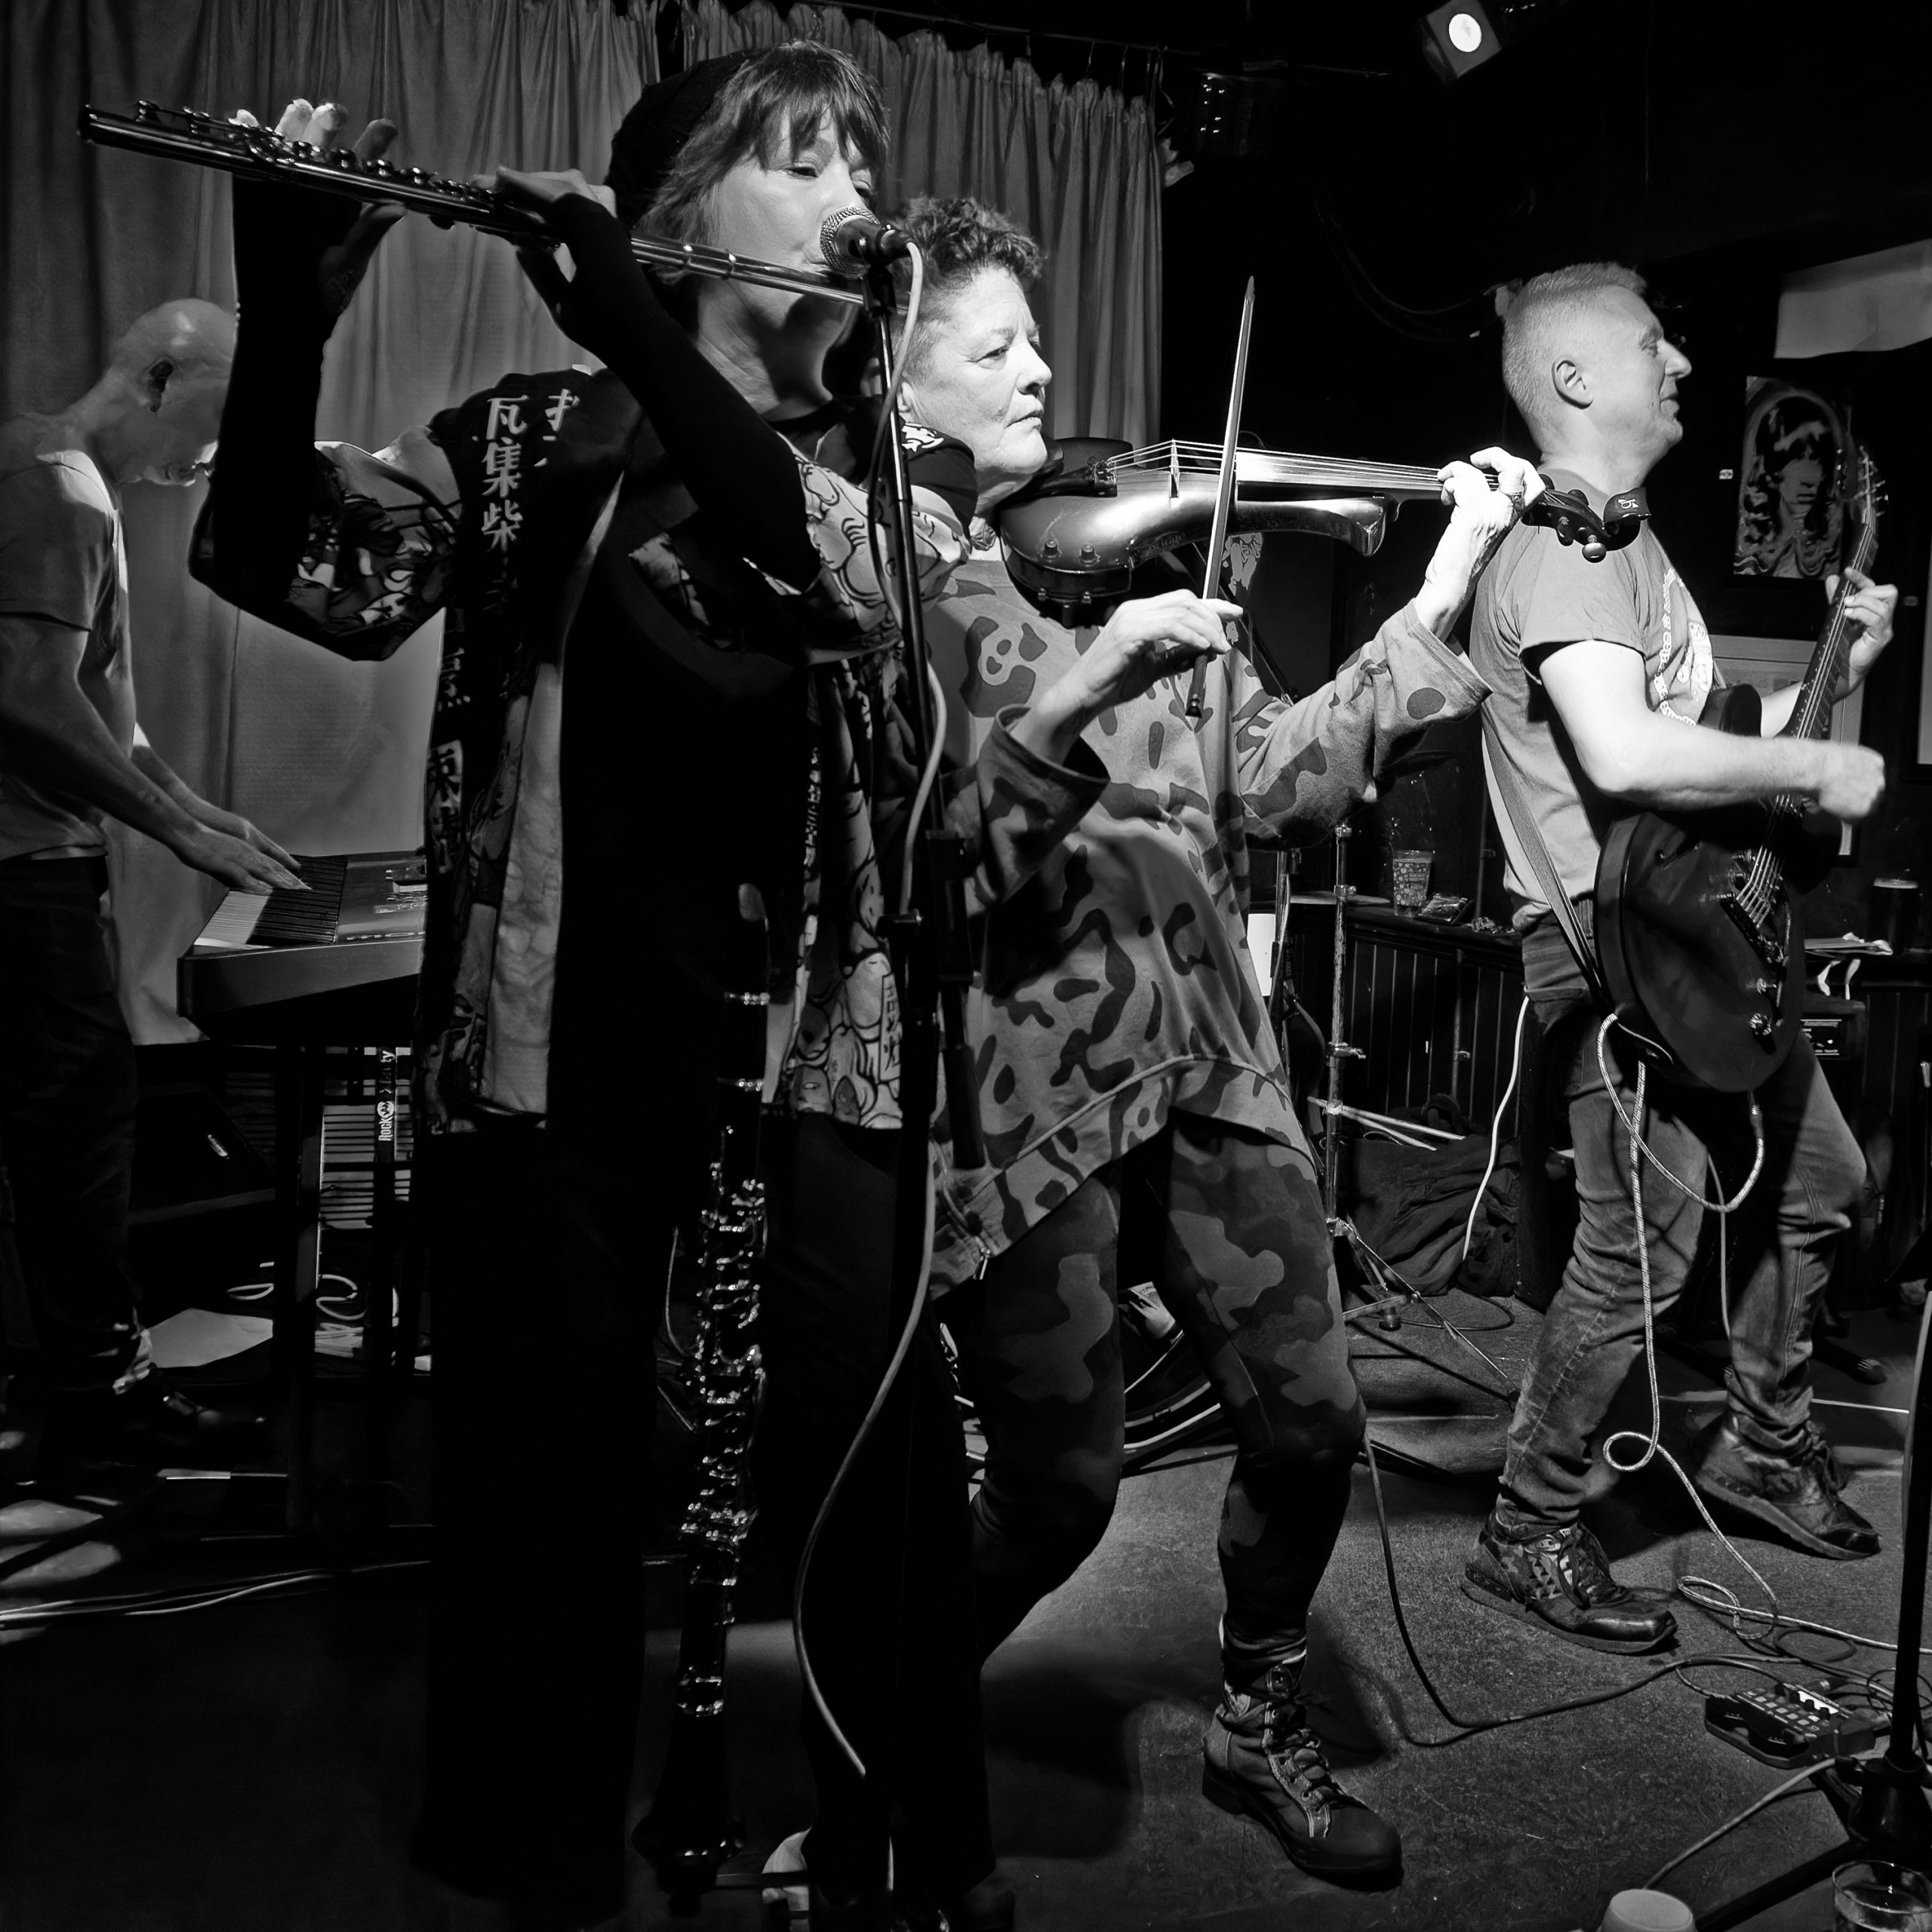
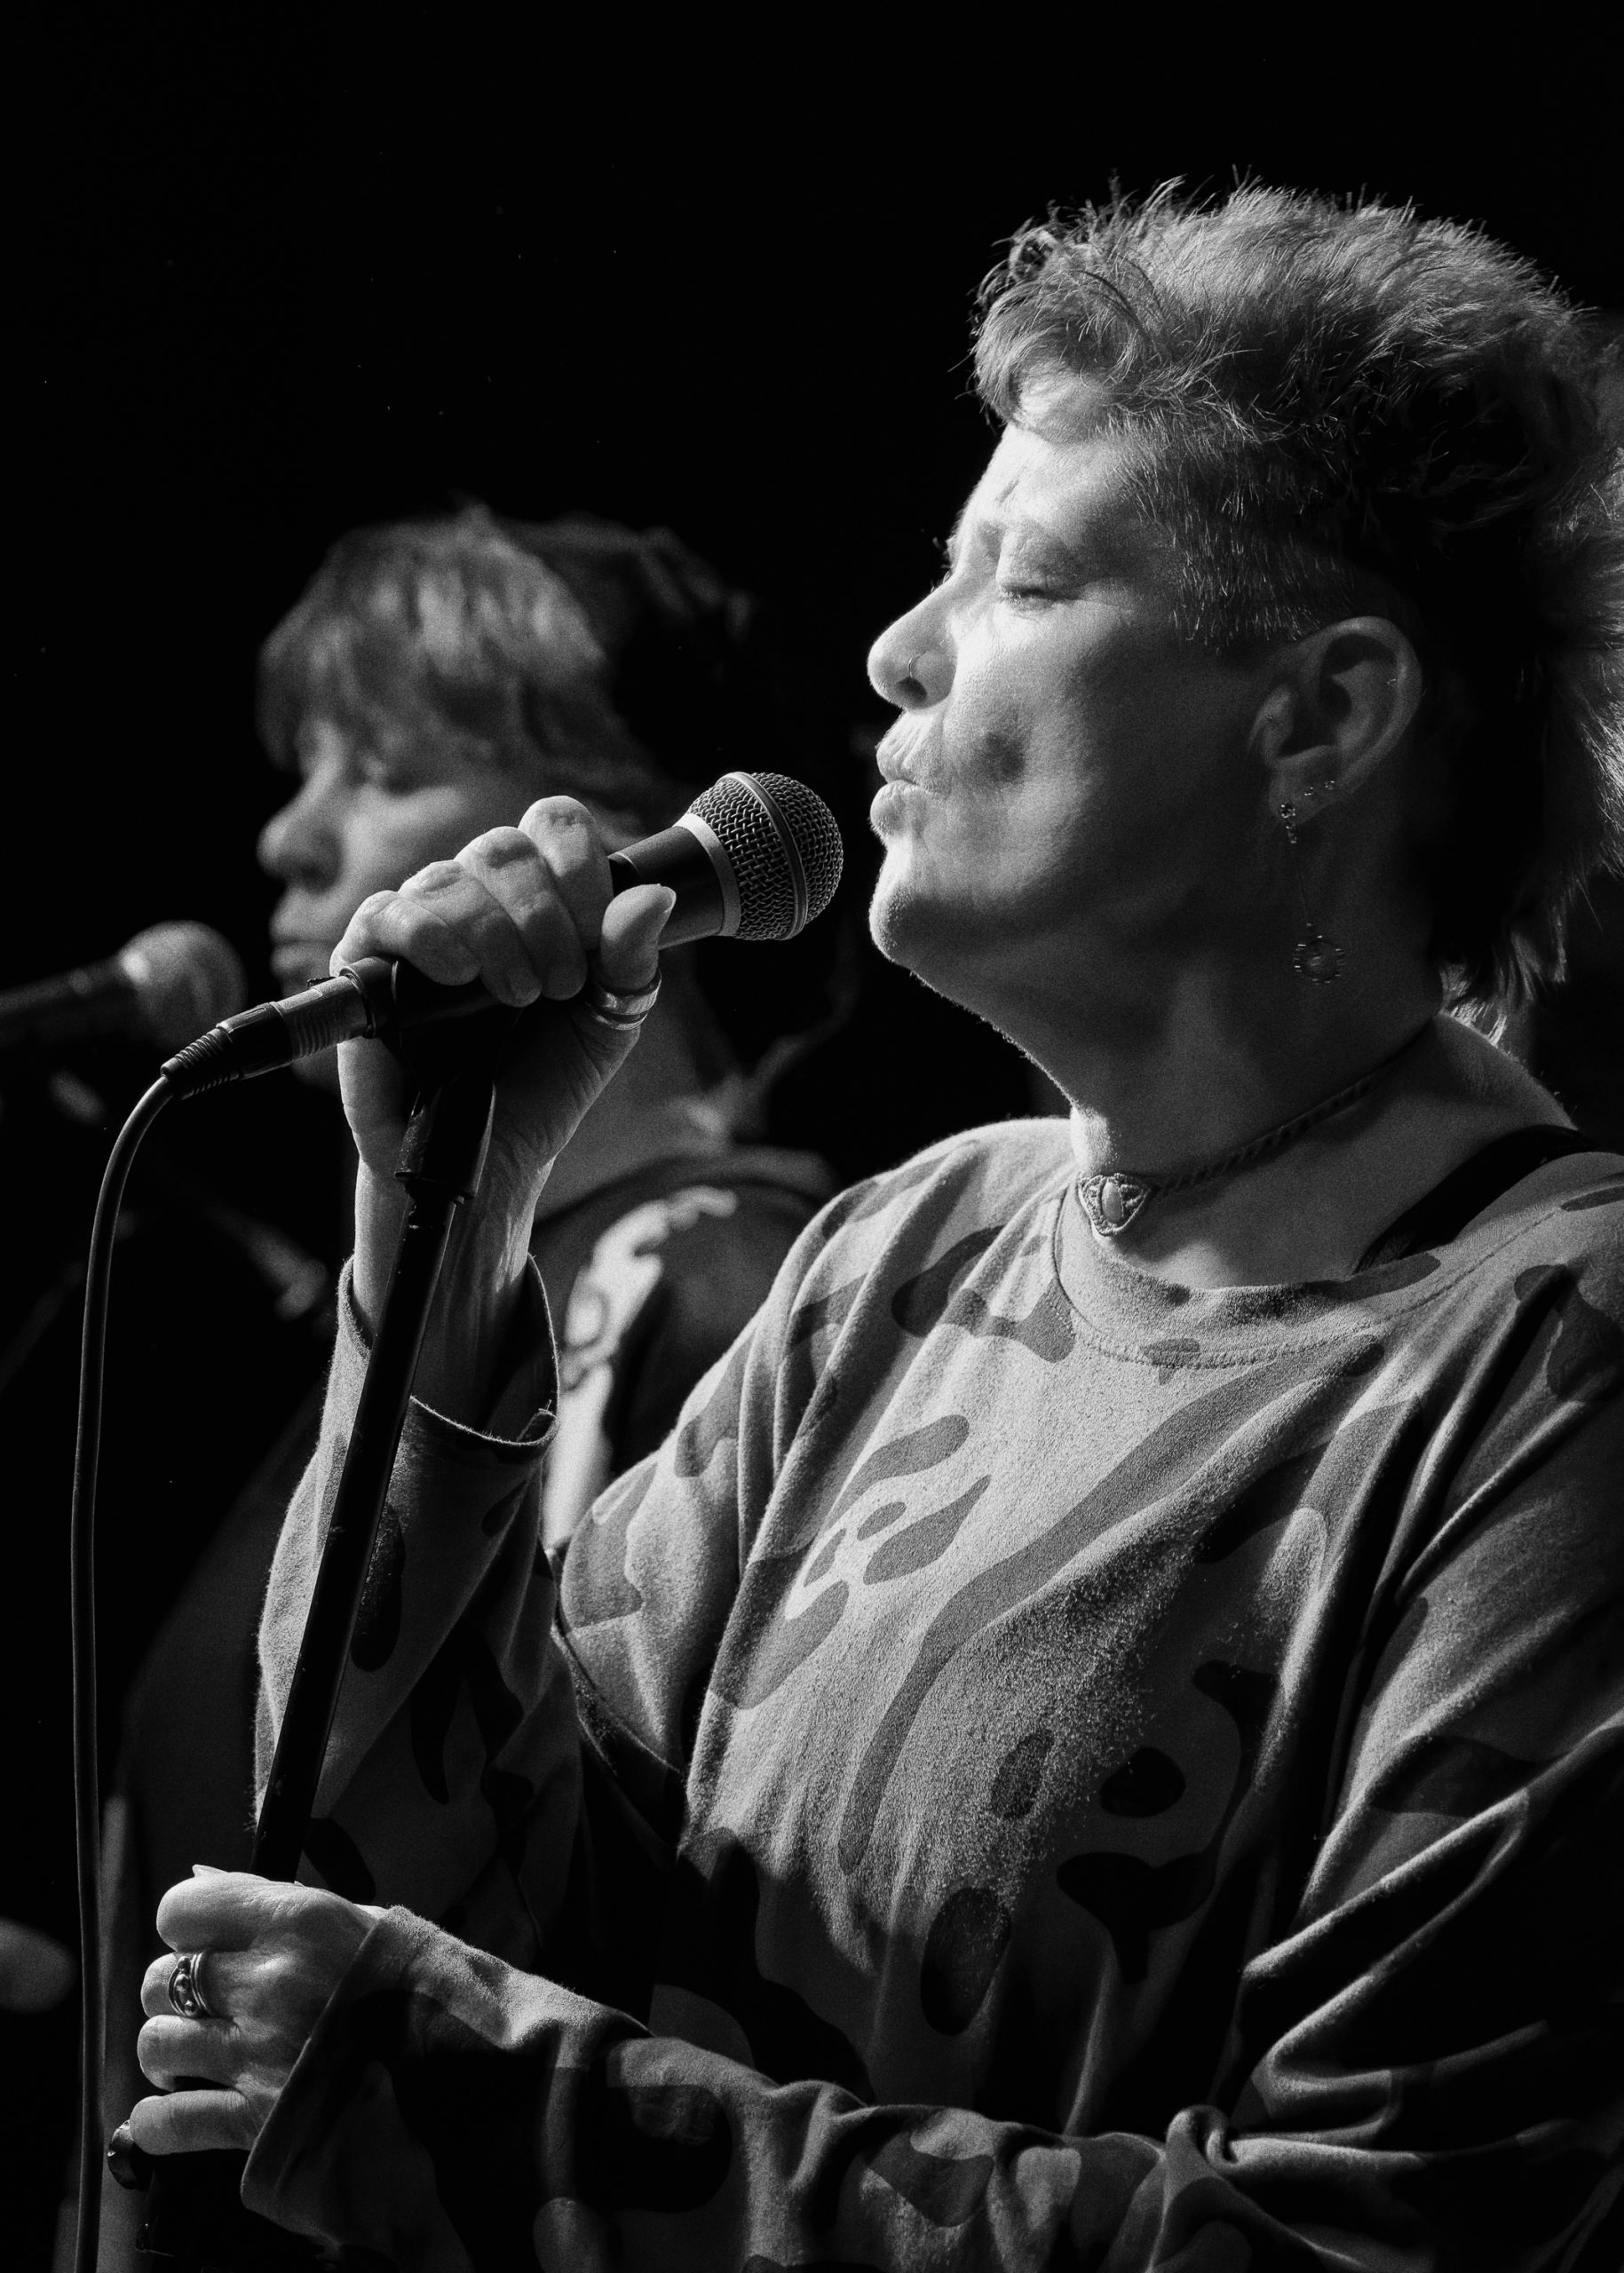
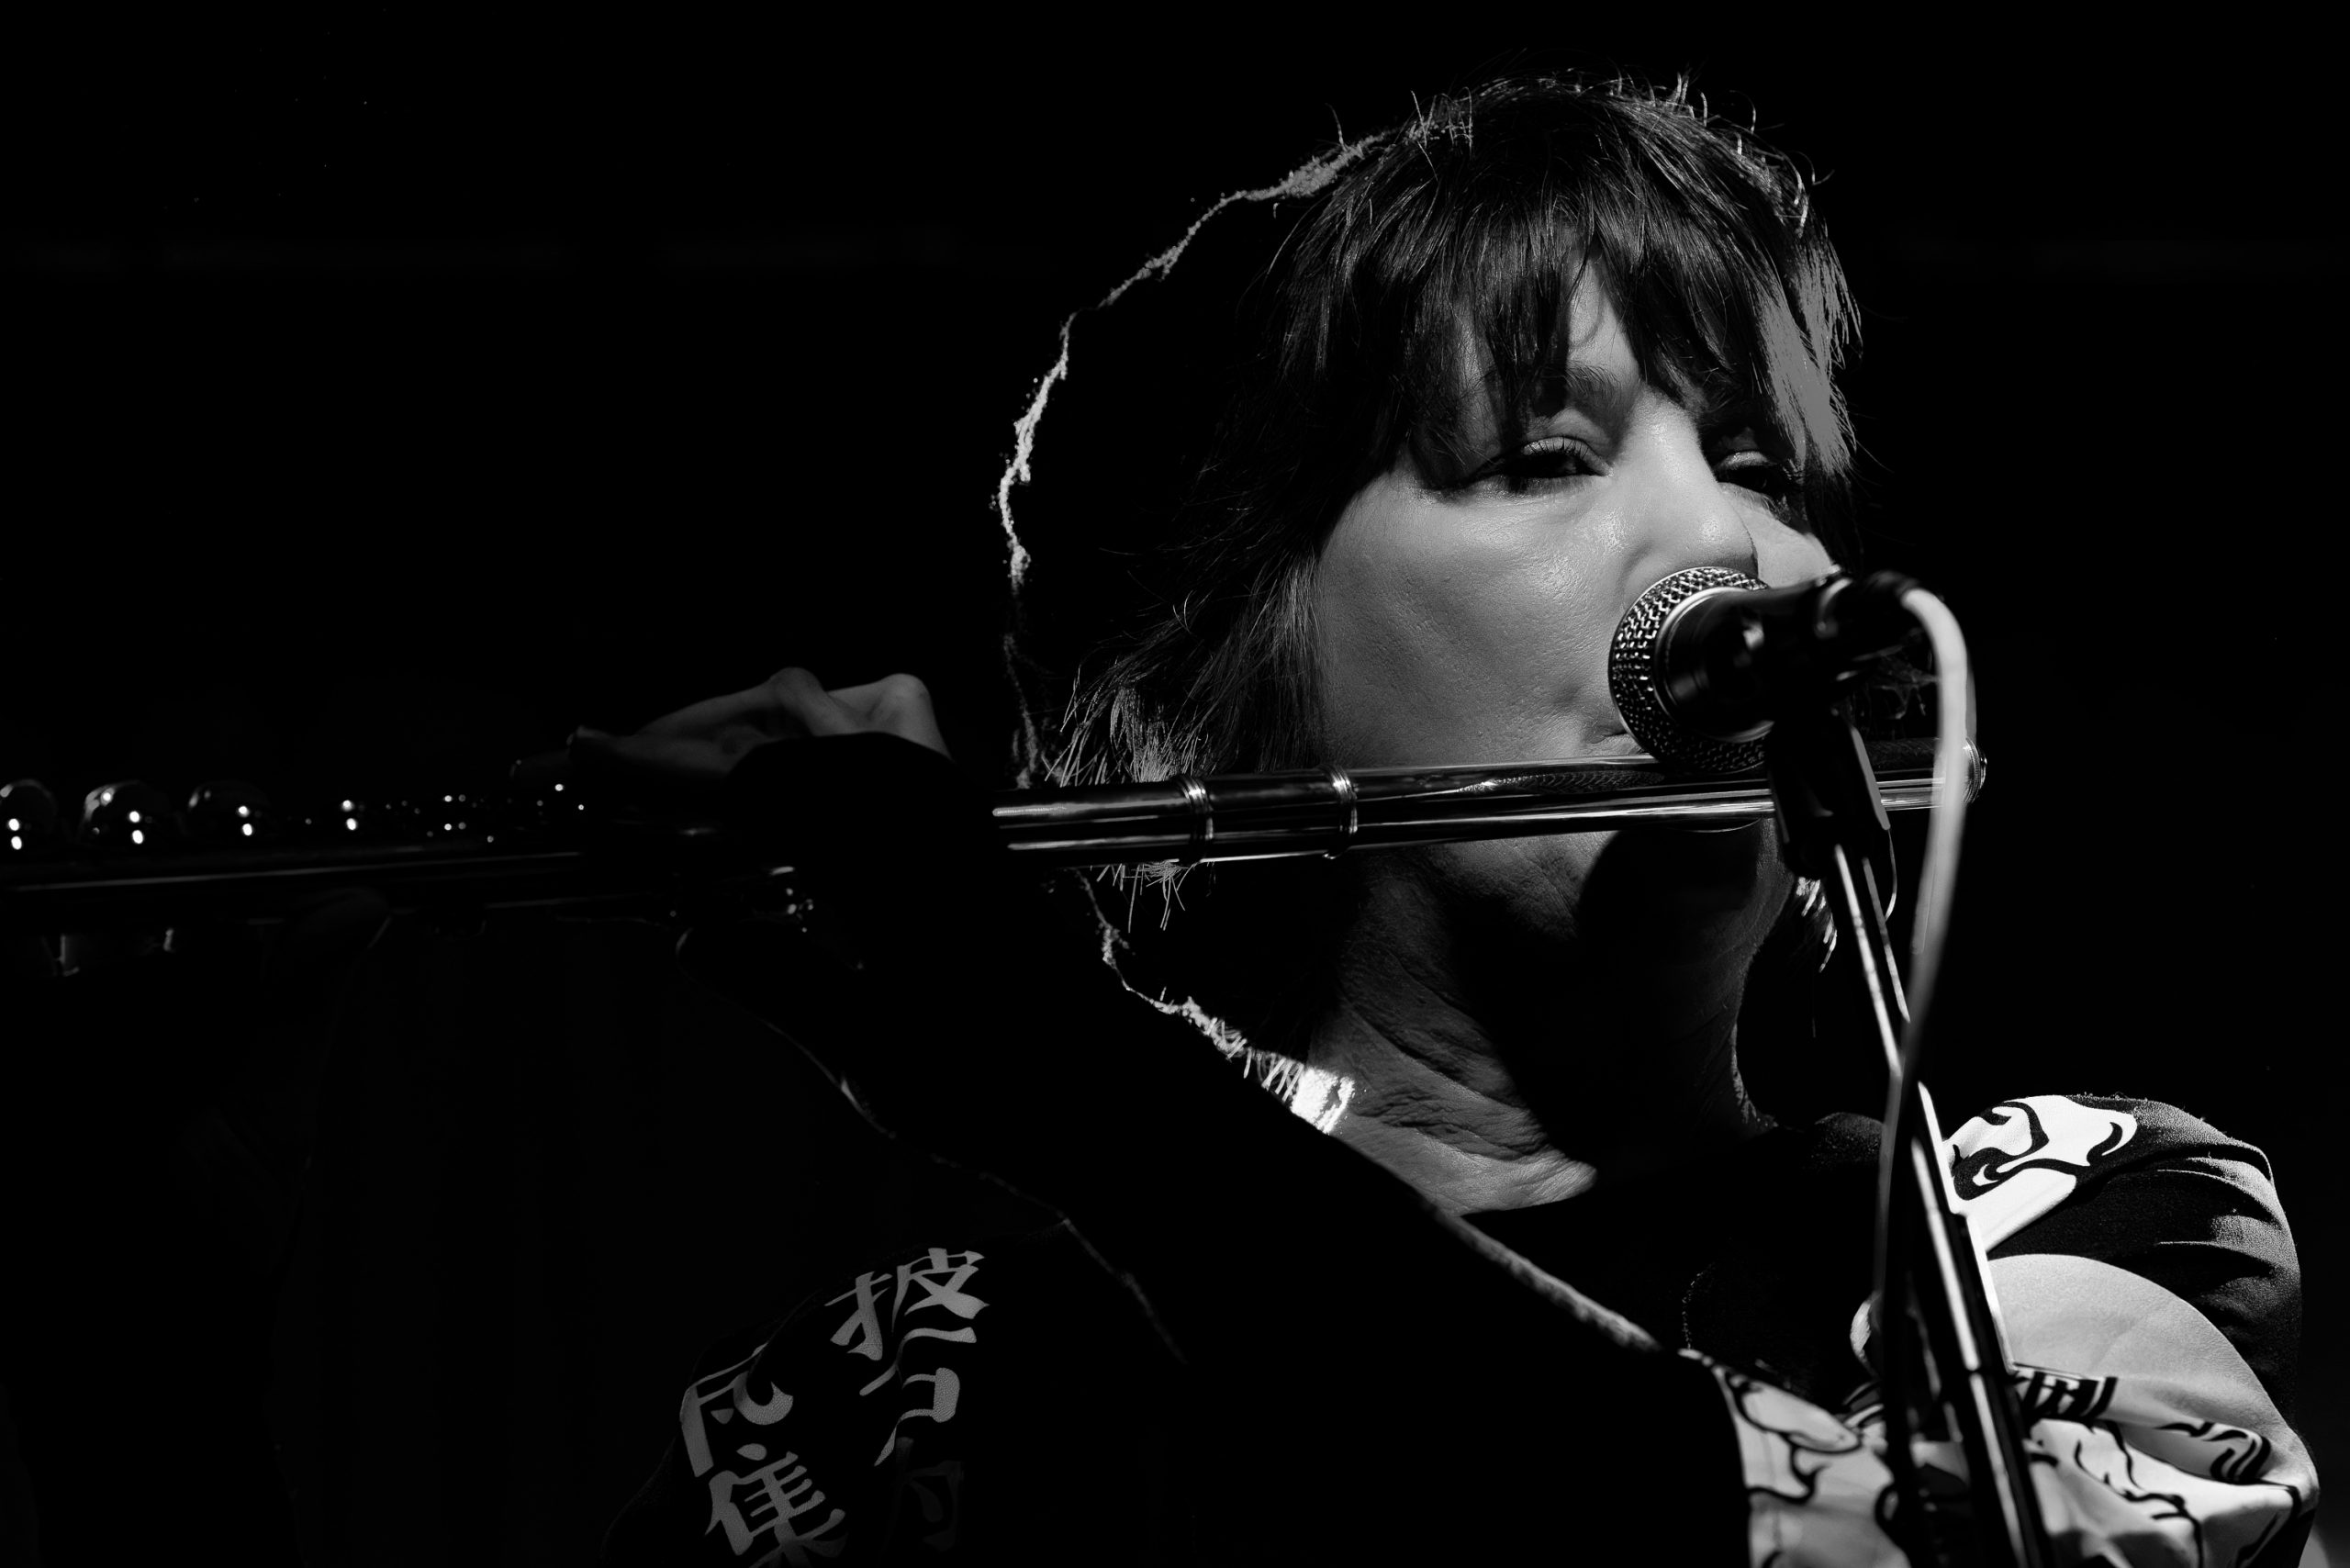
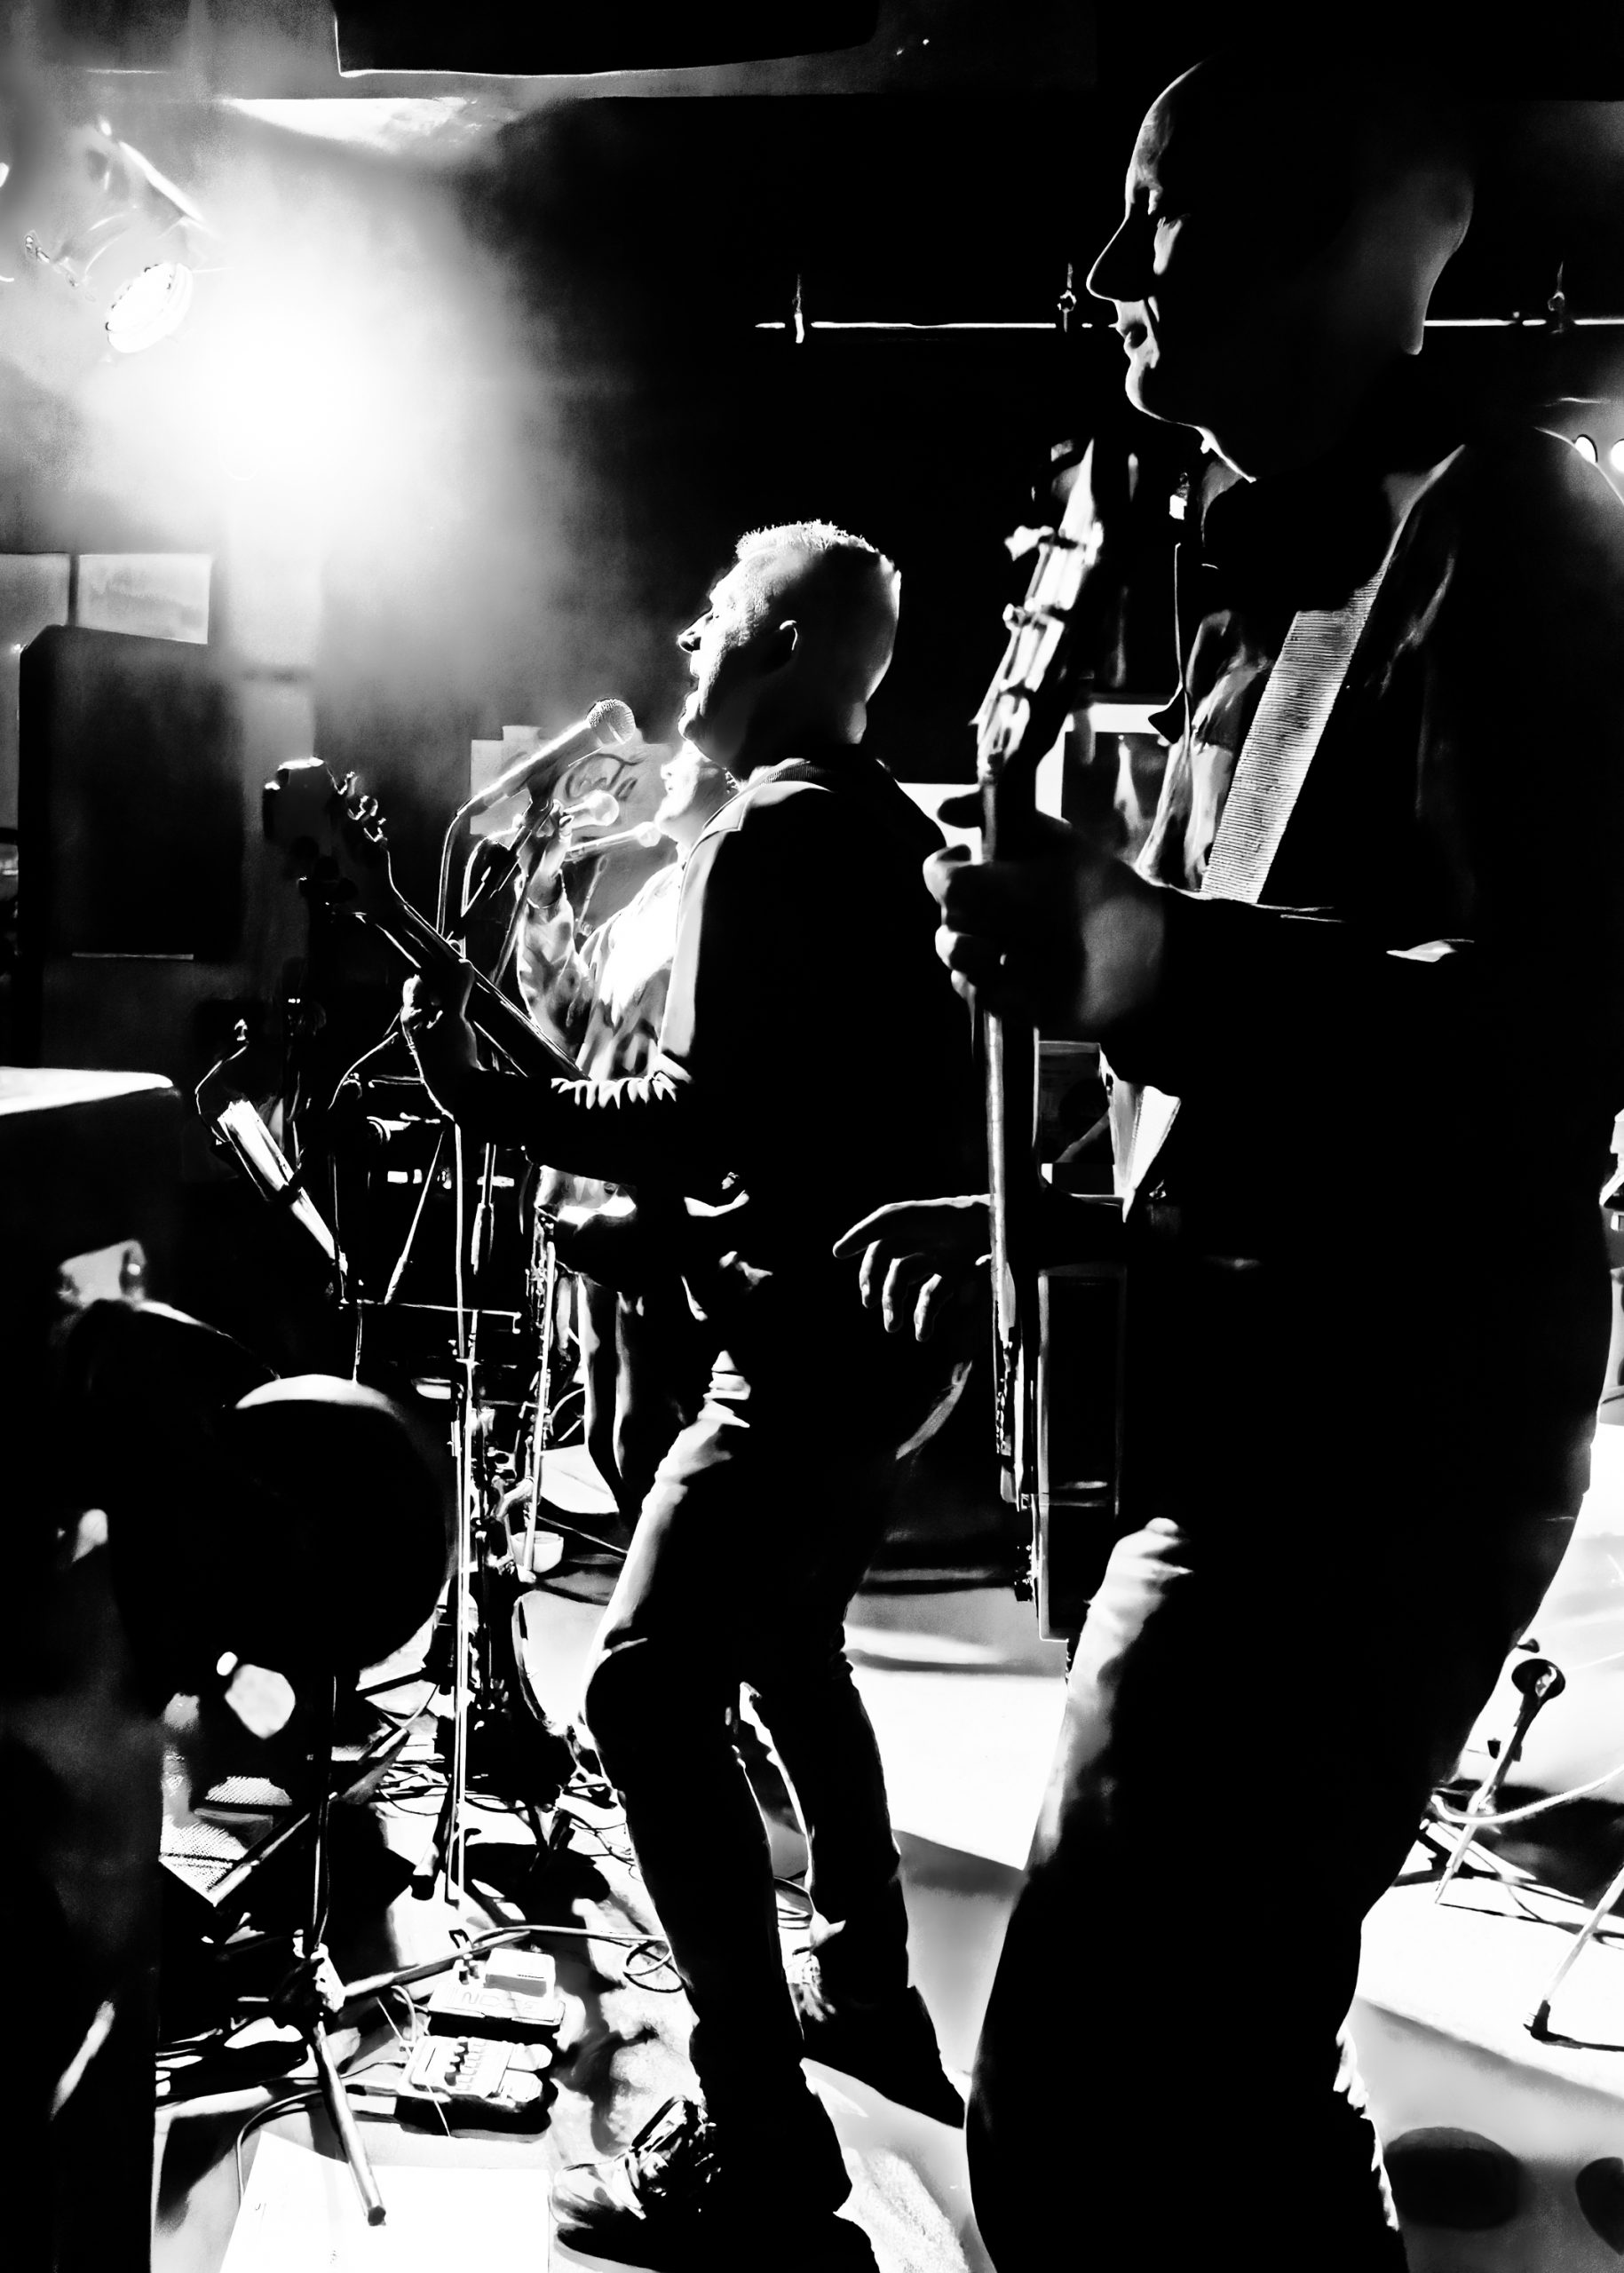
As this is hosted at one of my usual smaller music venues, I took my camera along and got a few shots of the artists performing that night: Boilerverse, JJ Lovegrove, Boilers, and Velvet Crisis. There had been an incident of double booking for the room, which meant that things got underway a bit later than normal, and, sadly, I had to cut my stay a bit short, so I was only there for maybe half of the Velvet Crisis set. But I had a great night, excellent music to enjoy, some lovely chats with people and of course, I enjoyed using my camera. I’ll share a few of my photos from the night below.
All photos taken using Fuji X-T5 along with the 56mm f1.2 and the 27mm f2.8.
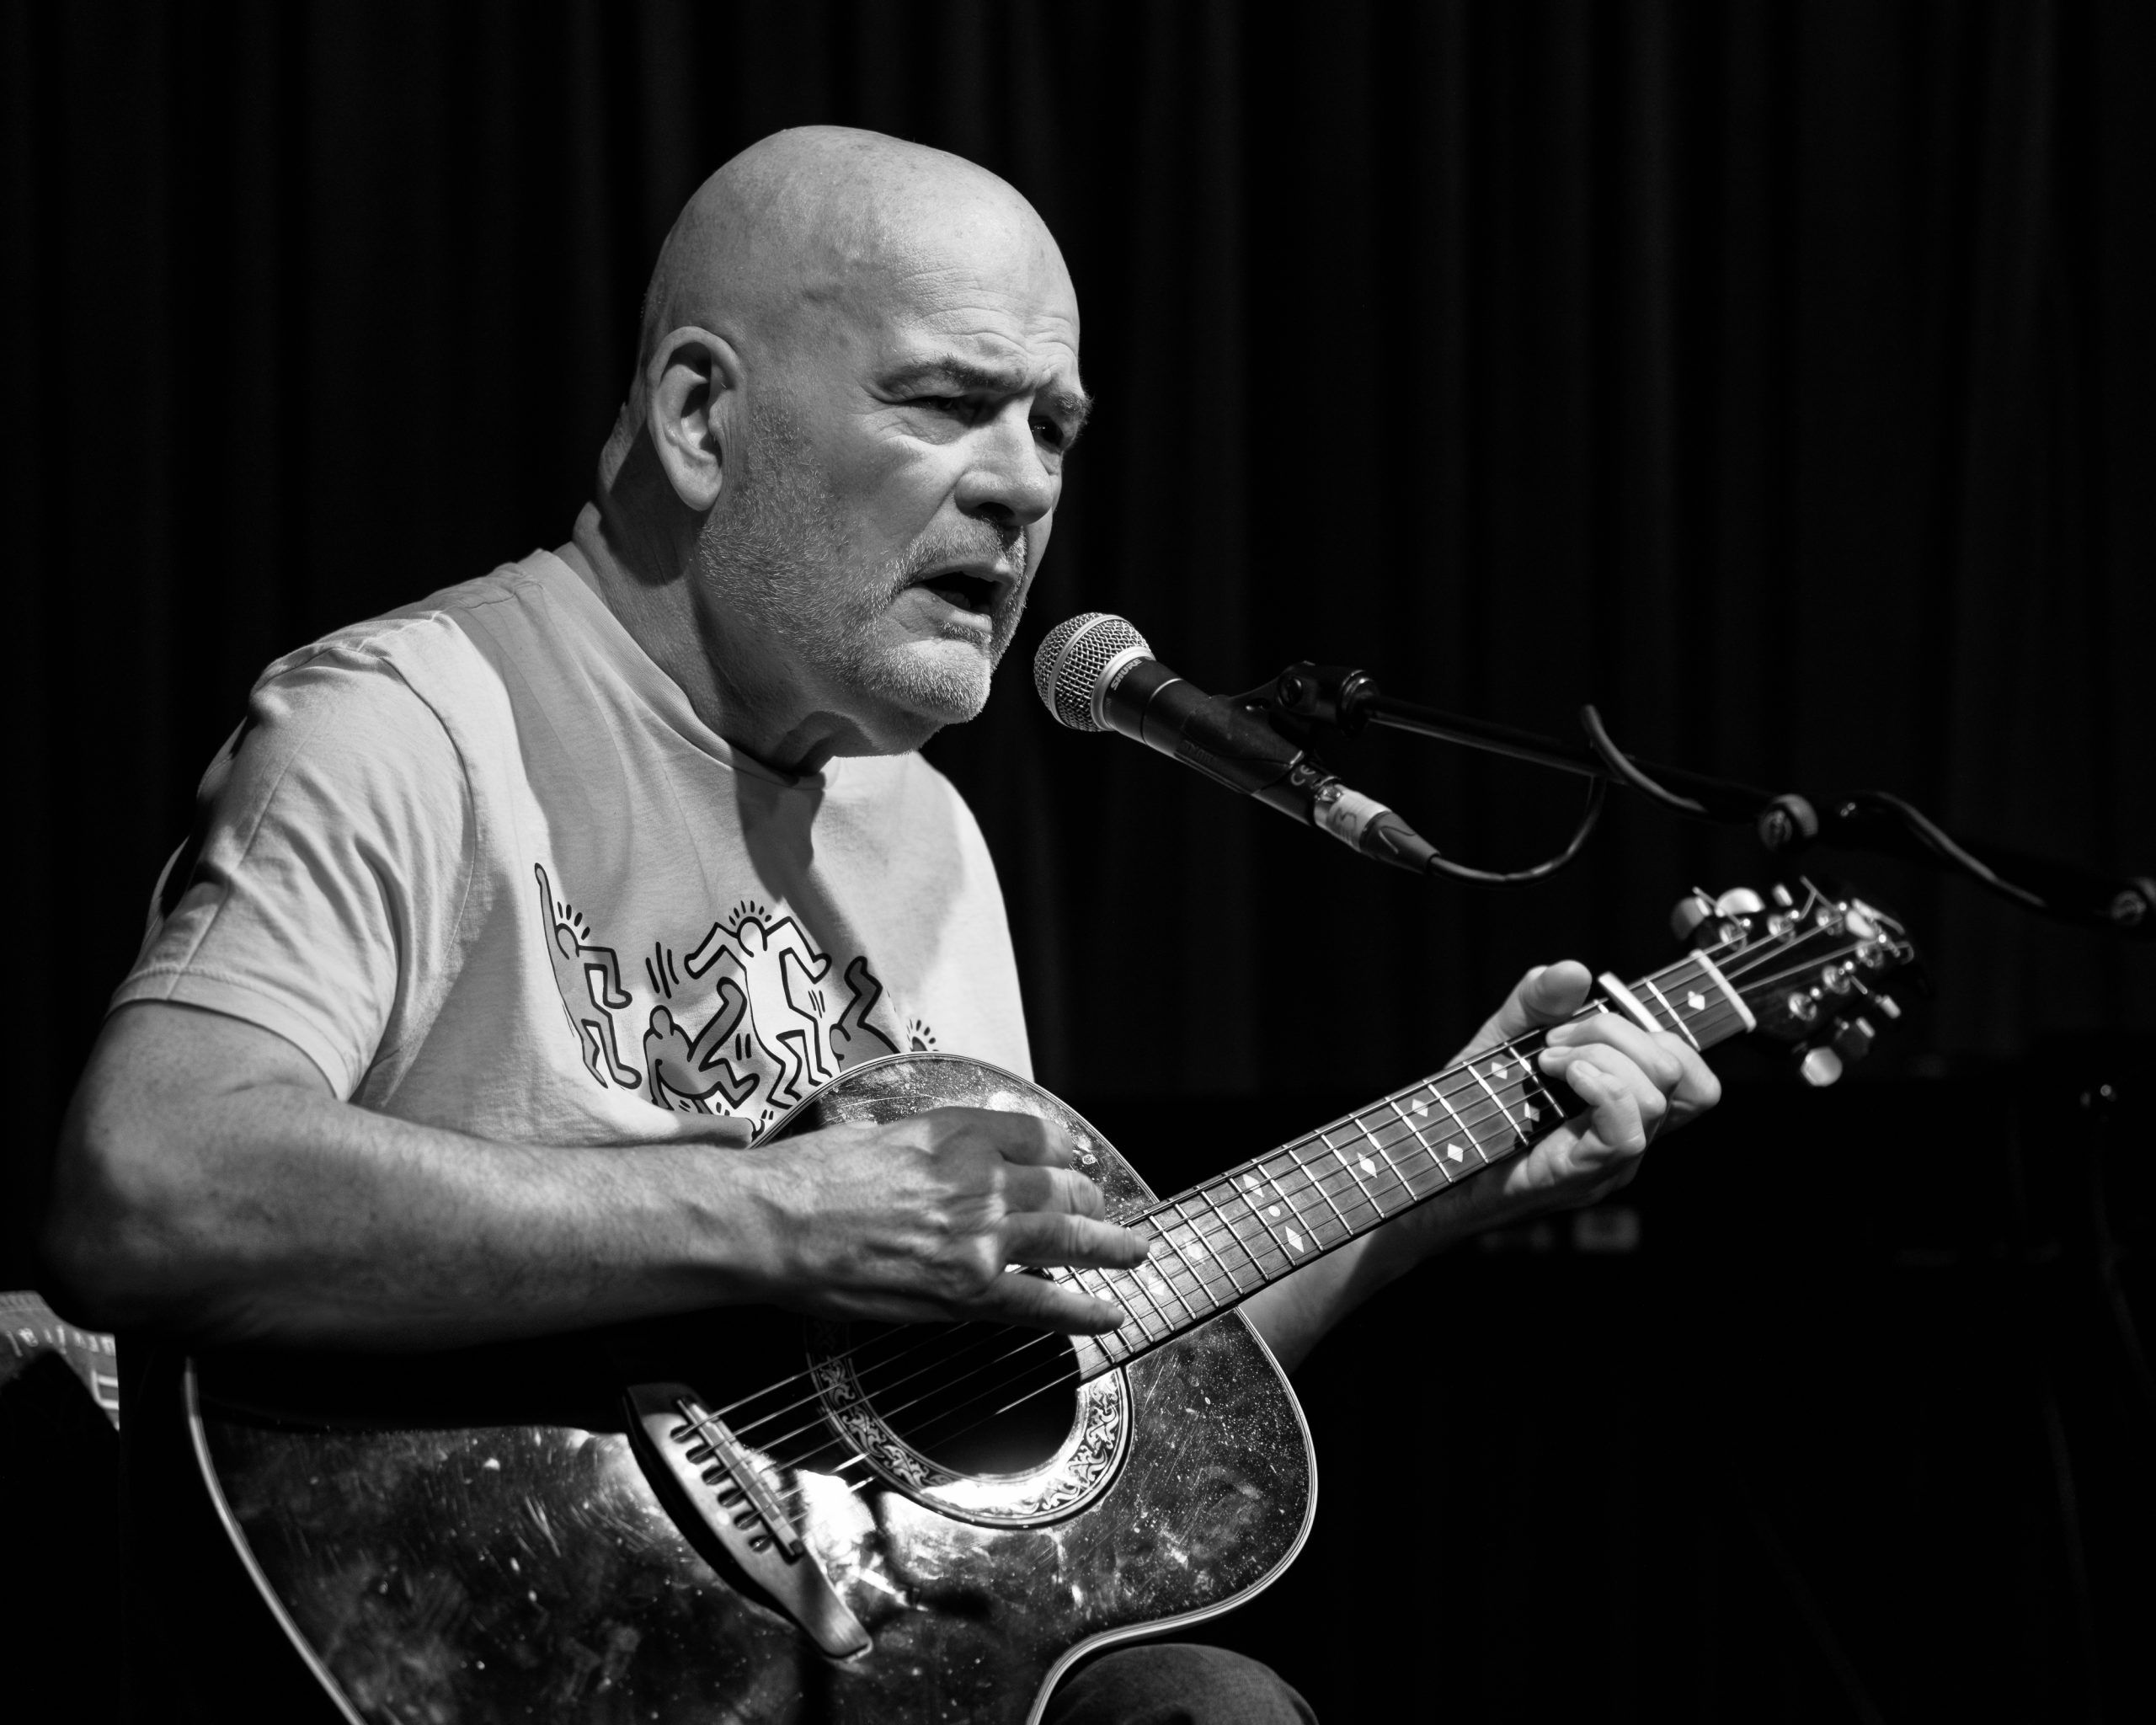
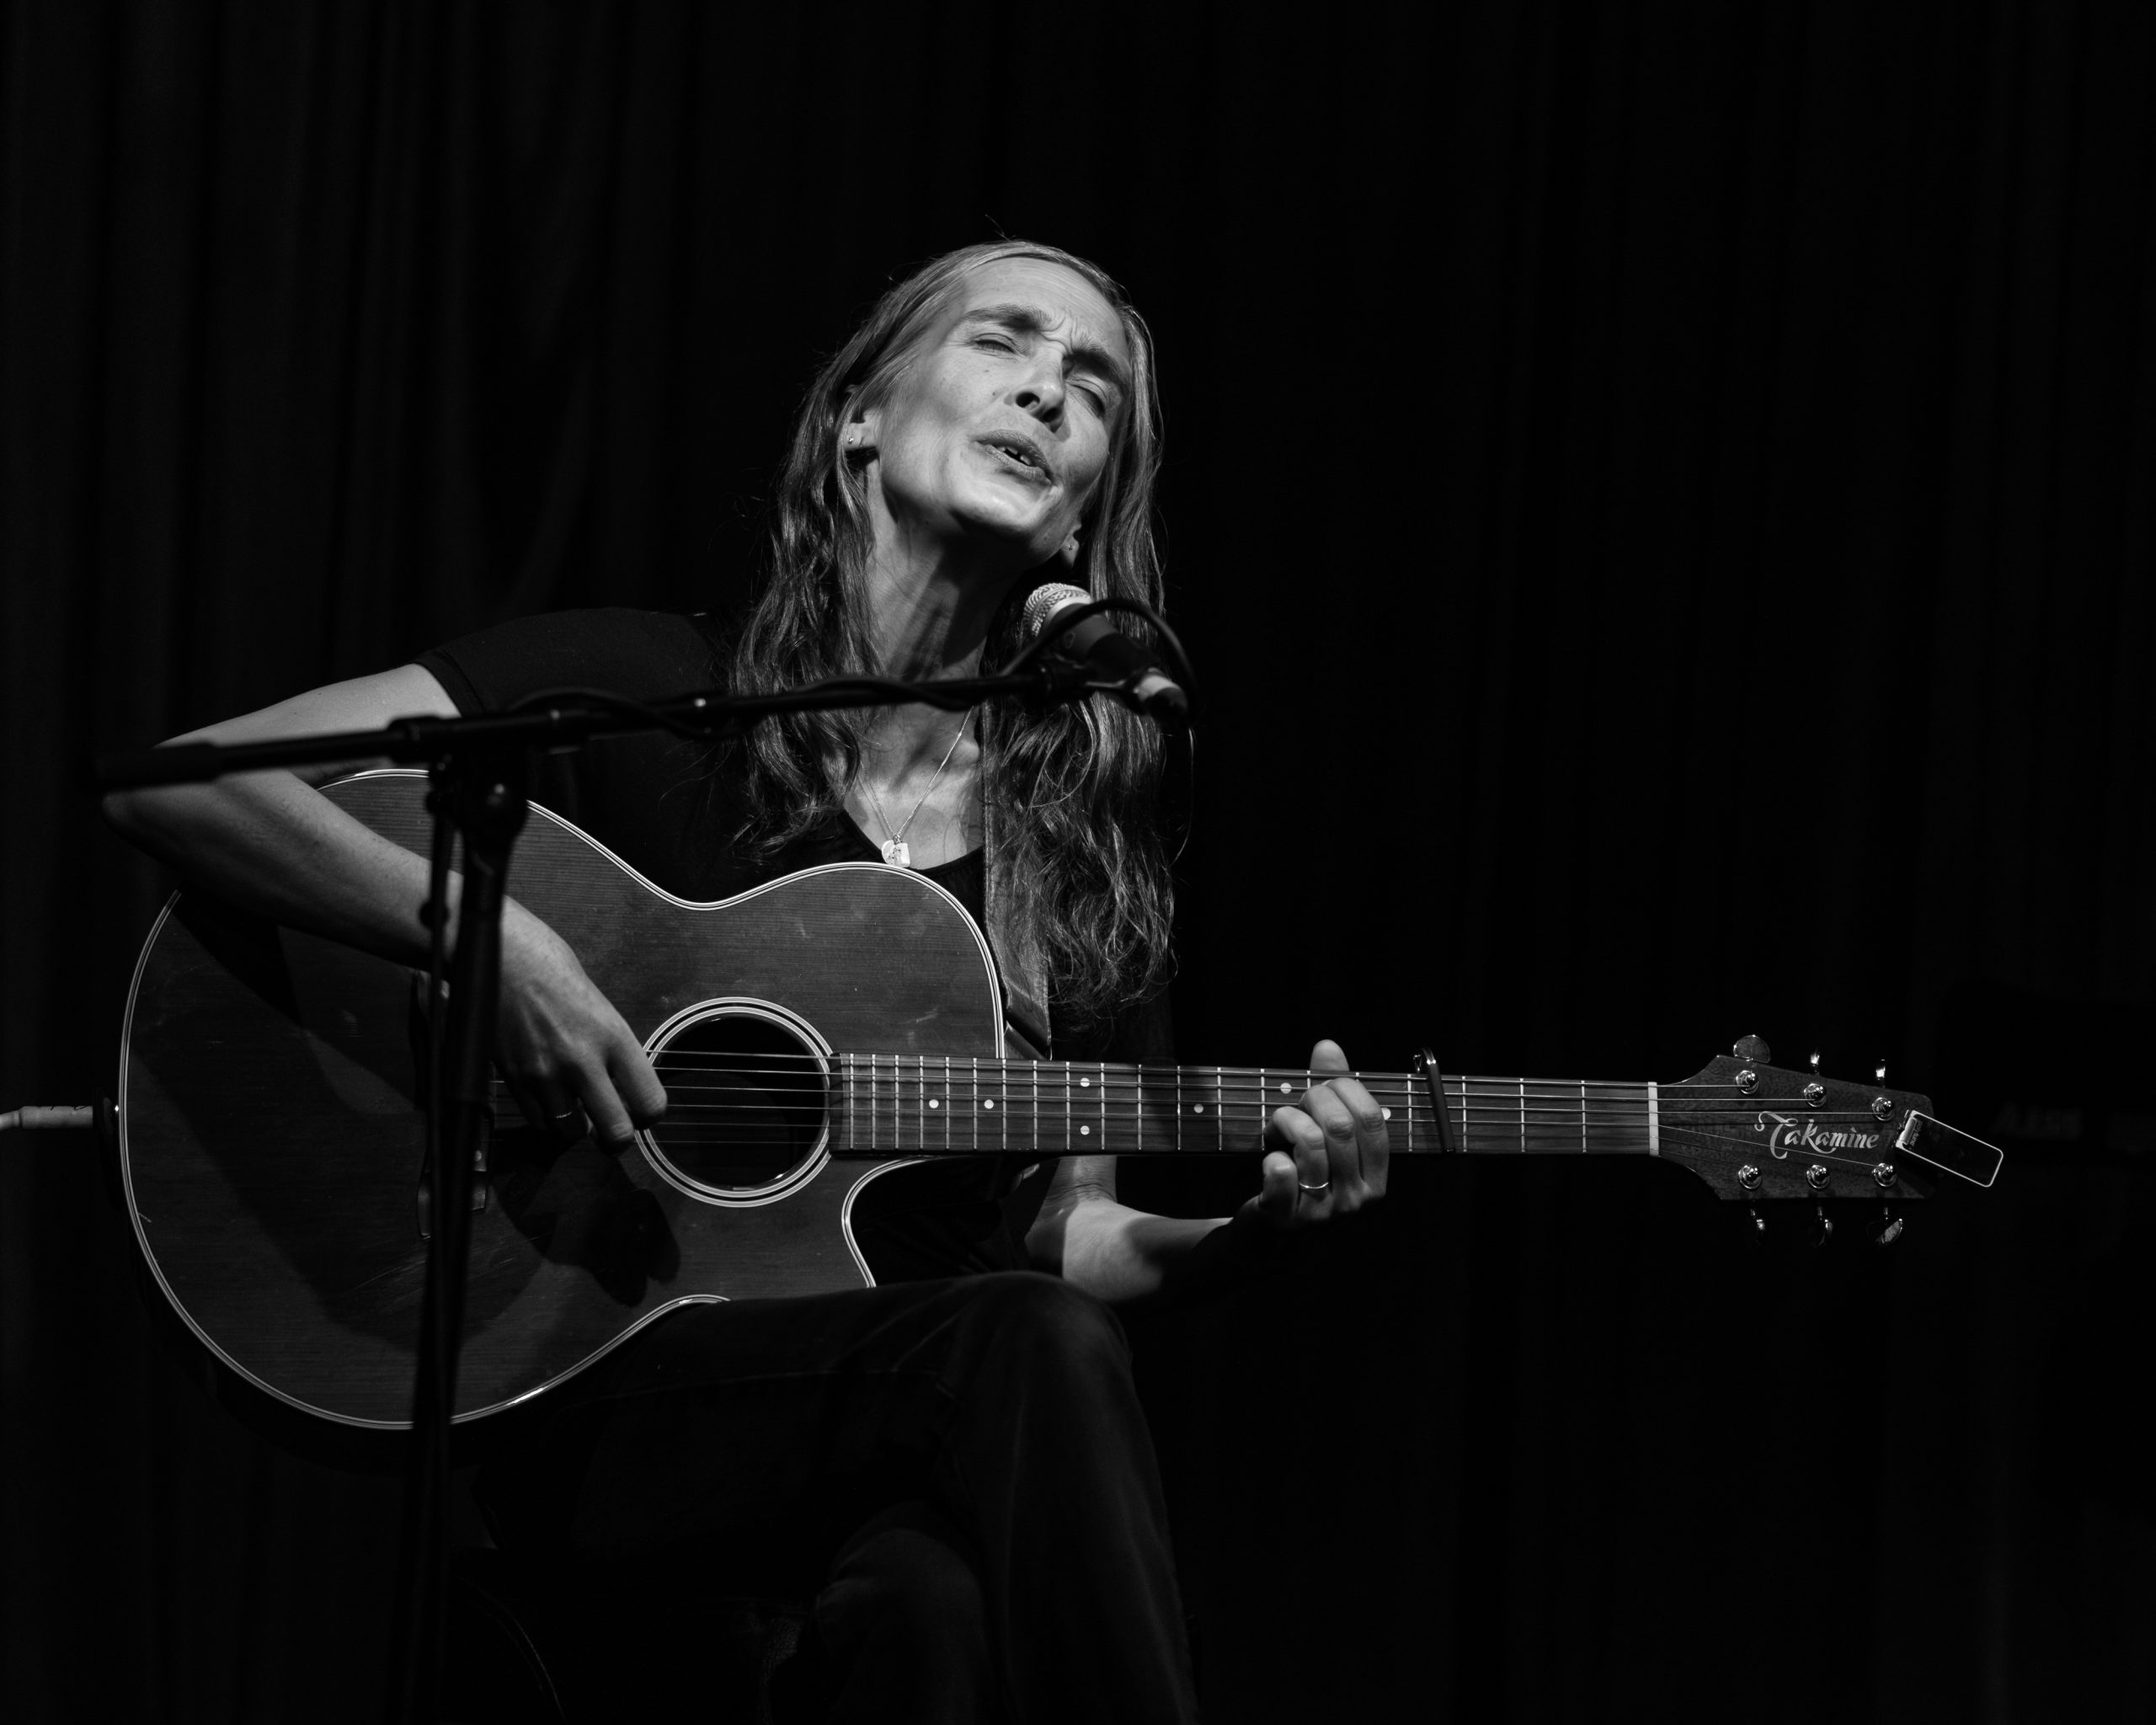
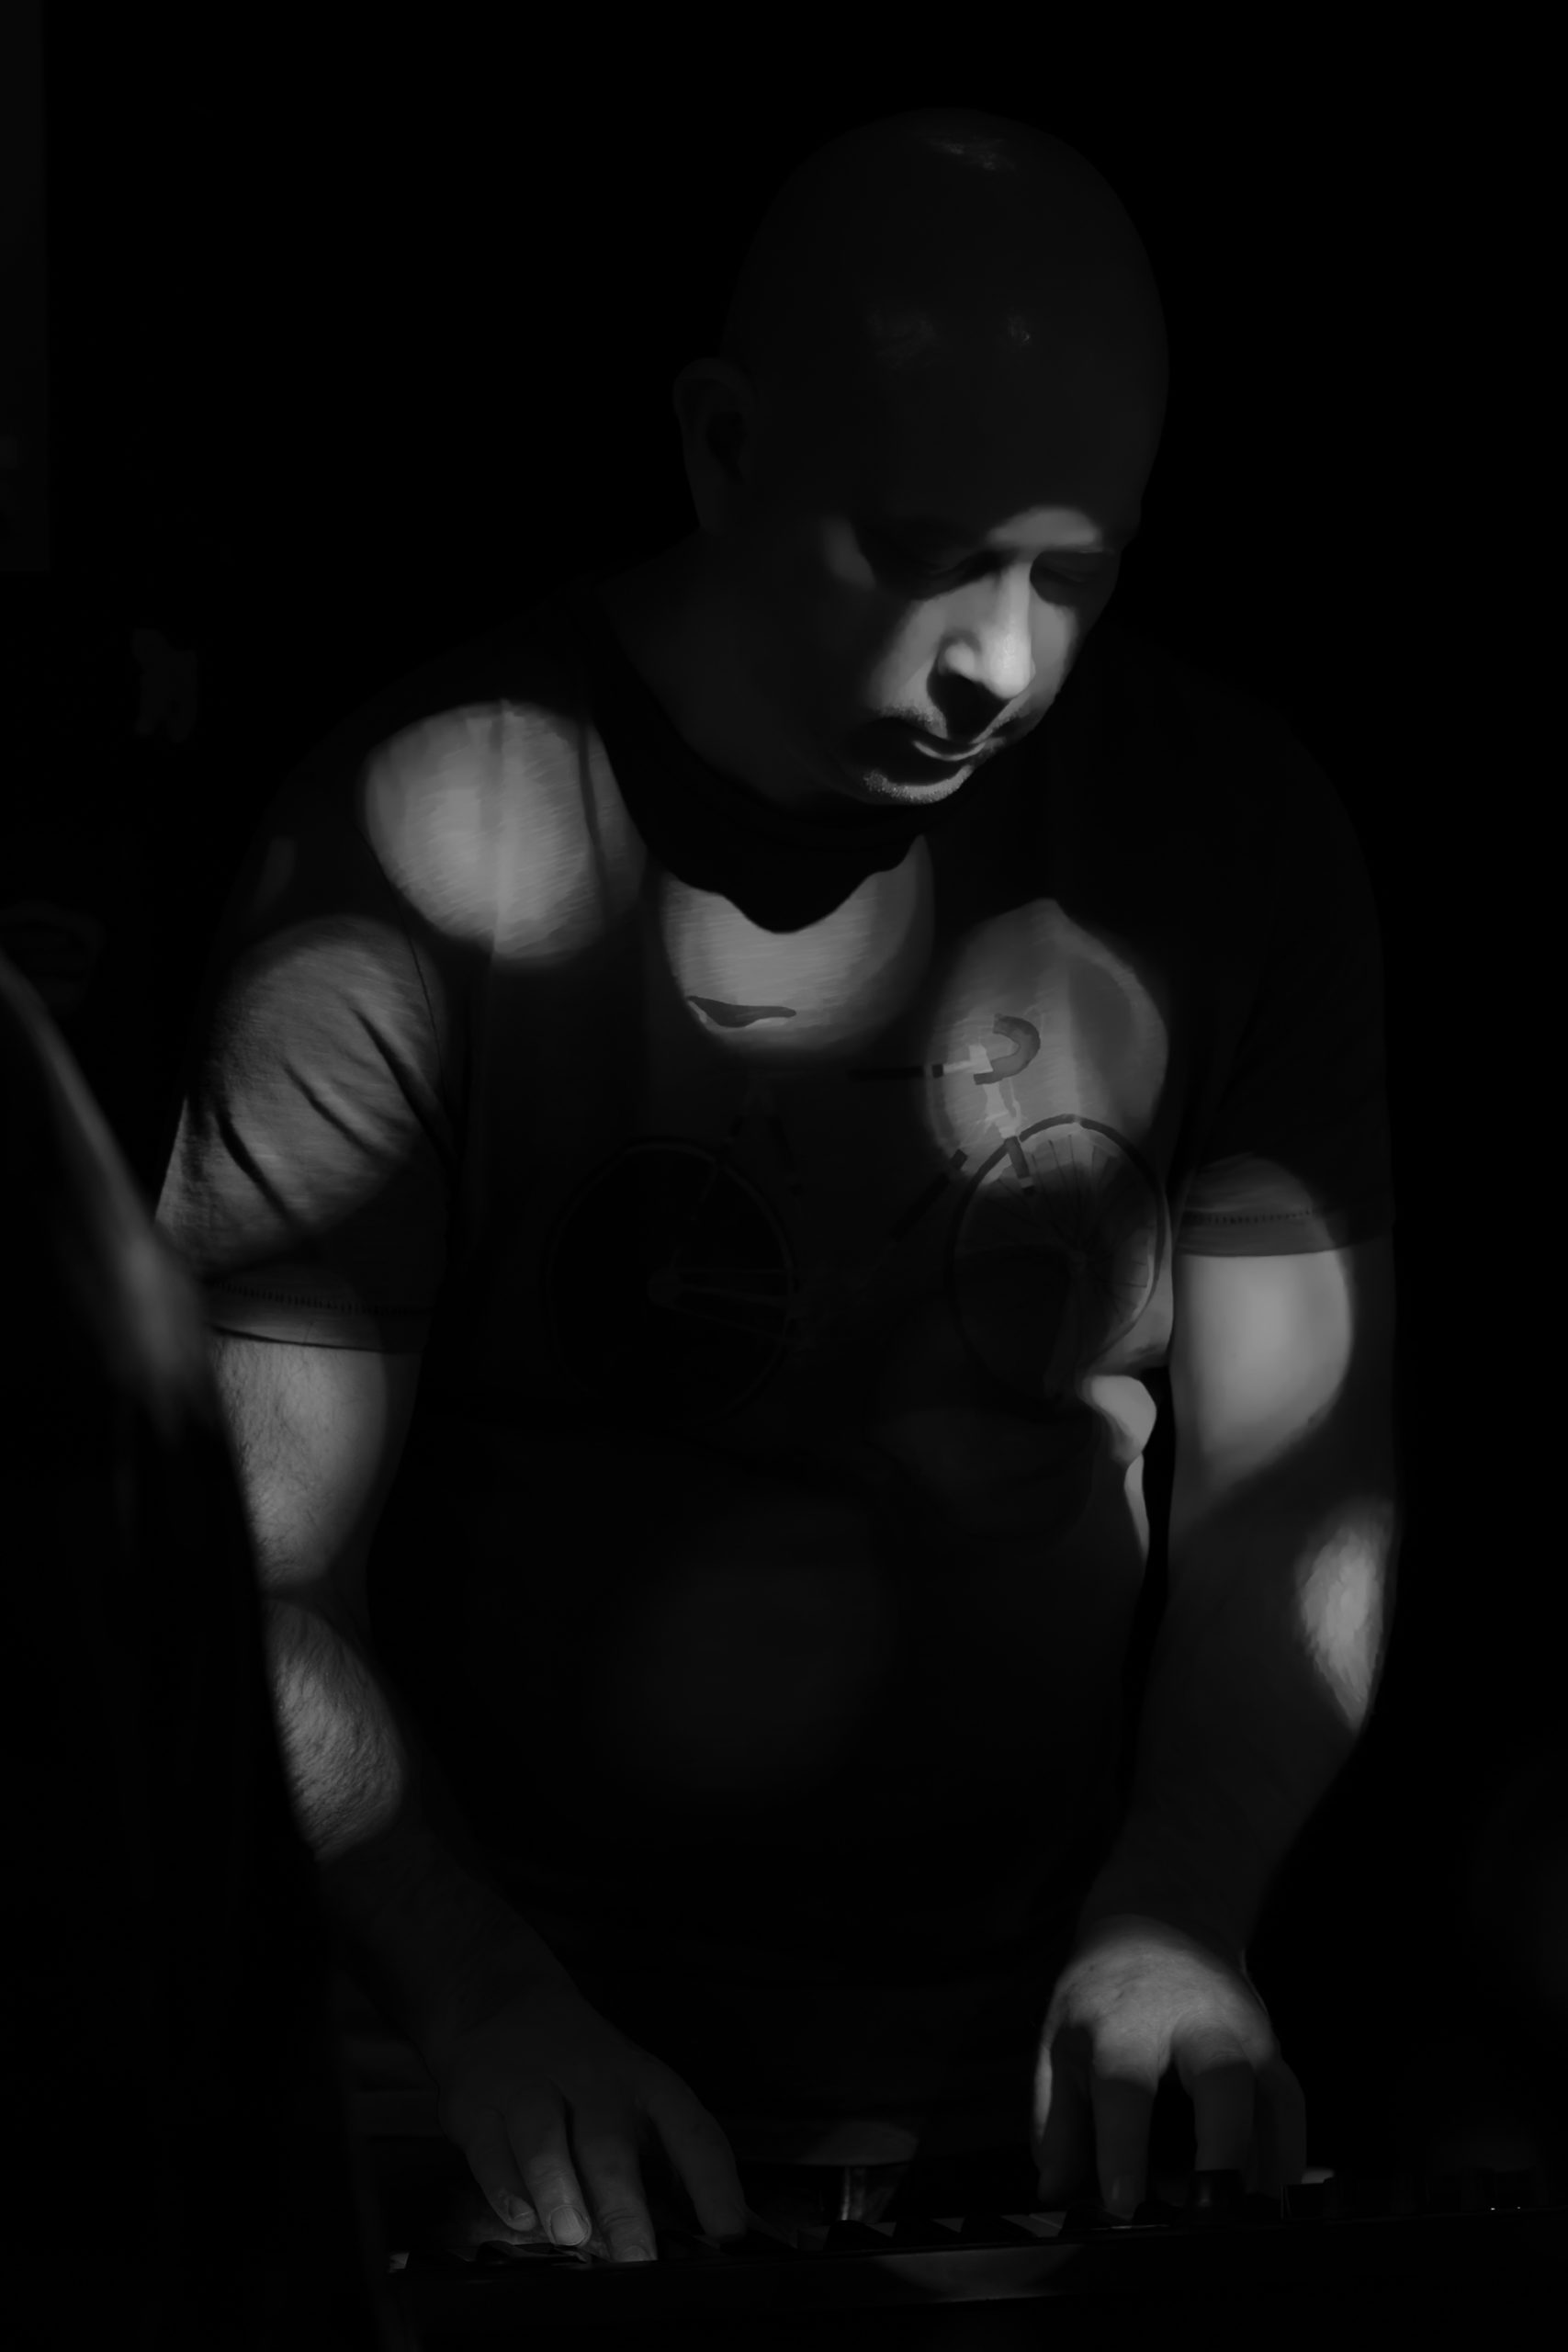
Boilerverse performing at Up The Duffy’s Leicester, 14th December 2025.JJ Lovegrove performing at Up The Duffy’s Leicester, 14th December 2025.JJ Lovegrove performing at Up The Duffy’s Leicester, 14th December 2025.Boilers performing at Up The Duffy’s Leicester, 14th December 2025.Boilers performing at Up The Duffy’s Leicester, 14th December 2025. Yes, the cream cake eating by Barbe is all part of the performance.Velvet Crisis performing at Up The Duffy’s Leicester, 14th December 2025.
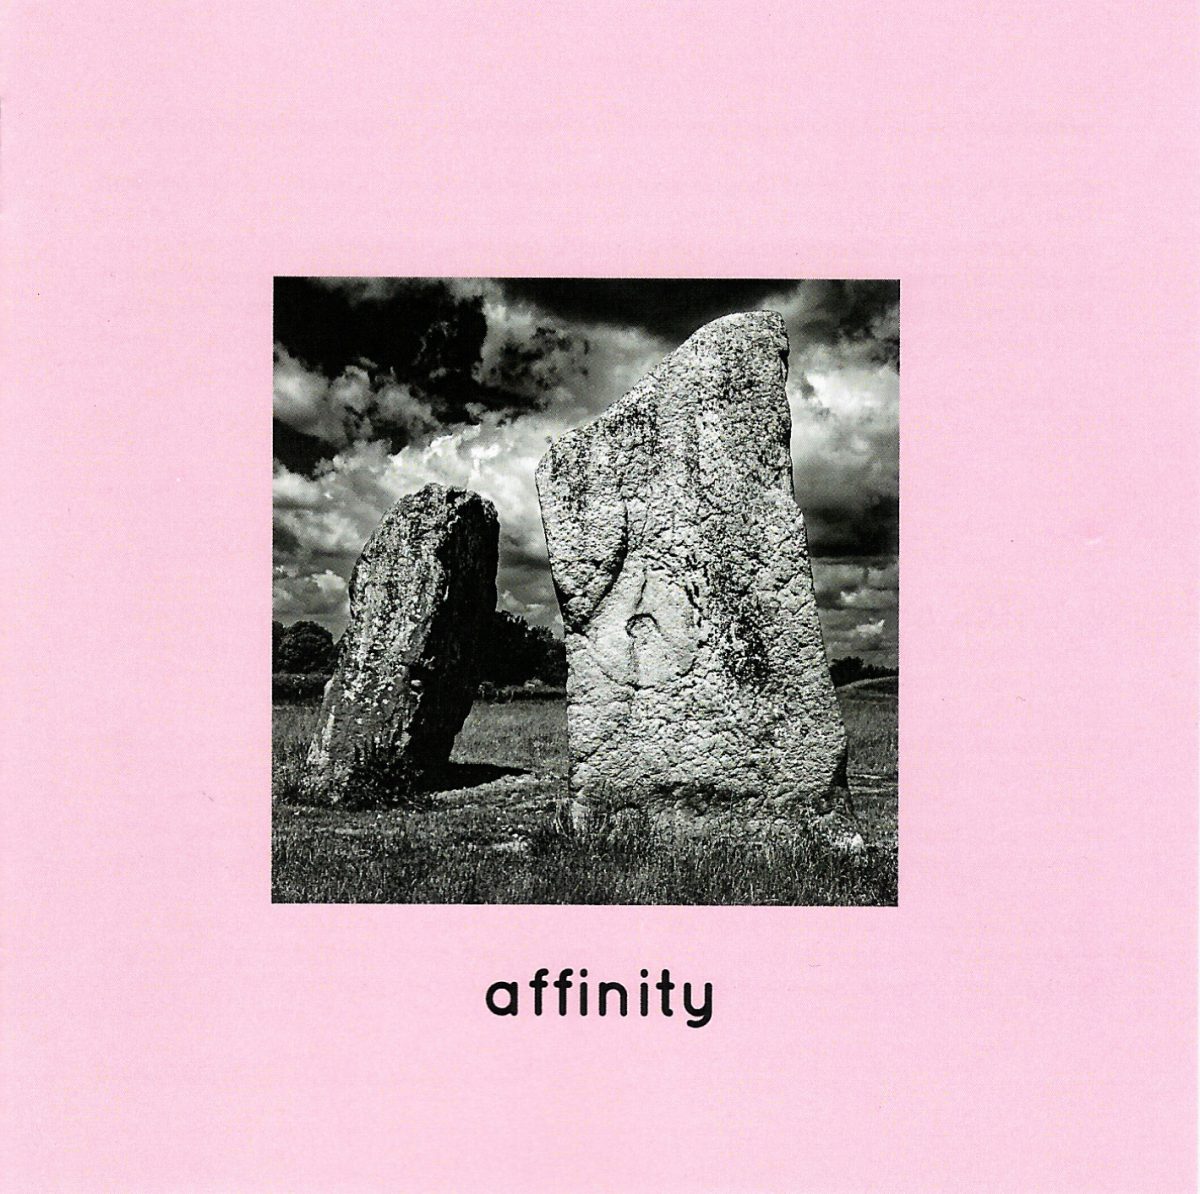
CD cover for album ‘affinity’ from monochrome motif records.
A few months ago I was contacted by Andrew Harstshorn, owner of Monochrome Motif Records. He wondered if I might have a photo suitable for use as a cover image for an upcoming album release.
The title, and concept of the album was ‘affinity’. It was to be a compilation album by artists who are ‘friends of the label’, and Andrew had requested the artists submit a track based around the theme of ‘affinity’.
I spent quite a bit of time thinking about the concept of affinity: ‘a natural liking for and understanding of someone or something’, and started to hunt through my photo archive. Might I already have something in my catalogue which would fit the bill? Would I need to take some new photos based on the concept?
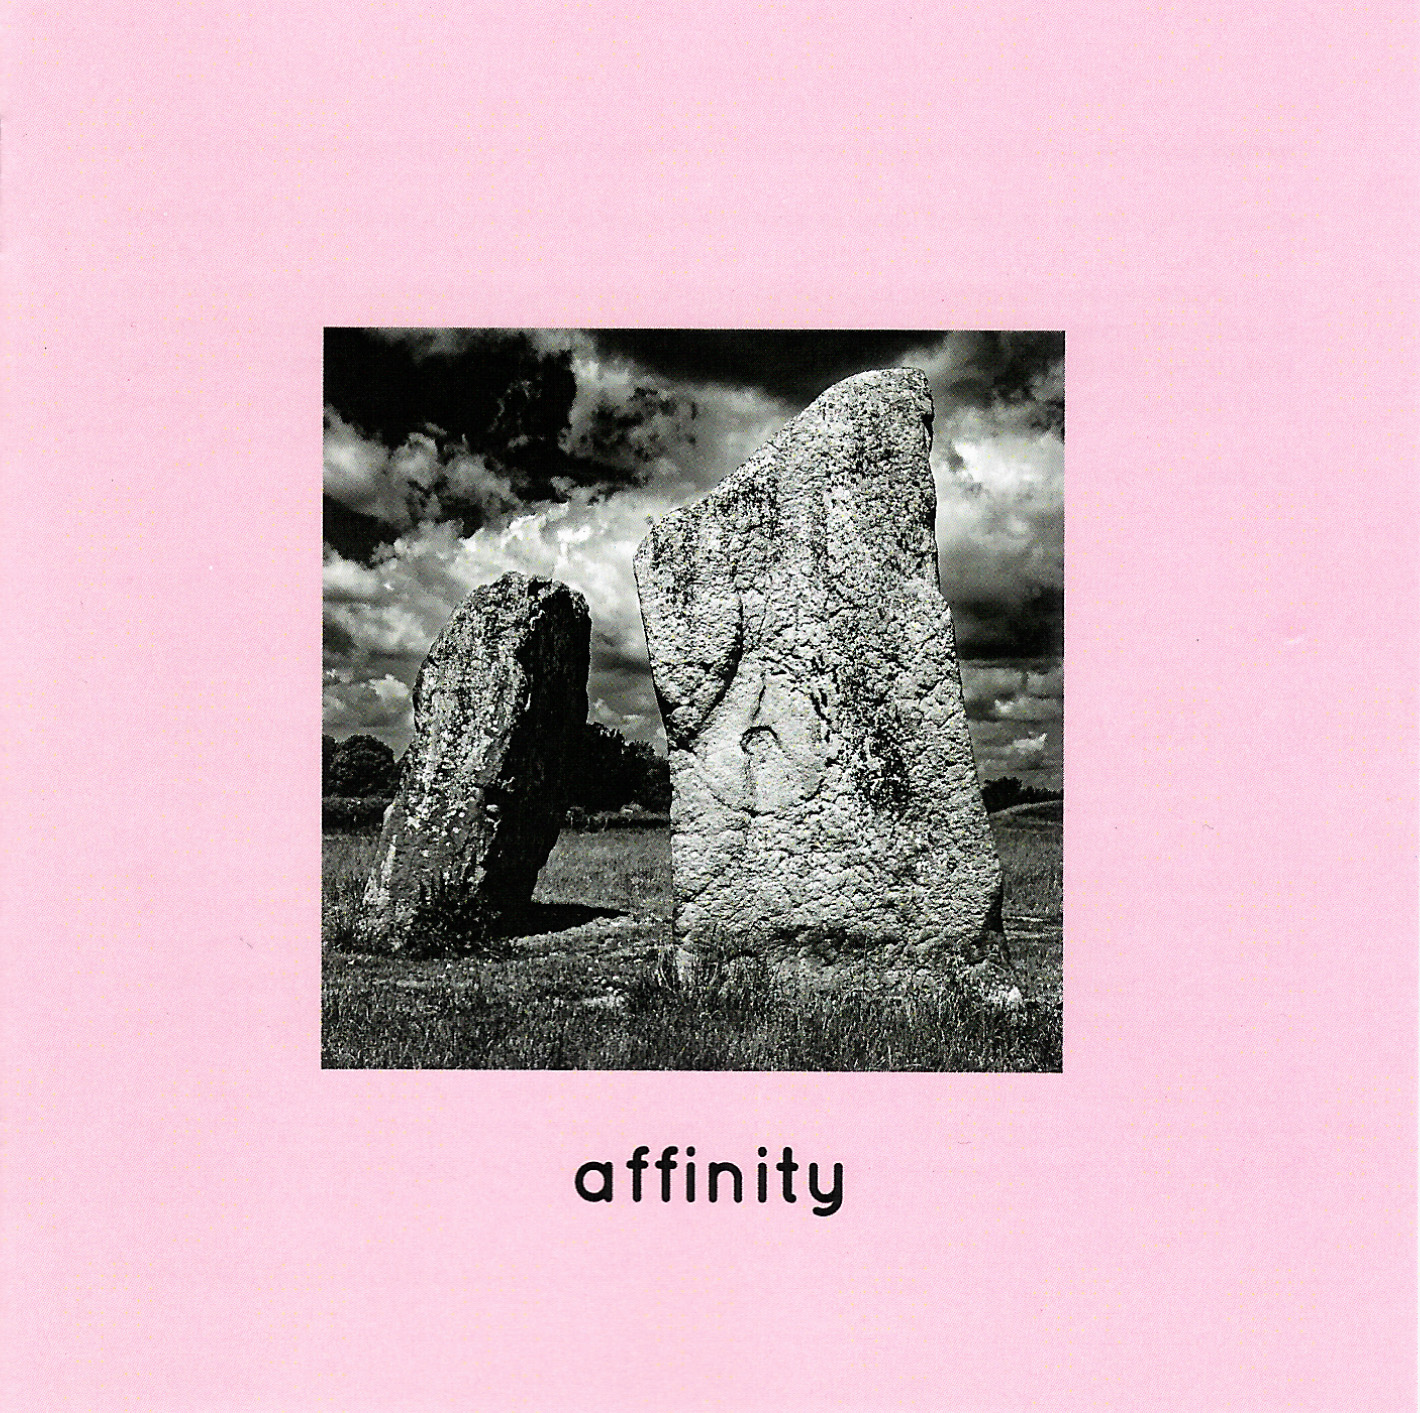
What did ‘affinity’ mean to me? Andrew had set me the same task as he had set the musicians who would be contributing to the album. And my task had the additional requirement of needing to be in black and white (to fit the label’s brand identity: monochrome motif), and I was thinking it had better be something that worked as a square crop to fit nicely on a CD inlay. I was familiar with monochrome motif’s styling from previous album purchases: lowercase text, black and white cover art placed in the centre with a broad coloured border.
My instant response was to look for any photos I had of bees gathering nectar from flowers, ducks on water, frogs on lily pads… that kind of thing.
But at the same time, I knew those things were a little too obvious and clichéd.
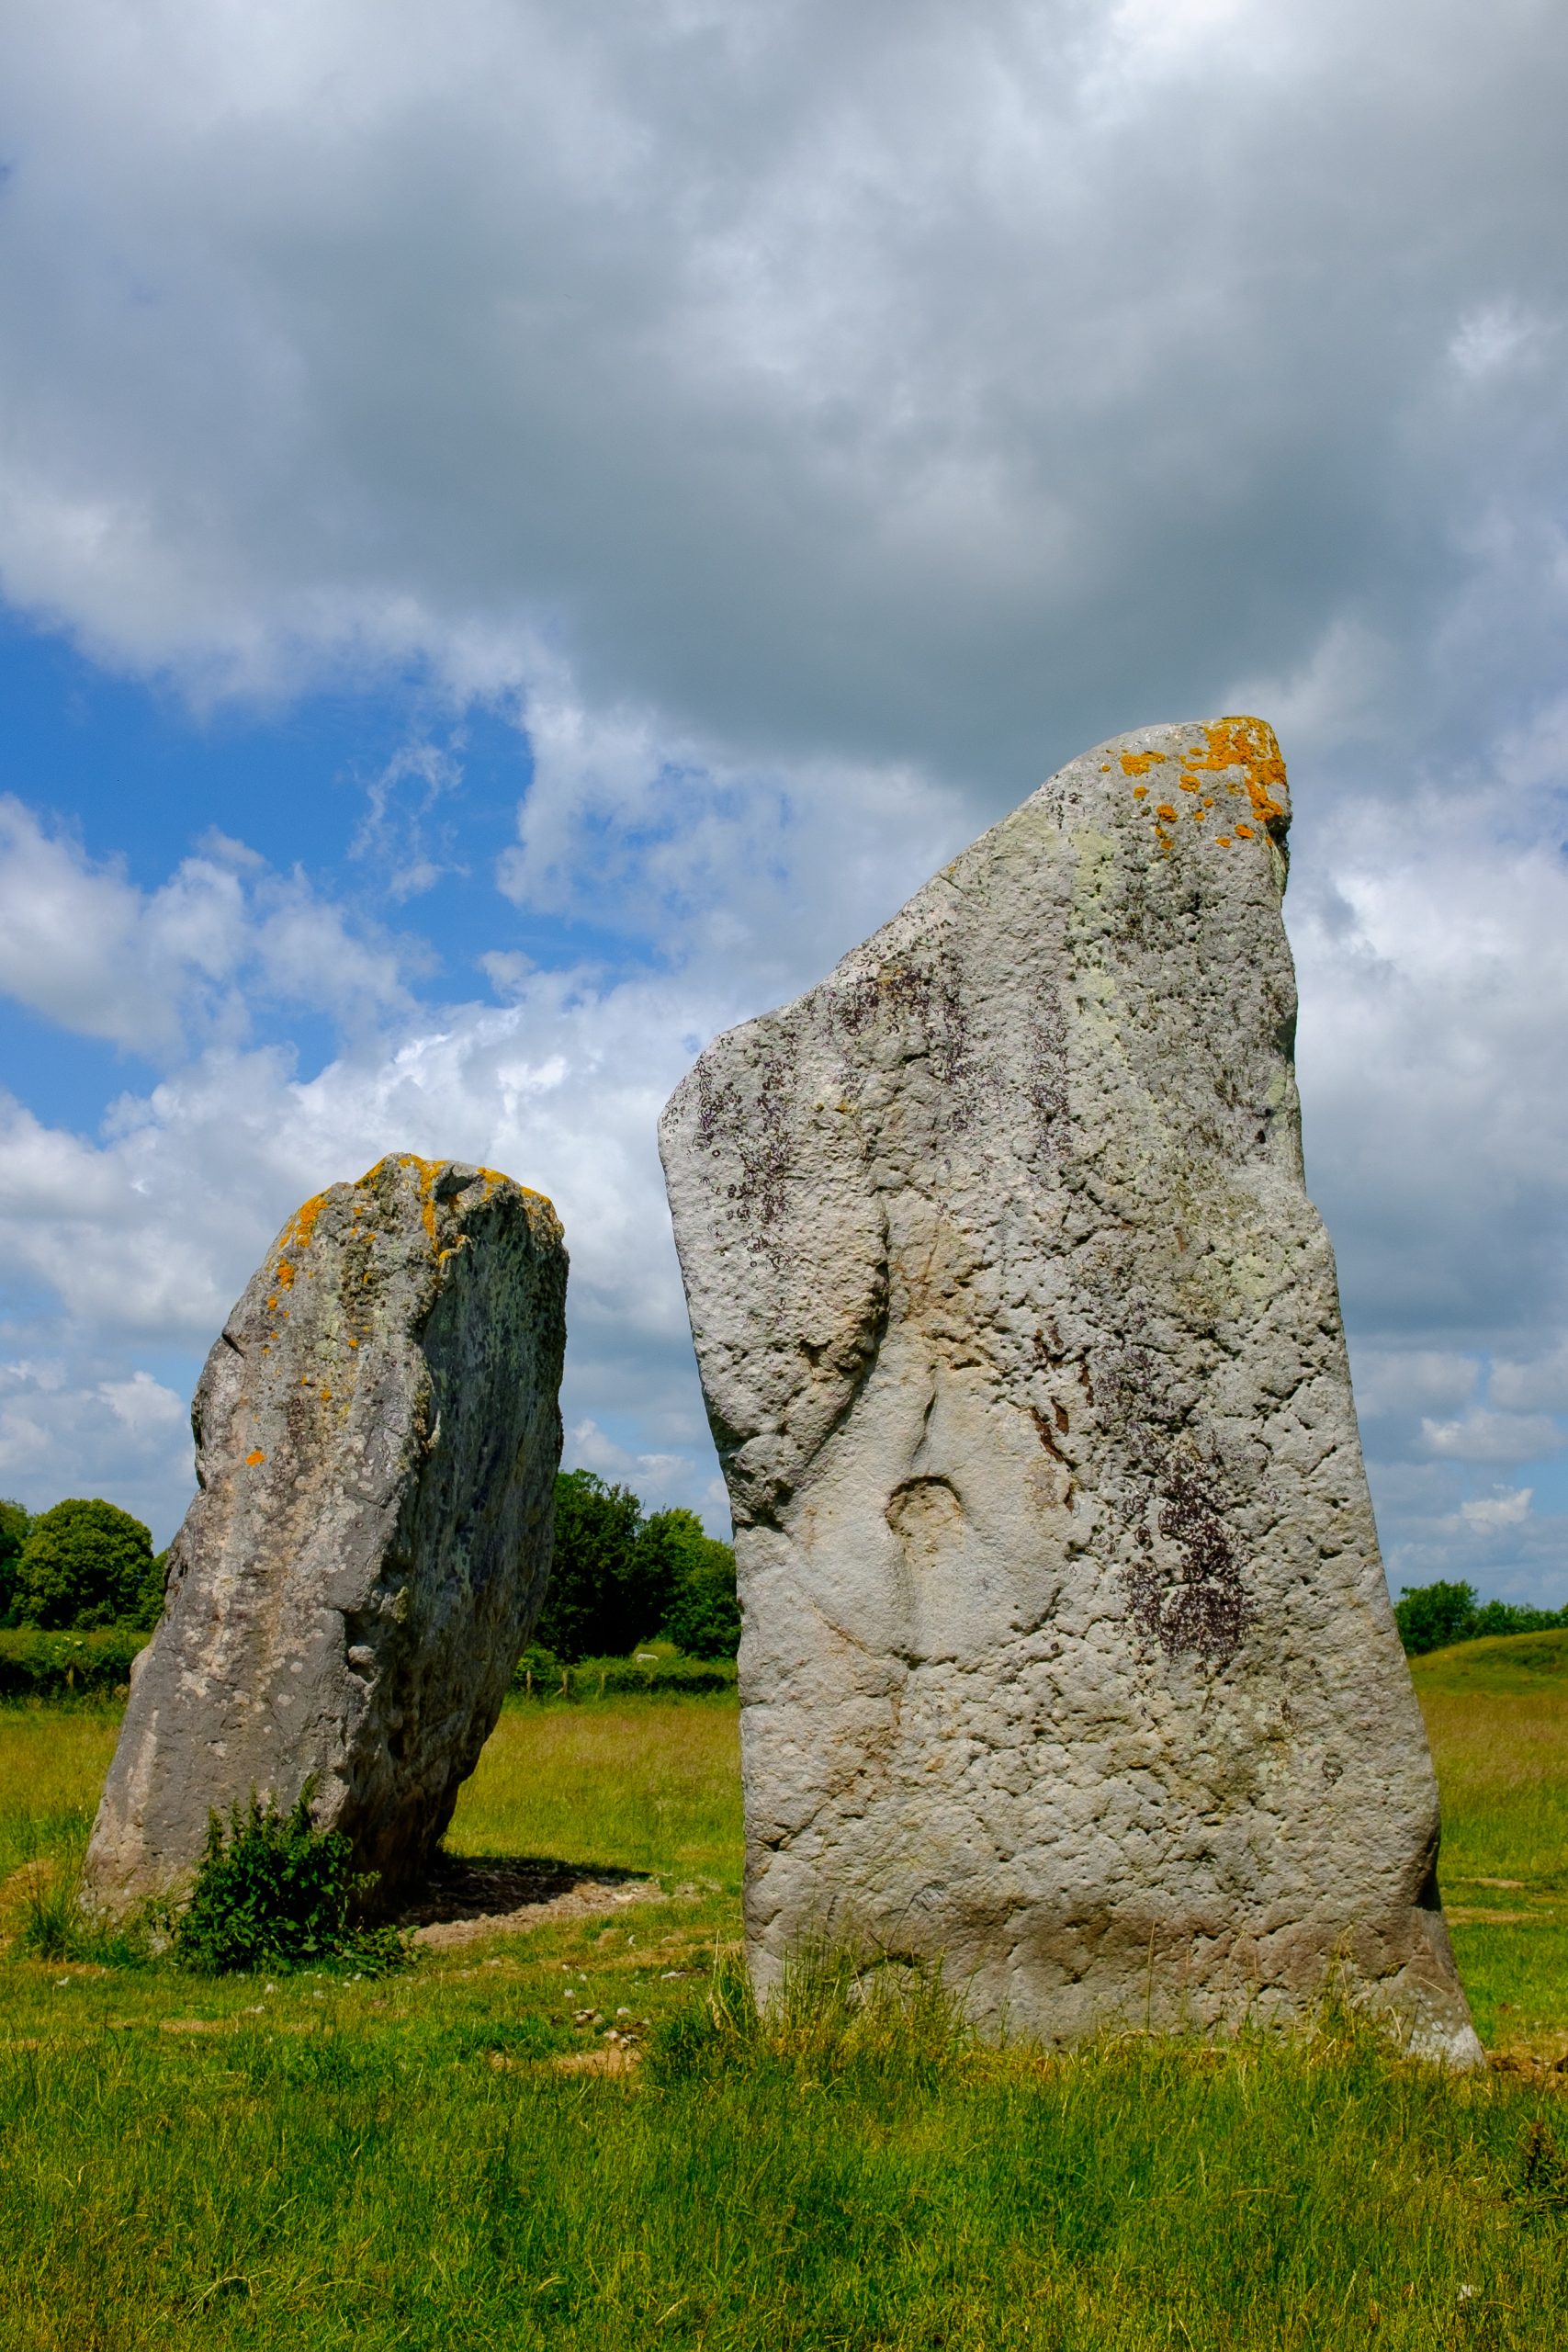
I started finding various photos of megaliths at stone circles, and I was particularly looking for ones where the stones appeared to be reaching up to the sky, or had an interesting relationship with the sun or moon. I remembered the stones along the Kennet Avenue at Avebury, alternating between pillar and lozenge shapes and I thought that somewhere in my collection I had a photo illustrating this. I eventually found one, but I wasn’t really satisfied.
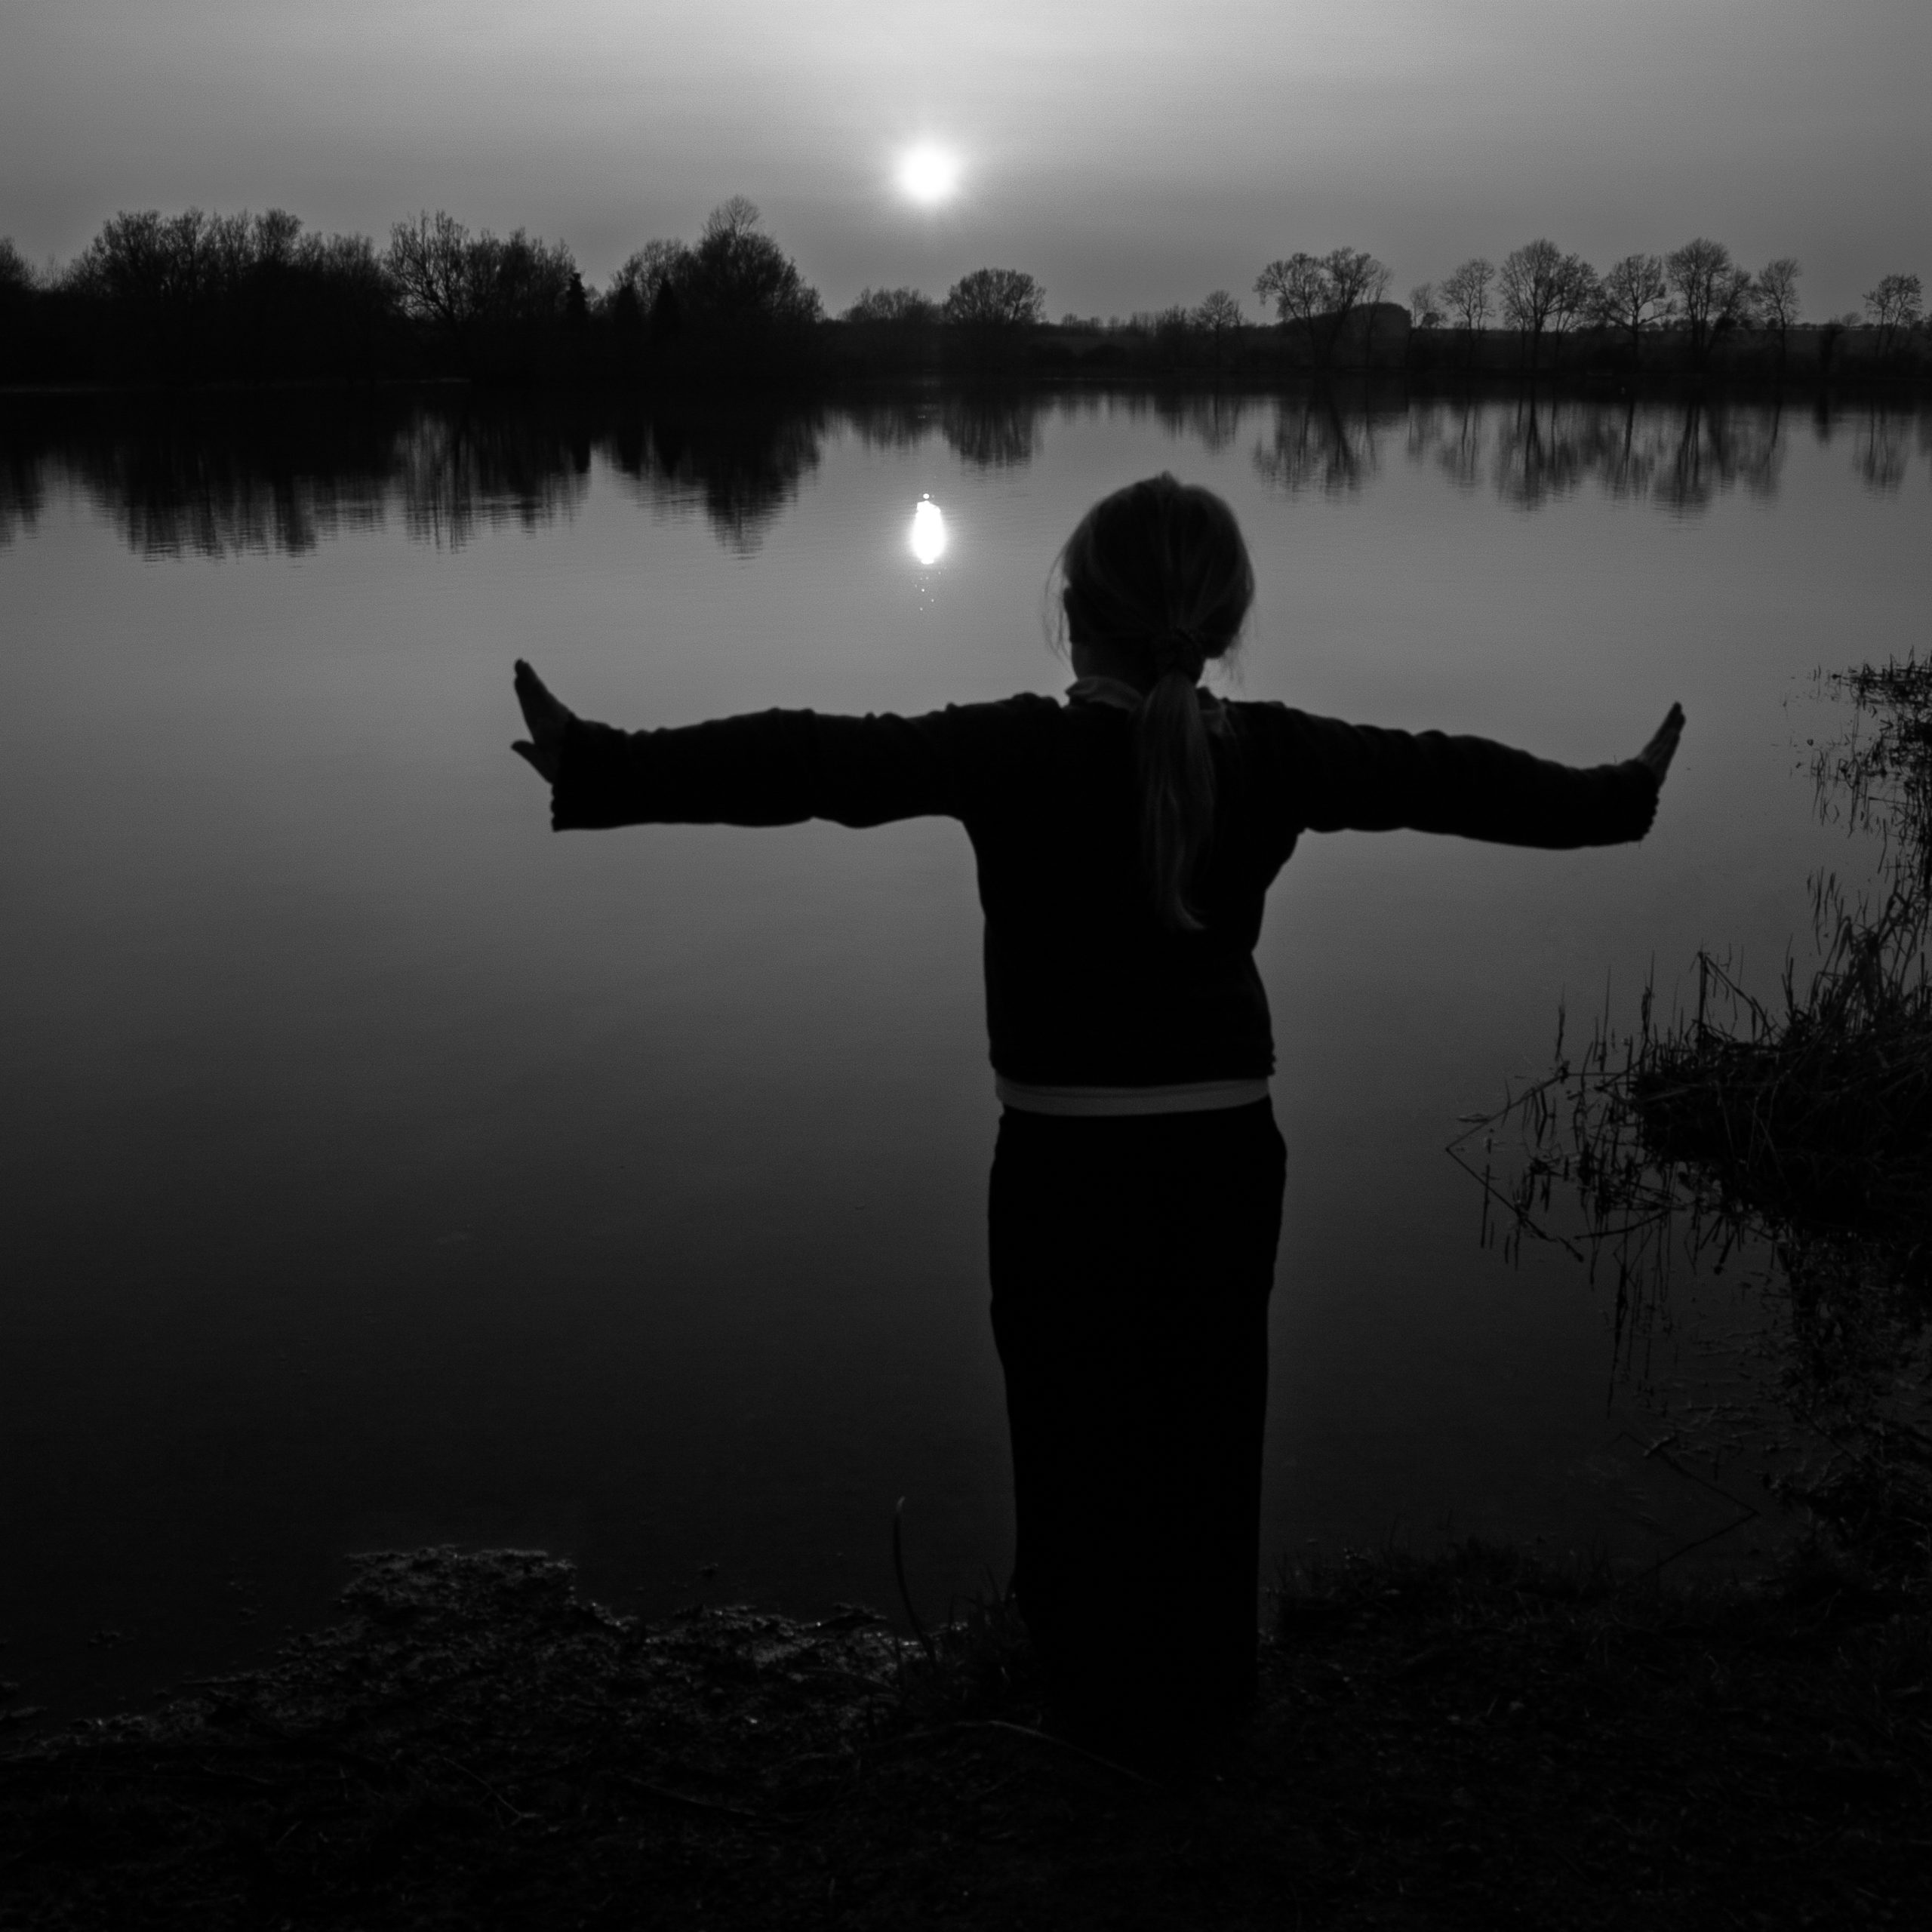
I found an old photo of my daughter, taken at sunset on the shore of a local reservoir, arms stretched out wide as she faced the sinking sun. It’s a nice enough photo; it kind of worked ‘ok’ in black and white and was showing a child’s affinity to the natural environment, so I added it to an increasing collection of possible photos to let Andrew take a look at.
The photo of my daughter I considered as a contender. However, it works better in colour.
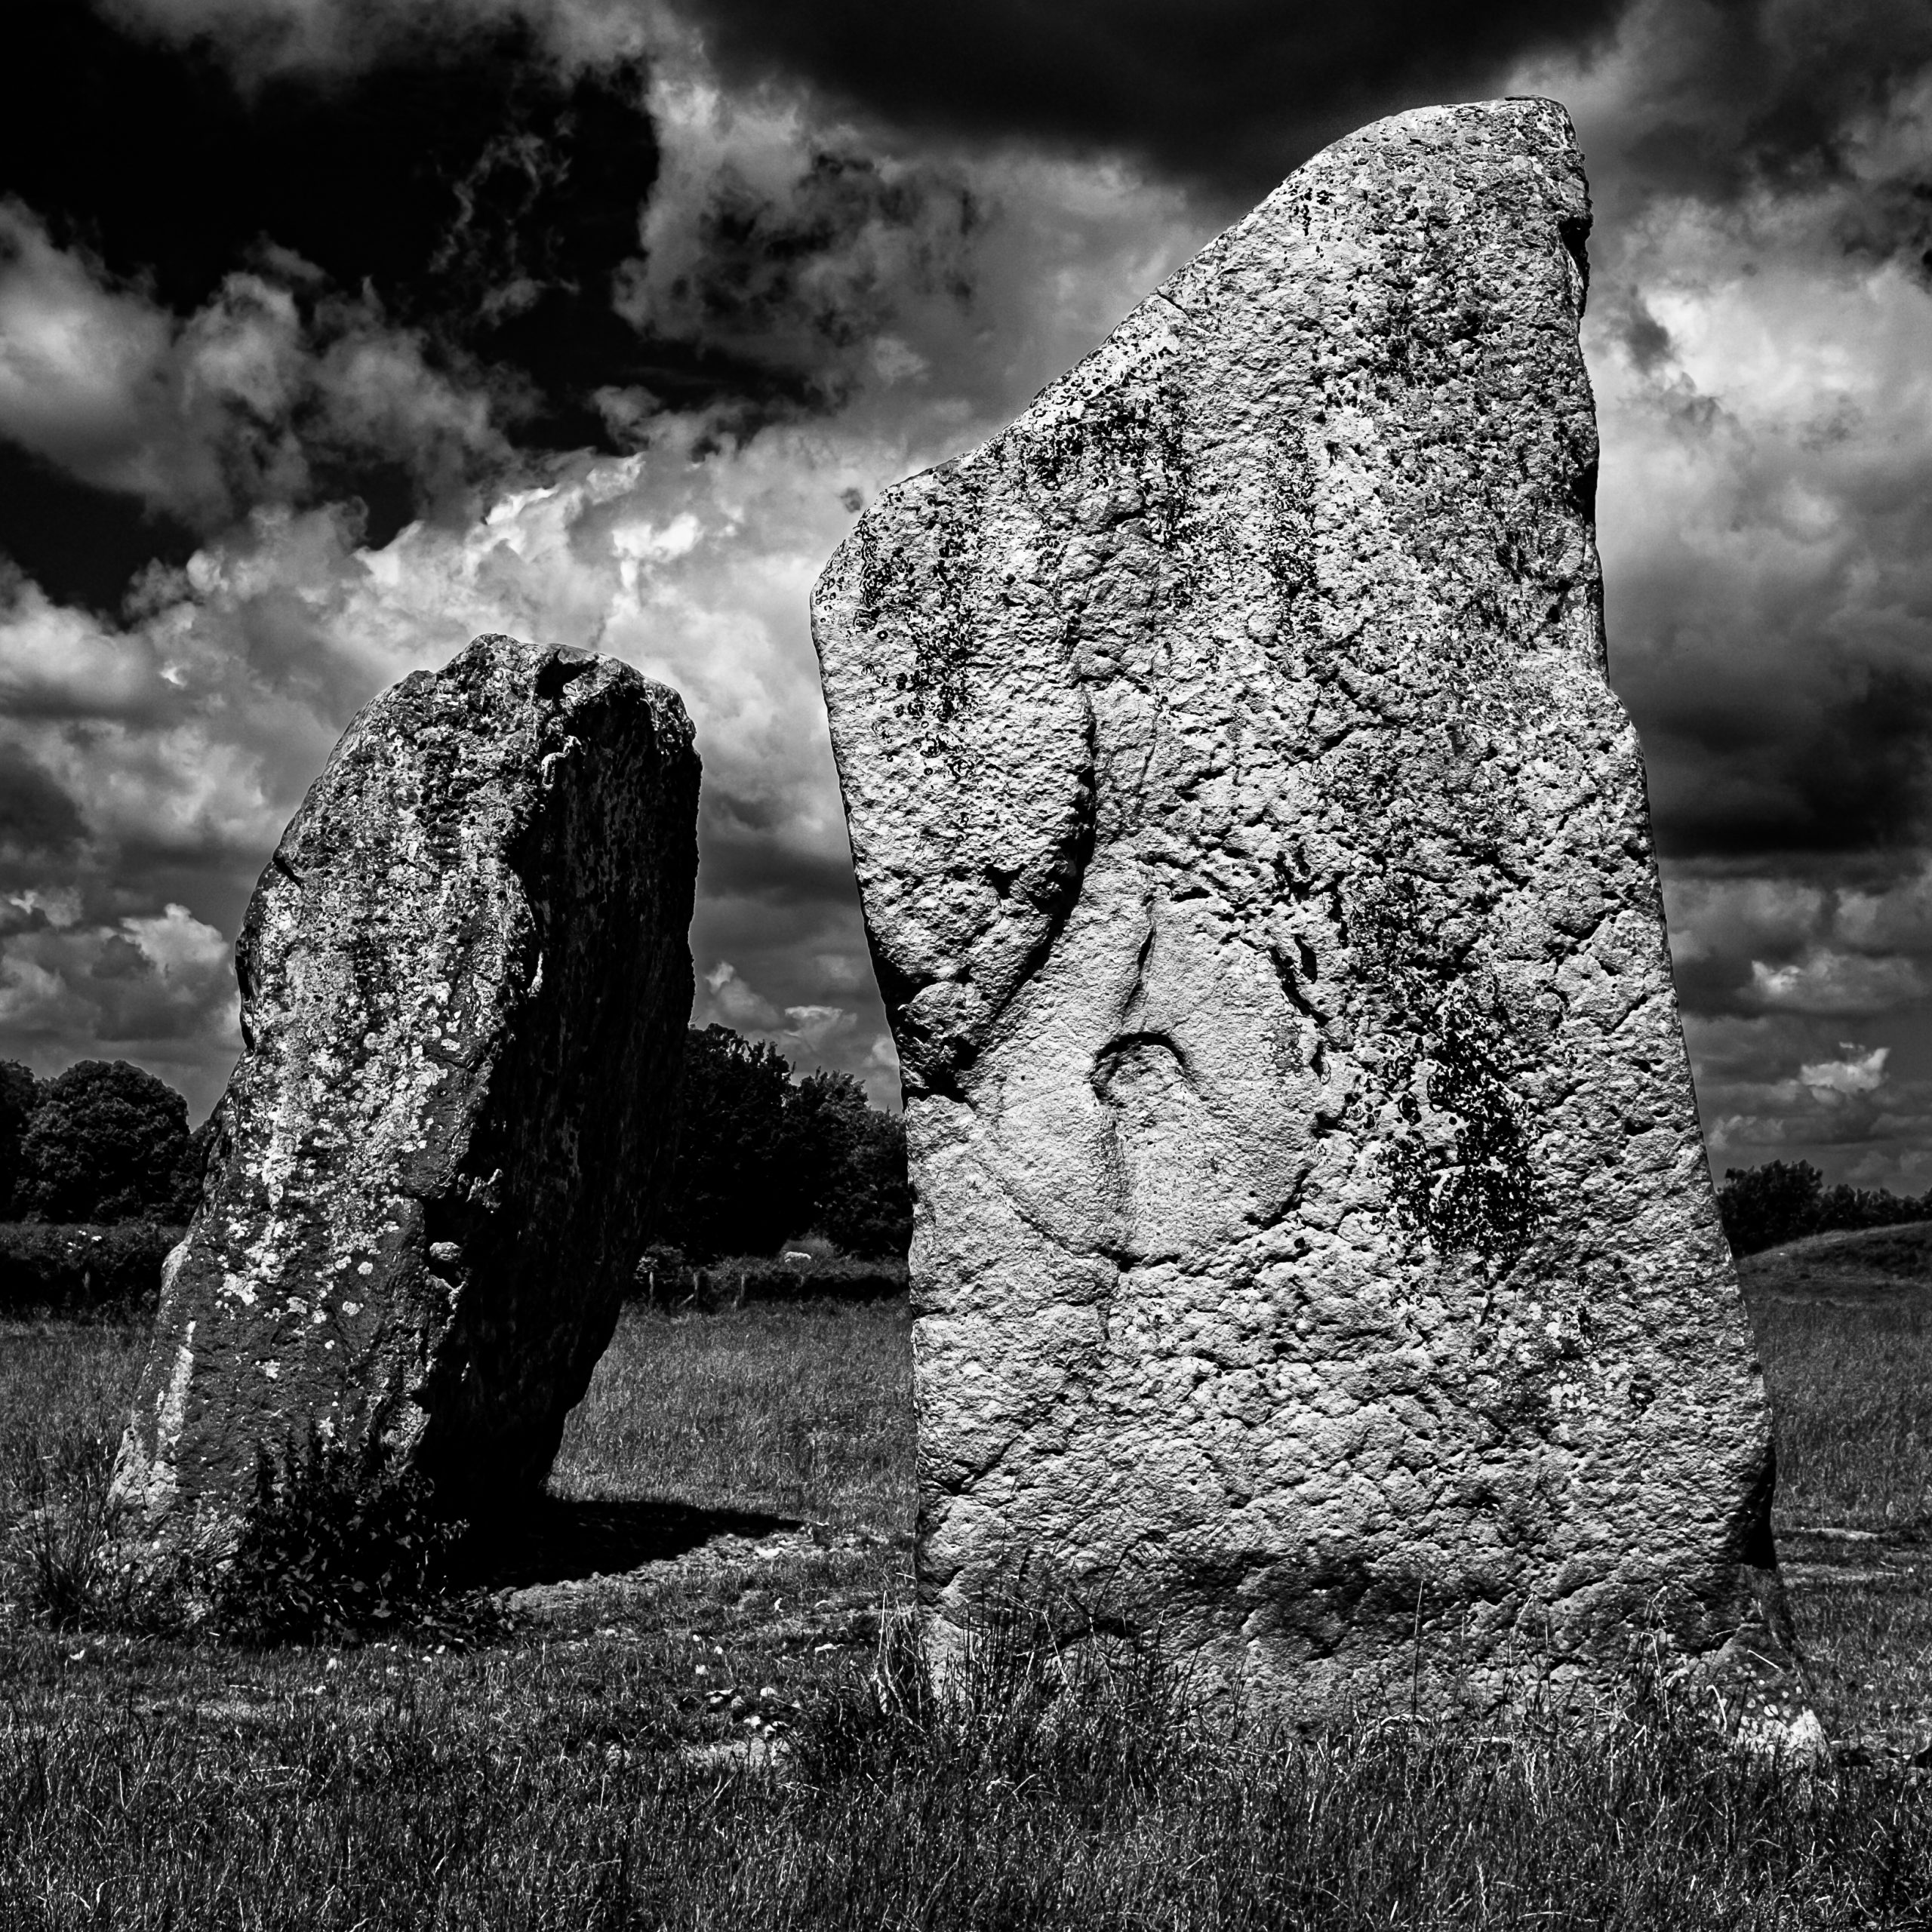
Very early on in my search, I found a photo I took in June 2015 of the cove stones at Avebury. I considered it for the theme of ‘affinity’, as from the angle I shot this from, the pair of massive stones appear to be leaning in towards each other.
I produced a square crop and did some work on a dramatic high contrast black and white conversion. I quite like the result, and it became my favourite of eight potential photos which I shared with Andrew. A little while later I heard that he liked the photo and planned to use it for the album cover (as shown at the head of this post).
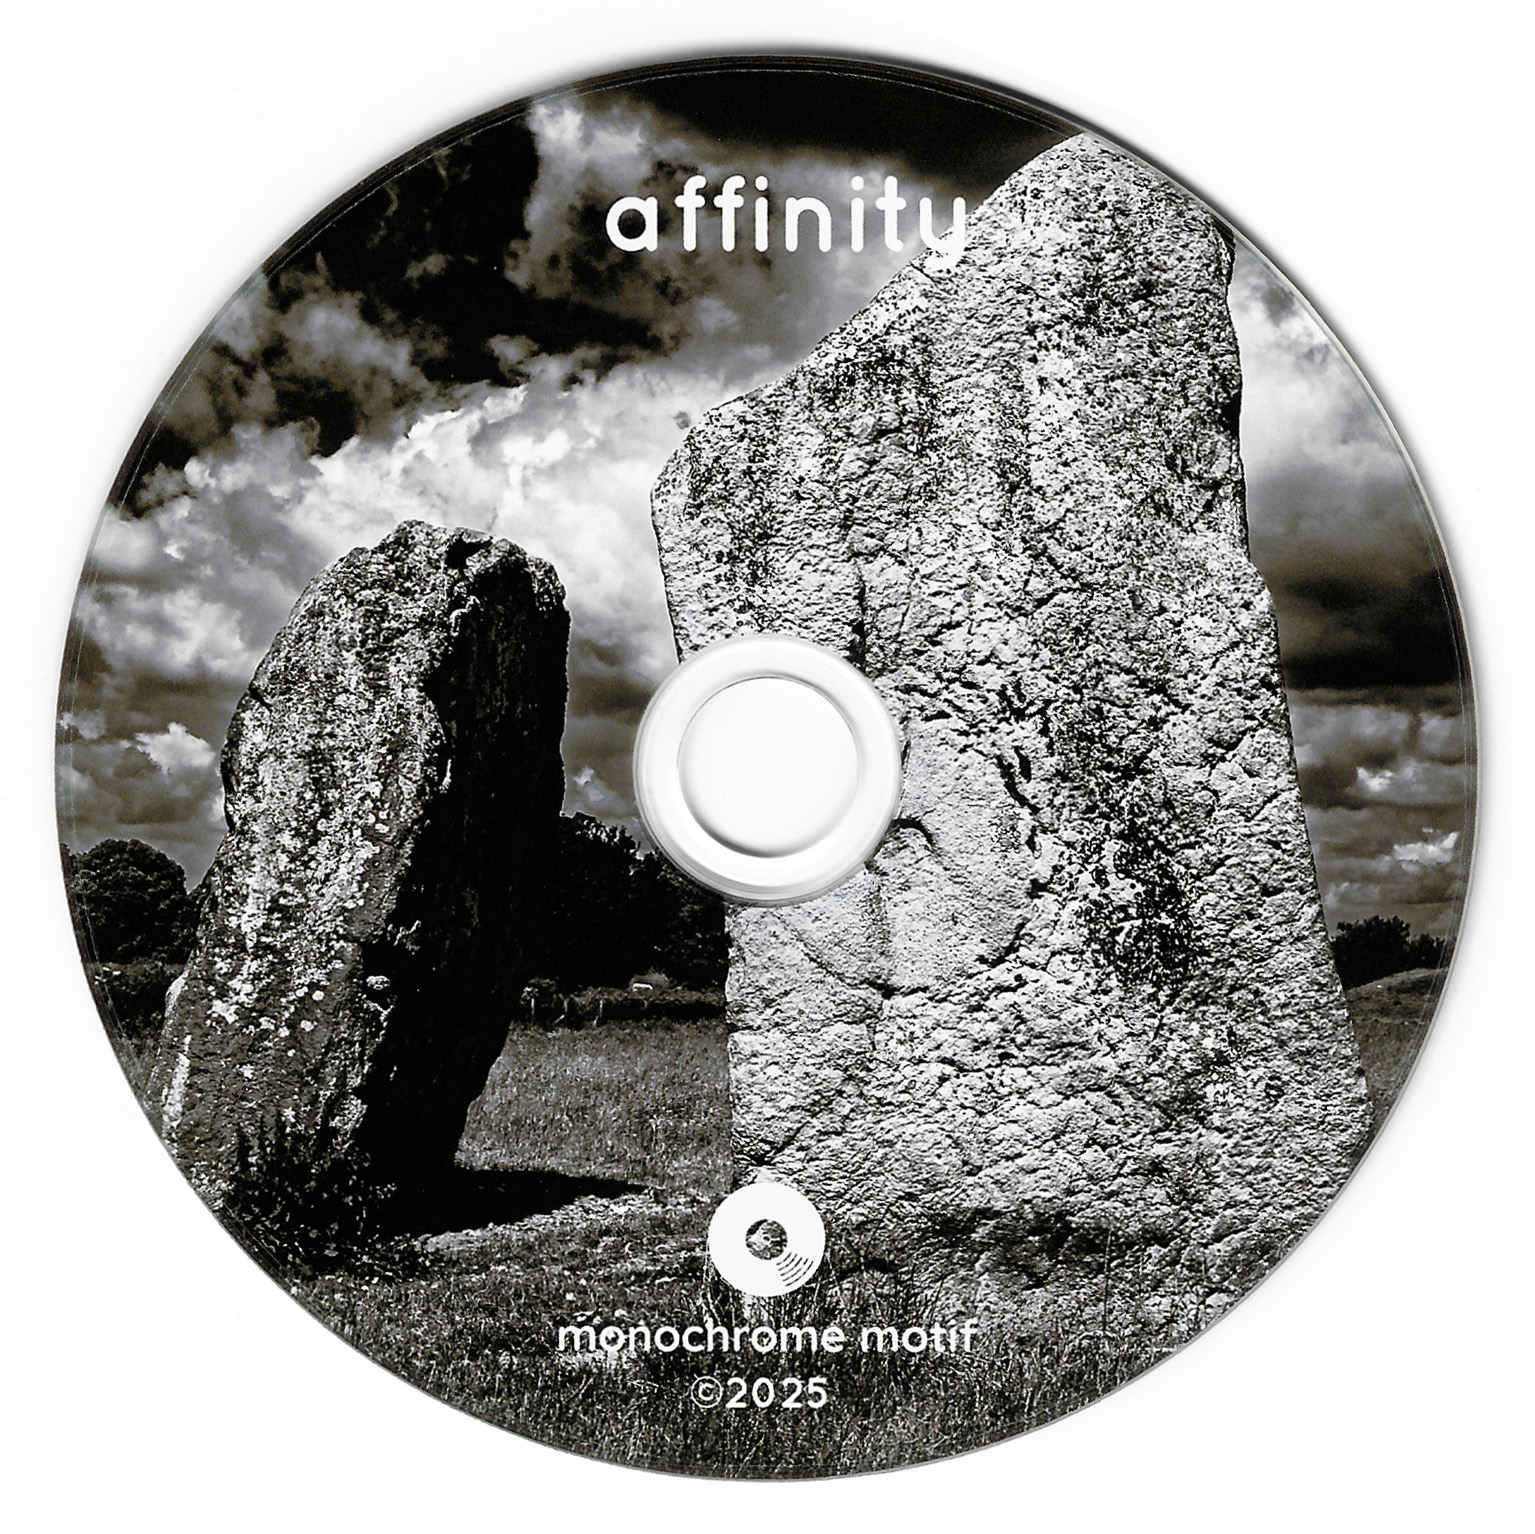
The photo was also printed as the disc label and I think it looks great there too.
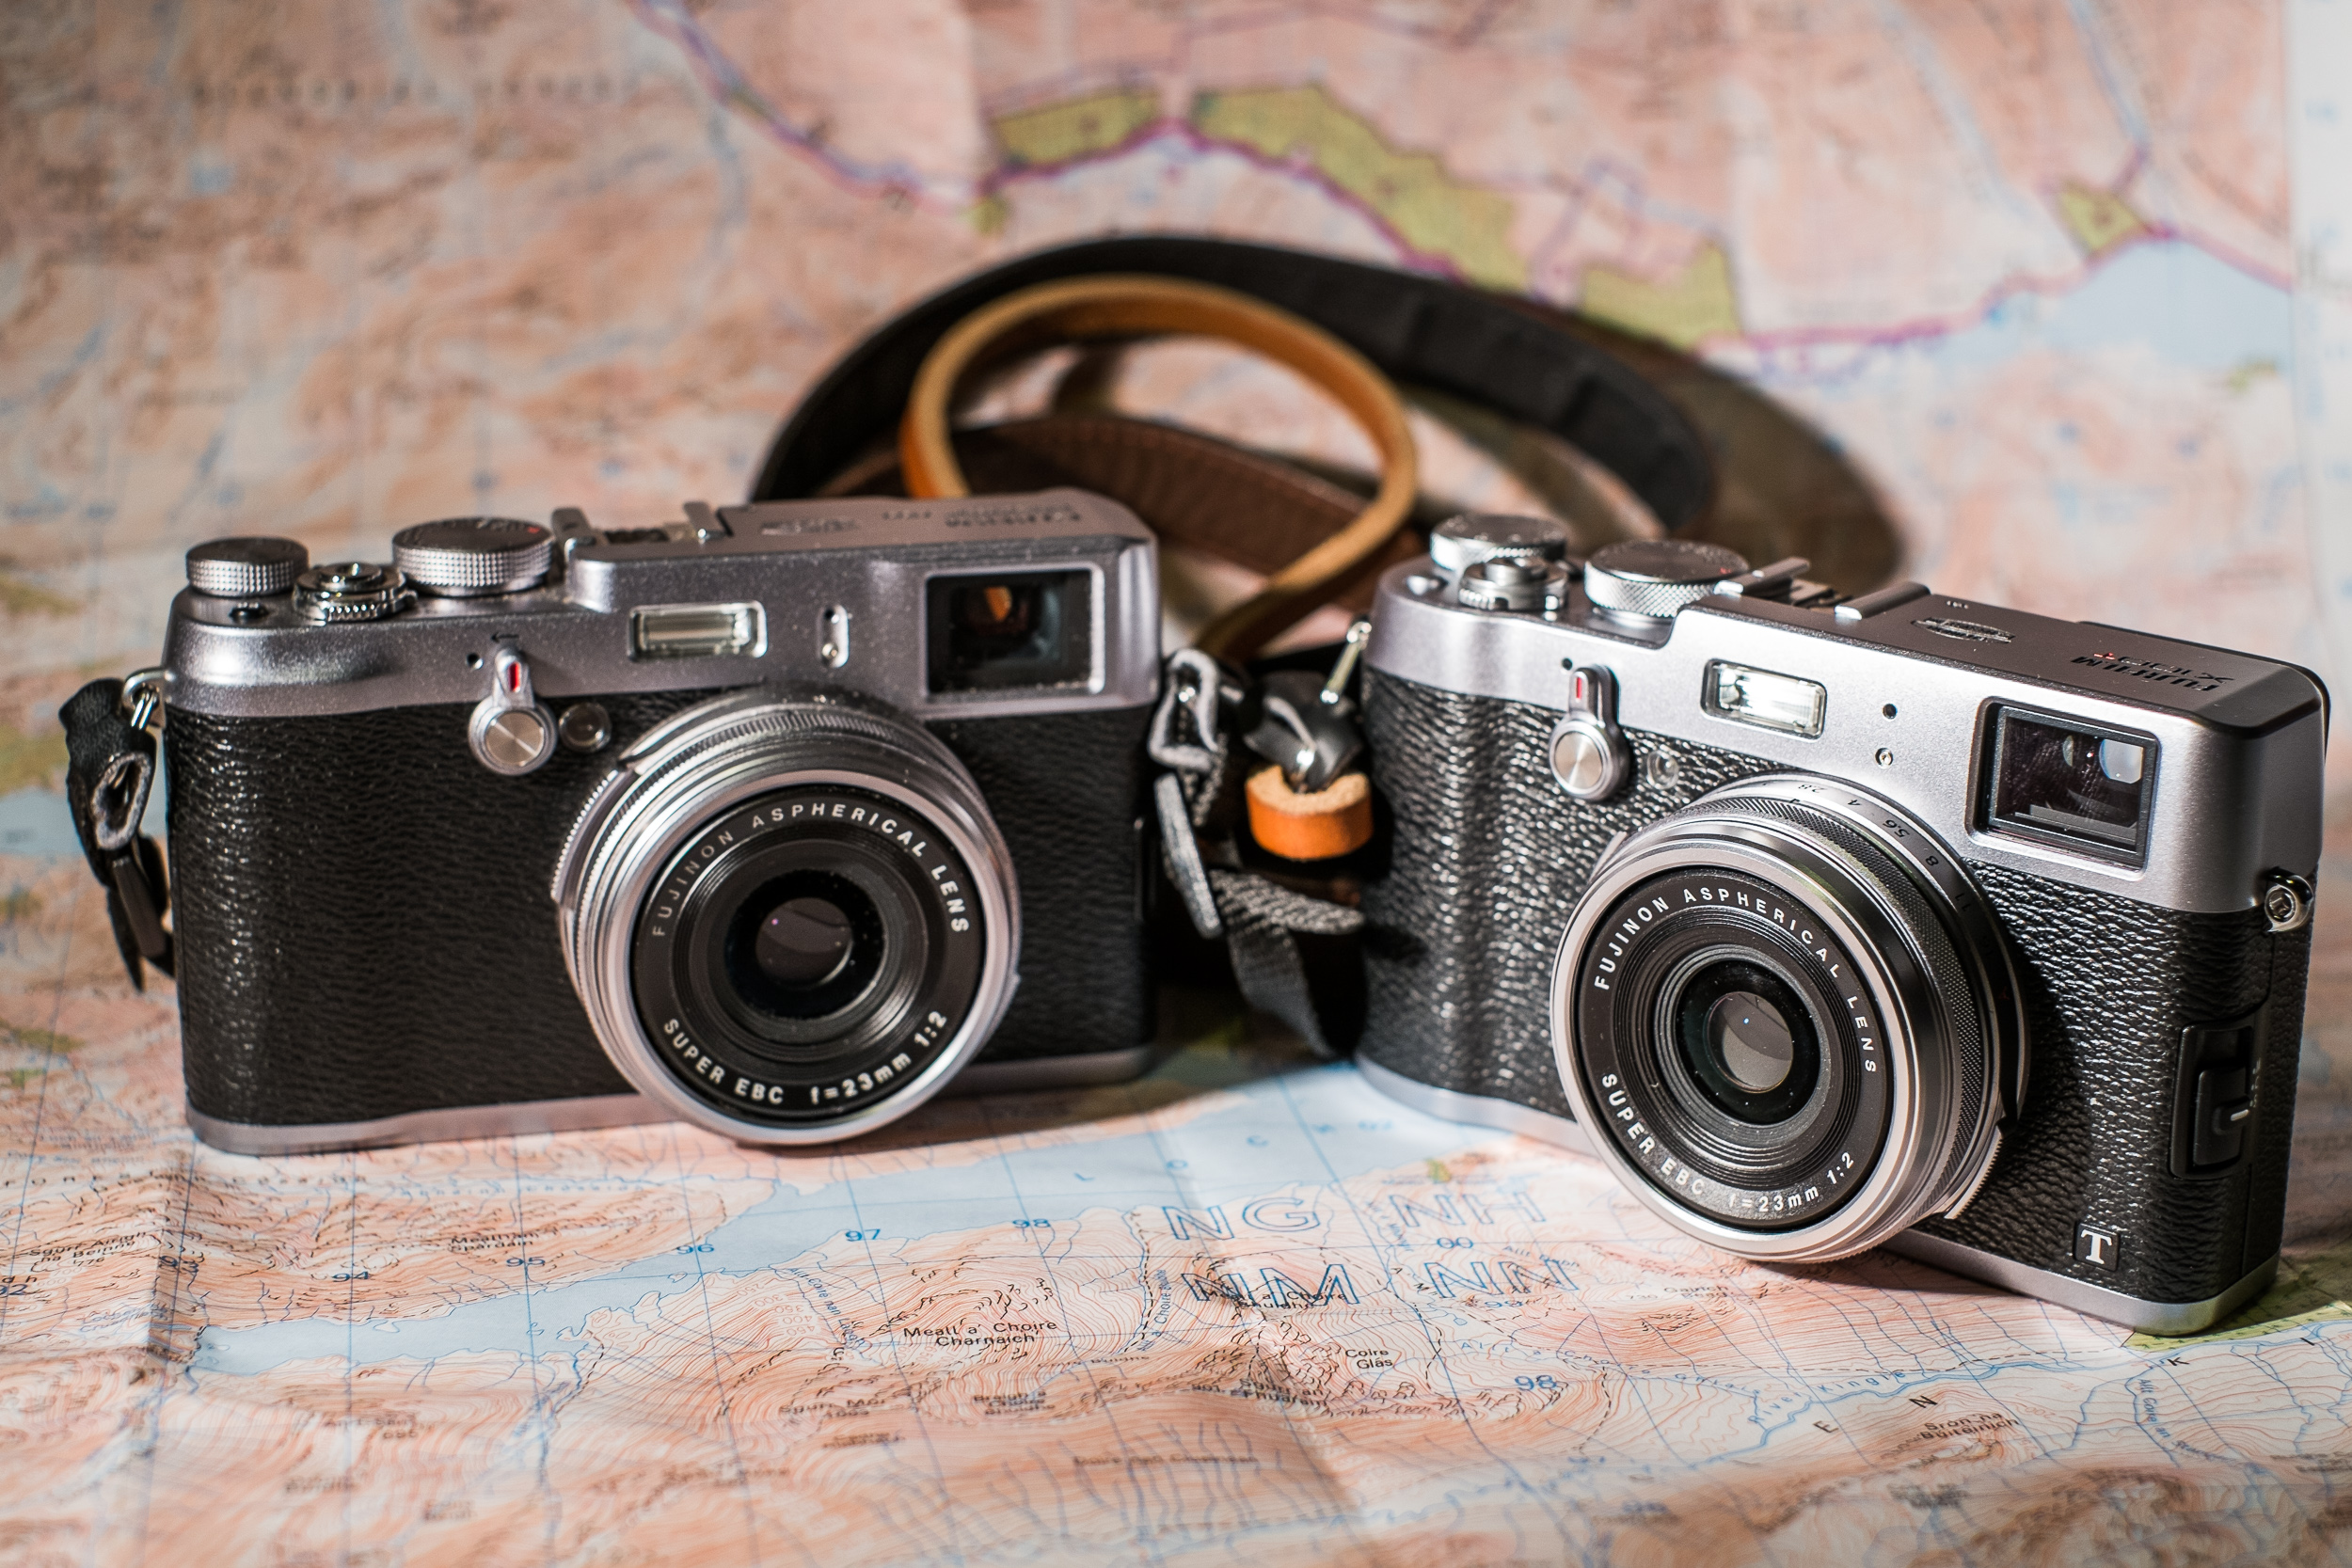
Affinity CD.The cove stones at Avebury. Fuji X100T, 23mm, 1/180, f8, ISO 200. 27th June 2015.
The image was captured using my little Fuji X100T during a family day out back in 2015. I found myself reflecting upon how fortunate I was to have decided this was worth a quick photo during our exploration of Avebury, ten years earlier. This wasn’t a dedicated photo trip, just a fun day out with my wife and daughter. I didn’t really have the time to wait around for the light to be just right. Fortunately, at the point we were exploring around the cove stones, there was bright sunshine and quite a dramatic sky (which I will confess to enhancing a little with contrast tweaks etc in Lightroom – there is no ‘sky replacement’ here, I really don’t like that kind of thing in my photography).
The original colour photo, as shot. 3:2 aspect ratio. The cloudy sky area at the top served no purpose, so it was no problem to crop that away, along with a little of the grass at the bottom. I only wish I had a little more breathing space to either side of the stones.
If I were shooting specifically for this use case, I would have tried to give a little more space around the stones by standing a bit further back (it’s a prime lens on the X100 series, so ‘zoom’ is with your feet). This would have allowed a slightly wider field of view for the square crop. However, I certainly wasn’t viewing this photo as an album cover when I shot it; it was simply a scene that grabbed my attention.
I’ve loved the X100 series of cameras since the release of the original, which I bought whilst it was the current model, thinking it would be nice to have something a bit smaller to carry around than my Canon DSLR, yet still offering a good lens, full manual control via analogue dials and buttons, a good viewfinder and a good sensor. I loved the original X100 so much that I also bought the X100T when it was released, and this was the camera I used to take the ‘affinity’ cover photo. I’d love to add a more up-to-date version of the camera to my collection, but they have become so popular that they can be hard to find at RRP (and already expensive enough at that).
It’s a little too chunky to just slip into a pocket and forget, but if I’m out for the day, I will have at least a small bag of some description with me, and it easily fits in there, or, for that matter, a larger coat pocket. I also have a wrist strap for it, so it’s usually just there at hand and ready to shoot.
“But it’s not full-frame!”… Don’t even get me started on that… I’ll just leave a link here to a video by Zack Arias in which I think he represents my own views on that ‘issue’ very well.
At the end of the day, I happened to have this fun little camera with me rather than a bulkier kit because I was enjoying a family day out and didn’t want to be encumbered. I didn’t have a tripod, a polarising filter, or anything like that. Just the camera.
And I took a photo with it, which, ten years later, was chosen as the cover image for an album.
As I said earlier, the album is a compilation of work from different artists. I was only familiar with three of them before first hearing the album: JJ Lovegrove, Annika Jayne and John Serrano, who features on Annika Jayne’s song, ‘Occi’s Walls’.
Andrew has done a magnificent job of curating this compilation; the running order works amazingly well. The first five tracks of the CD are instrumental, and the second five have vocals. On the vinyl edition, this equates to an instrumental side and a vocal side.
There are several songs here that have inspired me to further explore the featured artists who are new to me, so this compilation has succeeded in its primary goal of introducing listeners to a variety of new artists and musical styles. I found myself loving every track on the album. I think that’s quite remarkable for a compilation album featuring so many artists I hadn’t heard before. I enjoy variety in many aspects of life, so being presented with lots of different musical styles here is a big positive for me. The concept of ‘affinity’ binds all these different artists and styles together and gives them cohesion. I feel honoured that my photo sits on the front of it.
If you would like to explore or purchase the album, you can do so here. It was released on December 5th 2025, on CD, digital download and vinyl. It’s no coincidence that I published this article on the same date.
I want to make it clear that I will in no way gain from any purchases made, other than the satisfaction of knowing that people are listening to great music, supporting independent artists and a great record label. (And also, I suppose, the knowledge that you’re seeing my photo every time you play the album).
You can find out more about monochrome motif records here.
J.J. Lovegrove at Firebug, 12th September 2025. Fujifilm X-T5, 56mm @ f1.2.
The night of Friday 12th September saw me back at Firebug in Leicester for a fantastic lineup of Chris Ilett, Rai Waddingham, L’Ku, Kevin Hewick, Sally Hossack and J.J. Lovegrove.
I was sporting my X-T5 accompanied by my 35mm f1.4, 56mm f1.2 and the trusty 90mm f2. They’re all firm favourites for gig photography. I did also have my 27mm f2.8 in the bag but I didn’t use it.
In music venues like this one I do find the wider aperture of prime lenses more than makes up for the flexibility of a zoom – which will more than likely have a smaller maximum aperture. The light gathering capabilities of these primes is amazing.
I also find myself astonished at the noise control of the X-T5, and indeed most more modern cameras. All of the photos I’m sharing here were shot at ISO 1600 and I feel pretty comfortable going up to ISO 3200, even ISO 6400 at a pinch when needed (but maybe only for black and white). My first DSLR, a Canon 20D, produced very grainy images at these ISO settings. But hey, I need to remind myself that was 20 years ago. What’s also true is that noise reduction in post processing software has improved dramatically over recent years.
What I really should do is take along a second body as a matter of course so I can have the 90mm on one camera and either the 35, 56 or indeed 27 on another. That way I can have most of the utility of a zoom lens but with much wider apertures just by swapping bodies.
Chris Ilett at Firebug, 12th September 2025. Fujifilm X-T5, 35mm @ f1.4.Rai Waddingham at Firebug, 12th September 2025. Fujifilm X-T5, 90mm @ f2.L’Ku at Firebug, 12th September 2025. Fujifilm X-T5, 90mm @ f2.Kevin Hewick at Firebug, 12th September 2025. Fujifilm X-T5, 90mm @ f2.Sally Hossack at Firebug, 12th September 2025. Fujifilm X-T5, 90mm @ f2.
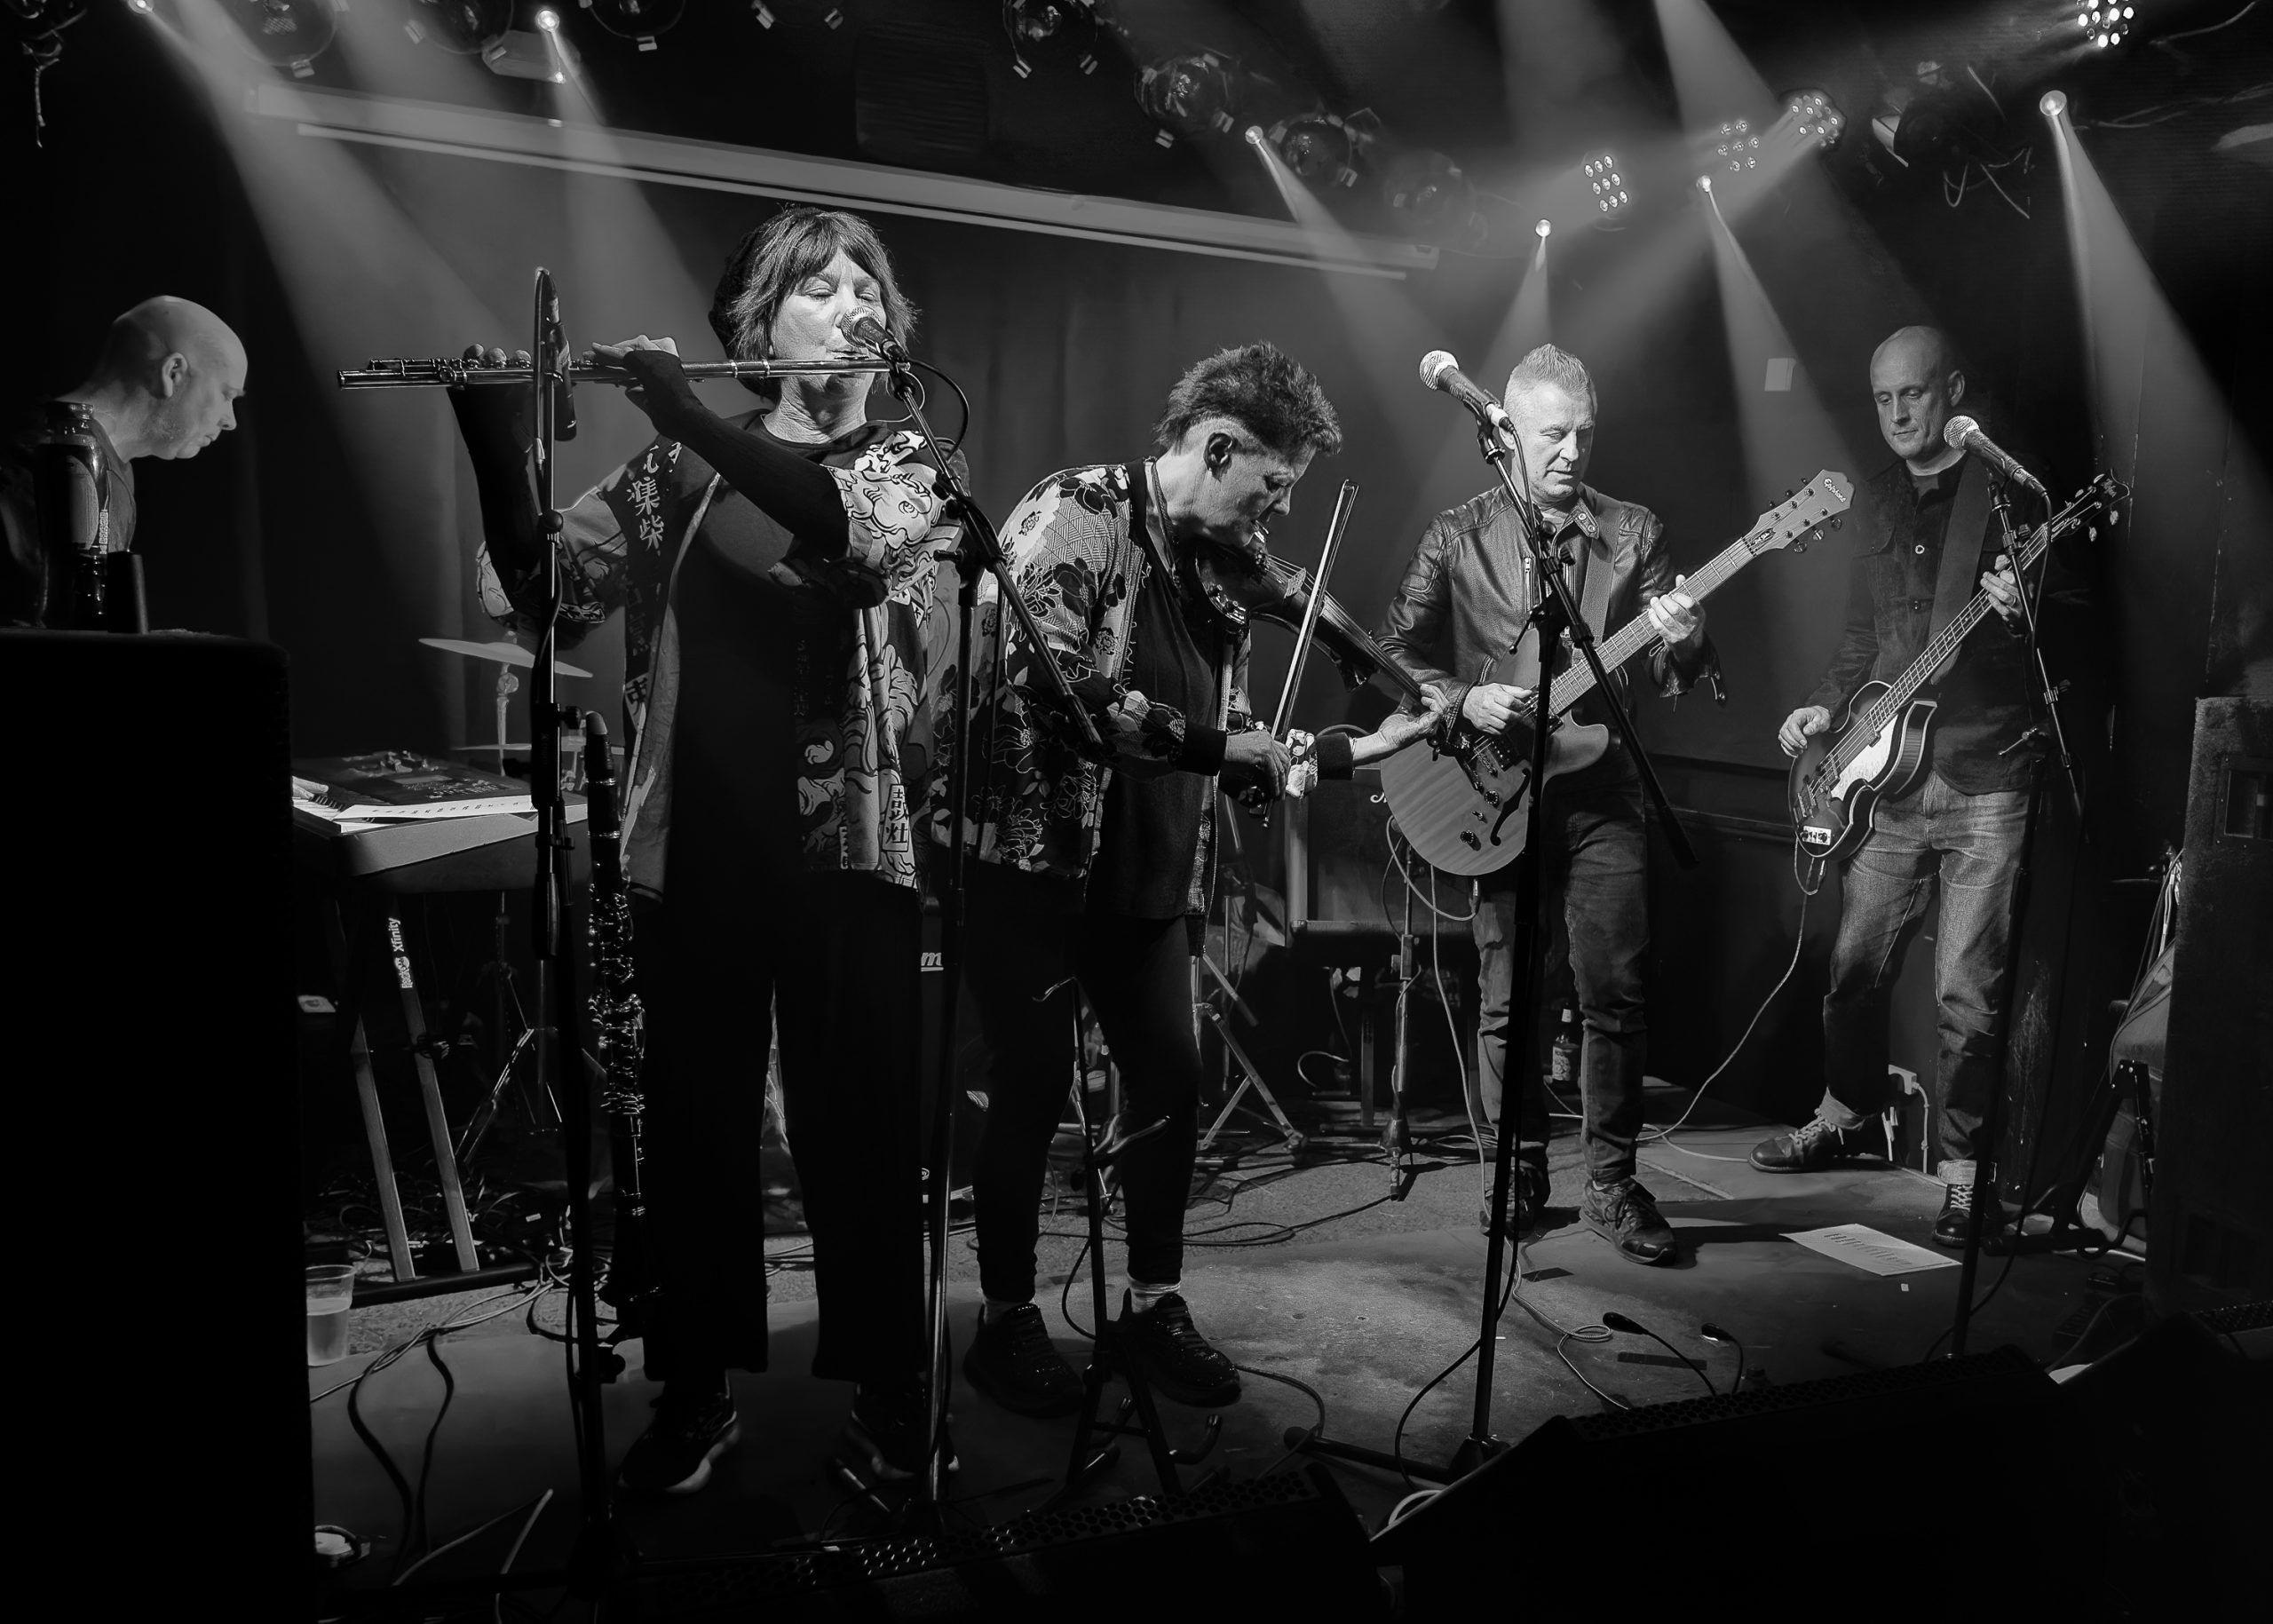
Ian Harmer of Bellatones picked out by spotlights.
Bella tones : beautiful sounds! And Bellatones are a Leicester band I’ve been following and shooting for many years now. And they do indeed create beautiful sounds.
I went to a couple of their gigs in December, one at The Donkey on the 3rd and the other at Soundhouse on the 15th. I thought I’d share a few images from these gigs.
I only shot during the first of two sets at The Donkey as 1) I felt I already had plenty of photos and 2) I always feel like I’m getting in the way of the rest of the audience enjoying the show.
I was quite pleased with the shot at the top of this post of Ian Harmer picked out by small circles of light. He (as usual) was positioned right at the back left of the stage so it took a bit of careful aiming. I was quite surprised how well the autofocus managed to lock on to him given the low light and other members of the band moving around in front of him. I’ll share a colour version of this photo below, along with more from that night.
The multicoloured lights at these venues are one of the reasons I produce many of my live music photos in black and white, trying to get white balance right for somebody’s skin tones when the lights are shifting colour all the time is tricky. And then of course I do also just love black and white. As I’ve probably said several times here before : I love the timeless quality of black and white, I love the way it adds another layer of abstraction from reality and I also like the way it removes the distraction of colour. Anyway, on with the photos. There will be more from the Soundhouse gig further down this post.
All photos taken using my Fujifilm X-H1 and a variety of prime lenses (90mm f2, 35mm f2, 18mm f2) and also the 10-24mm zoom.
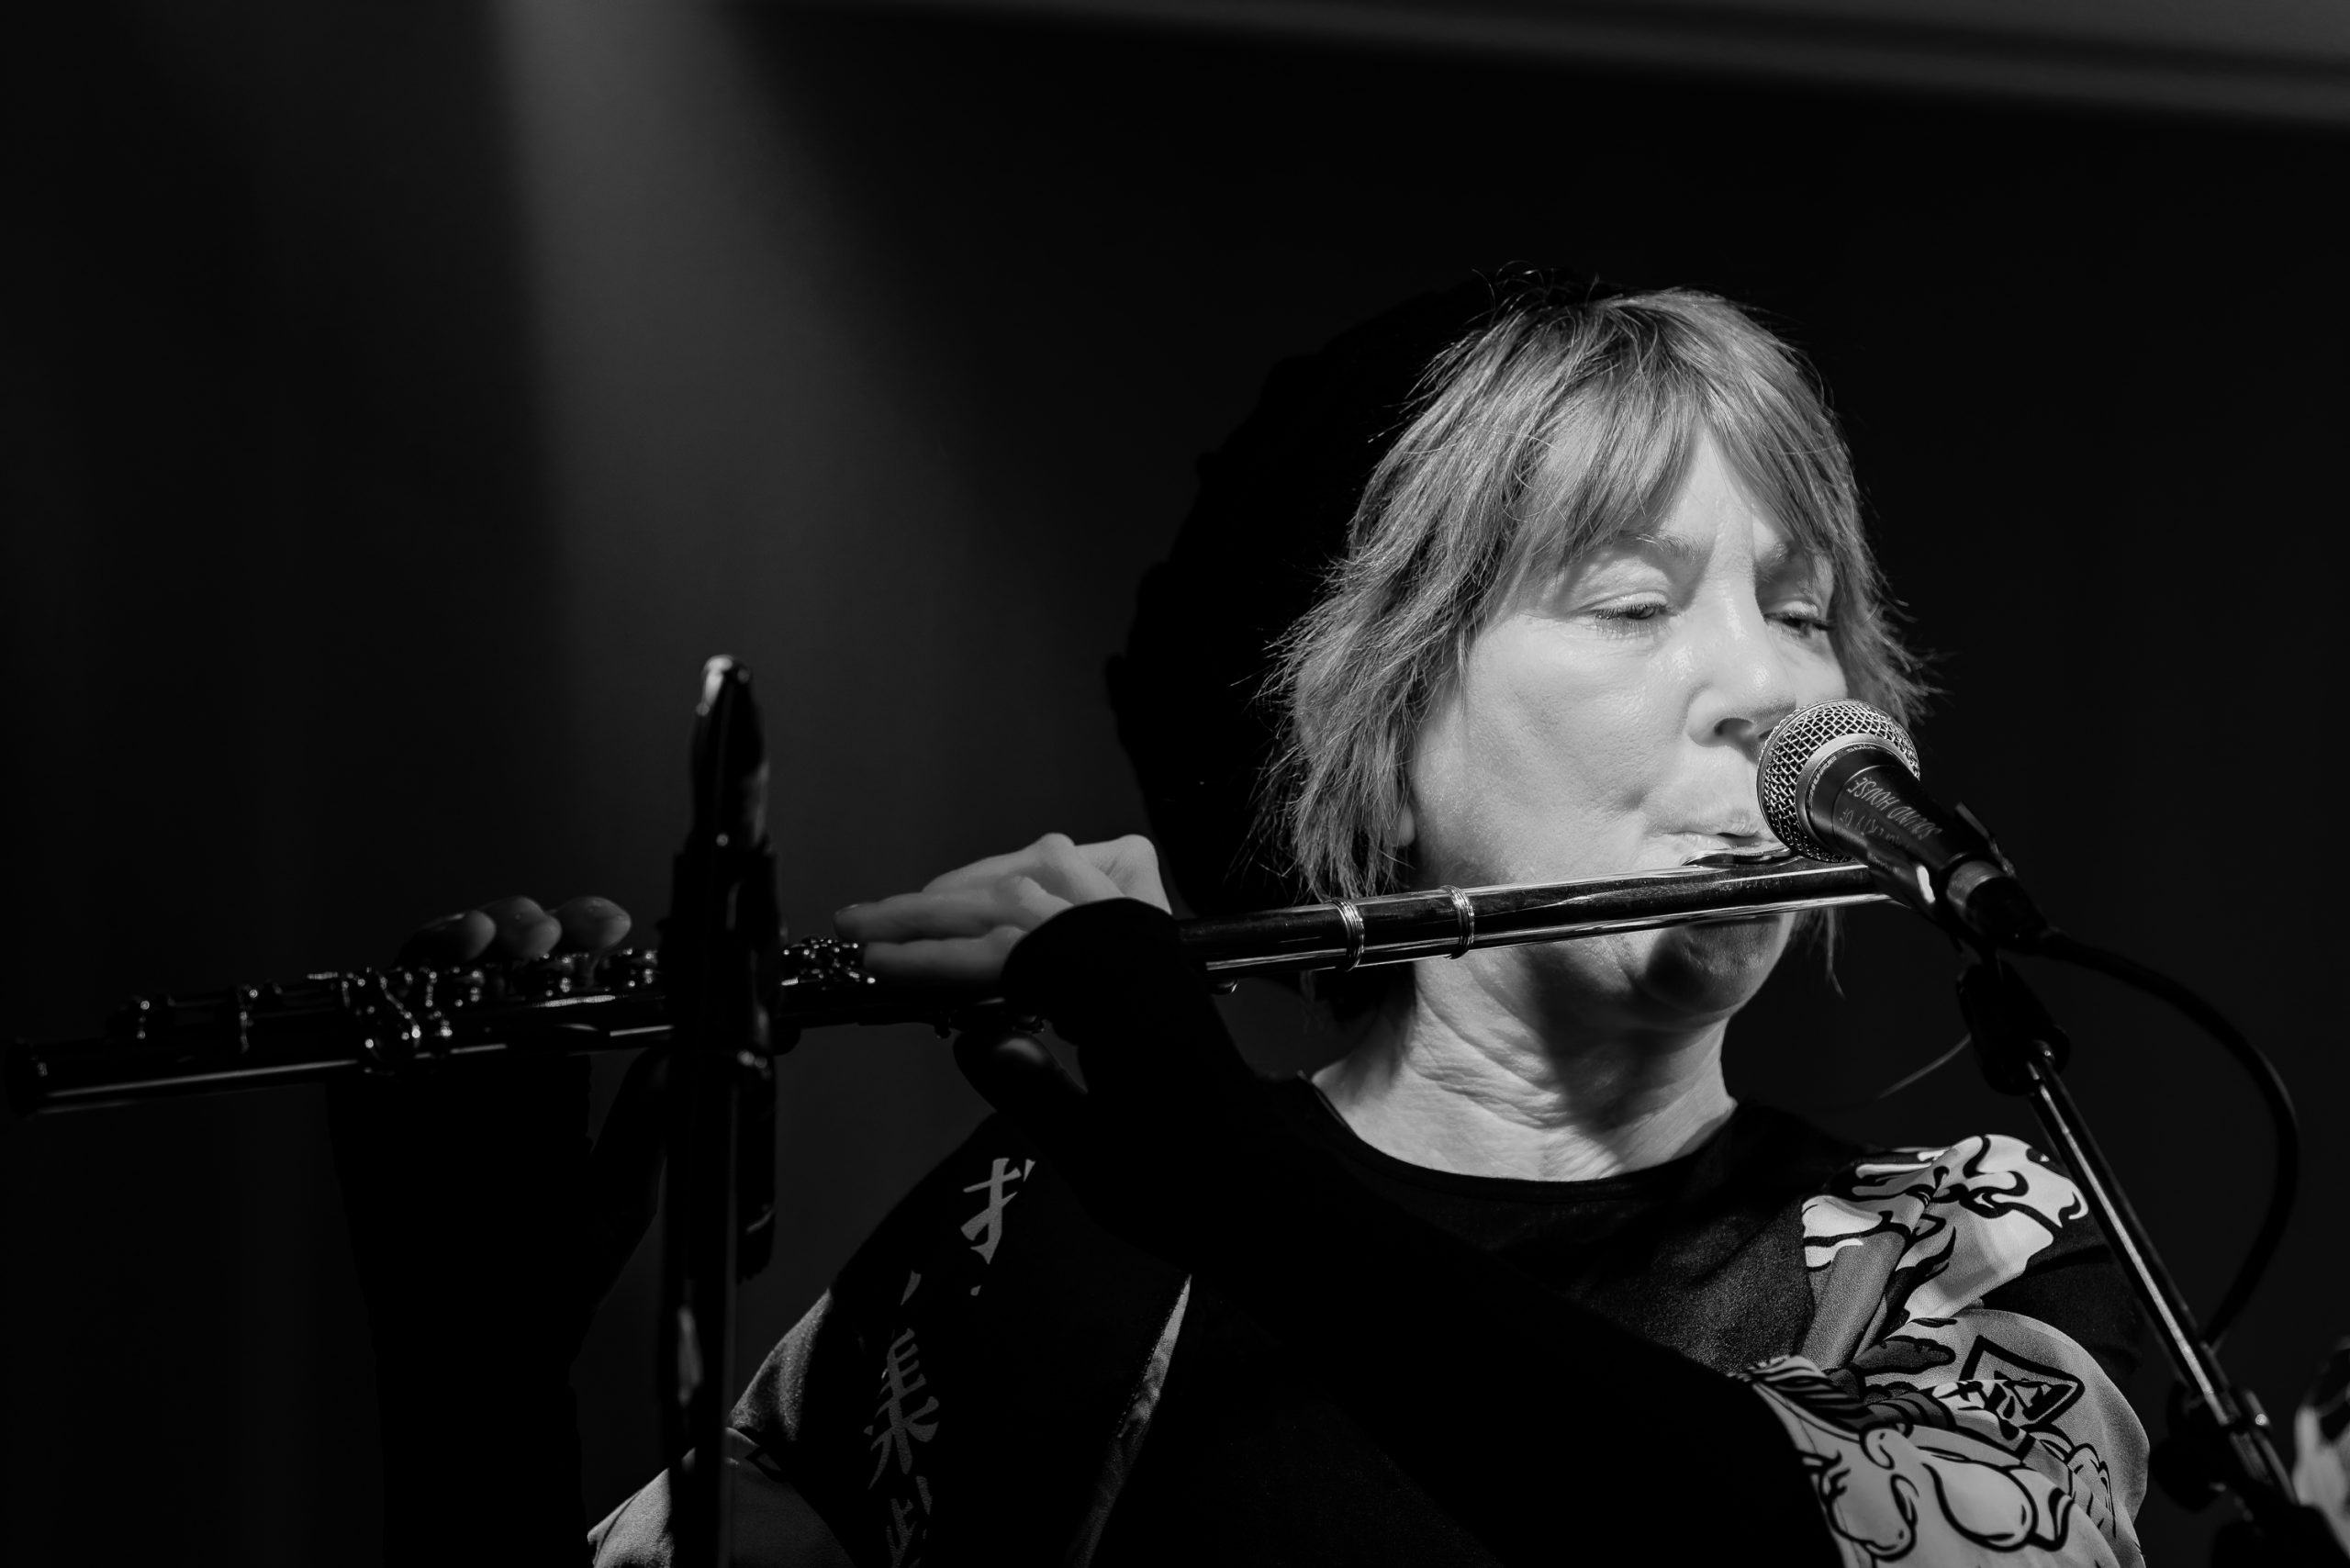
Ian Hamer of Bellatones on the keyboard at The Donkey, 3rd December 2023.Bellatones playing at The Donkey, Leicester. 3rd December 2023.Olive (foreground) and Sam of Bellatones at The Donkey, Leicester. 3rd December 2023.Sam of Bellatones on flute at The Donkey, Leicester. 3rd December 2023.Olive (foreground) and Paul of Bellatones playing at The Donkey, Leicester. 3rd December 2023.Bellatones playing at The Donkey, Leicester. 3rd December 2023. I went with a very extreme contrast rendering for this photo. New bass player Nigel “Waldo” Underwood is closest to the lens and was lurking in the shadows throughout the gig so I got around the side of the stage to try and capture something. The spotlights made the contrast high anyway so I just went with that look.
Having taken way too many photos at The Donkey on 3rd December I was back to see Bellatones play again at Soundhouse on 15th December. And I need to learn a lesson here. I said above “way too many photos” – there were hundreds. And it being a busy time of year all I’d really done was pick out half a dozen favourites from those in the two weeks before this next gig at Soundhouse.
When I shoot at a gig I’ll start off in “single shot” mode on the camera. One press of the shutter release equals one photo taken. As the gig progresses I’ll find myself switching into “continuous” shooting – keep the shutter release down and keep firing off photos at a rate of many per second. Why? Because with musicians moving around the stage you can find that you’ve slightly missed focus or slightly missed a good pose / expression / moment of action. Great, continuous shooting can help with that but it leaves me with quite a daunting number of photos to work through. I might only process a couple of dozen of those photos but I still have to look through all 400 to find the ones I want to process. I might have a burst of between 6 or 10 shots of pretty much the same scene and I might use one of them – or none. I need to be more disciplined and not take as many photos.
At the Soundhouse gig Not My Good Arm played before Bellatones so I got a few shots of them. There should have been another band playing too, Code Switch Theory, but sadly they had to pull out due to sickness and Not My Good Arm were down one member of the band for the same reason. This becomes significant later in the story, honest.
Not My Good Arm playing at Soundhouse, Leicester. 15th December 2023.Not My Good Arm playing at Soundhouse, Leicester. 15th December 2023.Not My Good Arm playing at Soundhouse, Leicester. 15th December 2023.
And then Bellatones came on and played a great set to finish off the evening. I was right down at the front and having to work hard to avoid the enthusiastic dancers getting into shot. This harks back to what I said earlier about trying to make sure I don’t get in the way of the rest of the audience enjoying themselves. These places do not have “press pits”.
I thoroughly enjoyed myself that night, took way too many photos (!) and heard some great music. However a couple of nights later I started to feel a cold coming on. I don’t remember anyone coughing or sneezing in my face but this is the most likely place that I will have picked up that virus. By the Monday morning I was feeling so awful, every part of my body was aching, every movement felt like I must be 100 years old. And this thing was persistent, it really knocked me out of action for a couple of weeks all through the Christmas and New Year period. I managed to get done what I had to do but it took me a couple of weeks to reach the point where I felt up to working through the photos from that night. It wasn’t Covid-19, I did test myself several times at various points during the illness – all negative. I did find myself reflecting on mask wearing. I was back to wearing one when I went into shops because I didn’t want to spread whatever nasty bug this was to anyone else. If only others felt the same way I might not have caught this.
Bellatones playing at Soundhouse, Leicester. 15th December 2023.Paul of Bellatones playing at Soundhouse, Leicester. 15th December 2023.Bellatones playing at Soundhouse, Leicester. 15th December 2023.Sam of Bellatones on flute, Soundhouse, Leicester. 15th December 2023.
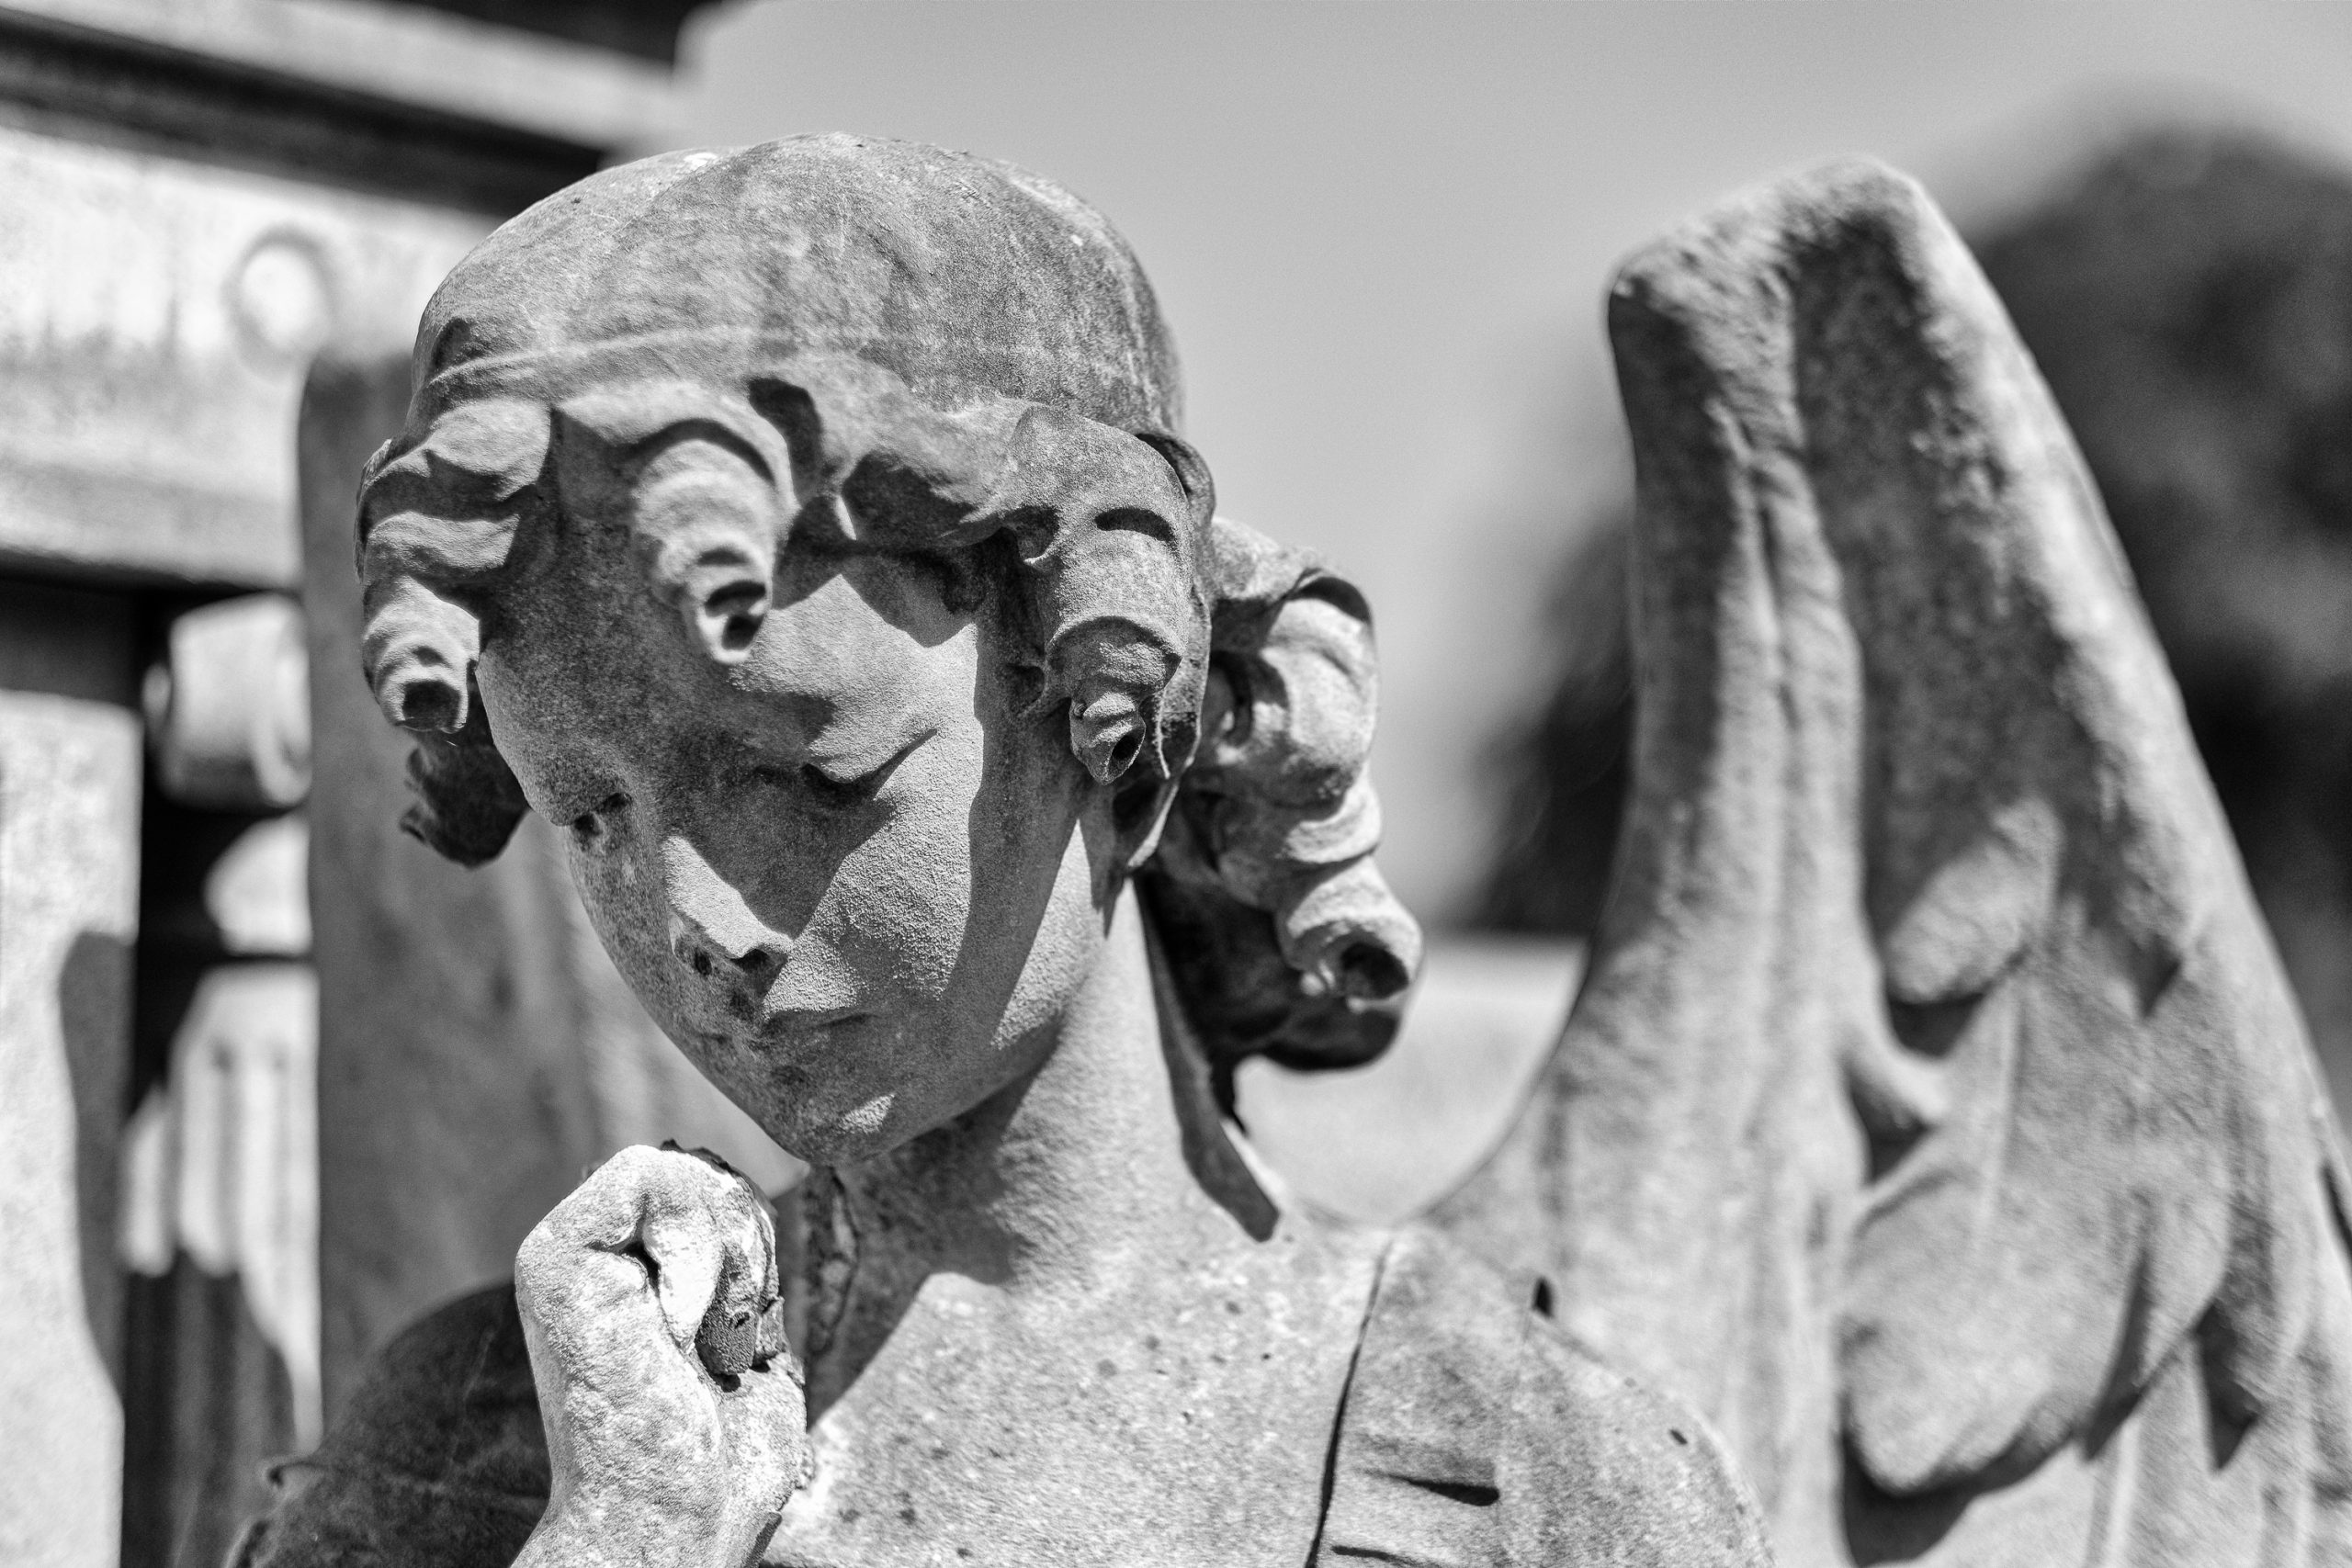
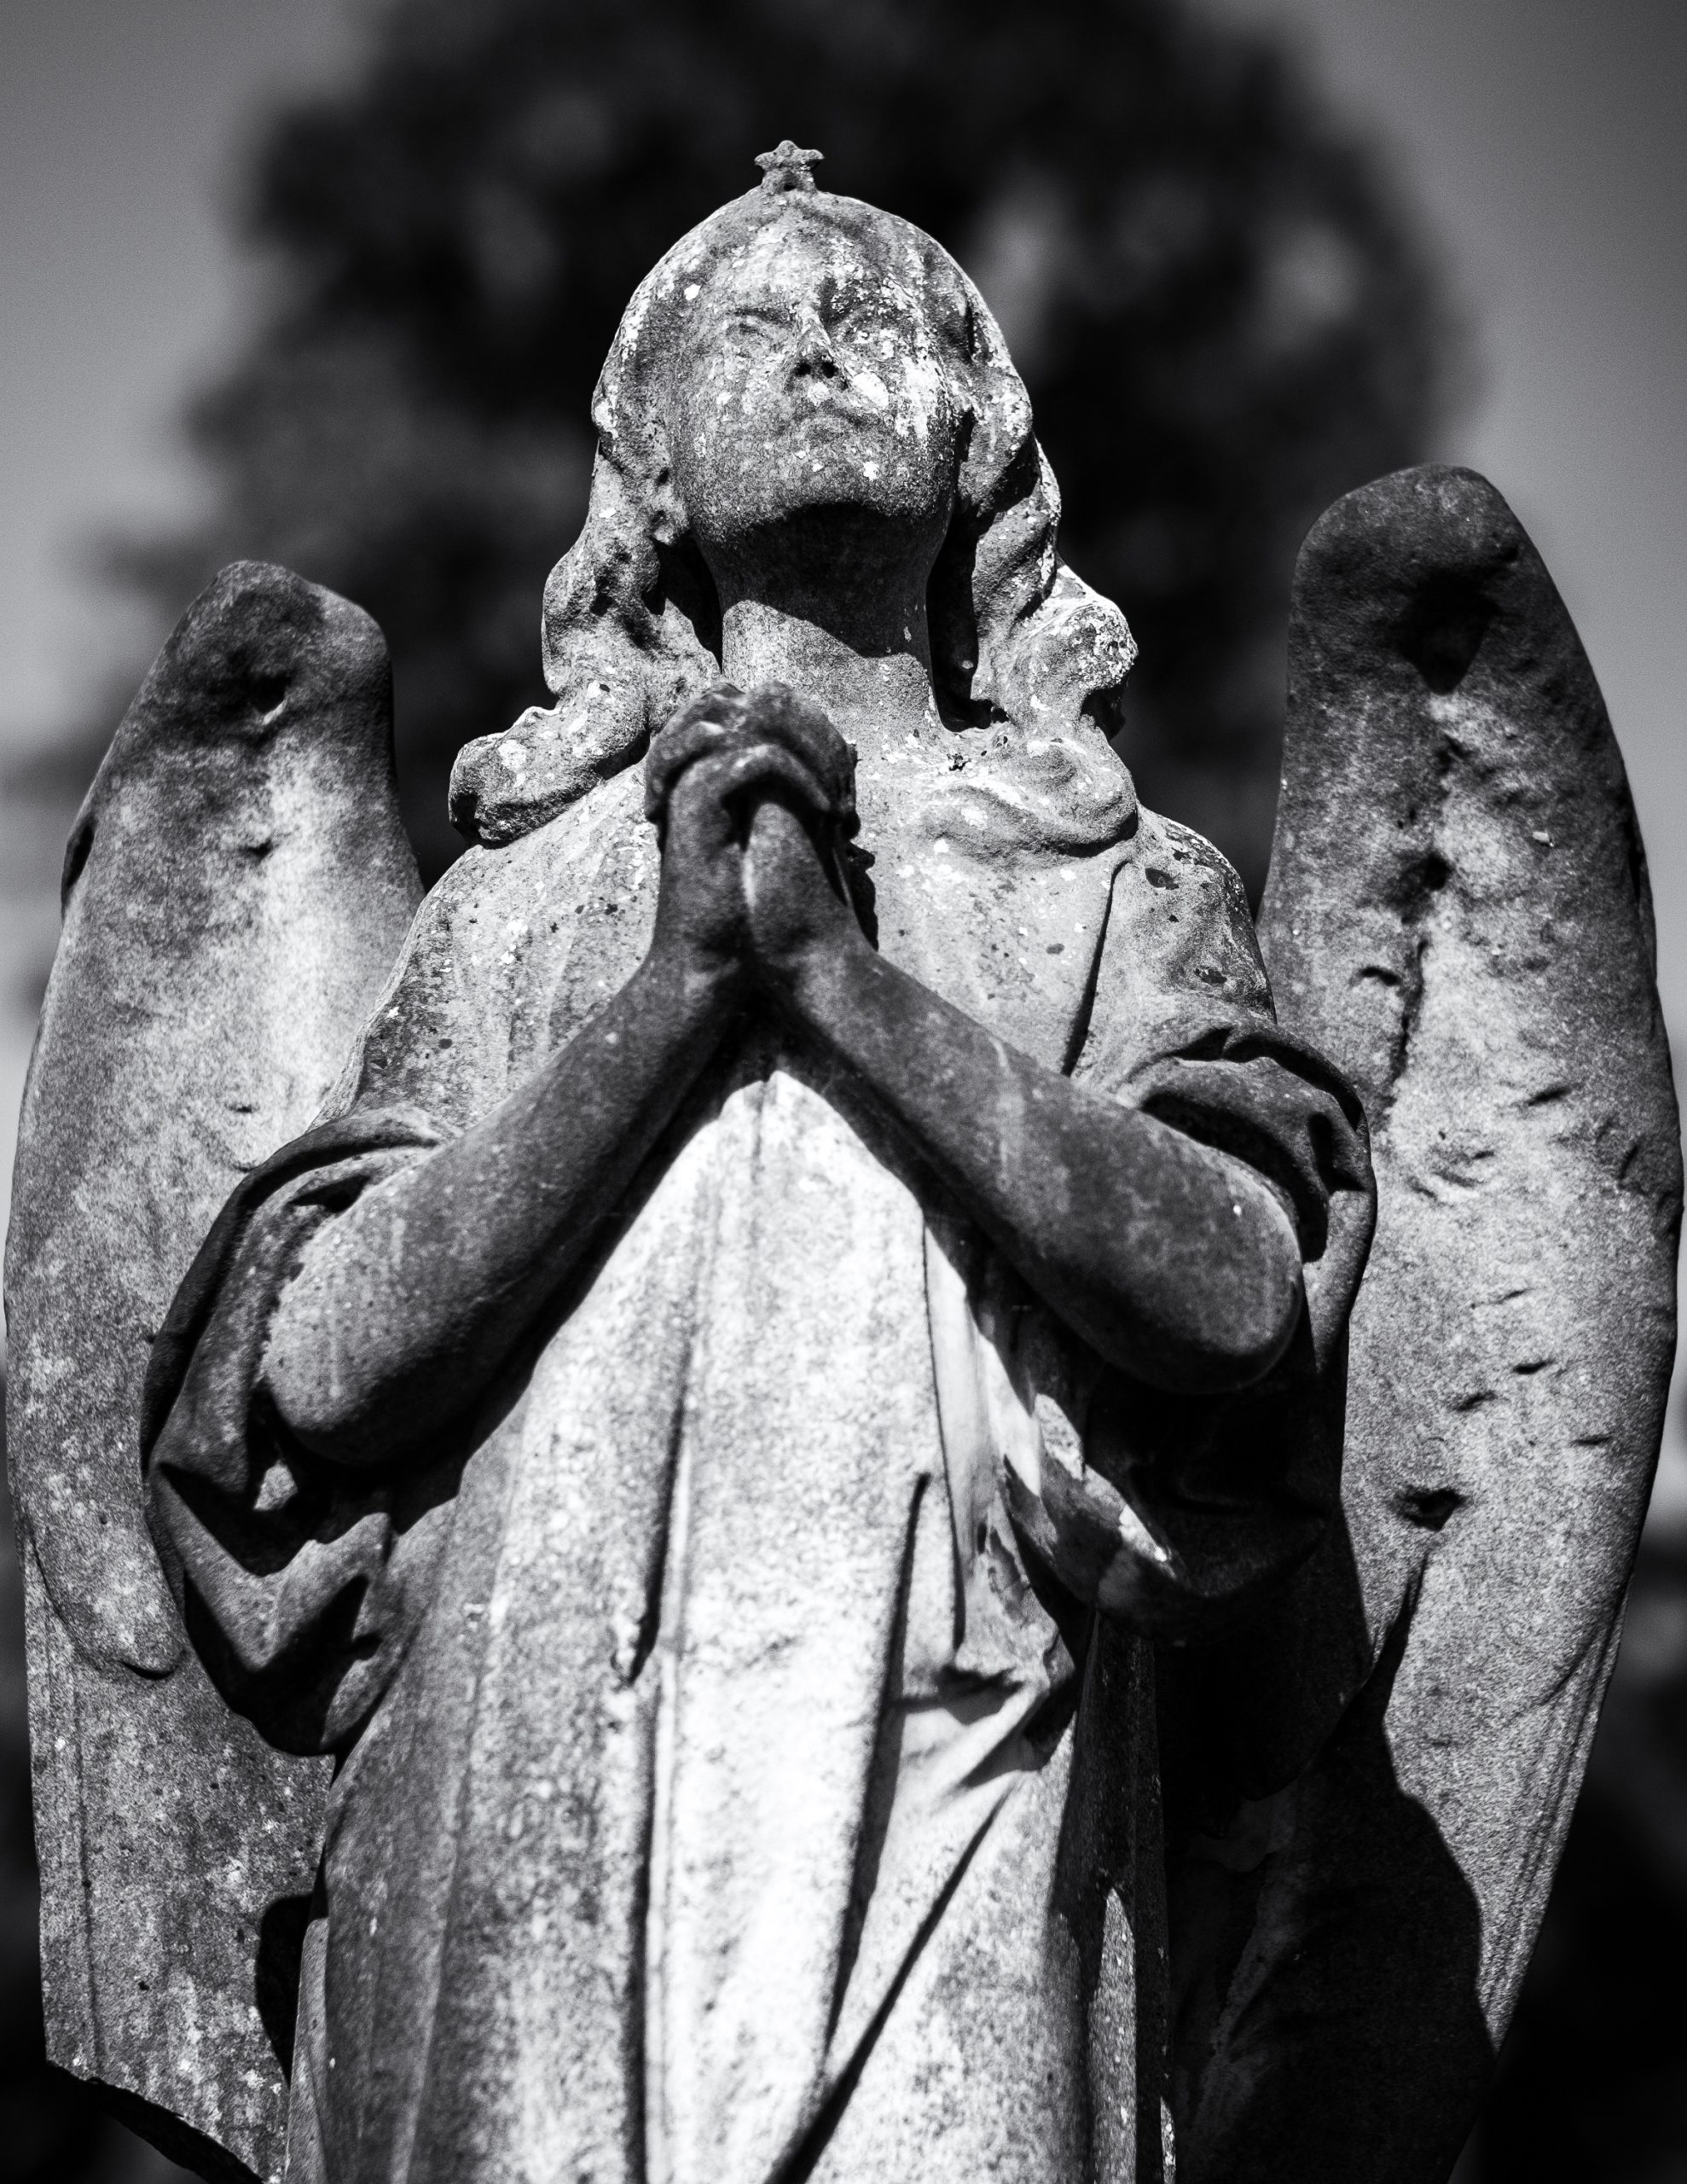
The angel statue at Welford Road Cemetery that has been drawing me back for years. Fujifilm X-H1 and 56mm f1.2 .
It had been a few years since I was last at Leicester’s Welford Road Cemetery, it would certainly have been before the first Covid-19 lockdown in the UK. The place is only about 2 miles from home but I just hadn’t been feeling like visiting. I had suffered multiple bereavements in 2020 so maybe part of it was feeling like I’d had enough of funereal stuff for a while. But also it was a place I’d visited quite often anyway as it was close to home.
I headed down there on Saturday morning and took my Fujifilm X-H1 and the full kit of lenses because I just “grabbed the kit bag”. I ended up only using one lens (how often does that happen?), the 56mm f1.2 .
It’s a lens which is ideal for portrait photography. 56mm on the cropped X series sensors works out to 84mm equivalent field of view, great for some head and shoulders shots and the f1.2 aperture can produce some excellent subject separation.
I only stayed for a little while, stuck around my favourite area and only shot my favourite angel and one other. I need to go back later in the day when the sun will be shining more towards her face.
A few more shots from Saturday morning below. I wasn’t feeling too inspired to experiment, too much on my mind maybe. Everything processed using a mixture of Adobe Lightroom, DXO Photolab and DXO Nik Collection.
“That Angel” with surrounding wild flowers. These old cemeteries can be a haven for wildlife. Shot at f1.2 to increase background blur. I deliberately underexposed a bit, it was a very bright morning and I wanted a slightly darker feel – it helps to bring out the colours of the flowers too.I remember when she still had that finger, lost it a few years ago now.Angel statue at Leicester’s Welford Road Cemetery.The only other statue I shot on Saturday. I was seeing the tree in the background as a dark halo around her head.
In my last post I wrote about my joy of shooting with my Fujifilm X100T. I have since then been out and about using it a bit more and appreciating this quirky little beast for what it is – a highly capable compact camera.
Earlier this evening I was just checking over some camera settings and noticed that there was a (minor) firmware update from 8 years ago which I hadn’t applied. Whilst noodling around online I thought I’d check out pricing for the current latest iteration of this camera, the X100V. Not that I’m in the market for a replacement, I was just curious.
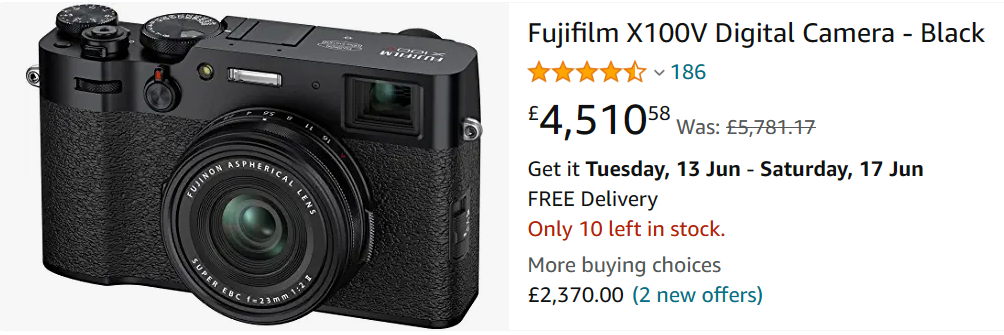
WEX were showing the X100V at £1,349 which I believe is around the RRP, but out of stock. So I took a look on Amazon and very nearly choked on my tea when I saw it listed at £4,510.
Amazon UK listing for X100V
£4,510 for an X100V?
You could buy the medium format (Fuji are now calling it “large format”) Fuji GFX 100S for £4,799. Ok, you’d need to add a lens to that… but seriously?
Apparently the X100V has been trending on TikTok after somebody raved about it on that platform. Just goes to show what a powerful platform that is, not that I’d want to go near it.
The X100V is a lovely little camera and it has a few features I would appreciate but you would have to have way more money than sense to pay £4,500 for one.
Come to that my X100T (two generations older) is also a lovely little camera and I’ll continue to shoot with it and enjoy it. Hopefully I’ll have more photos taken with it to share here soon.
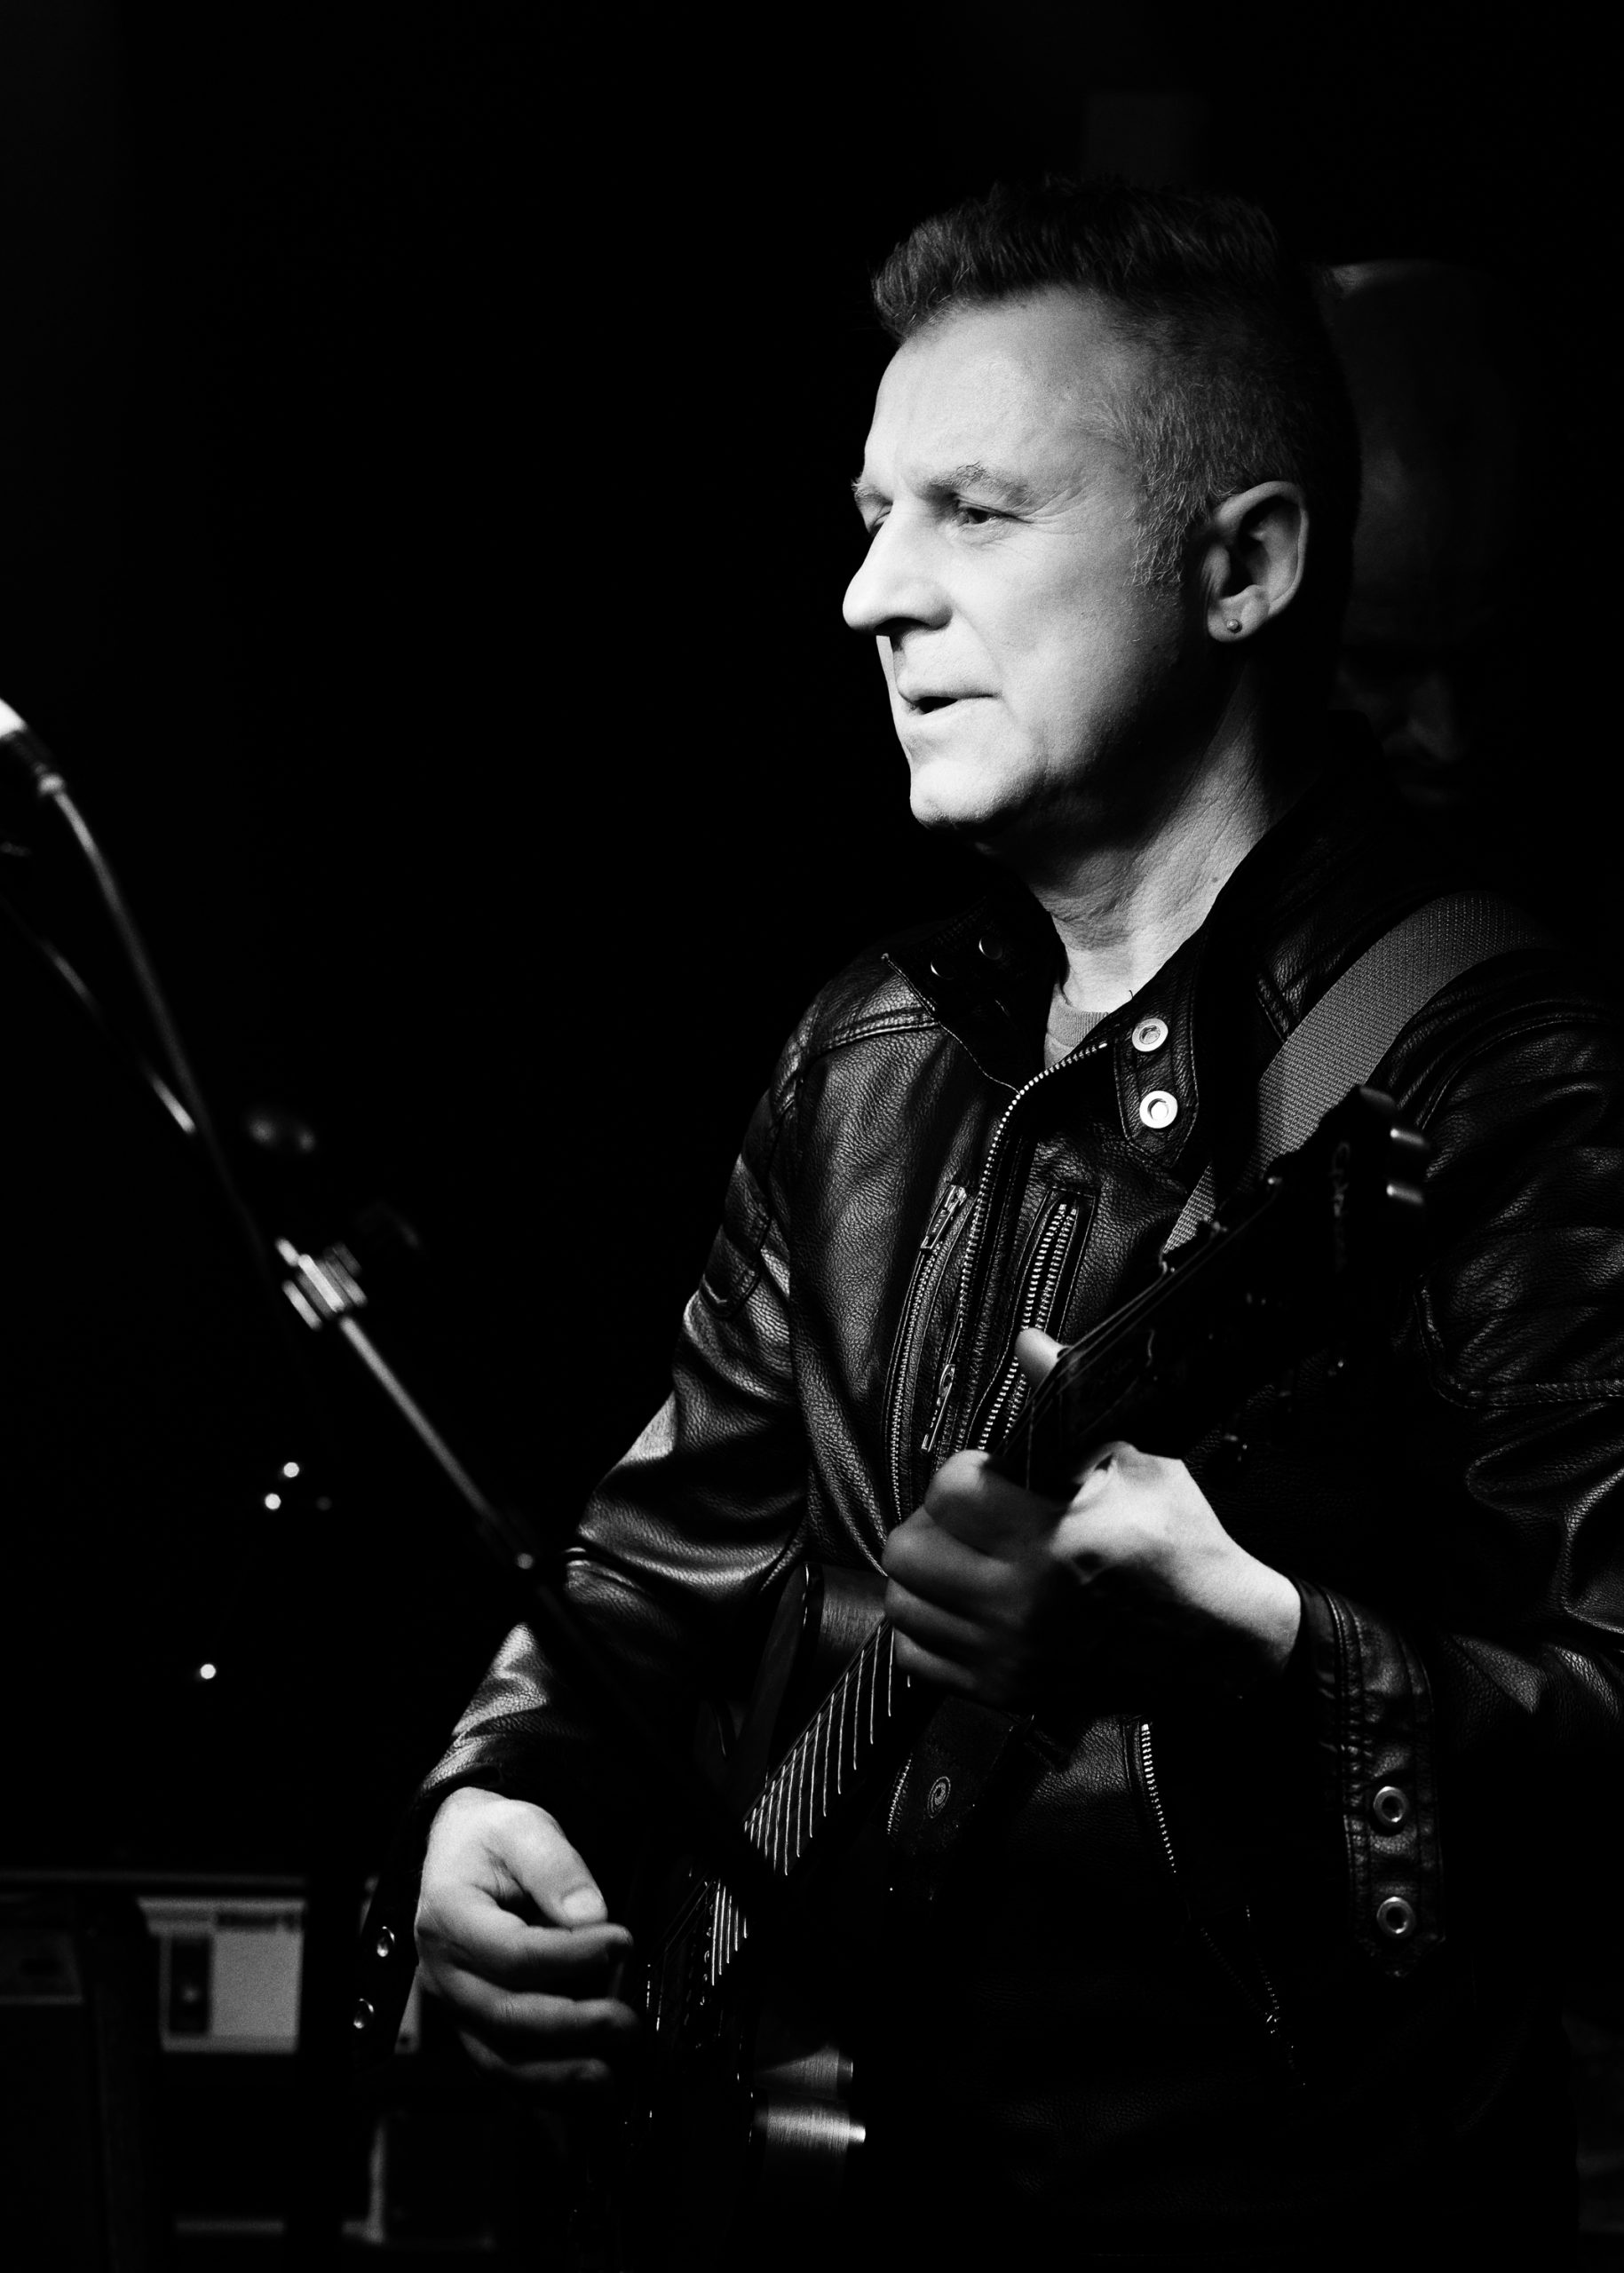
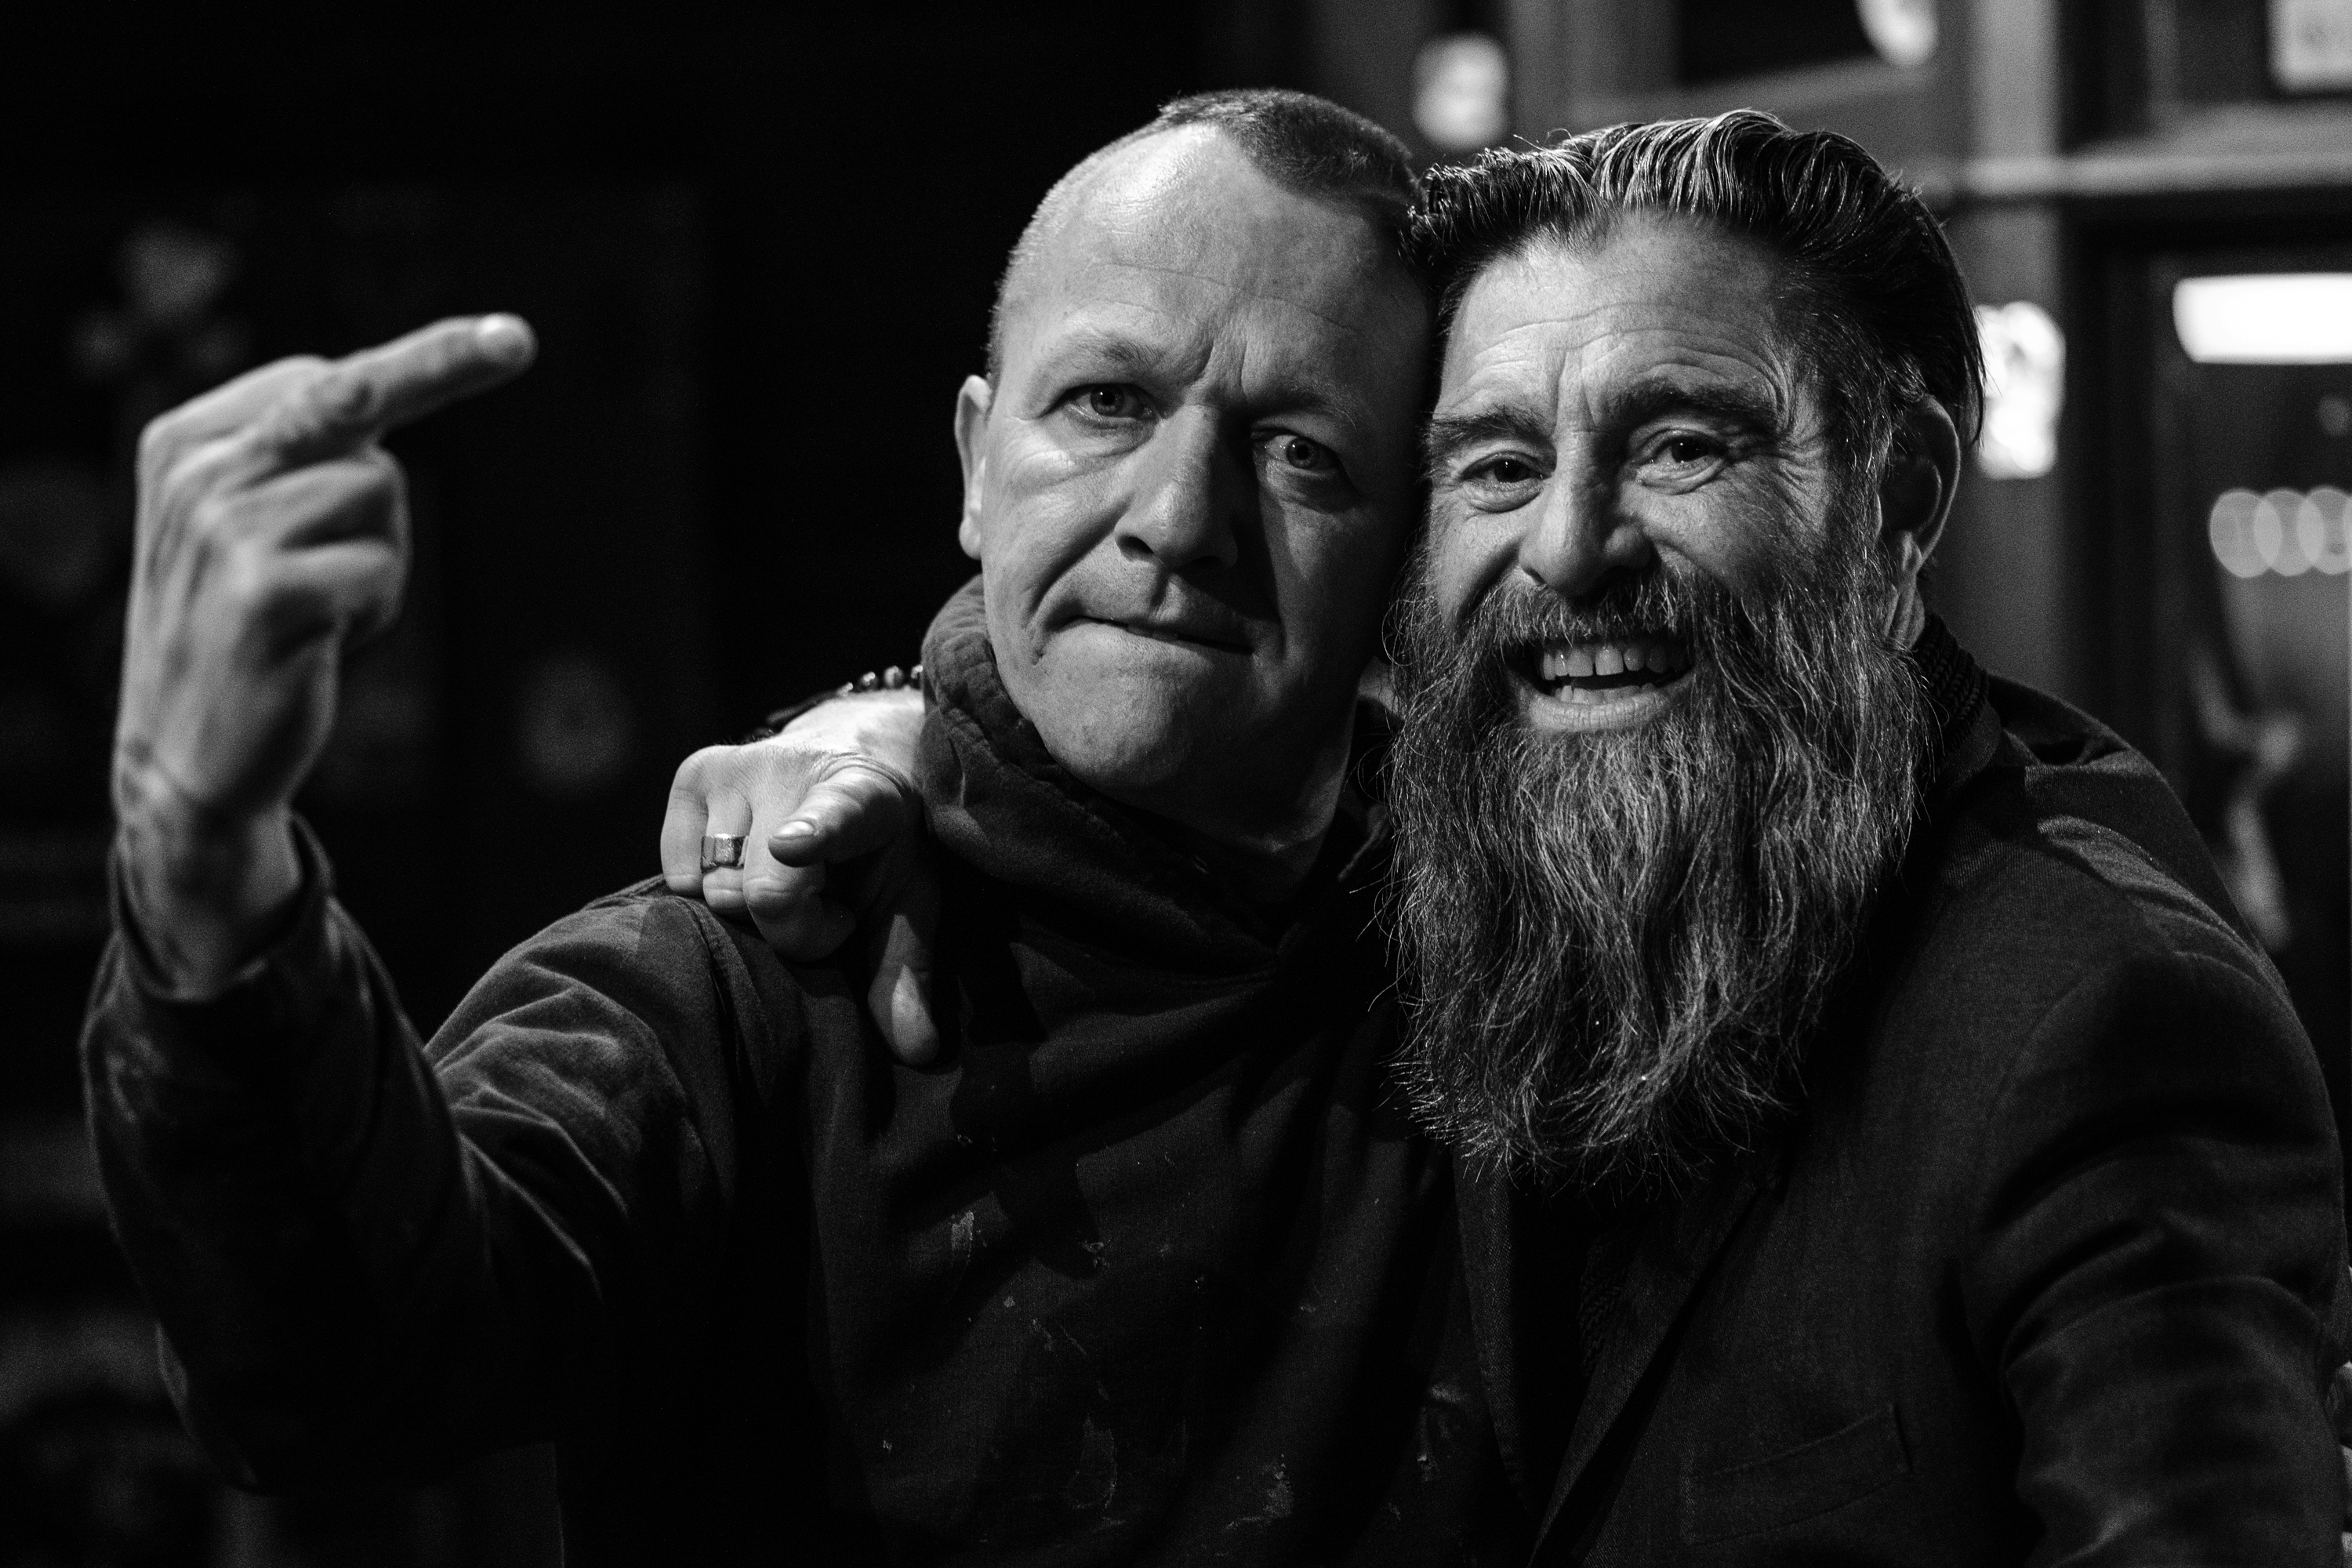
Rick and Warren. Fujifilm X-Pro2, 90mm f2. 1/125 at f2, ISO 6400.
I’m very aware that it has been a couple of months since I posted anything here. Yes, it has been a busy couple of months and thankfully some of that has been photography busy.
This photo of Rick and Warren was taken during the interval at a charity gig I recently attended at The Donkey on Welford Road, Leicester. I was there to support the good cause of the night and also to support my friends on stage : Bellatones.
I still have loads of photos to work my way through from that night which was over a week ago now but this one stood out from the pack for me when I was browsing through to see what I had captured that night.
The vast majority of my photos were of the musicians on stage, that was what I had intended to shoot after all. But at the interval I got chatting outside with Warren (the landlord at The Donkey) and Rick and his good lady, Caroline. It was Caroline who told me that it was “Rick with a silent P” so I do hope he doesn’t mind me using that as the title of this post.
We had a bit of friendly banter during which time Rick, Warren and Caroline got talking about my photography and I snapped one of Rick and Warren together at their request.
It can often be tricky to judge the technical qualities of a photo from the tiny screen on the back of a camera but this one looked pretty good and after showing it to the subjects I ended up being persuaded to take quite a few more of Rick, Warren, Caroline and various of their friends.
It was dark out there.
I had been shooting the acts on stage at ISO 3200 but for these shots I was nabbing outside the venue I had to crank it up a notch to ISO 6400. I’ve always been wary of shooting at high ISO with any camera I’ve owned but I tend to think that it’s better to get something that may have some noise but is free of camera shake so these days I tend to just go with the flow and pump up that ISO as necessary.
And I was not disappointed.
Shot at 1/125, f2 on the X-Pro2 with the excellent Fujinon 90mm lens at ISO 6400. I was even able to focus using auto-focus without any trouble. The only lighting was provided by a string of light bulbs set along the top of the wall about 10 to 15 feet to my left as I shot.
Would this photo have been any better if I’d used my so called “full frame” EOS-6D? I doubt it. I don’t like the term “full frame”. If you mean 35mm sensor then say 35mm sensor. “Full frame” is meaningless – what is full? 2.25 inch square is bigger than a 35mm frame size so how can 35mm be “full”? How about 4×5 inch sheet film? How about 8×10 inch? That makes 135 film (35mm) look tiny. Where do you stop? (I tend to agree with Zak Arias’ point of view on this as expressed wonderfully here).
The best camera is the one you have with you – whether it has a 35mm sensor, an APS-C sensor, Micro Four Thirds or a phone’s camera. You just have to get out there and shoot with it.
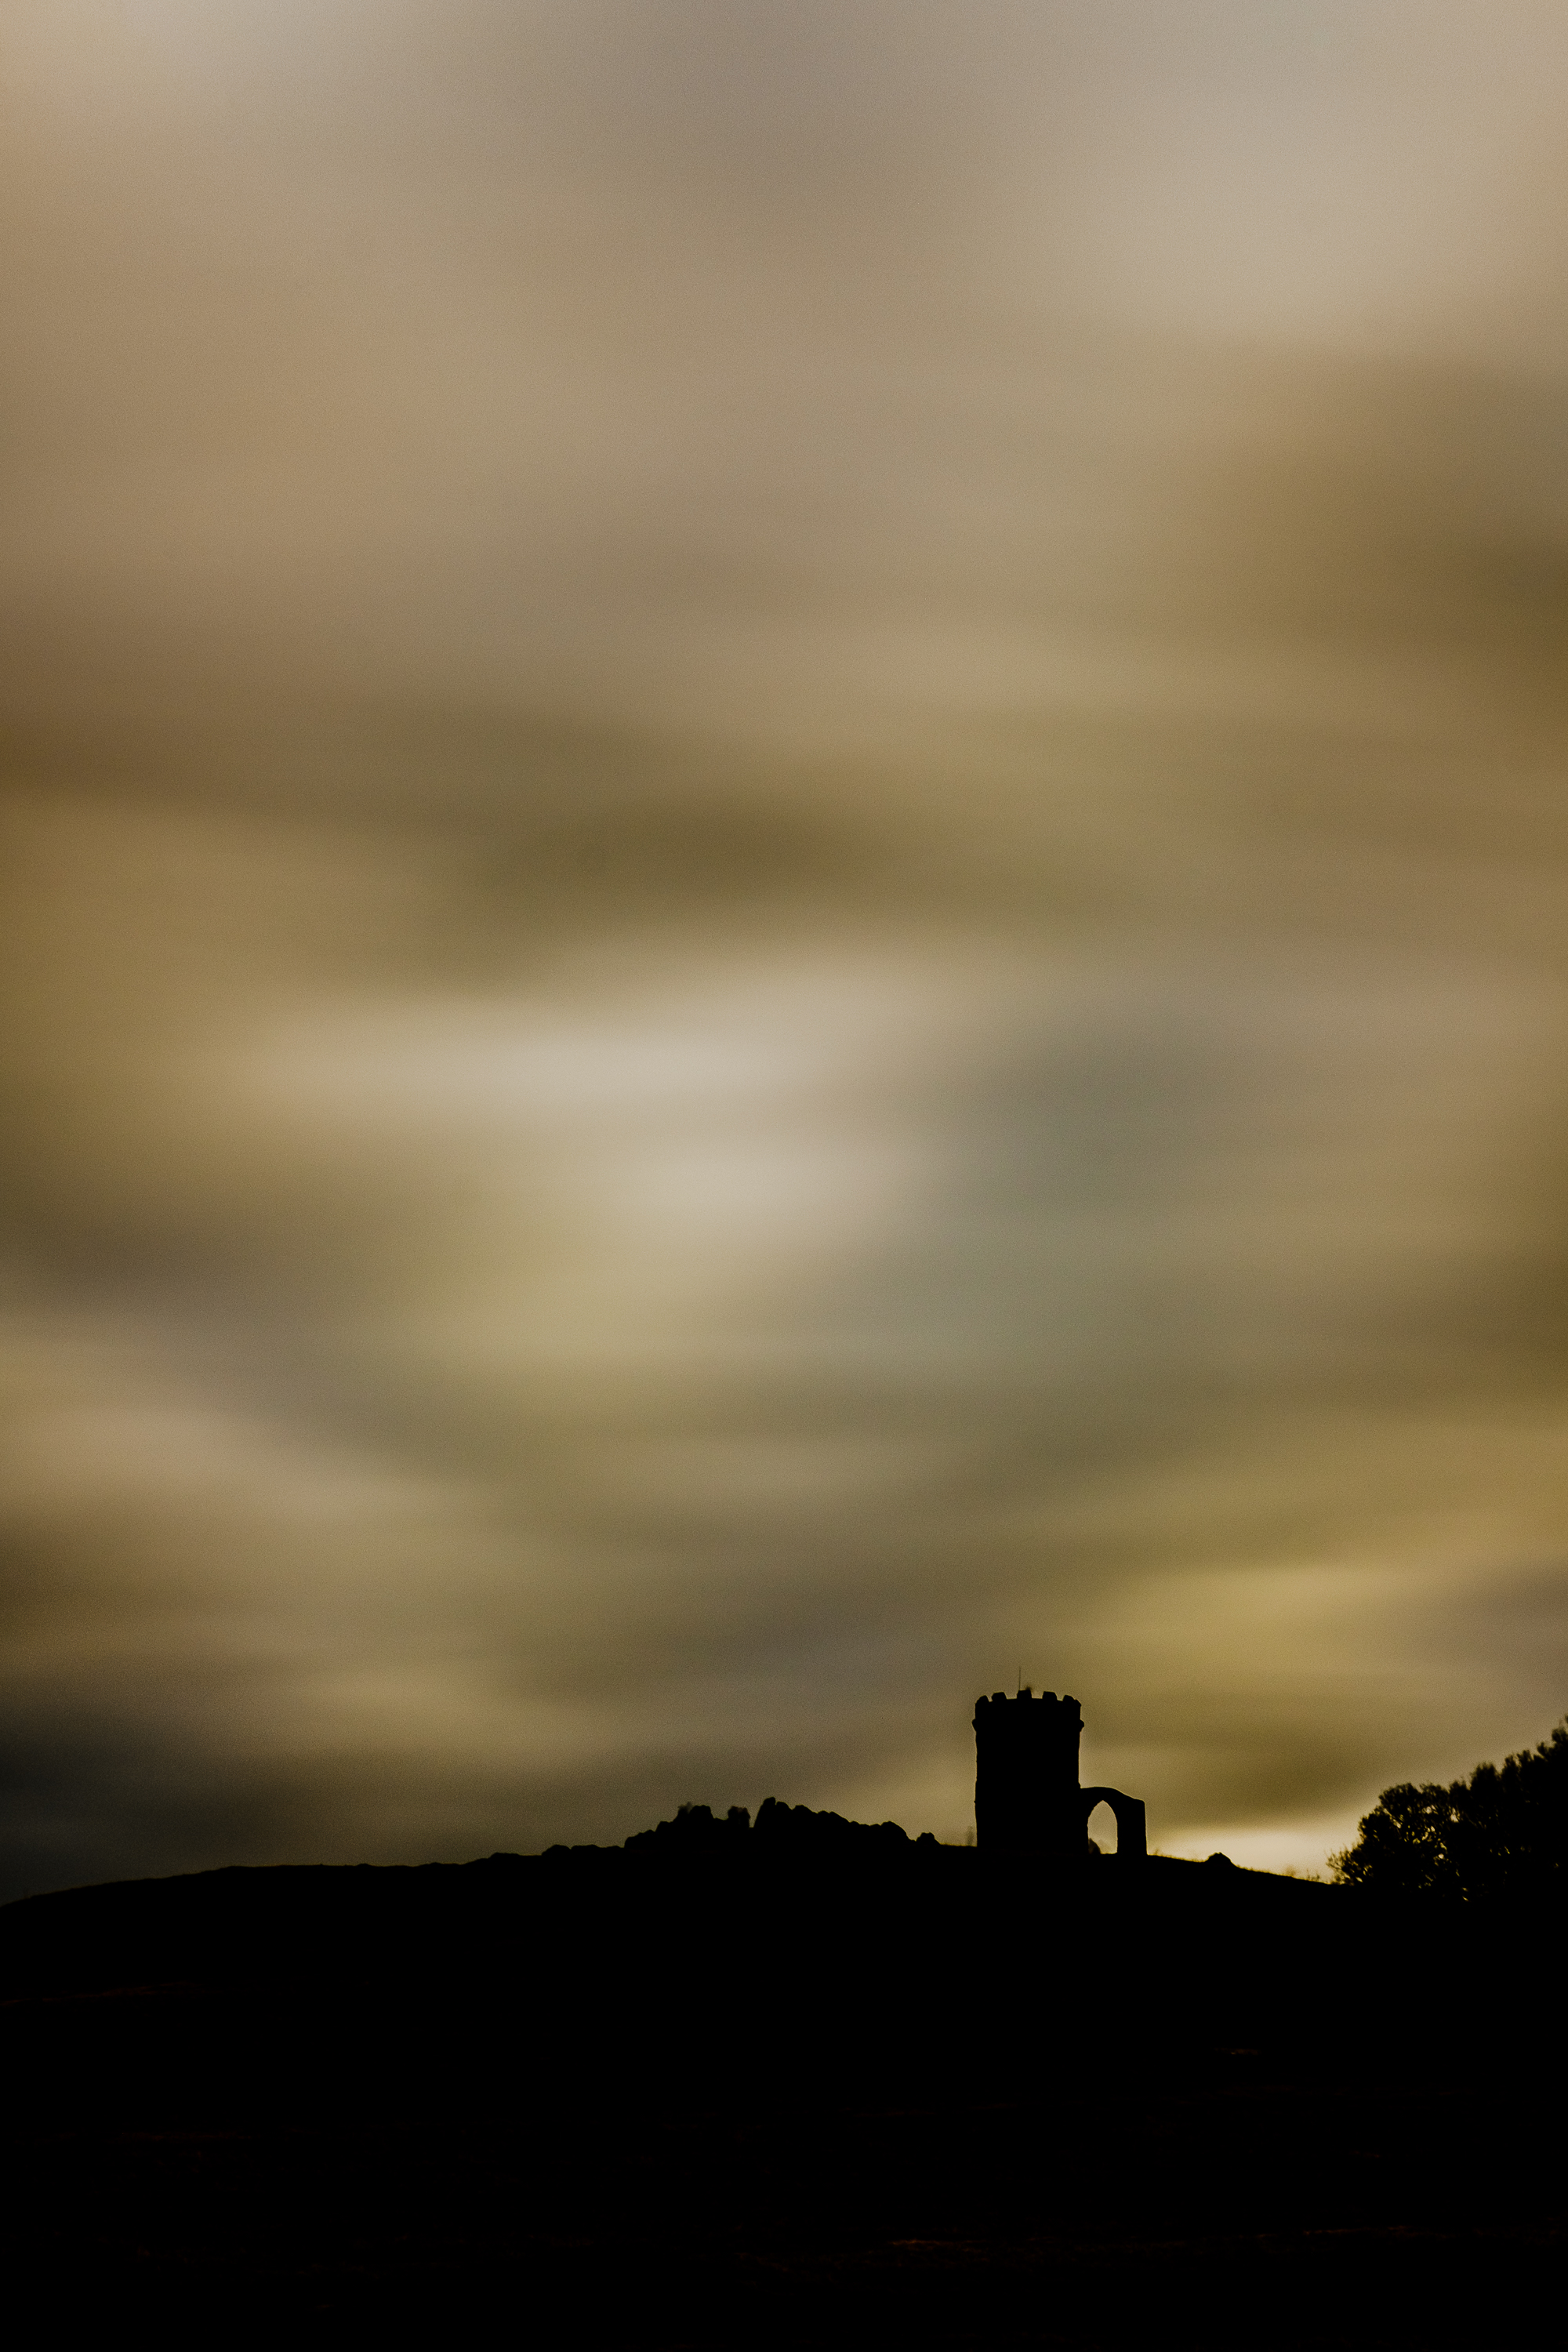
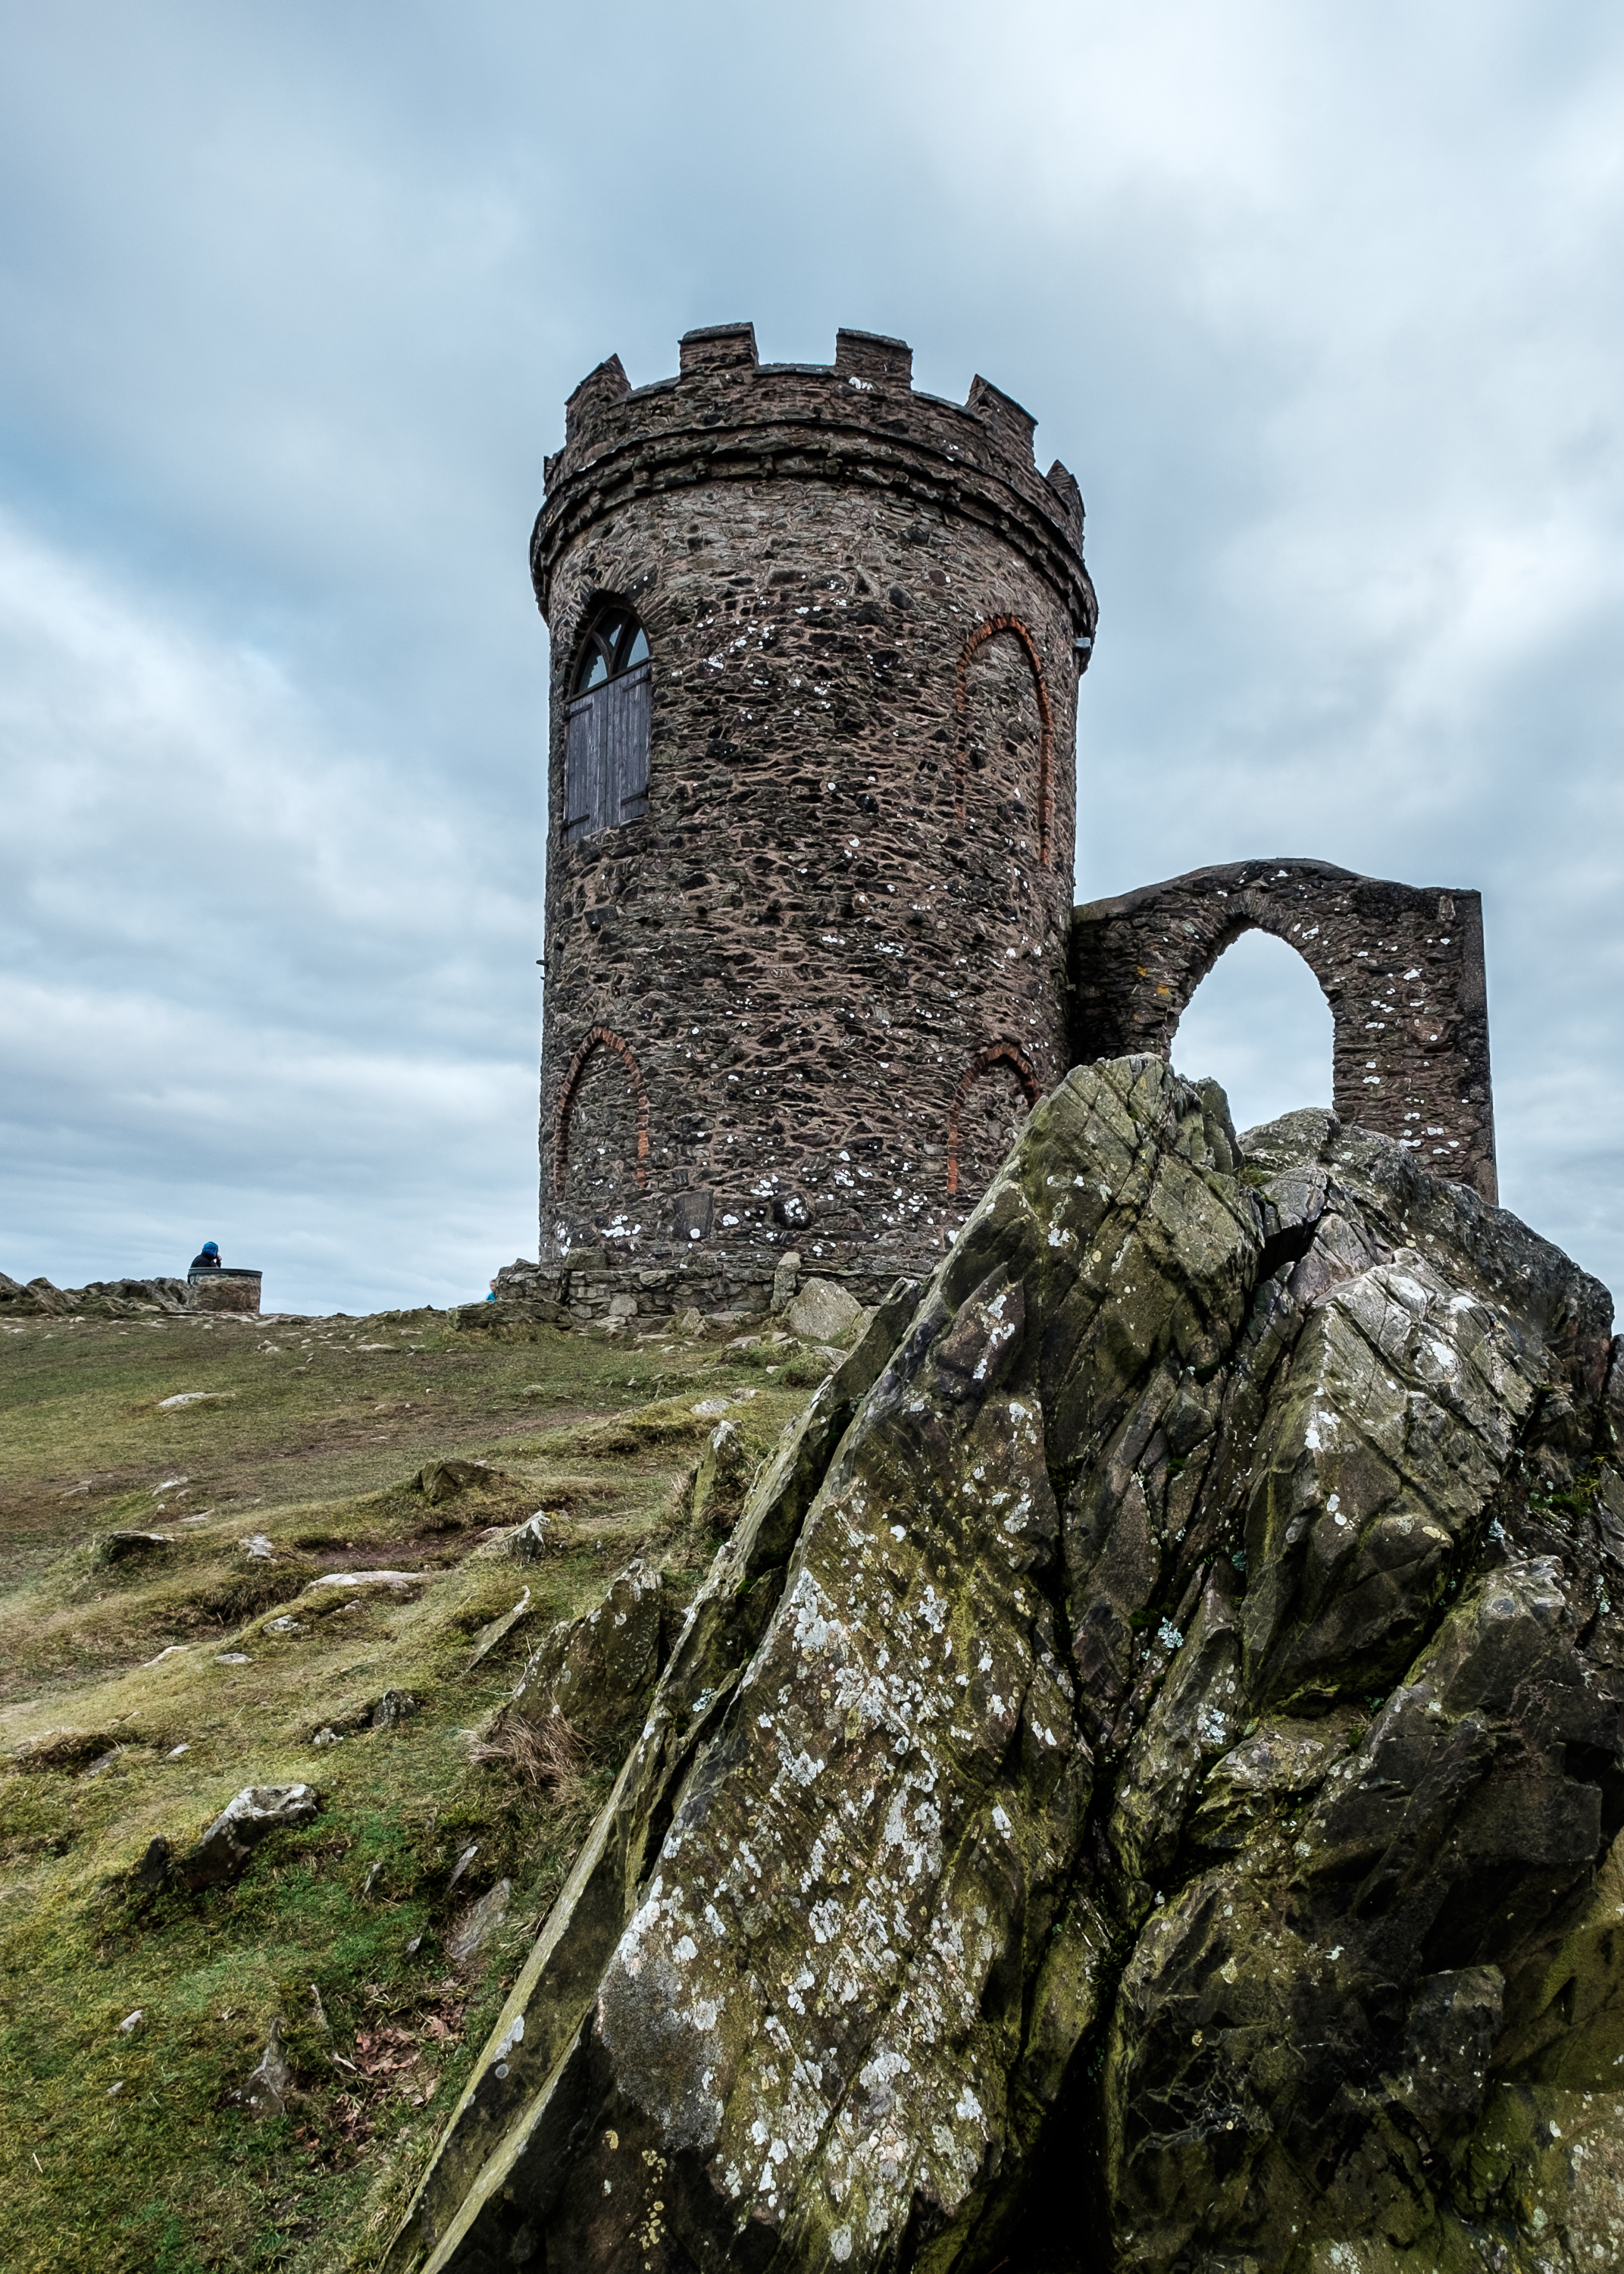
Old John, Bradgate Park, Leicestershire. 30 seconds at f16, ISO 200. Fujinon 35mm f2.
This morning the sun was shining and as I ate my breakfast it looked like a great day to get out and take some photos. However I was suffering from my usual problem – not knowing where to go.
I had just about made up my mind to head into town and wander around aimlessly for a while when I got an SMS from my sister and during the exchange of messages she suggested I head out to Old John, a very well known Leicestershire landmark situated in Bradgate Park.
By the time I actually got in the car the clouds had blanketed just about all of the sky. But this was fine, I had my tripod and my 10 stop ND filter with me (Cokin Nuances) so I decided during the drive that I would try taking some long exposures.
Old John, Bradgate Park, Leicestershire. One of a handful of shots I took that weren’t long exposures today. 1/35 at f11, ISO 200, Fujinon 10-24mm.
As I set up my tripod for the first time I was soon regretting not having thought to bring gloves with me. It wasn’t long before I was fumbling with the controls of the camera and shoving my hands in my pockets did little to remedy this.
I stayed around the vicinity of the Old John tower for a couple of hours getting steadily more refrigerated before deciding that I’d done enough and that what I really needed was a huge mug of tea.
As I sat processing my photos in Lightroom and sipping my tea at home, I discovered that the sensors of both my X-Pro2 and my XT-1 really could do with a very thorough clean. Dust spots show up way more at smaller apertures and I tend to use smaller apertures when I’m shooting long exposures.
It’s maybe the one downside of interchangeable lens mirrorless cameras that I can think of – more sensor dust. There’s no mirror so there’s nothing to stop dust falling right onto your sensor. I had given both bodies a good dust out using a rocket blower before heading out. Maybe it’s time I dug out the swabs I bought but have never used?
This is the reason I have used my X100T for most of my Fujifilm based long exposure work in the past. The X100 range are mirrorless but the lens is fixed so there’s no lens swapping opportunity for dust to get inside. But sometimes you just want to shoot some long exposures at different focal lengths so it’s time to suck up the dust.
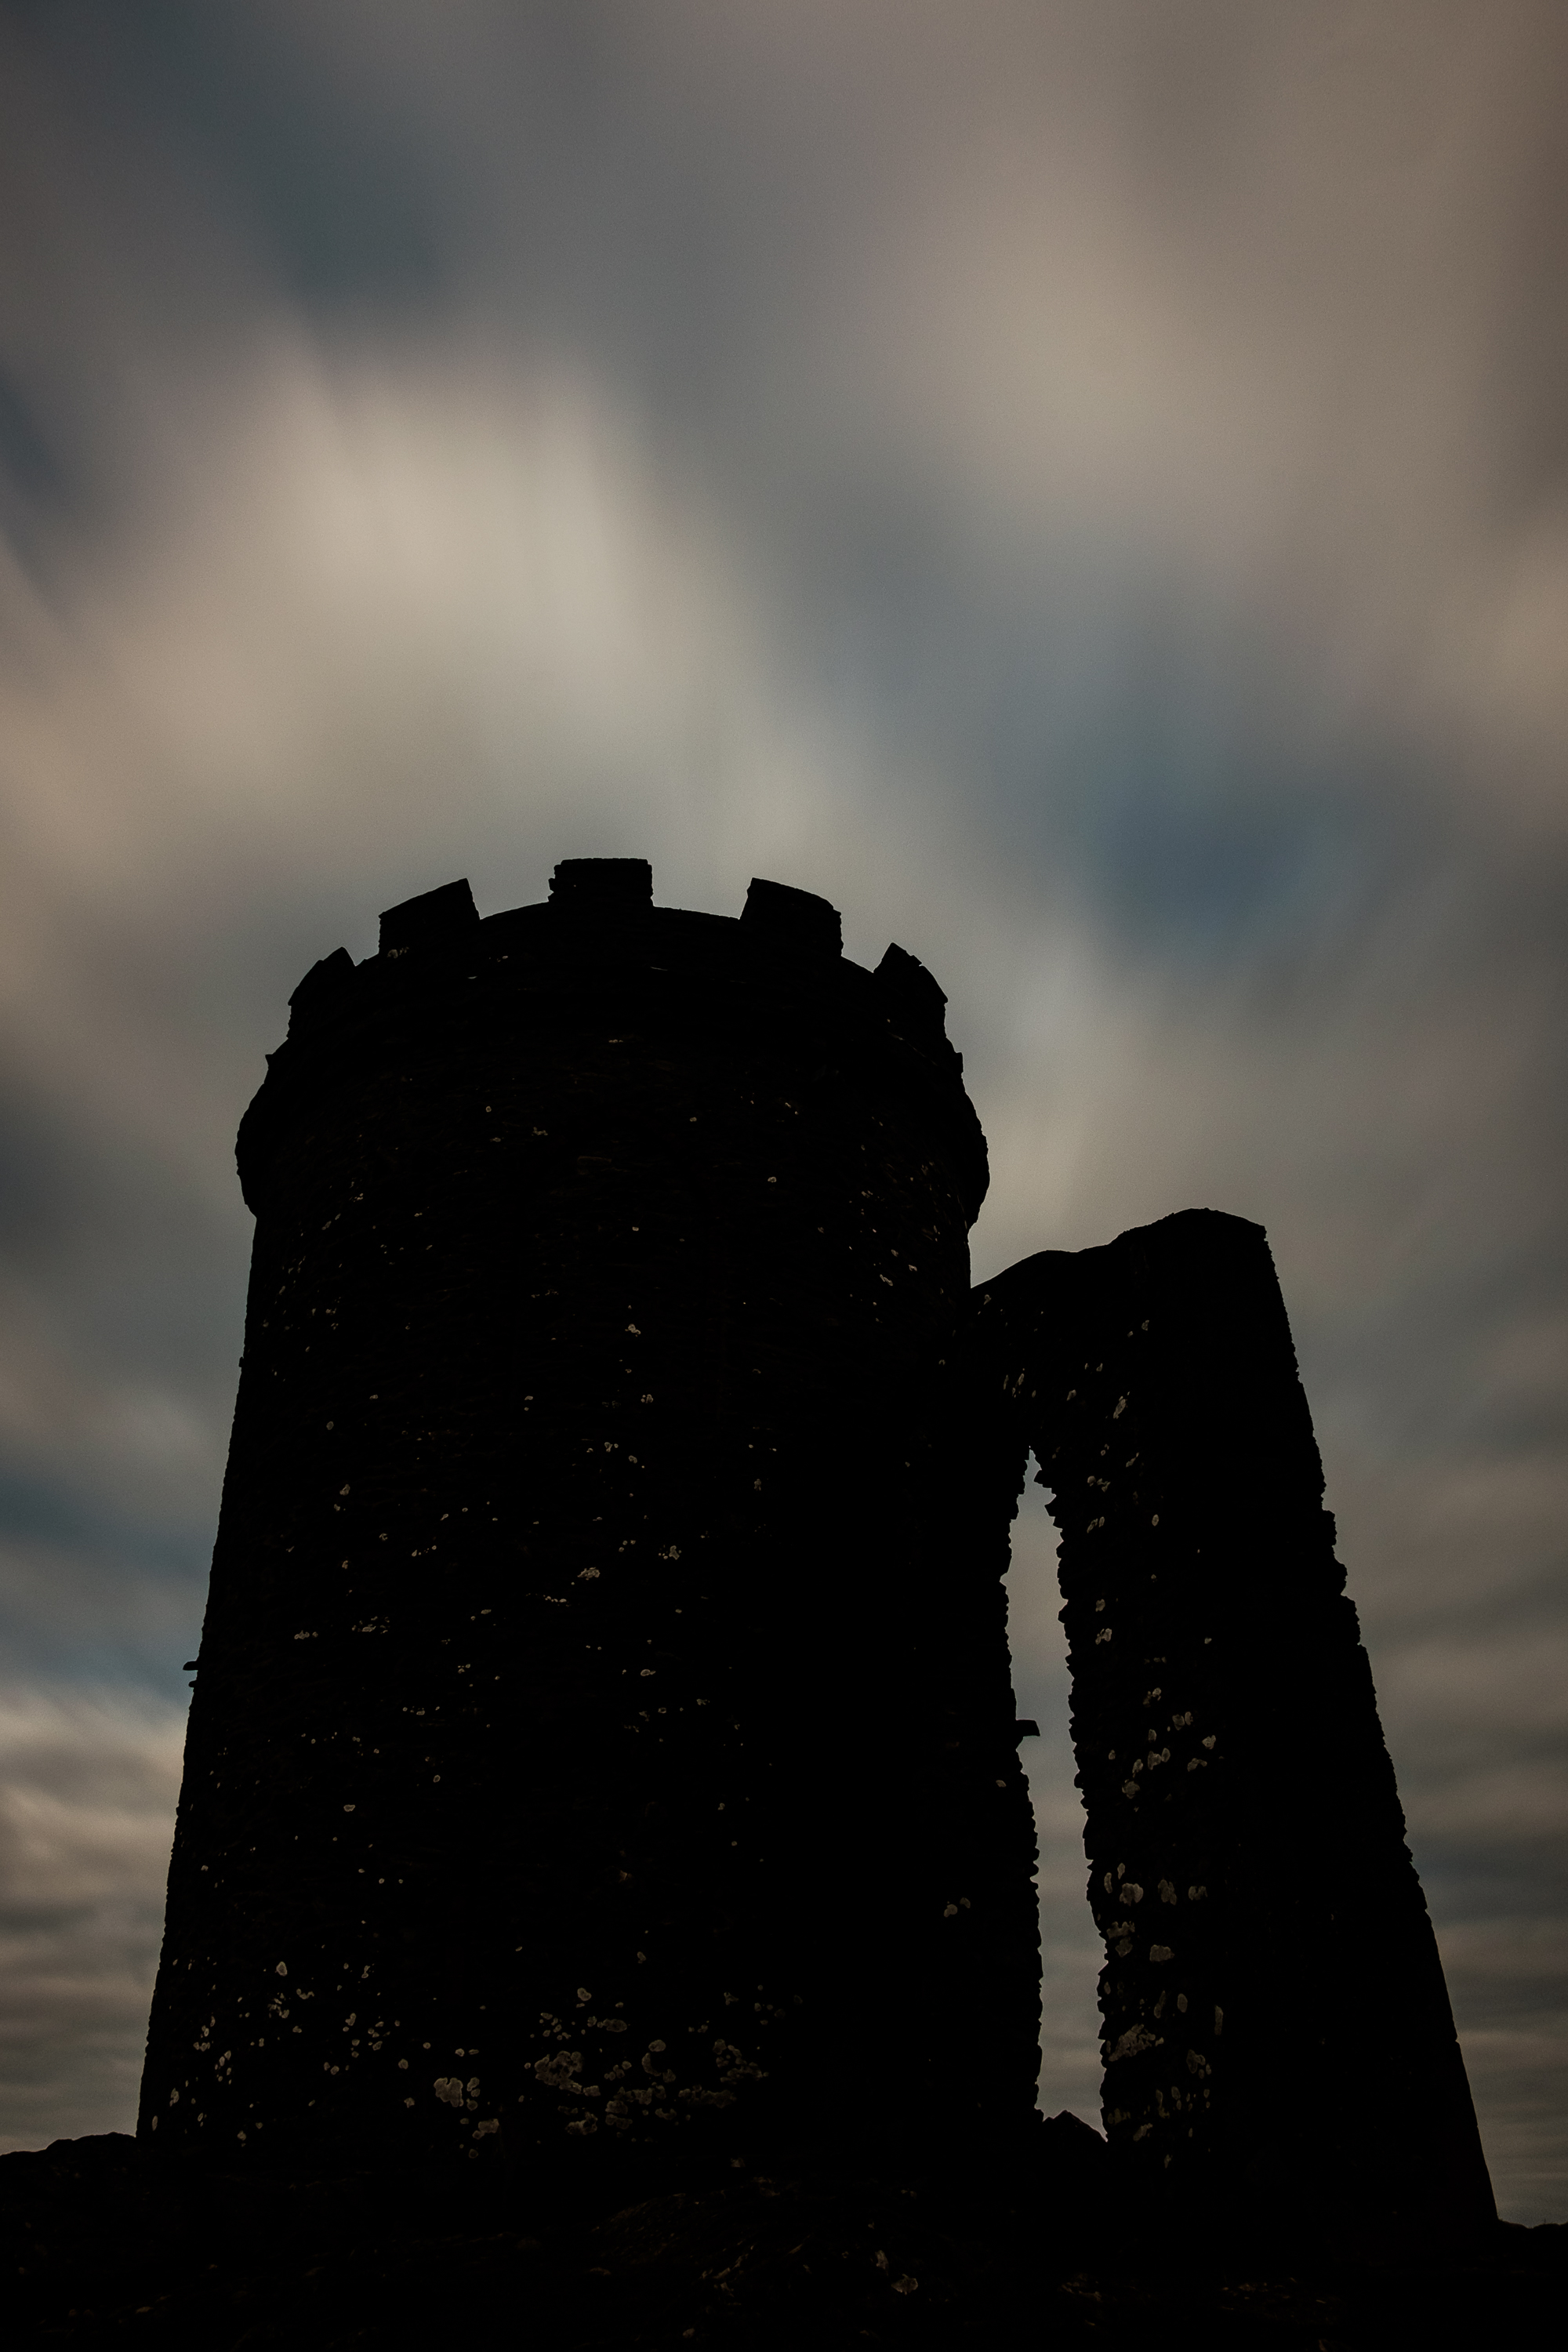
A bit closer up. 28 seconds at f11, ISO 200. Fujinon 18mm f2.
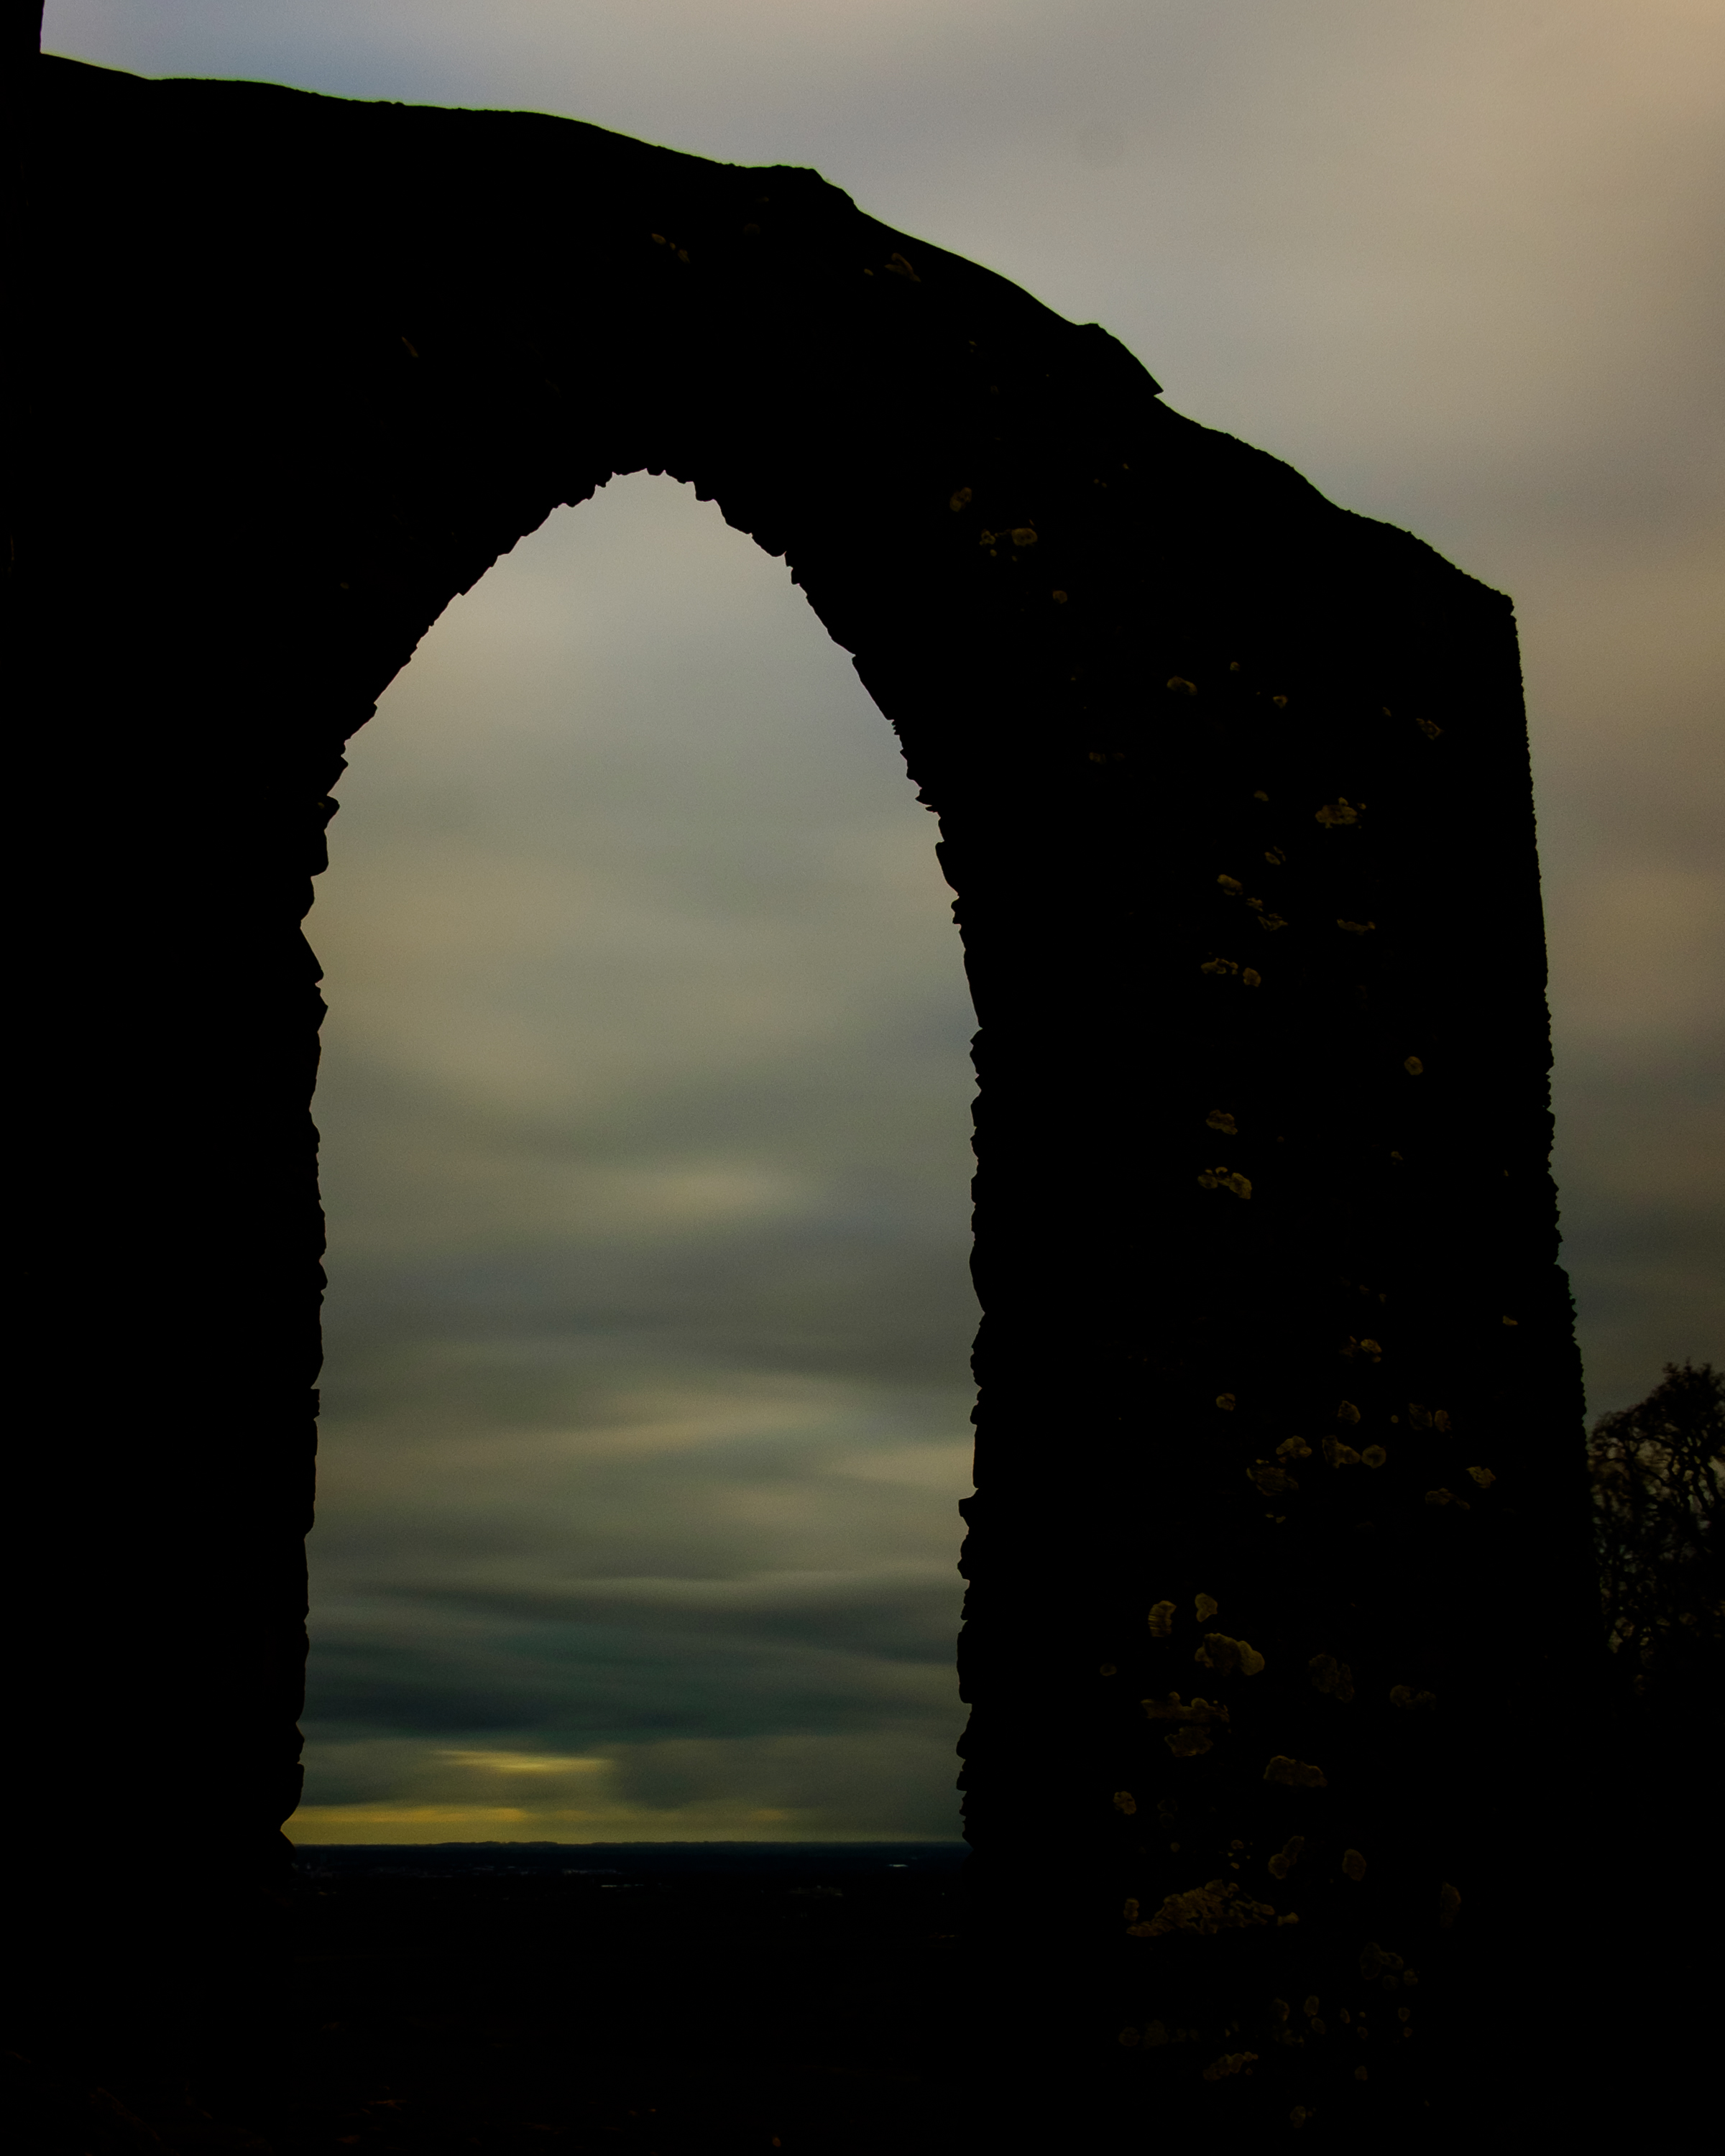
The “handle” of the “tankard”. 28 seconds at f11, ISO 200. Fujinon 18mm f2.
Just over a year ago I wrote about using a then new piece of software called Iridient X-Transformer which dramatically improved my results when processing photos from my Fujifilm X System cameras.
Back in January 2017 Iridient X-Transformer was in beta testing but the results were impressive enough for me to purchase the software right away.
Since then I have been using X-Transformer on a photo by photo basis where I think it will be of most benefit to the image.
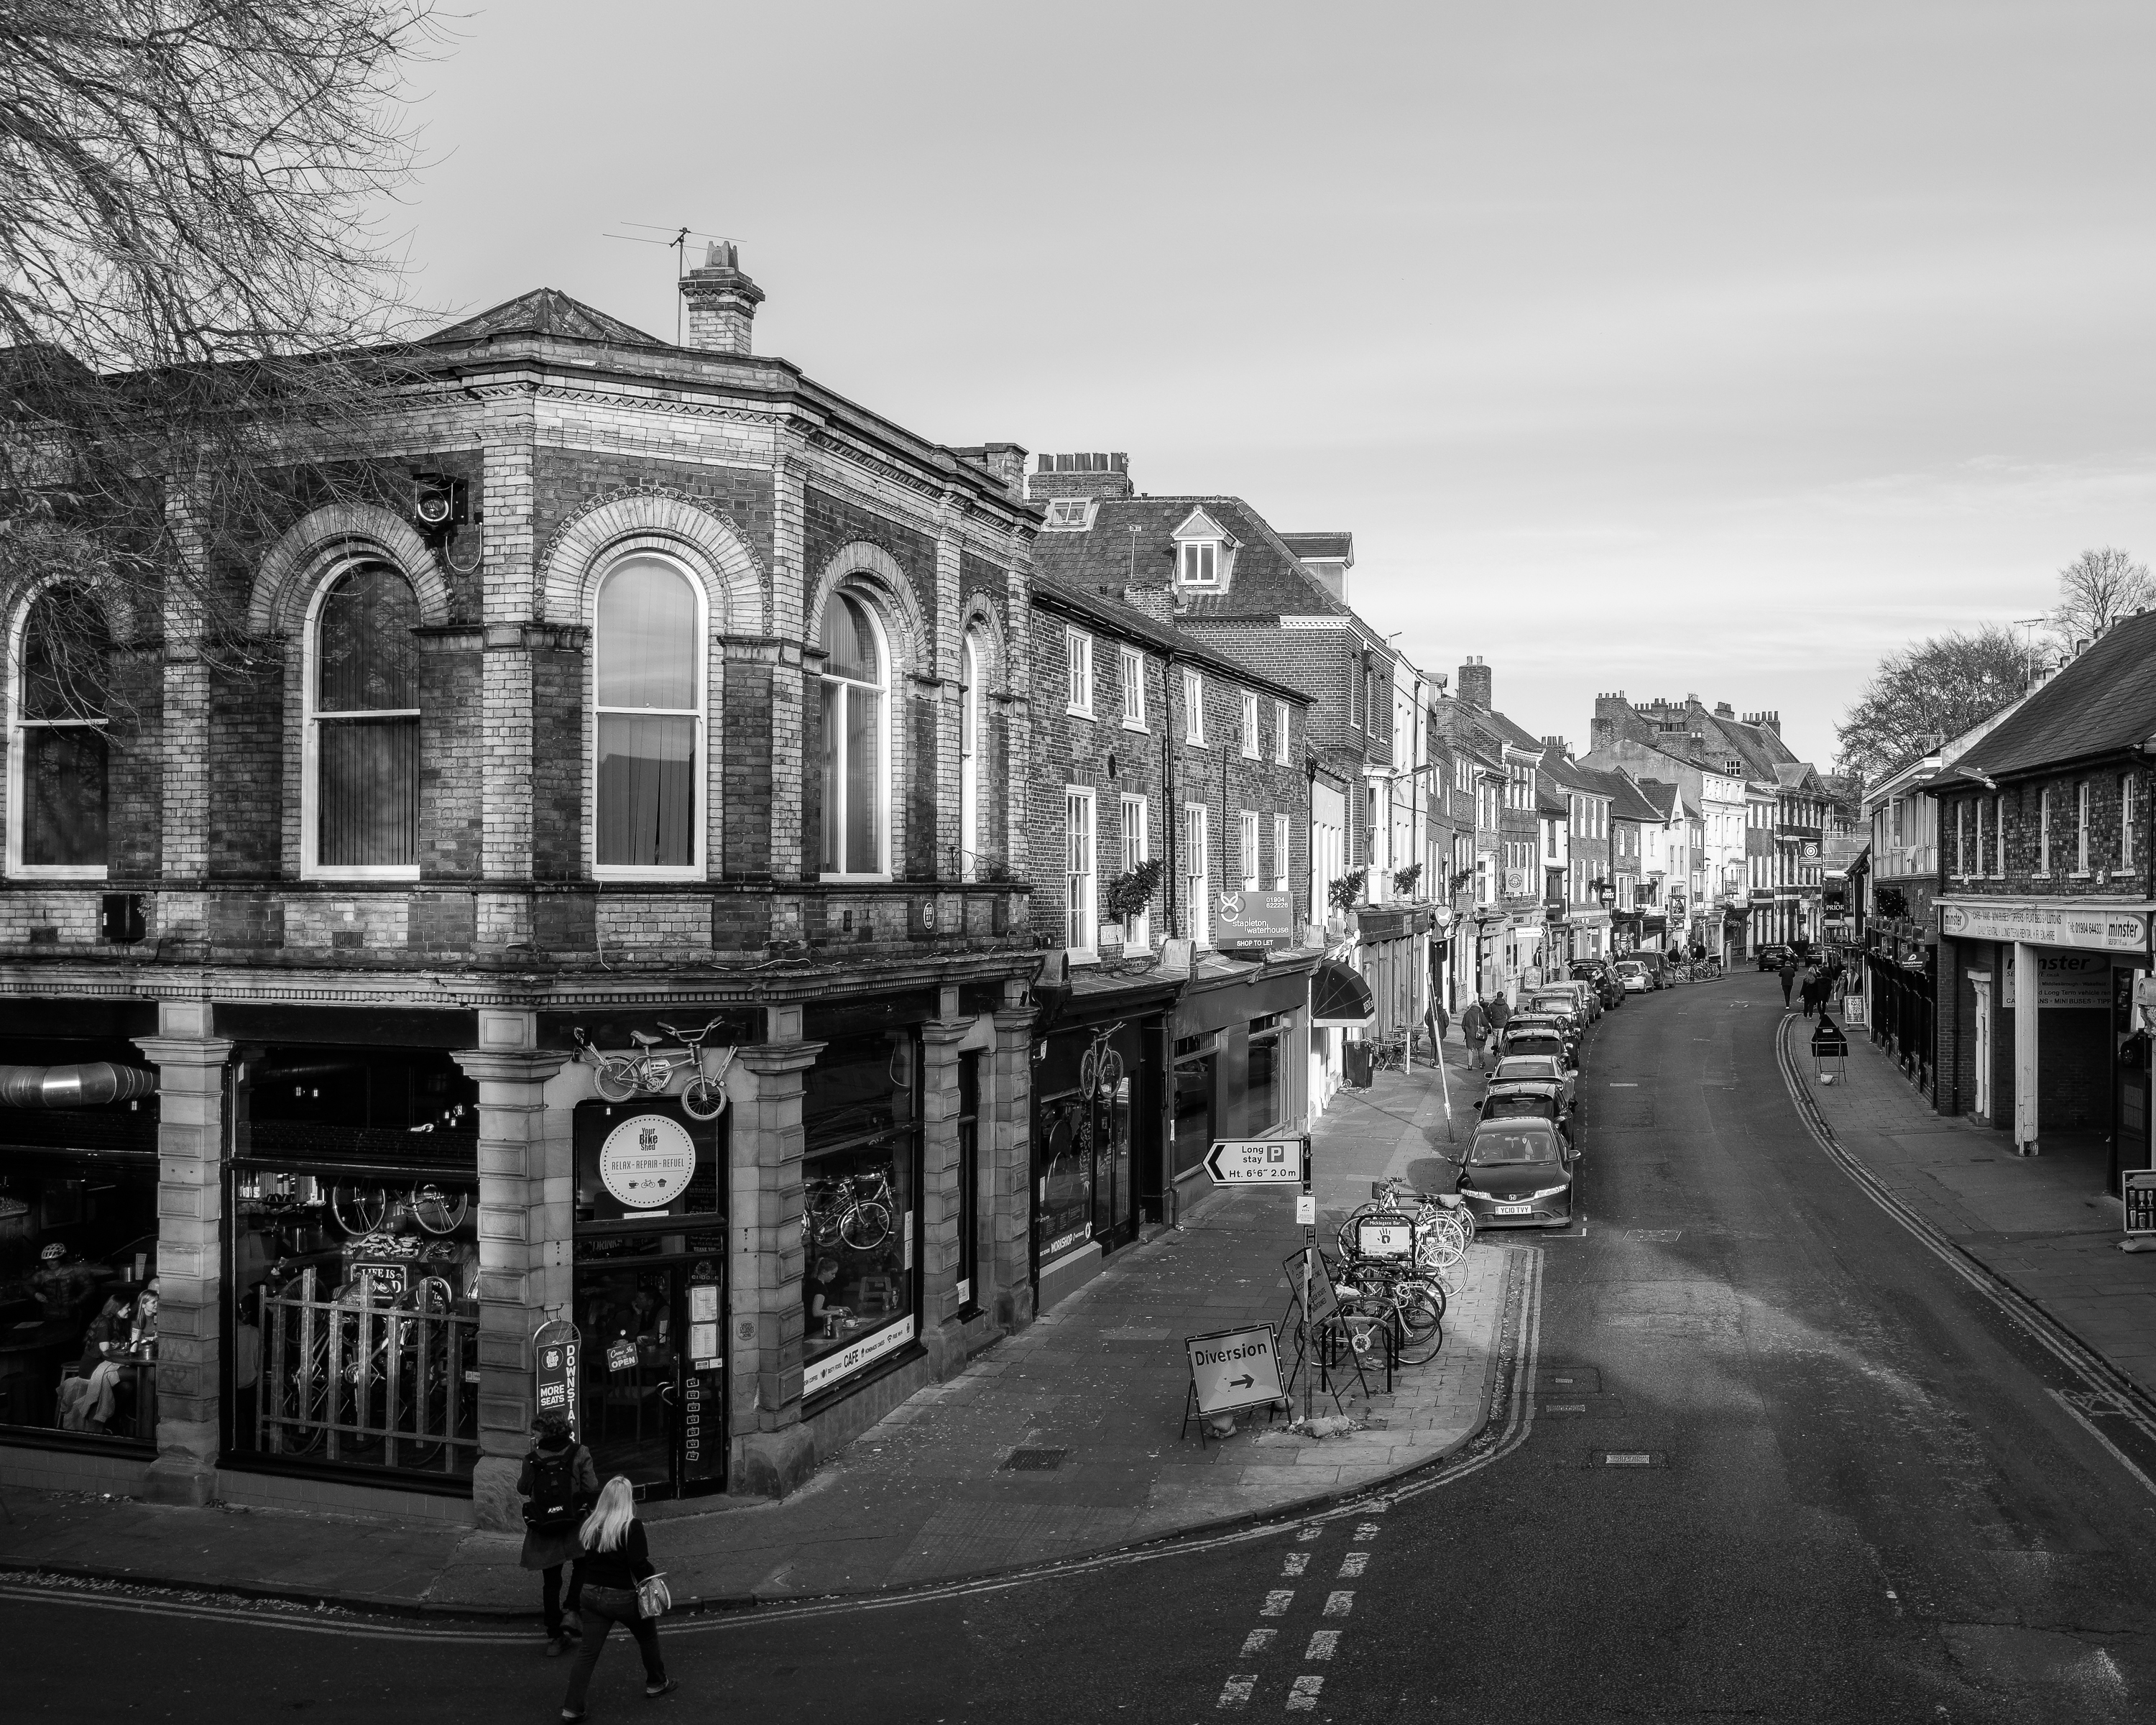
I’m now beginning to think that I should just run all my Fuji photos through X-Transformer regardless. Why? Have a look at the screen shot below. This is one small section of a photo I took in York back in November, looking along Micklegate from Micklegate Bar. It’s not a great photo, I didn’t bother to process it at the time and I’m just using it as an example here. Click on it to see it at 100% or I doubt you’ll be able to see what I’m talking about and particularly look at the lettering on the red “shop to let” sign, but also at the brickwork and the little Christmas tree.
Small section of a photo viewed in Lightroom’s compare loupe. Click to see at full size.
Which looks better / sharper / clearer / better defined to you? The image on the left or the image on the right?
To my eyes the version on the left is the clear (and clearer!) winner. No surprise then that the version on the left is the .dng file processed through X-Transformer whereas the version on the right is the default .raf imported by Lightroom.
I was originally planning to run all of my Fuji photos through X-Transformer as I stated in that original blog post but then I noticed how much more disk space the .dng file took up compared with the .raf file. In the case of the example shown the .raf file is 24.4MB, the .dng is 66.7MB. This photo was shot using my X-Pro2 and I use a (losslessly) compressed raw format so the .dng version is always going to be much larger as that compression is removed during the process of converting to .dng.
I am now thinking that it would better to accept the greater file size and just process everything I shoot on a Fuji camera (99% of my photography) through X-Transformer. I likely wouldn’t have used it to process this photo as I wouldn’t have viewed it as containing lots of intricate details – just a normal (and rather dull and uninteresting) street scene.
The difference is clear so I think it’s time for another change to my workflow. Process everything through X-Transformer before importing into Lightroom and I might as well stop using that compressed Fuji raw format on my X-Pro2 as there will be no benefit if converting to .dng anyway. Yes, the photos will take up more space but that might be a good incentive for me to be more ruthless with my “pruning” during the editing process.
I dont think this is “pixel peeping”. I think that Lightroom’s de-mosaicing of Fuji raw images is substandard and I’m not getting the full benefit of the image quality my Fuji cameras are capable of providing.
Adobe should be doing way better than this. I pay a subscription to use Lightroom, it’s not “cheap”. X-Transformer currently costs just £23.75 and is produced by a small, independent software developer. I do wish they produced their full Iridient Developer package for Windows, I’d be highly likely to switch from Lightroom.
I have considered and tried using Capture One and again the results are way better than Lightroom but at the moment I would rather not spend hundreds of pounds on new software and I don’t know how many hours learning to use it. I know Lightroom pretty well and get along with it fine, if I pre-process my photos with X-Transformer I can then just carry on as normal with Lightroom. I just wish to heck that Adobe would do something about its treatment of Fuji files. Good job Iridient are there to step in where Adobe fall short.