A Quick Play With Fuji’s Arcos Film Simulation

acros-example-3
Acros with red filter, no film grain – reduced in size for blog posting. Click to see larger (but not full size)

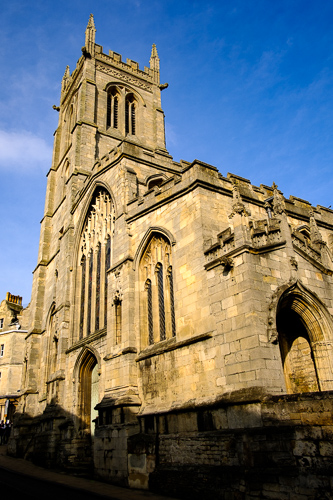
During my trip to Stamford with my X-Pro2 last weekend I shot in raw and processed everything through Adobe Lightroom, as I normally do. However, one of the strengths of Fuji’s X System cameras is their in camera jpg production. So why don’t I shoot jpg more? I’m sure there are several reasons. One is that I want to make sure that I retain the raw data from the sensor which provides me with everything I need to process the image in whatever way I want. Another is that maybe I’ve got too used to fiddling around with raw files? I now seem to see this as an essential part of the production of “A Photograph”. I have been shooting raw for about 11 years now, maybe I’ve got a bit stuck in a rut?

Every now and again I’ll go through a stage of shooting raw + jpg but I invariably end up messing around with the raw version and not touching the jpg. Maybe it’s time I revisited jpgs straight out of the camera? The X-Pro2 offers dual memory card slots so I can shoot raw to one and jpg to the other.

I’ve also had a long term quest for obtaining really nice contrasty black and white photos straight out of the camera. I’d got to a point where I was happy enough with the black and white settings I was using on my X100T. But now Fuji have also given us the Acros film simulation to enjoy on the X-Pro2.

So yes, maybe now is a good time to start shooting raw + jpg again.

Another very handy feature of the X System cameras is the ability to copy a previously shot raw image file from your computer back to a memory card, pop said memory card into the camera and then use the camera’s built in raw converter to create a jpg. This is what I’ve been playing with a little this evening.

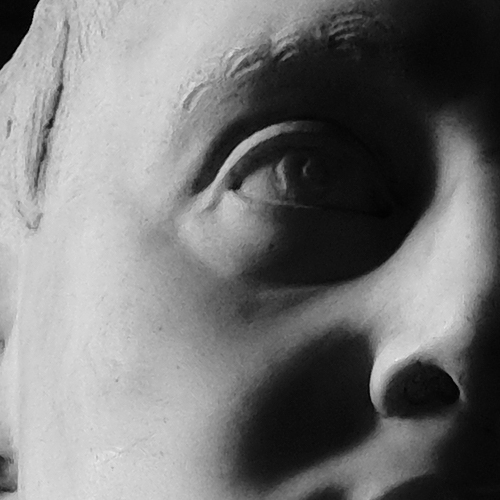
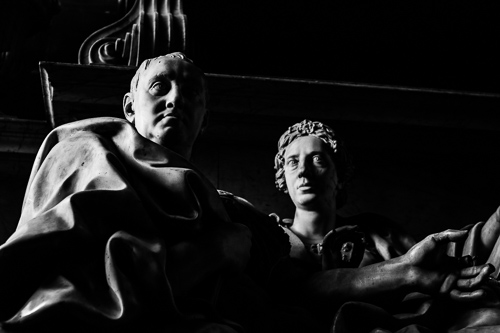
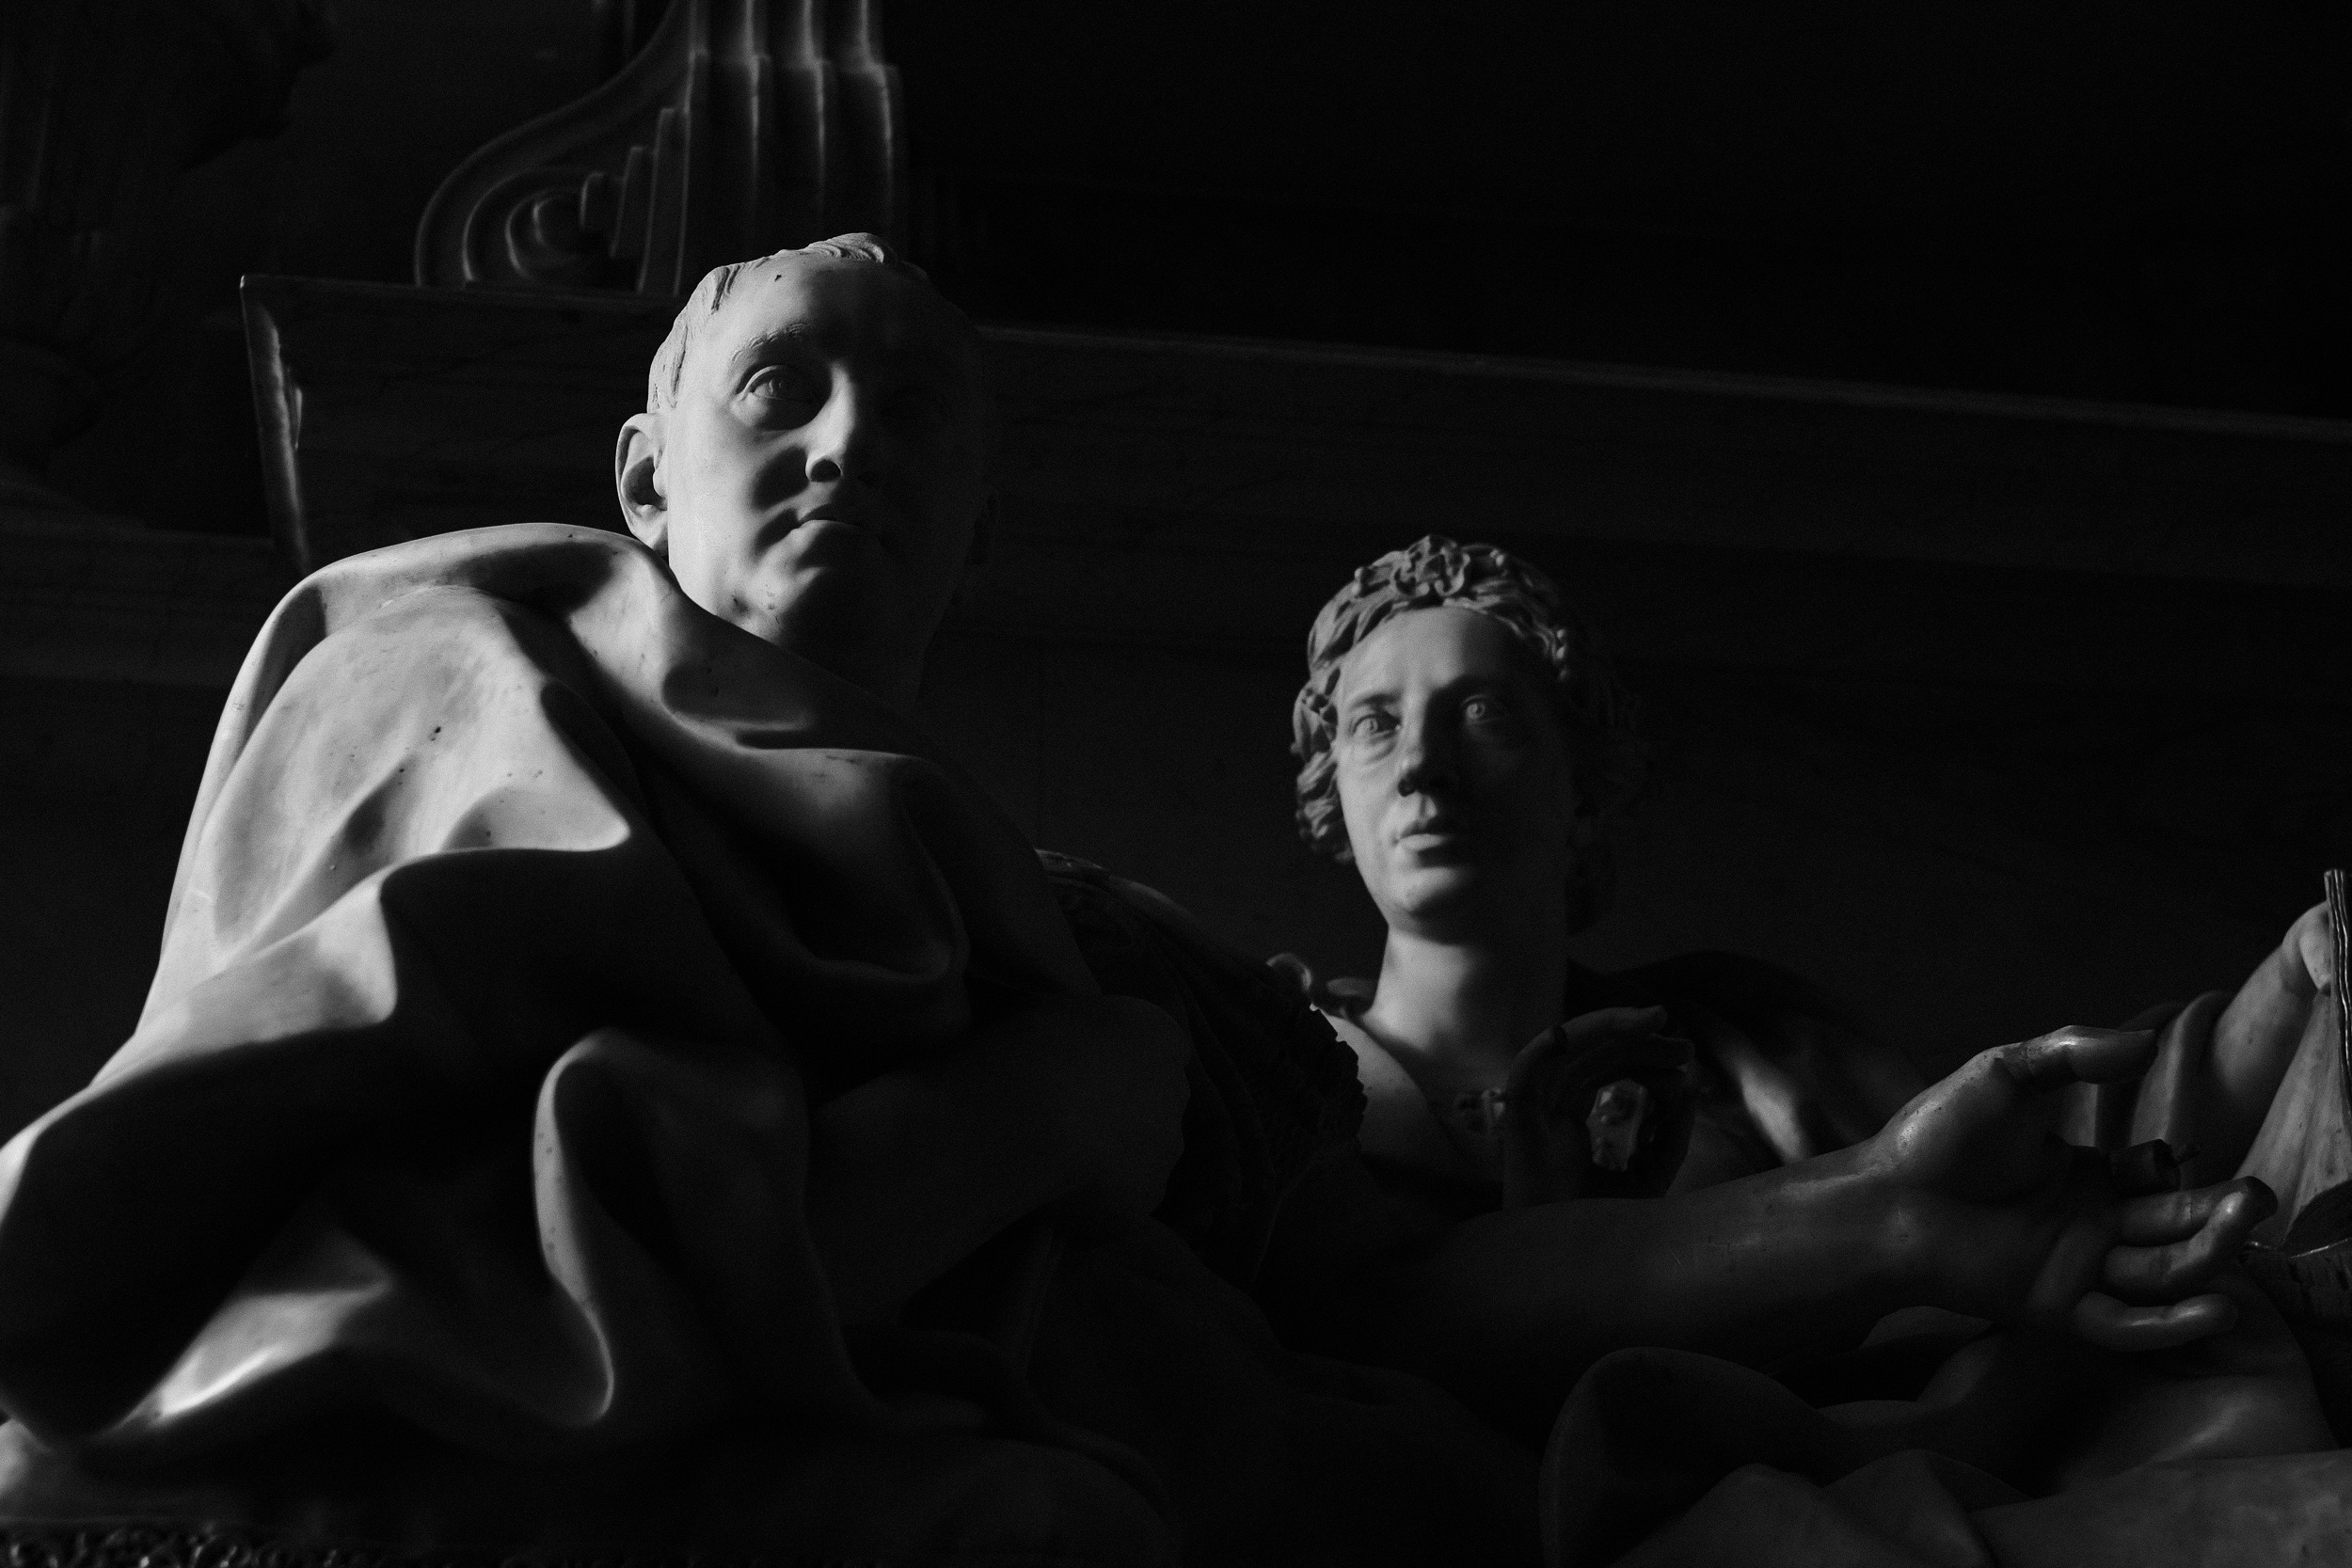
I took some photos of a monument in a church in Stamford which felt might benefit from the Acros film emulation. I copied the file back to the camera and fiddled with the raw conversion settings. I was particularly interested to see how the “film grain” effect looked so I processed the photo twice with the same settings but added some “weak” film grain to the second version.

It’s interesting to see how much of a difference there is in file size when you add film grain. There’s more “detail” in the image so the jpg can’t compress so well. Straight out of the camera the version without grain was 6.36MB, the version with grain was 15.1MB.

A scaled down copy of the version without grain heads up this post. I would have uploaded the full sized versions but WordPress kept reporting an upload error. I suspect the files were larger than some limit set somewhere in the system.

However I’ve also produced a couple of 100% crops from the original jpgs, just to show the film grain effect and these can be seen below. I’m quite impressed with the film like grain structure and I’m looking forward to having more of a play with the Acros simulation. It certainly produces the kind of high contrast black and white that I enjoy so much.

And do you know what else I discovered? I really do actually prefer the jpg straight out of the camera to the one produced by me sat tinkering in Lightroom for… however long it took. I think there might be a lesson in there somewhere.

crop1
100% crop of Fuji’s Acros film simulation – no added grain.
crop2
100% crop of Fuji’s Acros film simulation – added “weak” grain.

An Afternoon in Stamford

Town Bridge, Stamford
Town Bridge, Stamford, Lincolnshire.

A sunny Sunday afternoon prompted me to get out and about with a camera. As I’d not long had the X-Pro2 I was very keen to give it a try in normal daylight conditions. The only serious time I’d spent shooting with it so far was at the gig at The Donkey the previous Thursday evening.

Stamford is a large market town in Lincolnshire, about an hour’s drive from home for me. I’ve visited quite a few times before but it had been a while and I couldn’t remember the last time I’d looked around in such lovely weather. A bit of sun on the honey coloured stone commonly used for building around here really helps to give it a warm glow. Stamford is an ancient town, tracing its routes back to at least as far as Roman times. There are lots of interesting old buildings to enjoy with many intriguing narrow lanes twisting between them. The town has retained much of it’s older heritage which has been so sadly depleted in my native Leicester.

I packed my X-Pro2, all three of my Fujinon lenses and also my Helios 44M along with my X100T – plus the usual array of spare batteries, memory cards, mini Manfrotto tripod etc. With Fuji kit I’m always amazed at just how much I can carry for so little encumbrance.

St. Mary's Passage, Stamford.
Stamford seems to be full of interesting narrow passages and lanes. This one is opposite St. Mary’s Church and is named accordingly.

I didn’t set out to do anything adventurous such as time lapses or long exposures. The afternoon was just for me to start to get used to the camera. Yes, I’d had years of experience with the X-Pro1 but the second incarnation of the X-Pro body has made quite a lot of changes. The two things which seem to keep catching me out more than anything else are hitting the D-pad buttons instead of reaching for the new focus point joystick (this I can put down to the way I shoot with my X100T) and rather curiously finding myself lifting the shutter speed dial and thus changing ISO when I intended to just change the shutter speed.

However I was soon lost in my own little world, enjoying what the town had to offer and getting into the flow of the new camera.

One feature I really like on the X100T is the ability to move your spot metering along with your selected focus point. Years back, not long after I bought my original X100 Fuji sent out a survey asking users for features they would like to see in future versions of the camera or firmware. I’d voted for this feature and I’ve made a lot of use of it with my X100T. It’s great to have the facility available on the X-Pro body too now. I enjoy contrasty lighting, objects or people picked out in a shaft of strong light when all around is darkness. Using this feature I find it very quick and easy to achieve the exposure I want by just plonking my autofocus point over a bright subject. This is how I shot the memorial statue shown below, located in St. Martin’s Church. I felt that there was a decidedly Roman look about this tableaux of (presumably) husband and wife.

St. Martin's Church.
A monument to members of the Cecil family, St. Martin’s Church, Stamford.


The church yard at St. Martin’s, Stamford is also the location of the grave of Leicester legend Daniel Lambert. I did go and locate the grave but I didn’t take a photo as the lighting wasn’t right. For anyone interested to find the burial place – turn left as you walk out of the south door of the church, turn left and follow the path along the length of the building. When you reach the gate look to your right and you’ll see an extension to the church yard. Daniel Lambert’s grave is in there. Just walk through the gate and on a few yards and I don’t think you’ll be able to miss it. Although this is primarily a photography blog, I am very keen on history so at some point Daniel Lambert might well pop up in another post. Meanwhile here’s a bit of information about him from Wikipedia.

stamford 13032016-3
Church of St. John The Baptist, Stamford.

I thoroughly enjoyed my afternoon in Stamford. I’m sure I’ll be back again a little later in the year. Hopefully I’ll be able to spend a bit more time wandering aimlessly around the streets. It would have been nice to have the company of another photographer. I always feel it’s better to either go alone or with a one or two other photographers. Taking non-photographers along is usually a recipe for disaster unless they are very patient people.


stamford 13032016-4
A doorway just inside the porch of the Hospital of William Browne which was founded around 1483.