Photography has always been a big part of my life, it’s an interest I inherited from my dad and my aunt, Stella. They had both been very keen photographers throughout their lives. My dad worked in the photographic trade and my aunt was a school teacher. They were both frequently exhibited around Leicester and were members of various Leicester photographic societies. They used to create their own black and white photographic prints in a dark room they created at home in the 1950s and also shot colour slides.
Sadly my aunt passed away in 2020 at the age of 95. Over the years we would frequently discuss photography and show each other our photos. I was aware of my aunt’s collection of 35mm slides but didn’t really get to see many of them beyond an occasional slide show back in the 1970s following her return from a holiday. I also had no idea just how very large the collection was.
When we discussed her slides Stella would typically say, “I should just throw them all out really, nobody is going to be interested in seeing them”. To which I would respond quite firmly that I would love to see them so please don’t throw them away.
I did mention on occasions that I might be able to scan them and pop them onto a DVD for her to look at more easily but it never happened. I should have asked her permission to get started on this project years ago but the conversations never drifted in that direction.
It was only after Stella died that I found myself in possession of thousands of 35mm slides and I knew that I wanted to see them, to digitise them, to make them easier to view. Yes, I do have a slide projector and a screen but it’s quite a bother to set it up and the photographs still remain trapped on the transparency.
With this quantity of slides, I knew it wasn’t going to be realistic to scan them all. I do have an Epson flatbed scanner which I bought because it also had the facility to scan negatives and slides. This is fine for small quantities but it takes quite a long time. Four slides can be mounted for scanning at a time and then it takes ages to actually scan them. To scan a batch of four slides at 9600 dpi takes just over 11 minutes. At 4800 dpi the same scan takes a little over 5 minutes. The quality at 4800 dpi might be acceptable and it would probably be fine if I could stack up a set of maybe 50 to 100 slides and leave it going. But having to return to the scanner to reload and start again every 5 to 10 minutes would be painful for so many slides.
My old friend Phil had spoken to me about his slide digitisation projects before. He had thousands to work on, many of which he saved from being thrown into a skip. Phil had been re-photographing the slides in order to digitise them.
At first, I was sceptical about this method. Surely a scanner would give superior results? However, he showed me some of his results and I was suitably impressed.
The key advantage to this method is speed. It takes a few seconds to give each slide a careful dusting, pop it in front of the lens and photograph it.
I decided that this would be the method I would try. It would at least mean that I could see what was in the collection far more quickly than by scanning. If I wasn’t satisfied with the quality of the re-photographing method I could then go back and use the scanner for specific, targeted slides if I wanted to. I had used this method a few years ago on some old 2.25 inch square negatives that my grandfather had taken back in the 1920s and 1930s (yes, photography really did run in my genes). With these I had placed the negatives onto a lightbox and photographed them before returning to key photographs using the scanner when desired.
After a few conversations with Phil and a little anxiety over getting it all to “fit together”, the following was the kit I ended up producing to perform the task.
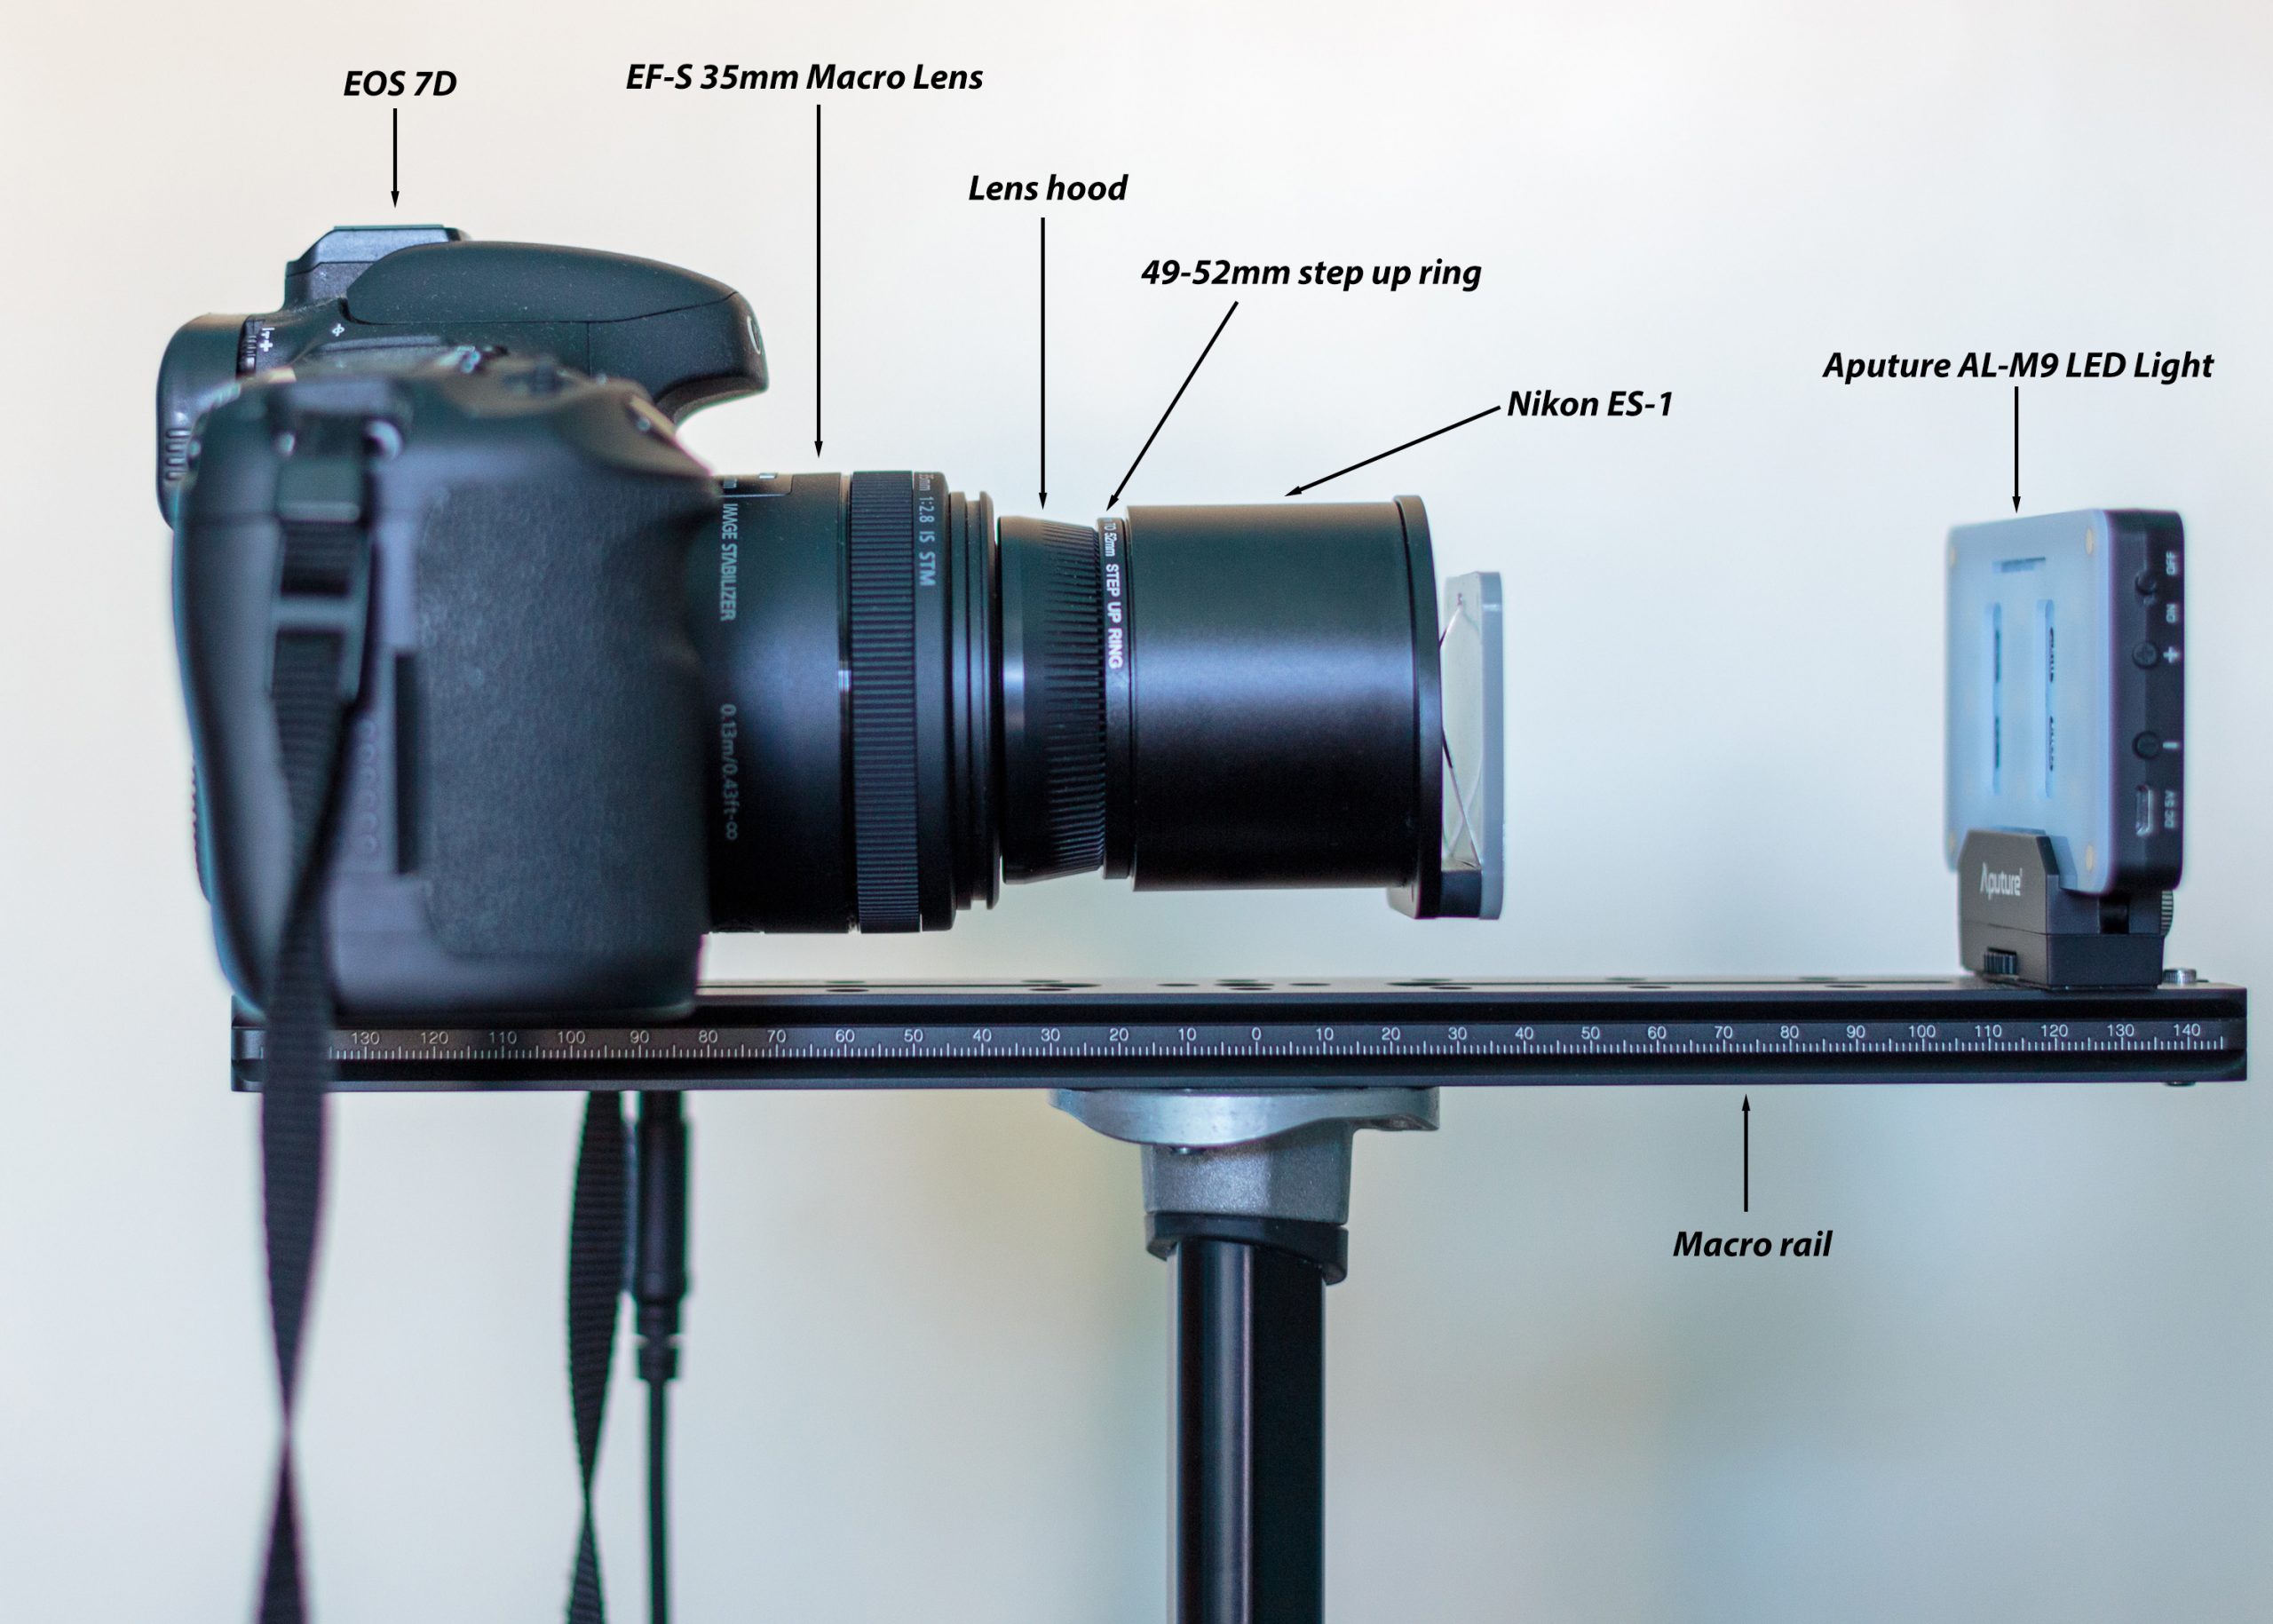
- Canon EOS 7D : an old APS-C DSLR with which I was happy to clock up a few thousand extra shutter activations.
- Nikon ES-1 slide adapter : I ordered this at a very reasonable price (less than £30) from an eBay seller based in Japan. Buying options closer to home were about three times the price or more. It was intended for use with a 60mm Nikon macro lens on a 35mm sensor (“full frame” – although I dislike the term) body. As I don’t have a Nikon DSLR I needed to think about the lens I would use alongside this. It did seem like the best way I could find to hold a slide in position in front of the camera. This device is just a short length of barrel with a slot to feed slides into at the far end. A diffuser screen comes fitted to provide even lighting behind the slide. It contains no optics.
- Canon EF-S 35mm macro lens : I bought this second hand from MPB. A 35mm lens on a Canon cropped sensor body has an equivalent focal length of 56mm (35 x 1.6) which is very close to the intended 60mm focal length of the Nikon ES-1 slide adapter. Being slightly “shorter” I could expect a small blank border around each frame I shot – easily cropped out in post. This was the most considerable financial outlay of the project but I convinced myself the lens would be useful for other things. I particularly like the integral LED ring light around the front element of the lens, although this is of no use to me for this project.
- Lens hood : this is the lens hood supplied with the EF-S 35mm macro lens. Unusually for a lens hood it has a filter thread. This proves useful below.
- 49mm to 52mm step up ring : this is used to convert the 49mm thread provided on the lens hood to a 52mm thread as required by the Nikon ES-1.
- Aputure AL-M9 LED light : This one was recommended to me by Phil, it’s what he uses. It provides a good, bright and even light to illuminate the slides from behind. It has an integral battery and can be charged via USB.
- Macro rail : I started work without this but it was a bit of a pain having to set up the LED light in the optimal position each time. The macro rail is mounted to a tripod and holds the camera at one end and the light source at the other. Everything can be kept on the macro rail and ready to shoot slides, even if I want to use the tripod for something else.
- Remote release : not labelled on the photo above but I use a cable release for each shot to avoid vibrations.
With this set-up I can probably shoot at a rate of a slide every minute or faster. I give each slide a quick dusting over with a soft brush before inserting it into the ES-1, check alignment and then shoot. I shoot in aperture priority at f8 (often a sweet spot for lack of distortion) and capture as raw files.
The post-processing can take rather longer but I would still have to perform this step even if I’d used a scanner to digitise the images. The photos are imported from the memory card to a dedicated Adobe Lightroom catalog to keep them separate from my other photographs. I apply the “camera faithful” colour preset, straighten the image (it’s very easy to have a slight tilt without noticing during shooting) and crop away the aforementioned small blank border. I often do try a quick “auto” processing in Lightroom – sometimes it gets things just how I want them, other times it looks a bit overprocessed and artificial. With or without the use of “auto” I fiddle a little with the basic exposure settings. Finally, I try to remove as many traces of dust and damage as I can and as sympathetically as I can. Even with using a soft brush some stubborn specks of dust remain, as is only to be expected given the age of these slides – more than 60 years old in some cases.
I’m keywording each slide as best I can. Sometimes this is just from a label Stella stuck onto the box containing the slide, other times I can add tags for places and people where known. Each box of slides is added to a Lightroom collection. Approximate dates can sometimes be gleaned from a month and year stamp on the slide mount added by the processing lab.
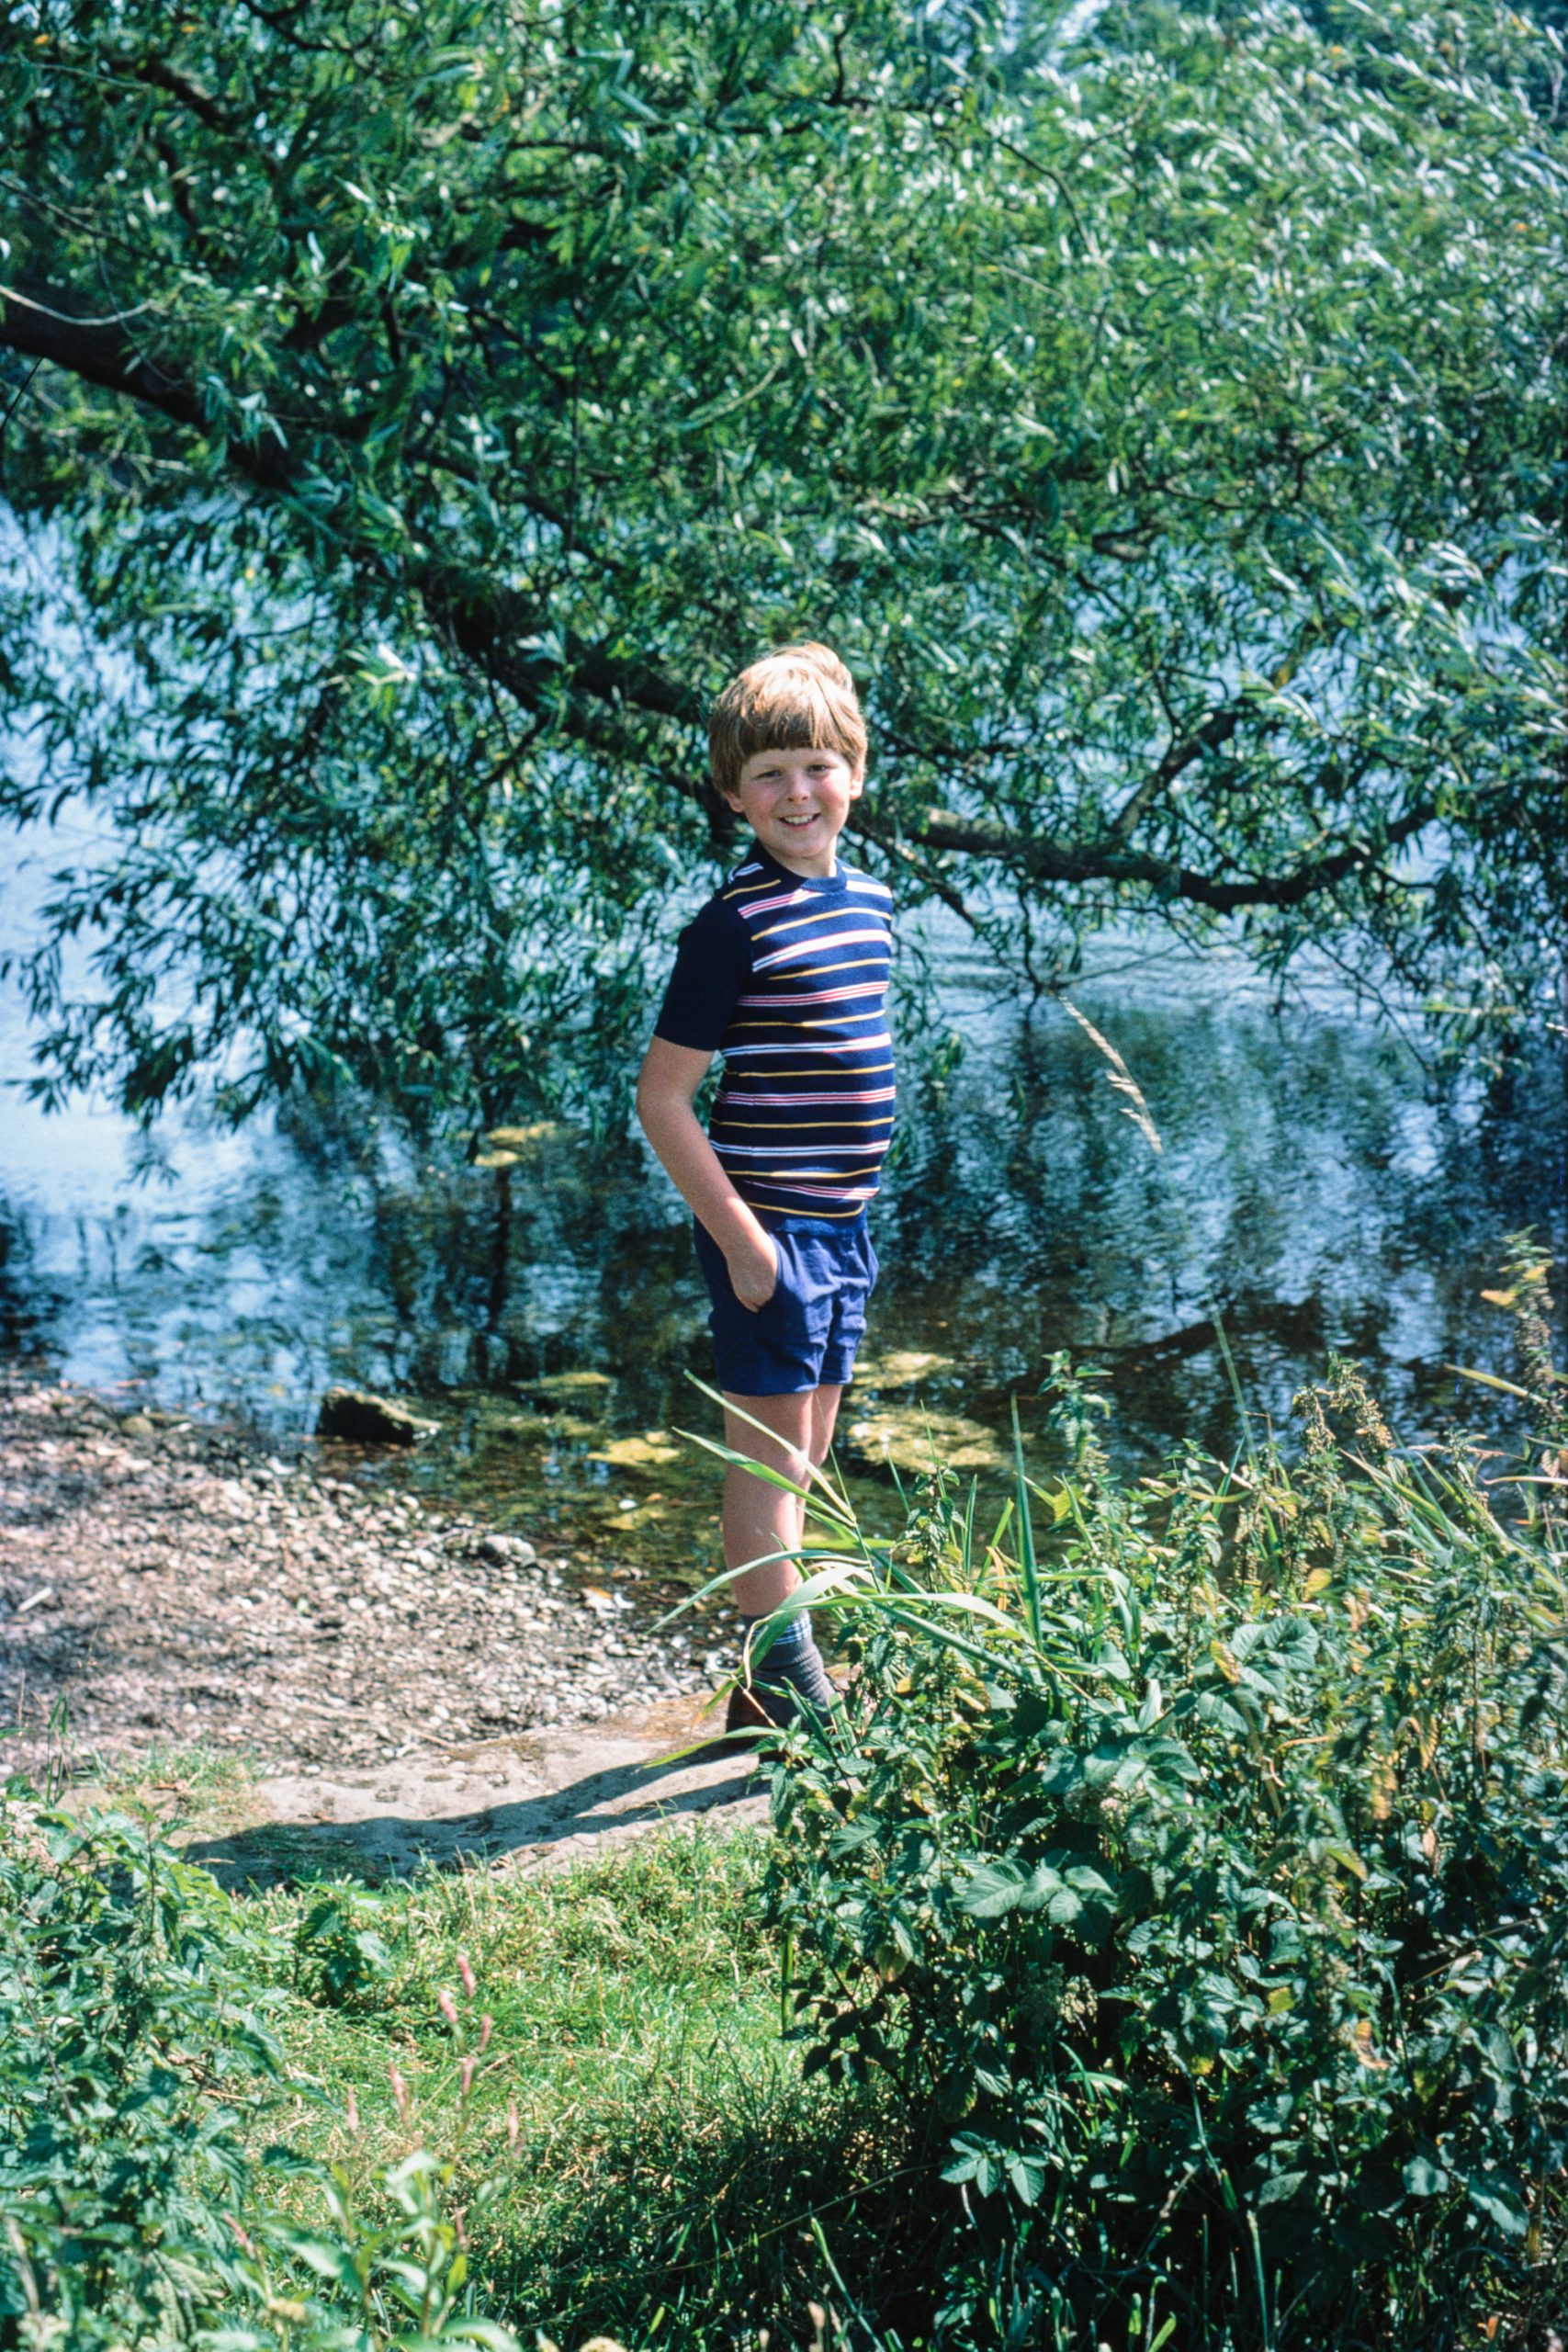
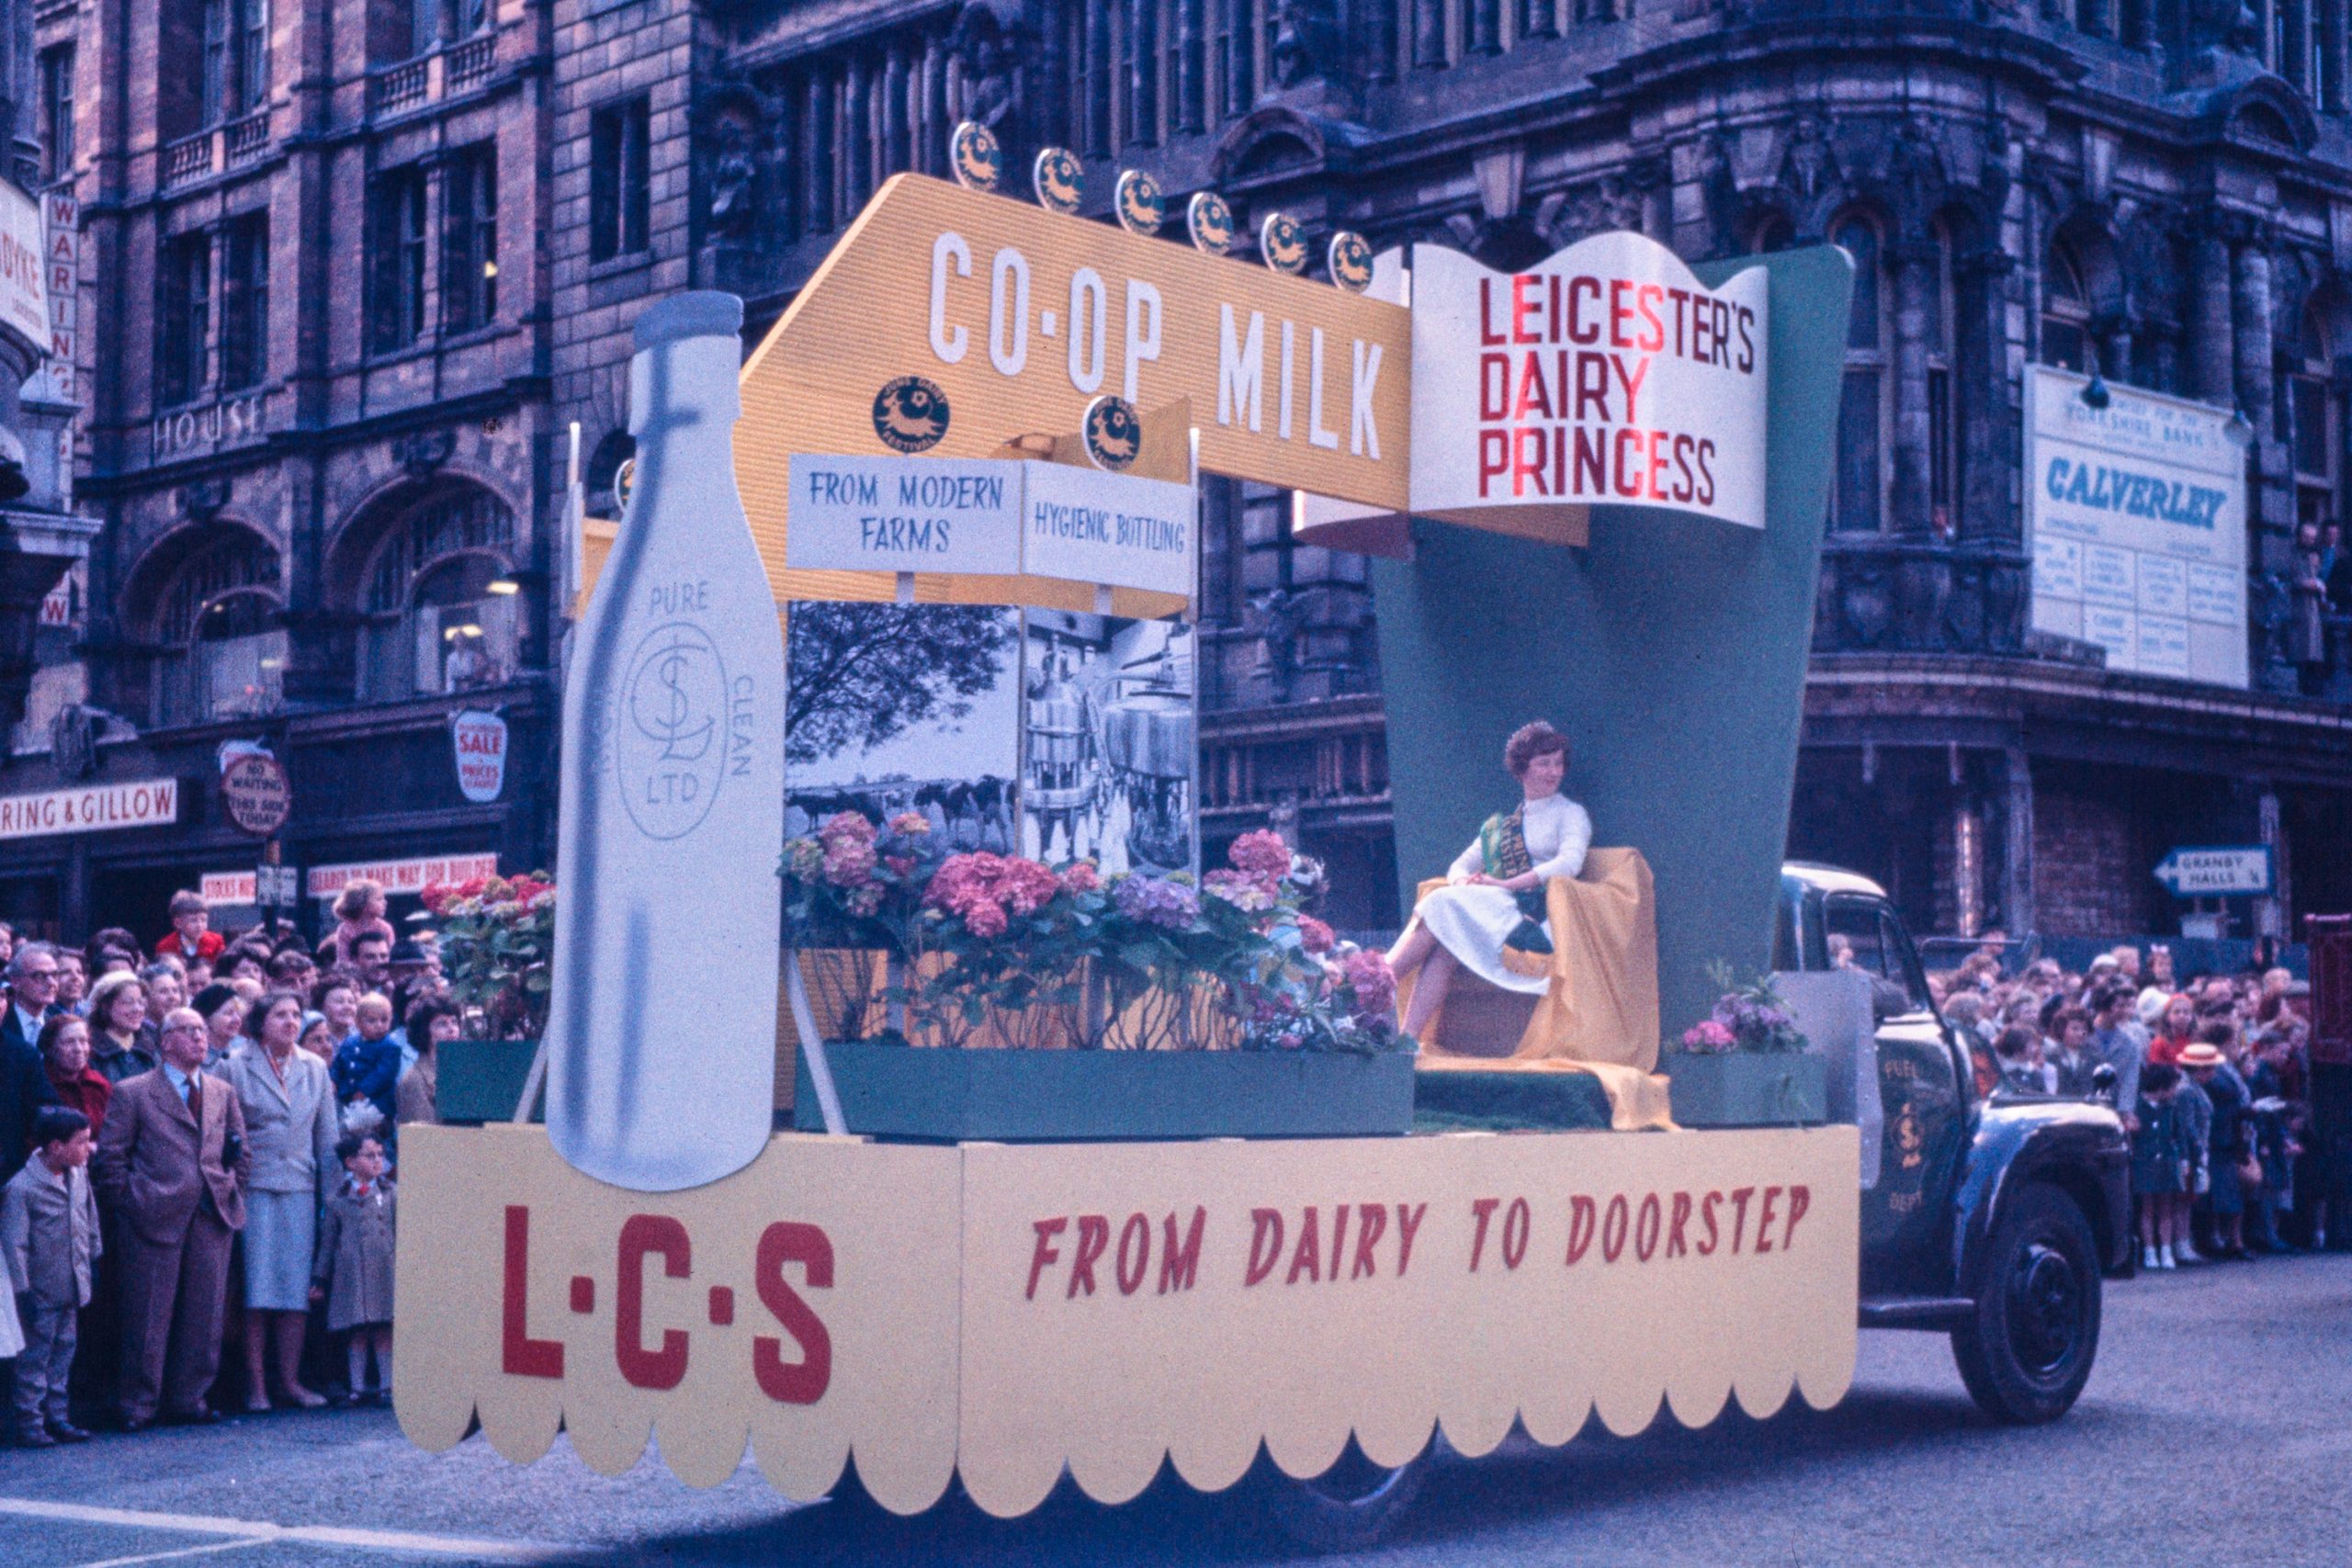
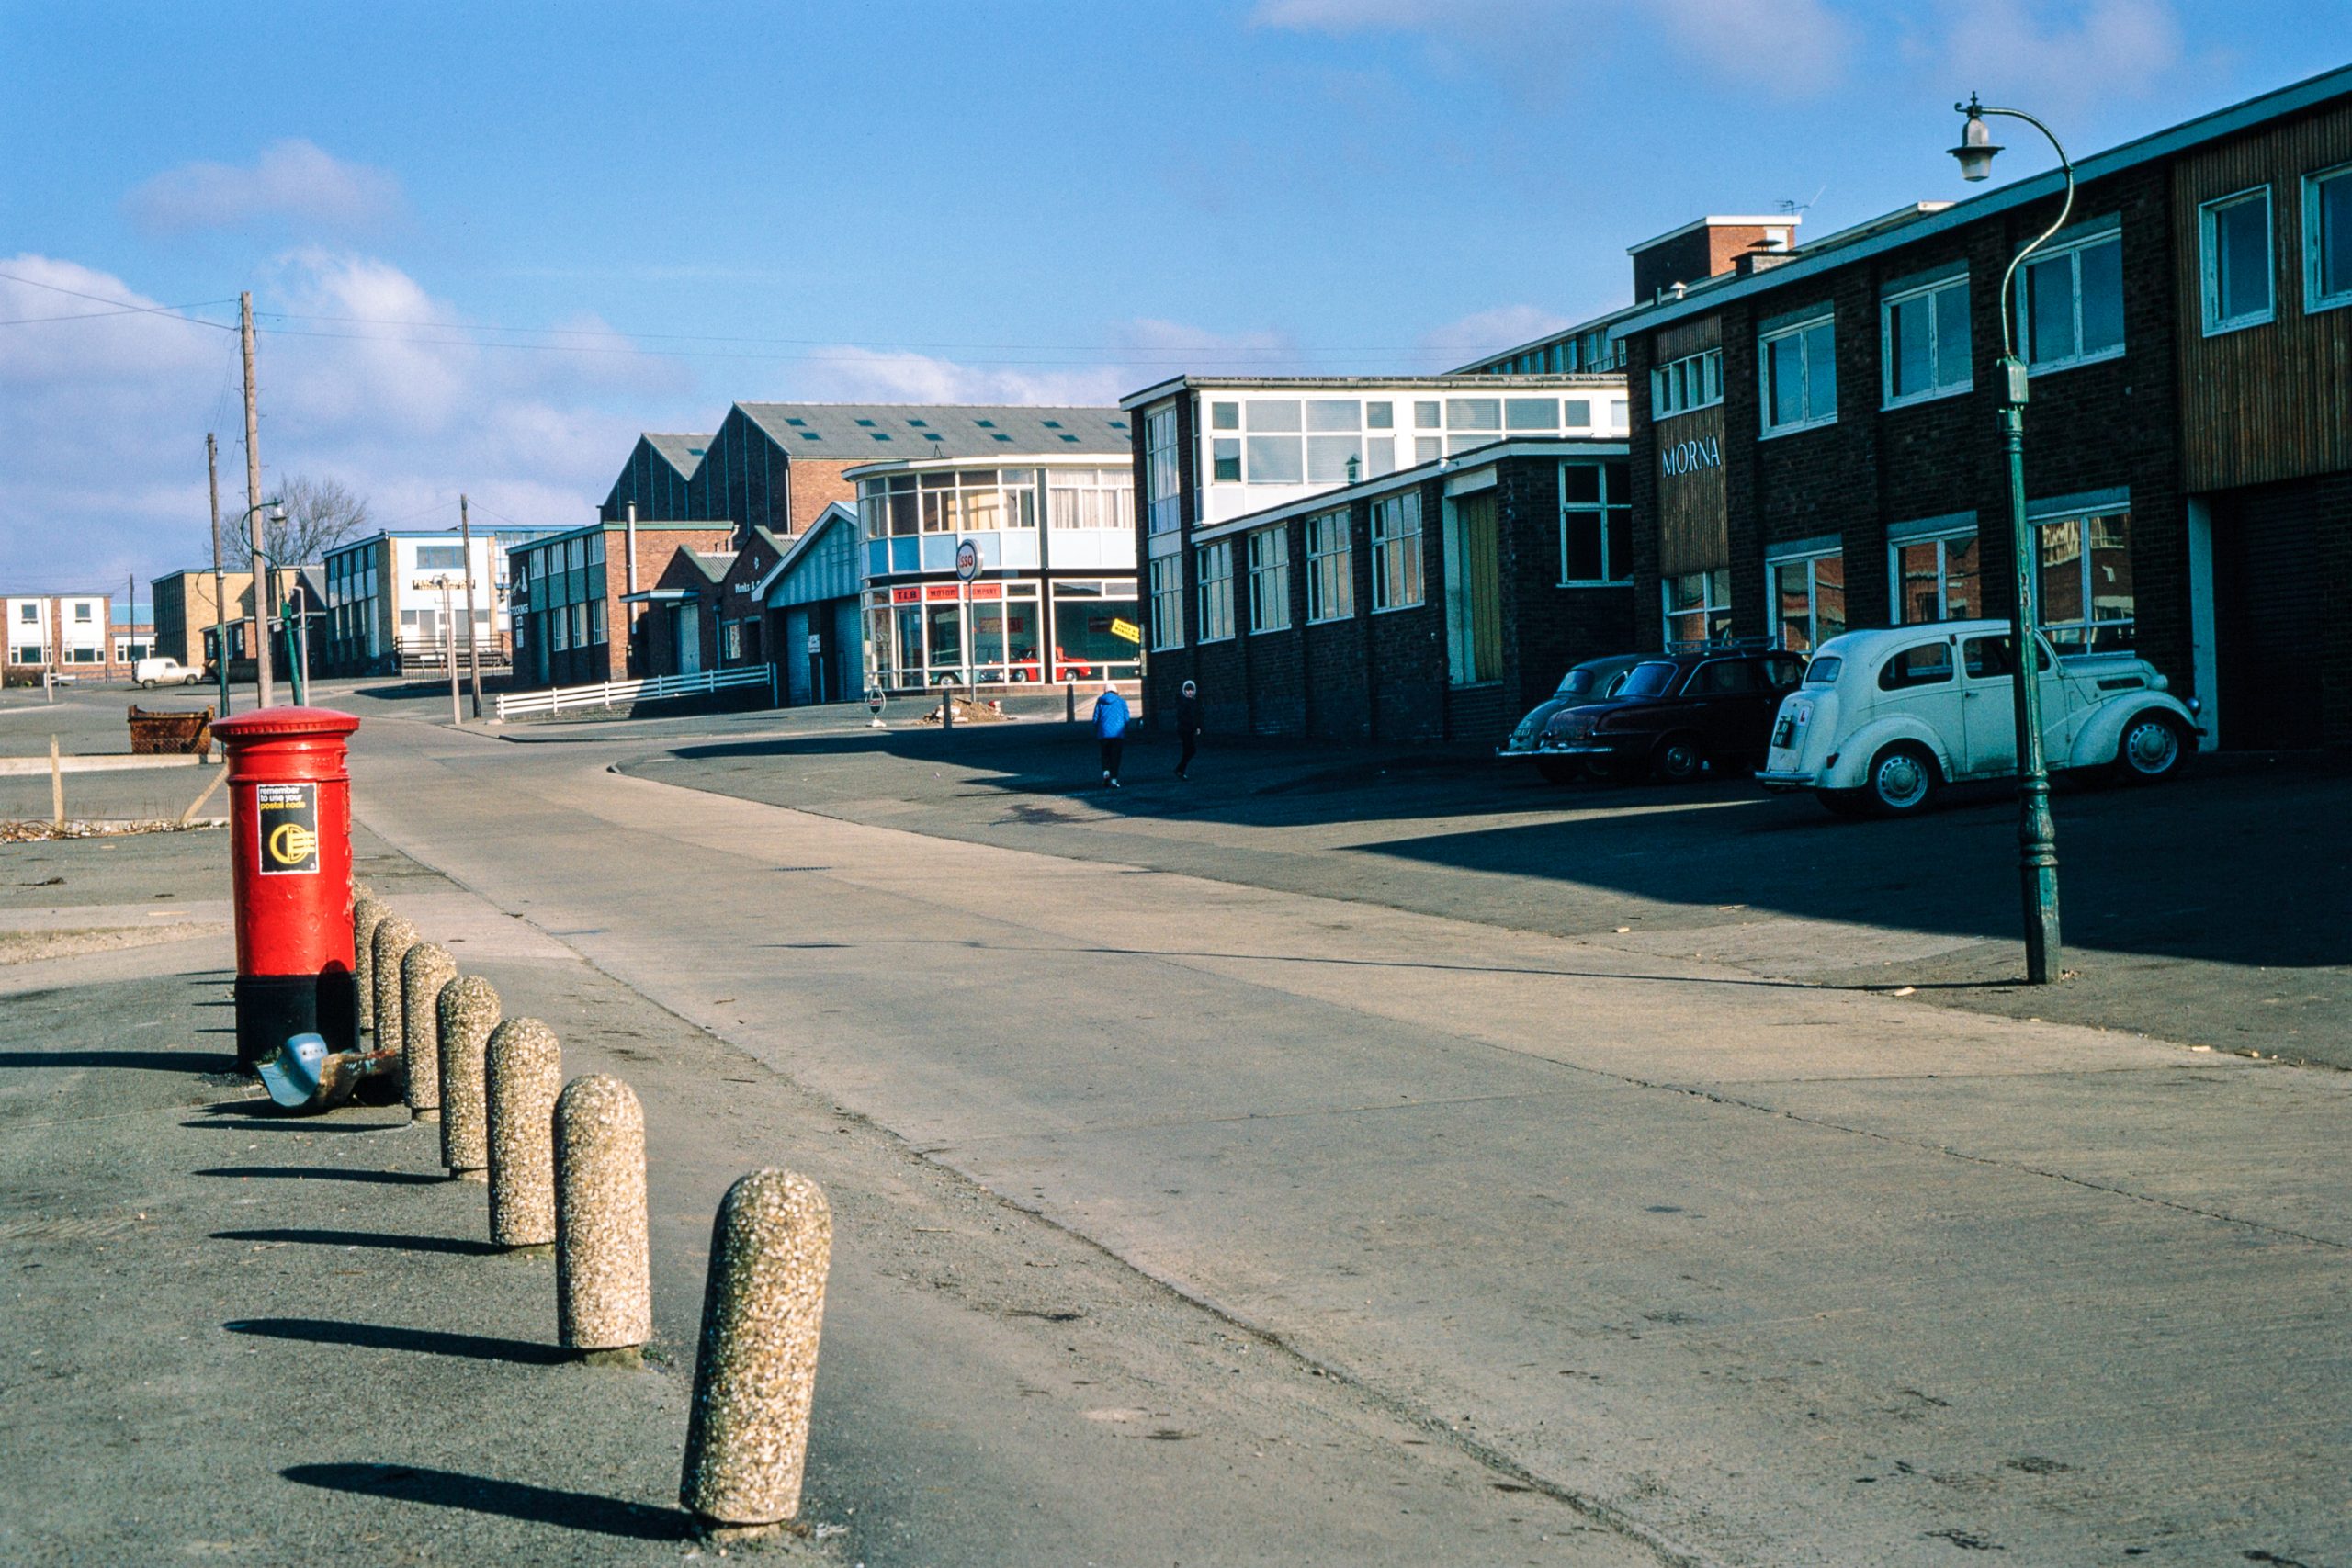
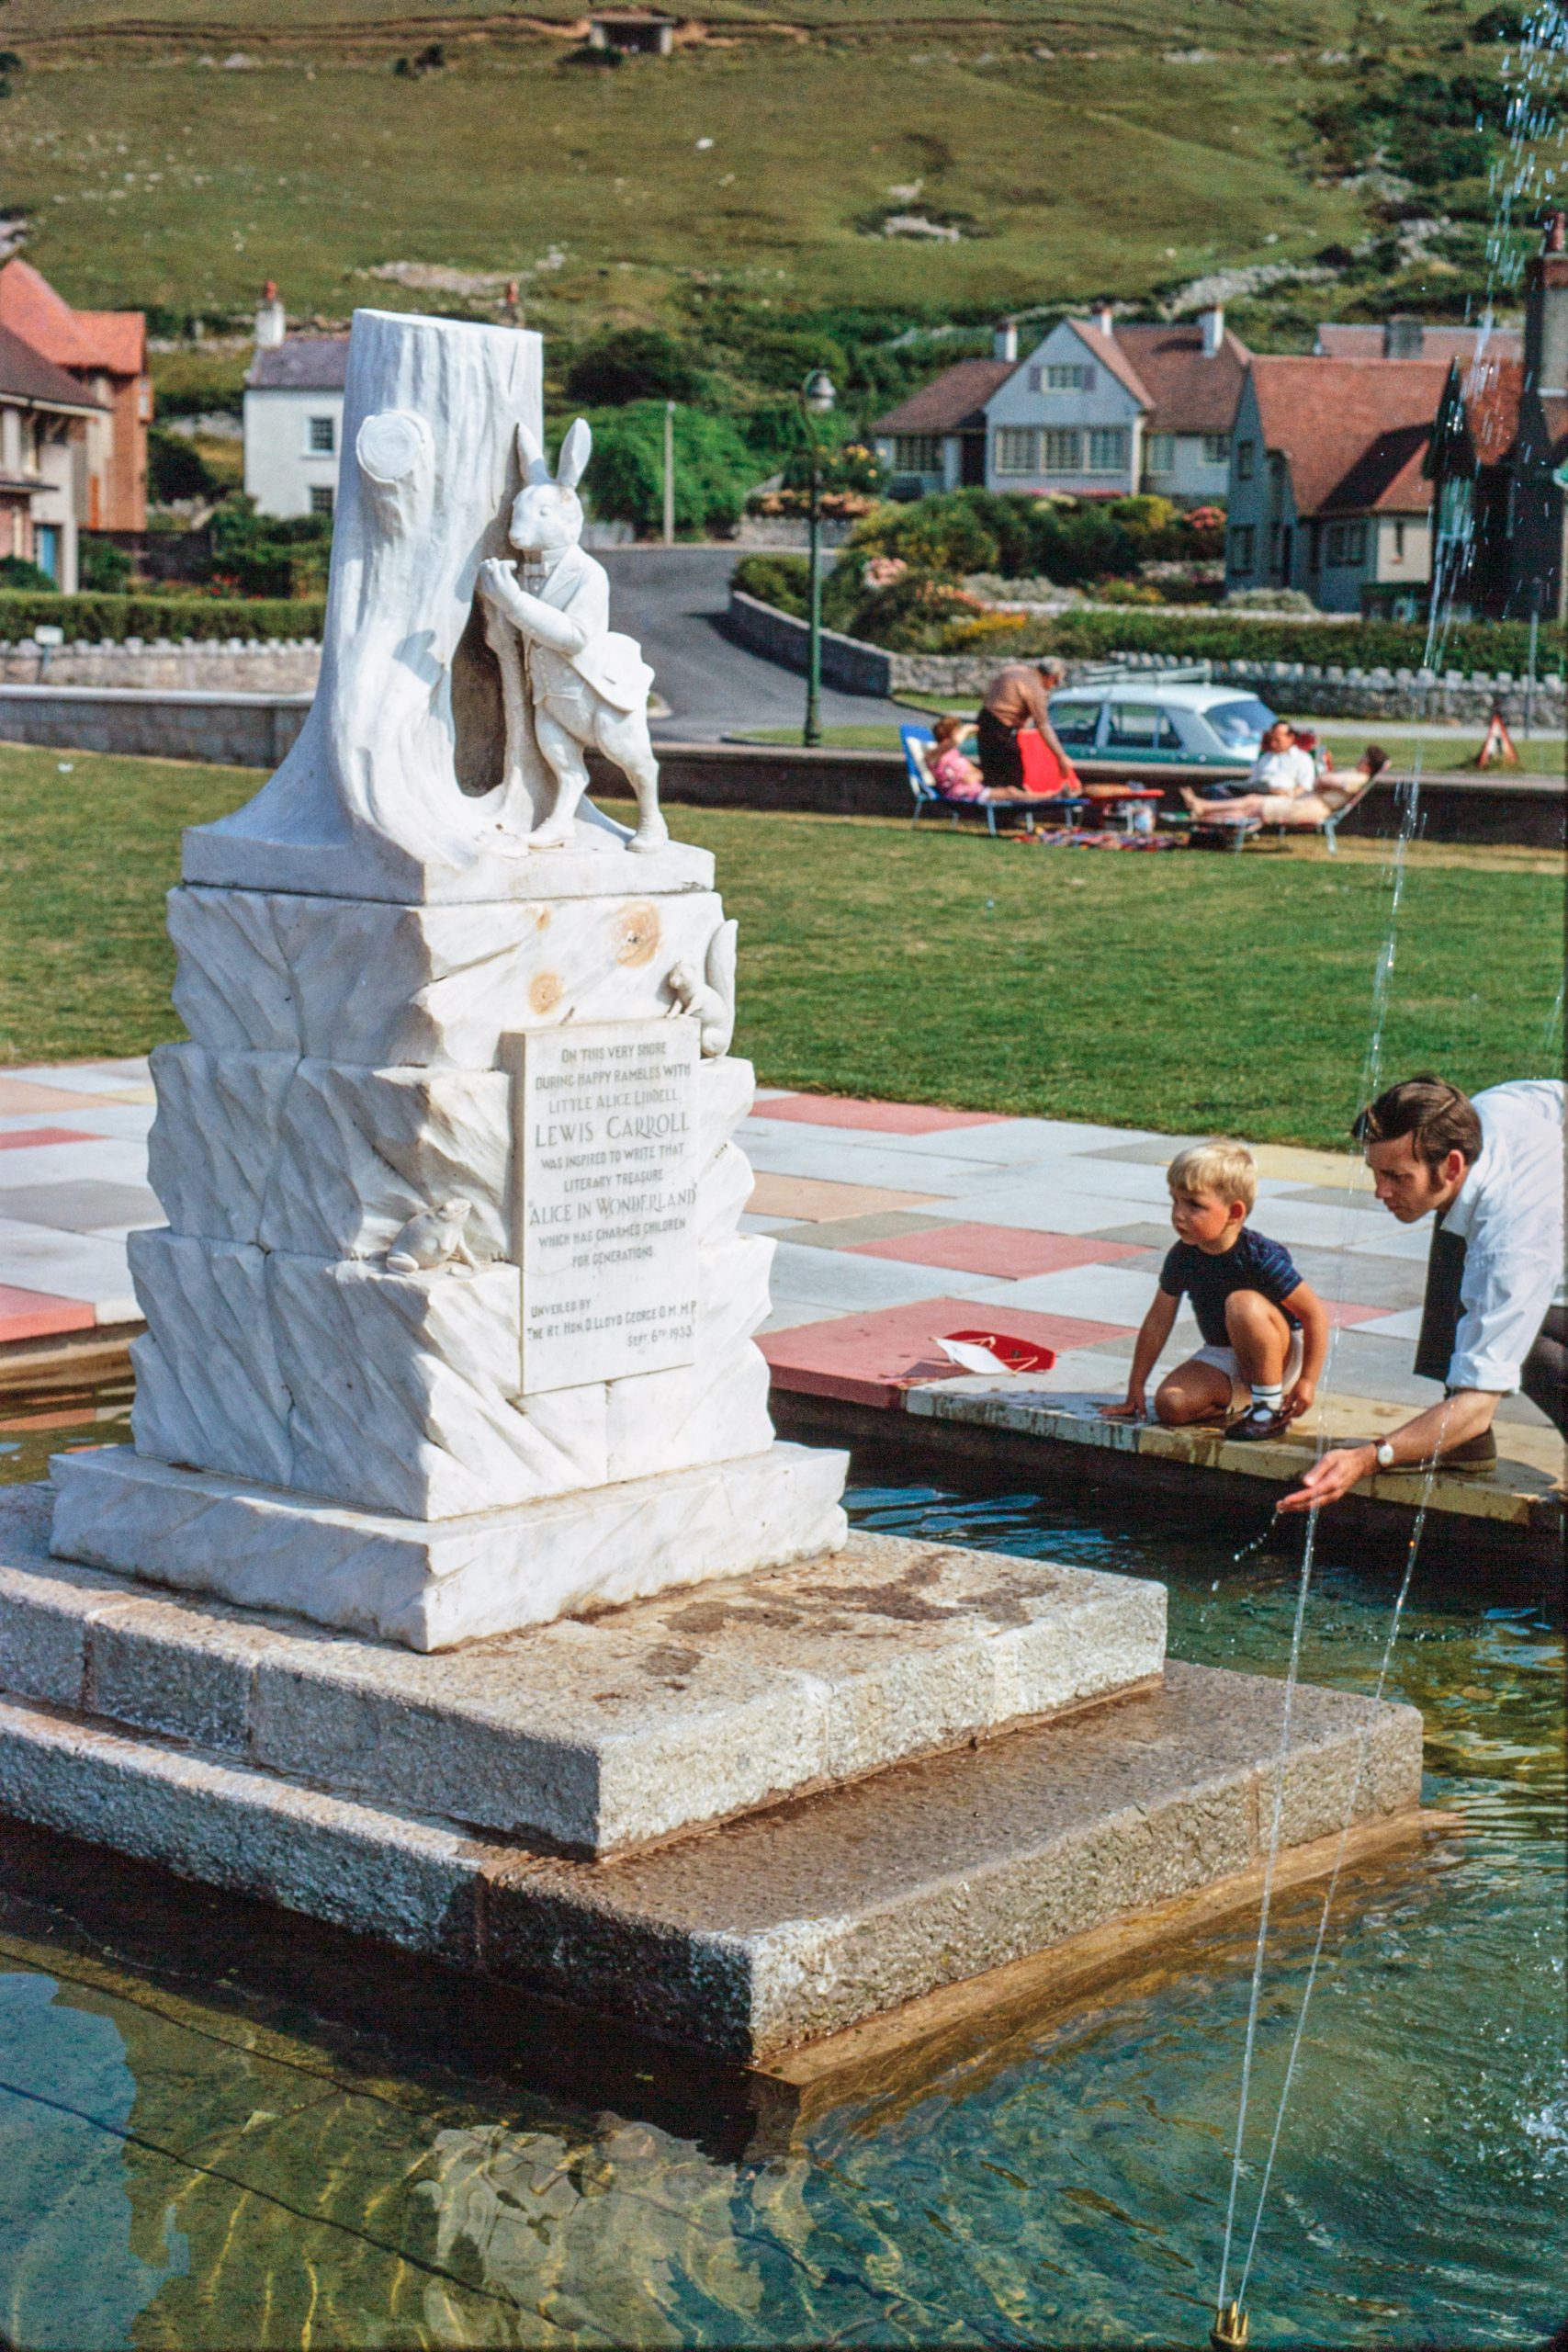
Each box can vary quite a bit in the number of slides contained. Some of these boxes are the standard issue slide boxes which the processor provided when the slides were returned after processing. Others are slide cassettes, ready to load into a projector and yet others are very large wooden or metal cases containing multiple films. For example, the box of slides from a holiday in Switzerland (1958) contained 150 photos (see photo of photographer with glass plate camera at the head of this post).
The quality and colour rendition varies quite a bit depending upon the film stock used. Kodak stock has proved the most impressive so far with little degradation of the emulsion and really great colour rendition. Not quite so good have been Ilford, AGFA and Perutz film stock. Some slides are still in mounts supplied when processed, others have clearly been mounted at home. Often there can be significant dust and damage to be found around the perimeter of the image so sometimes I crop a little more than would be strictly necessary simply to remove the border if I won’t be losing any significant detail.
At the point of writing this post I have photographed and processed around 830 slides over a period of about two months. This is barely scratching the surface of the collection. It will be a long term project and I’m sure I’ll return to write about interesting finds as I work my way through them.
My main regret is that I didn’t start work on this many years earlier. I have been able to give my dad a DVD containing copies of the slides from his holiday to Switzerland with his sister in 1958 and he thoroughly enjoyed seeing the photos. A couple of lengthy and enjoyable conversations were had on the phone after he’d viewed them. It would have been lovely to be able to do the same for Stella and discuss the photos with her.
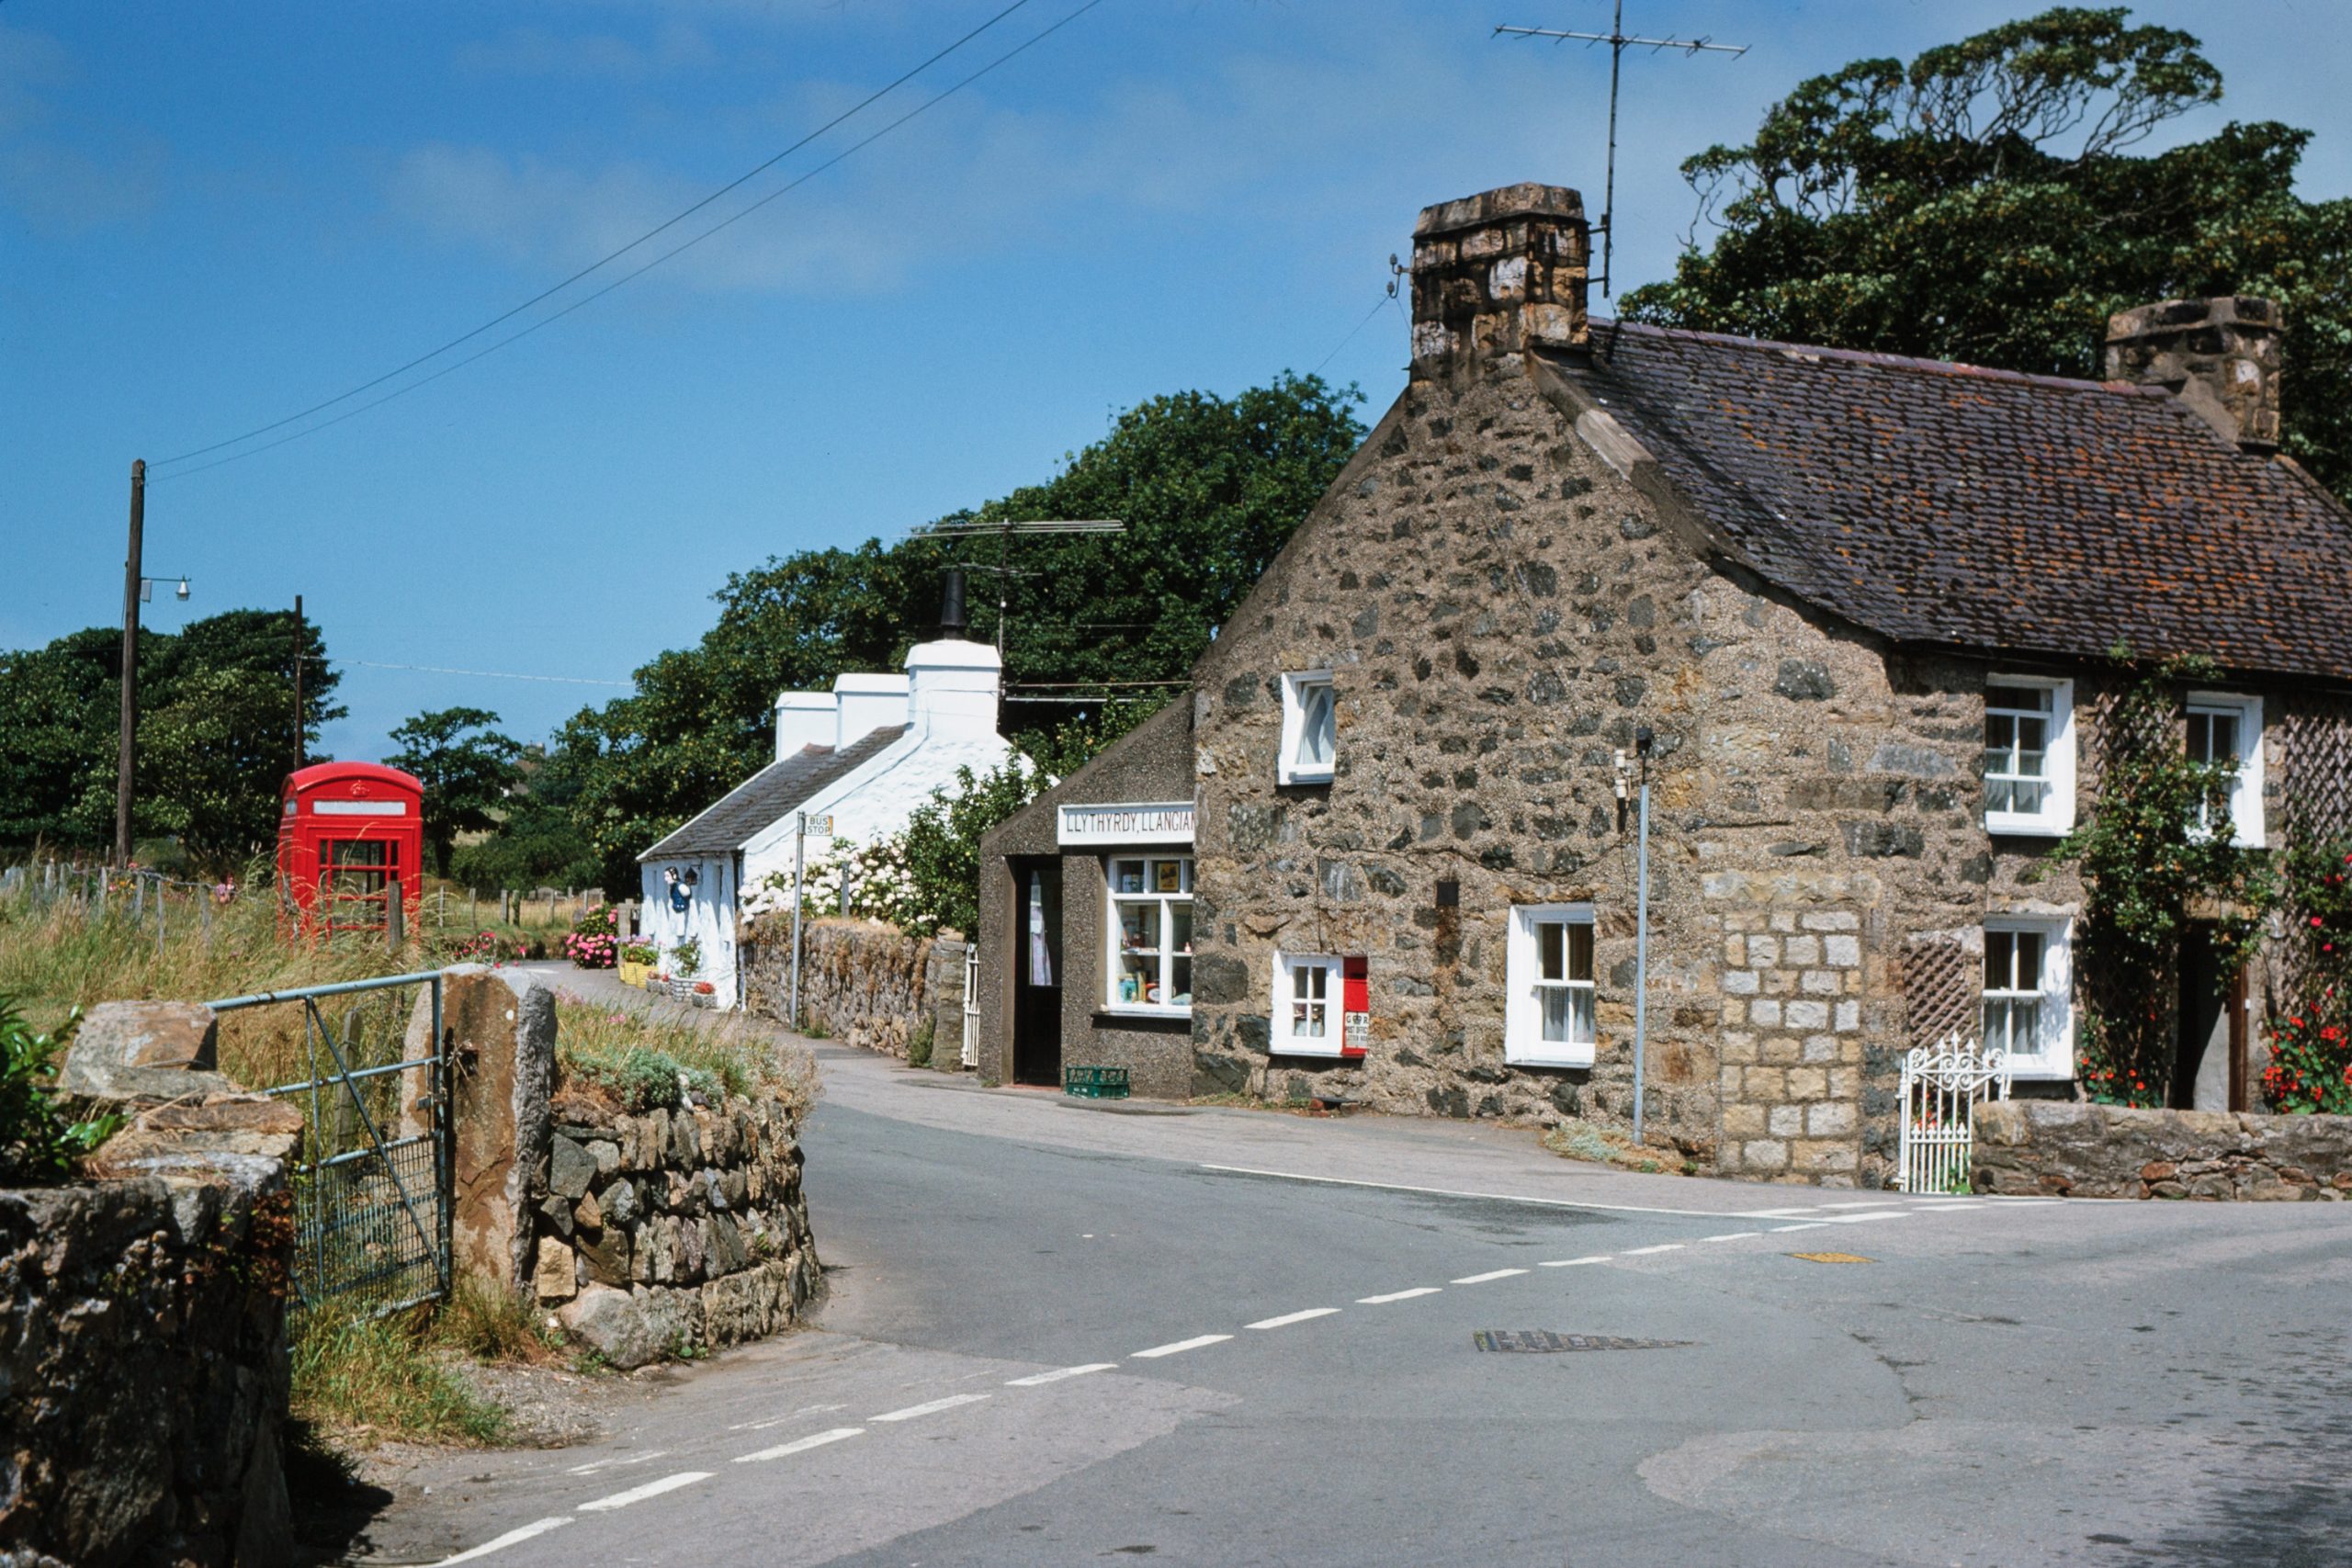
It has also been interesting to perform a bit of detective work when I’m ploughing my way through the slides. I have used Google Maps and Google Streetview to find the exact locations of some of the photos -even down to a photo of my dad stood by a signpost along a mountain trail in Switzerland. On Streetview I have found the same spot, with a modern replacement of the signpost. I managed to identify the location of some of the photos in a box from North Wales, 1972 as the village of Llangian by looking at the sign on a shop front. Streetview shows the phone box opposite the shop is still there but the sign post for a bus stop clearly shown in the photo from 1972 now seems to be without its sign and in use to hold a laundry line trailing out from the adjacent garden. The post box was set into the wall of the house when Stella took her photo nearly fifty years ago, now it’s mounted on a post.
The photo I chose to head this post is significant. Stella had recounted the story of encountering “an old boy” using a glass plate camera atop the mountains during one of her holidays in Switzerland. She was amazed that this elderly man could carry a big camera, all the heavy glass plates, tripod etc up the steep mountain paths. She said it was quite enough to have to carry her own small 35mm camera up there and regarded this feat as quite some mark of dedication to the art. She never mentioned in these conversations that she had taken a photograph of this man and yet, here he was, slide number 145 in that box of 150. From the sequence it seems that Stella and my dad had encountered him on the way back down from a visit to The Jungfrau. I was delighted to find this photo as it confirmed the story Stella had told me so many times over the years. I just wish I could have presented her with a DVD of her photos in the same way I shared them with my dad. We would have had hours of interesting conversation and I would know more details about the photos I’m discovering.
Naturally, I dedicate this post in loving memory of my aunt, Stella. She was the closest thing I had to a mother figure since my mum died when I was six years old. Teacher, historian, artist, photographer, traveller, gardener, wonderful cook, lover of animals and a staunch believer in women’s rights who retained a sharp and curious mind to the very end. Thank you for everything you did for me and for encouraging and nurturing my interests.